Removal Procedure
- Disconnect the negative battery cable.
- Remove the left instrument panel (I/P) lower insulator panel. Refer to Instrument Panel Insulator Panel Replacement in Instrument Panel, Gages and Console.
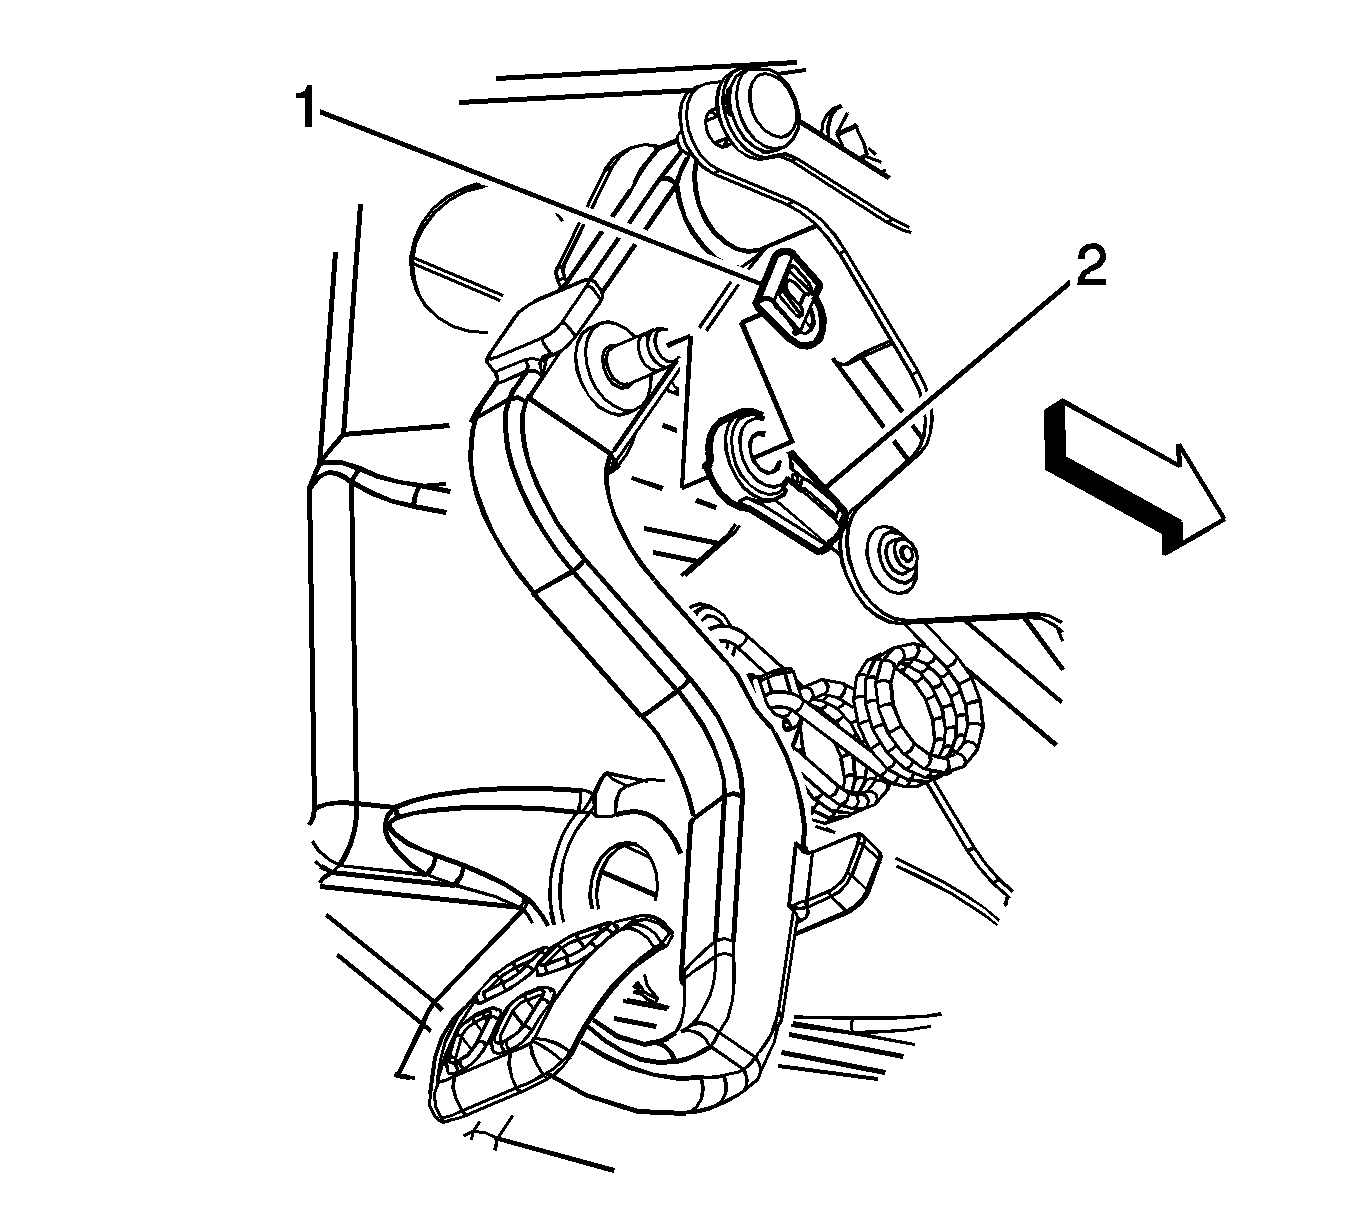
- Remove the clutch master cylinder rod retainer (1).
- Remove the clutch master cylinder rod (2) from the clutch pedal.
- Remove the windshield washer solvent container. Refer to Windshield Washer Solvent Container, Washer Pump, and Solvent Level Switch Replacement in Wipers/Washer Systems.
- Raise and suitably support the vehicle. Refer to Lifting and Jacking the Vehicle in General Information.
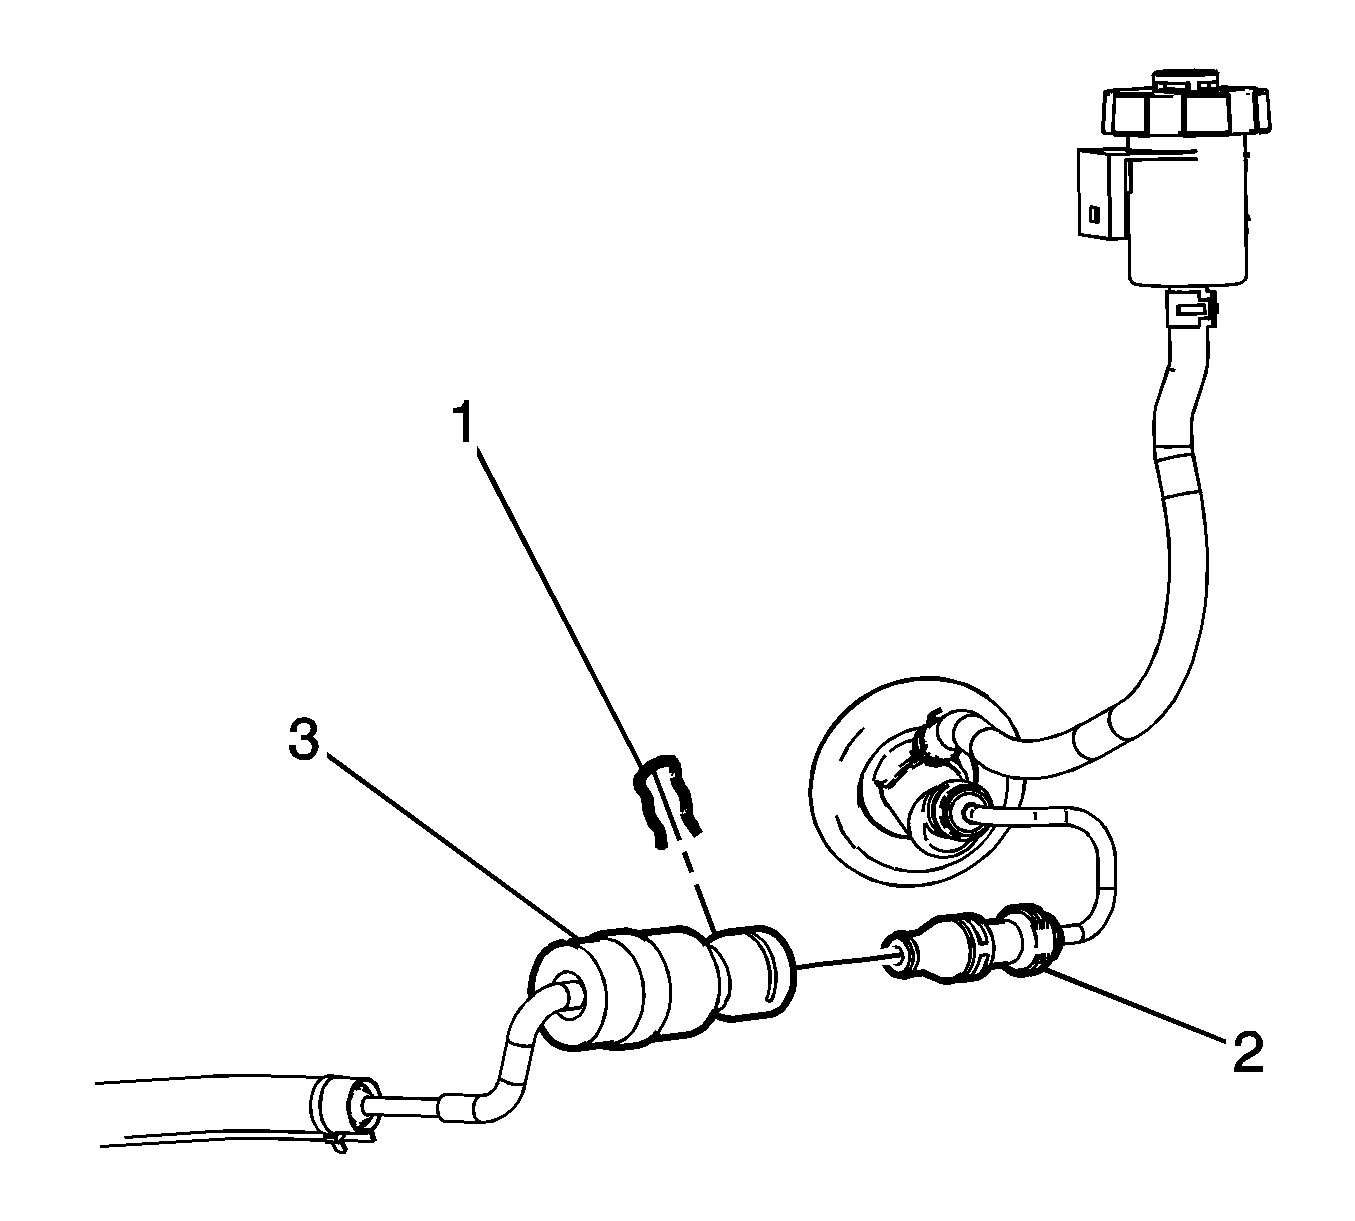
- Remove the clutch hose connection retaining clip (1).
- Separate the clutch hose (3) from the clutch master cylinder connection (2).
- Protect both hose coupling ends from dirt and damage.
- Remove the driveline support assembly and transaxle from the vehicle. Refer to Driveline Support Assembly Replacement in Propeller Shaft.
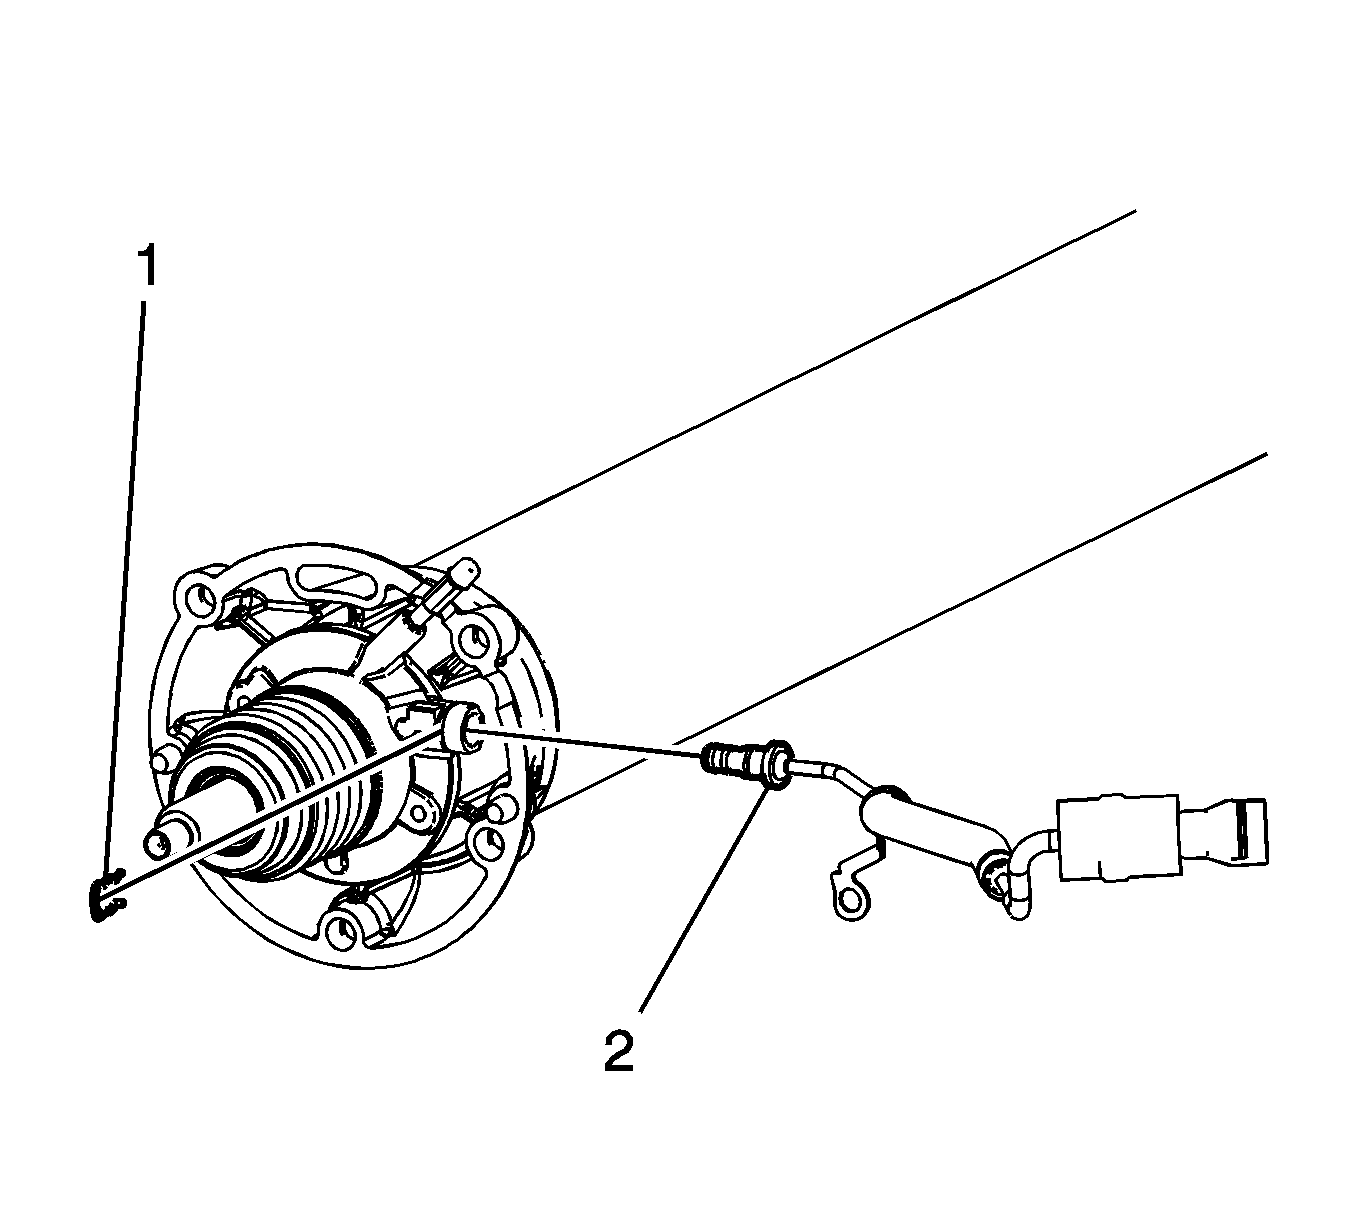
- Remove the clutch hose connection retaining clip (1).
- Separate the clutch hose (2) from the clutch actuator cylinder.
- Protect both the hose and actuator cylinder from dirt and damage.
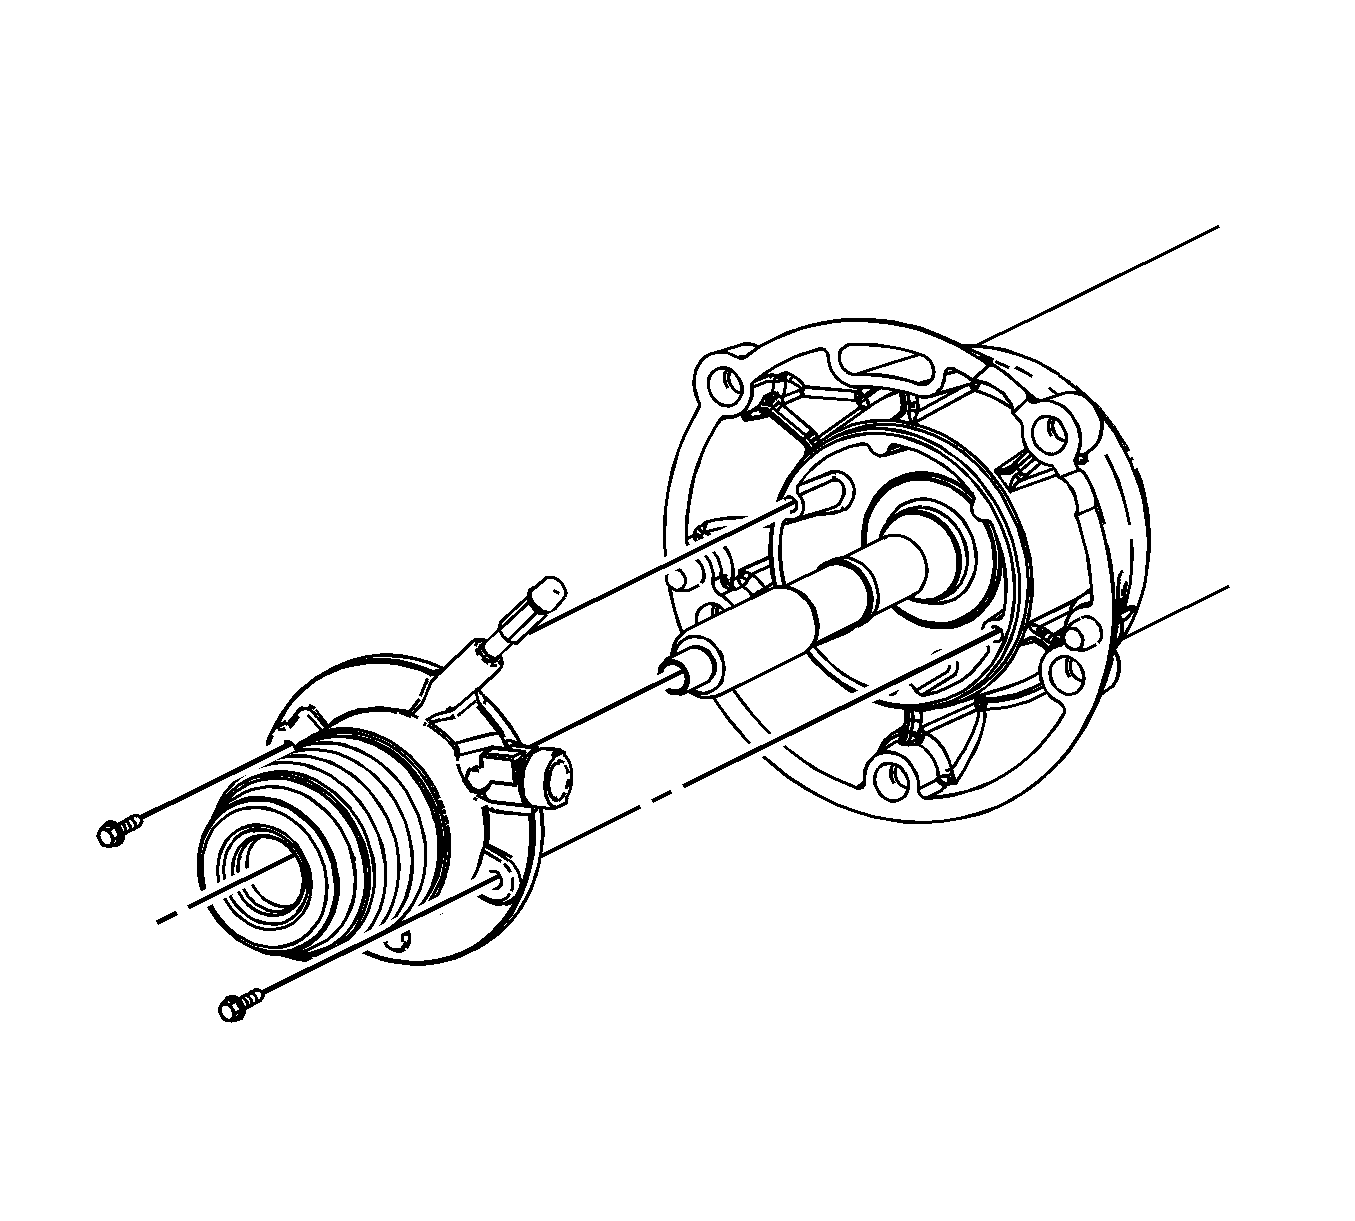
- Remove the clutch actuator cylinder mounting bolts.
- Remove the clutch actuator cylinder from the driveline support assembly.
Caution: Refer to Battery Disconnect Caution in the Preface section.


Installation Procedure
- Install the clutch actuator cylinder into position on the driveline support assembly.
- Install the actuator cylinder mounting bolts.
- Install the clutch hose connection retaining clip (1).
- Connect the clutch hose (2) to the clutch actuator cylinder.
- Install the driveline support assembly and transaxle to the vehicle. Refer to Driveline Support Assembly Replacement in Propeller Shaft.
- Install the clutch hose connection retaining clip (1).
- Connect the clutch actuator cylinder hose (3) to the clutch master cylinder hose (2).
- Check the clutch hydraulic hoses for twists or kinks.
- Install the clutch actuator cylinder hose to the hose retaining clip, under the brake master cylinder.
- Lower the vehicle.
- Install the windshield washer solvent container. Refer to Windshield Washer Solvent Container, Washer Pump, and Solvent Level Switch Replacement in Wipers/Washer Systems.
- Install the clutch master cylinder rod (2) to the clutch pedal.
- Install the clutch master cylinder rod retainer (1).
- Install the left I/P lower insulator panel. Refer to Instrument Panel Insulator Panel Replacement in Instrument Panel, Gages, and Console.
- Connect the negative battery cable.
- Program the transmitters. Refer to Transmitter Programming in Keyless Entry.
- Bleed the clutch hydraulic system. Refer to Hydraulic Clutch Bleeding .

Notice: Refer to Fastener Notice in the Preface section.
Tighten
Tighten the bolts to 12 N·m (106 lb in).

Important: DO NOT rely on an audible click or a visual verification of the clutch hydraulic hose quick connect fitting connection.
Firmly push the clutch hydraulic hose to the clutch actuator cylinder, then pull back on the fittings to verify engagement.

Important: DO NOT rely on an audible click or a visual verification of the clutch hydraulic hose quick connect fitting connection.
Push together the clutch hydraulic hose quick connect fittings, then pull back on the fittings to verify engagement.

Notice: Refer to Fastener Notice in the Preface section.
Tighten
Tighten the negative battery cable bolt to 15 N·m (11 lb ft).
