Front Brake Caliper Overhaul J56, J57
Special Tools
CH-47954 Caliper Seal Installer
Removal Procedure
Warning: Refer to Brake Dust Warning in the Preface section.
Warning: Refer to Brake Fluid Irritant Warning in the Preface section.
- Remove the front brake caliper. Refer to Front Brake Caliper Replacement.
- Install the caliper in a vise.
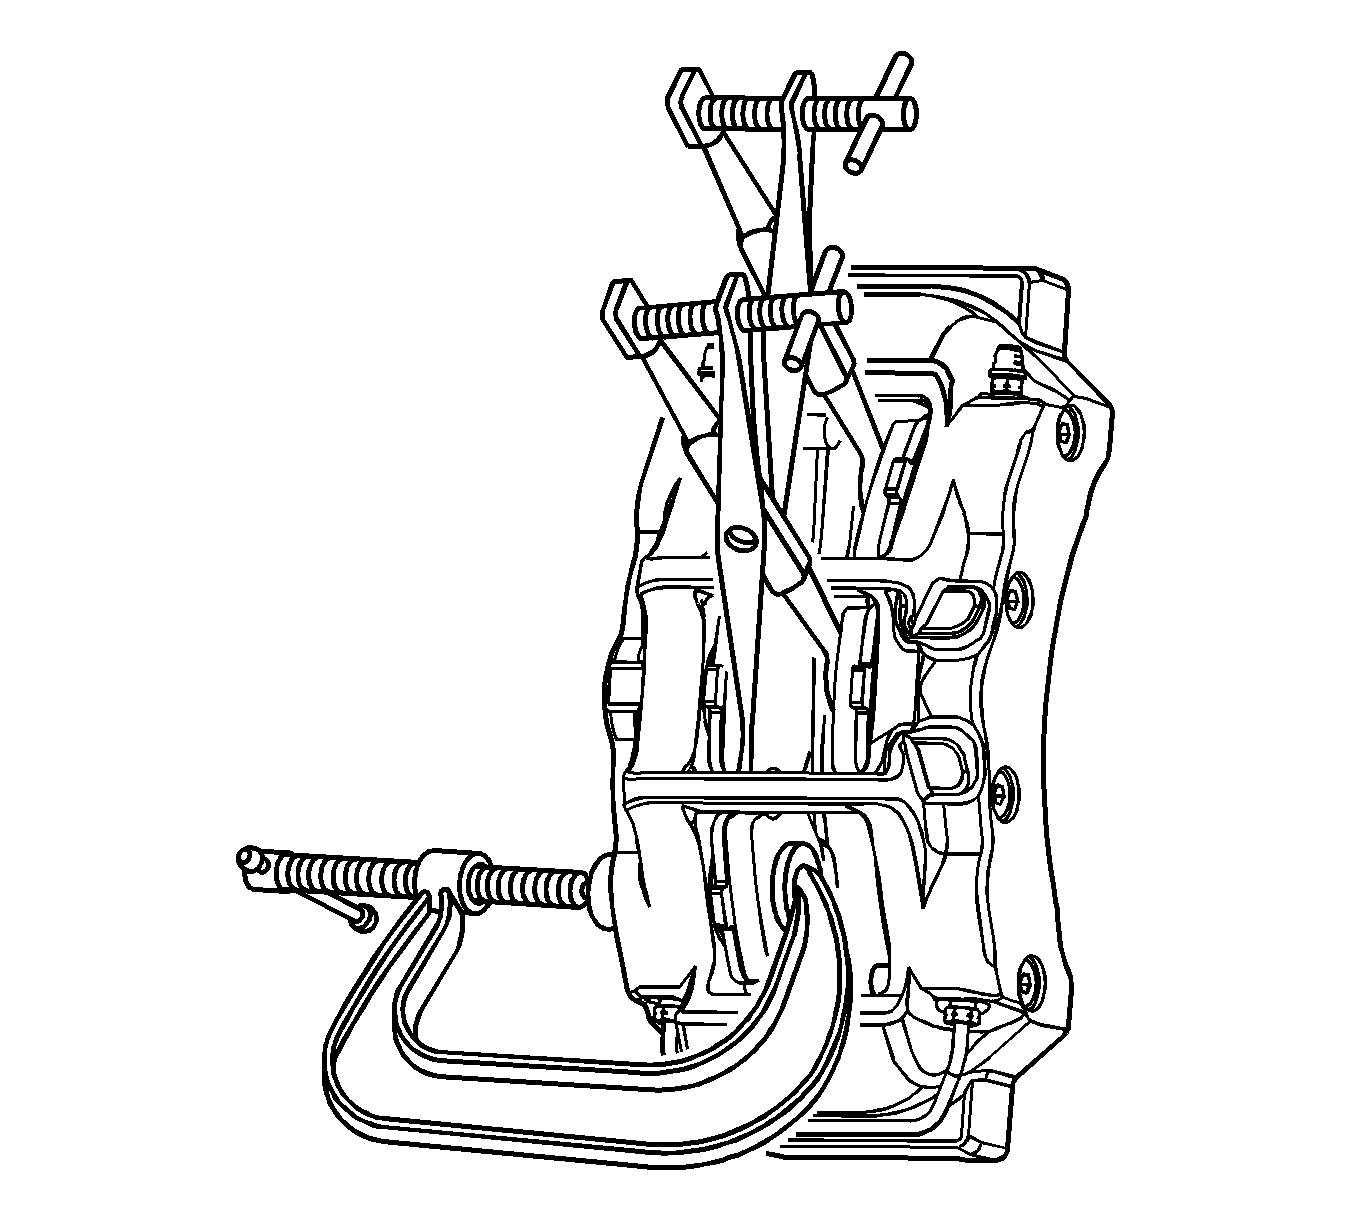
- Position a tool between the inner and outer brake pads to prevent the remaining brake caliper pistons from being forced from the caliper bores.
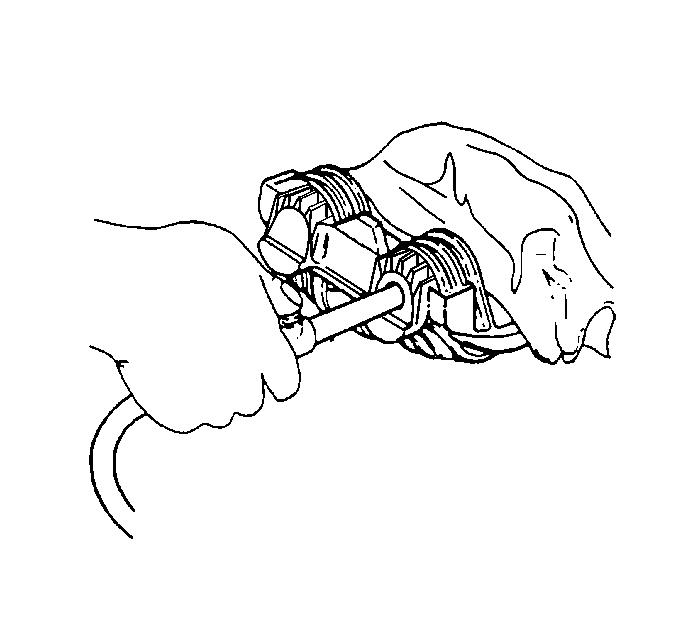
- Using the C-Clamp from the CH-47954 Caliper Seal Installer , hold the brake pad opposite the piston to be removed from the caliper.
- Apply filtered, non lubricated compressed air to the brake hose fitting inlet port.
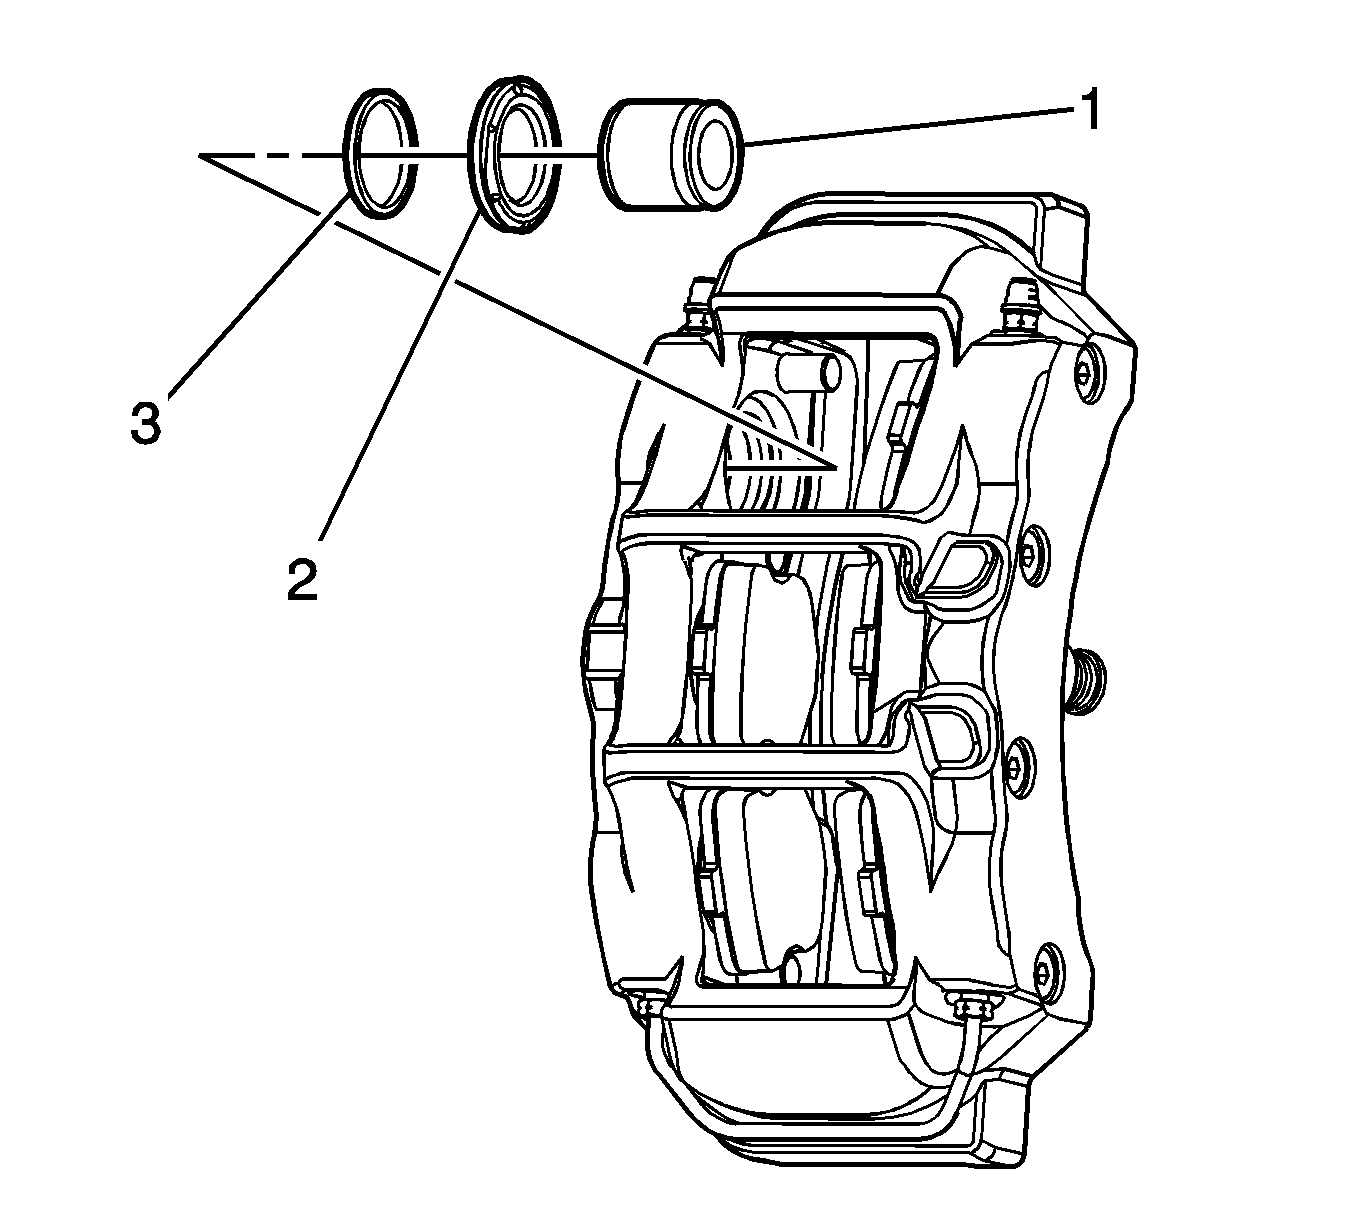
- Remove the piston (1) from the caliper.
- After opposing inboard and outboard pistons have been removed, repeat Steps 3-6 for the remaining brake caliper pistons.
- Using a plastic tool, carefully remove the dust seal (2) from the caliper body.
- Using a plastic tool, carefully remove the piston seal (3).
- Remove the brake caliper brake fluid transfer pipe, if necessary.
Note: Use a vise or holding fixture that has soft jaws to prevent damage to the aluminum body of the brake caliper.
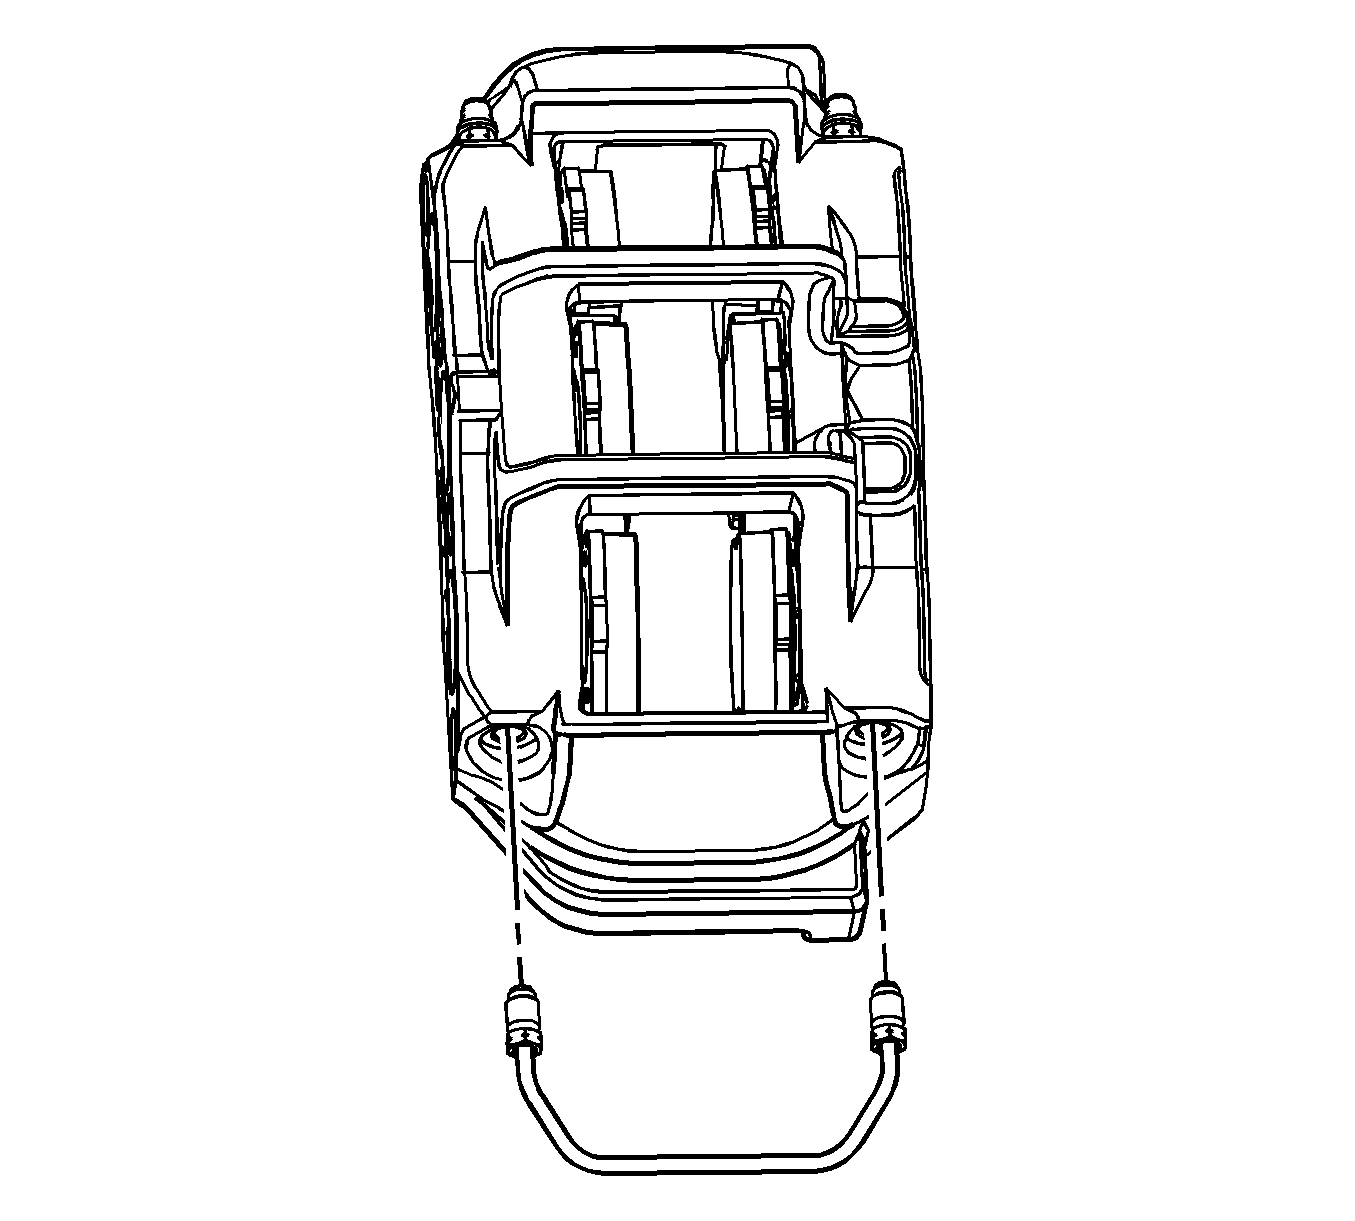
Note: Do not remove the brake caliper brake fluid transfer pipe unless the brake pipe is damaged and requires replacement.
Installation Procedure
- Install the brake caliper brake fluid transfer pipe, if removed and tighten the brake pipe fittings to 40 N·m (30 lb ft).
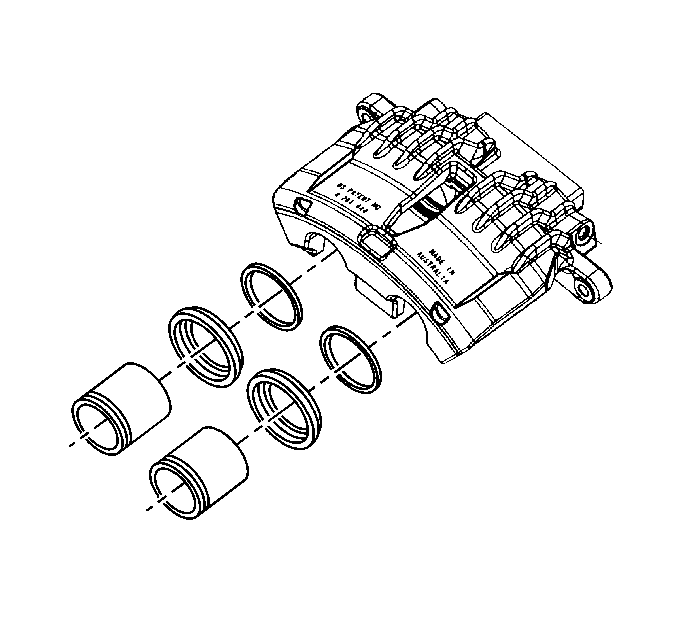
- Install the piston (1), the dust seal (2), and the piston seal (3) in the brake caliper piston bore.
- Using the CH-47954 Caliper Seal Installer , install the dust seal:
- Remove the brake caliper from the vise.
- Using a small plastic tool, position the dust seal in the groove of the brake caliper piston.
- Install the front brake caliper. Refer to Front Brake Caliper Replacement.
Caution: Refer to Fastener Caution in the Preface section.

Note: Hand install the brake pipe fittings completely before tightening.

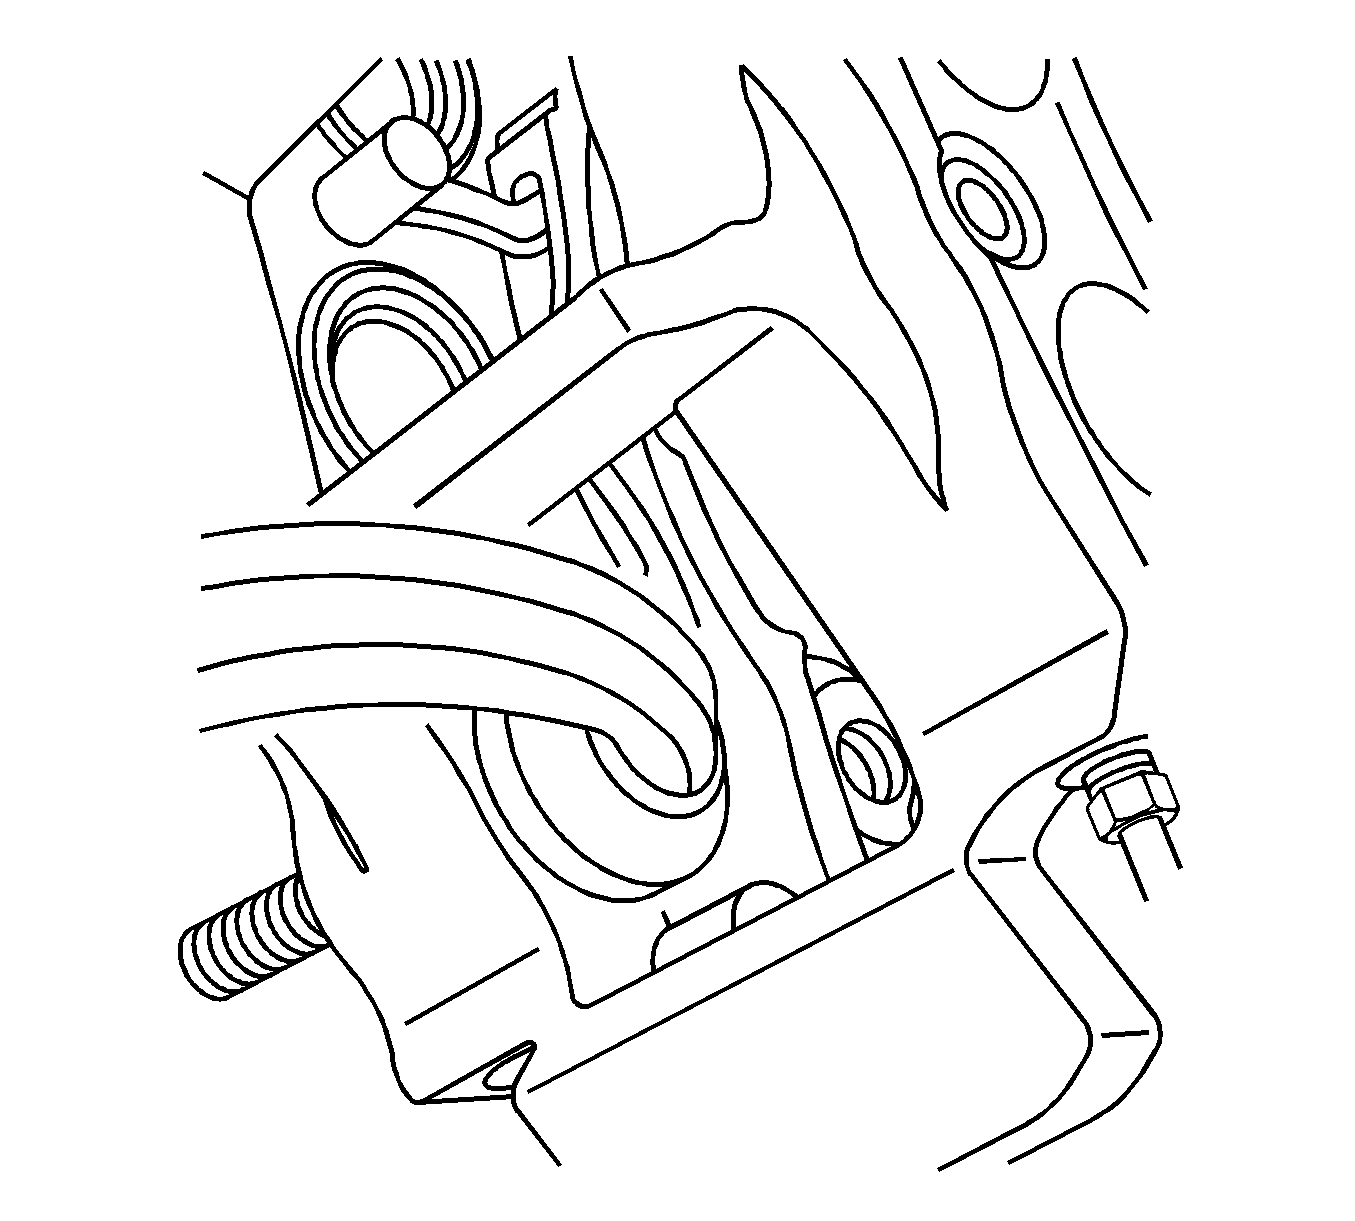
Note: When the brake caliper piston dust seal is properly installed, the seal may protrude slightly above the surface of the brake caliper. This is a normal condition due to the slight curvature of the brake caliper.
| 3.1. | Position the C-Clamp and cup on the caliper. |
| 3.2. | Align the tool on the dust seal to ensure correct installation of the dust seal. |
| 3.3. | Using the C-clamp, slowly apply pressure to the dust seal. |
| 3.4. | Check the alignment of the dust seal to the brake caliper bore. |
| 3.5. | If the position of the tool and dust seal has changed, reposition the tool on seal. |
| 3.6. | Fully seat the dust seal in the piston bore. |
| 3.7. | Repeat the above procedure for the remaining dust seals. |
Note: Do not damage the dust seal.
Front Brake Caliper Overhaul JL9, J55
Warning: Refer to Brake Fluid Irritant Warning in the Preface section.
Caution: Refer to Brake Fluid Effects on Paint and Electrical Components Caution in the Preface section.
- Remove the front brake caliper from the vehicle. Refer to Front Brake Caliper Replacement.
- Remove the brake caliper pistons from the caliper bore by directing low pressure compressed air into the caliper bore through the fluid inlet hole.
- Using a small wooden or plastic tool, remove the piston dust boot seals from the seal counterbores in the caliper and discard the boot seals.
- Using a small wooden or plastic tool, remove the piston seals from the caliper bores and discard the piston seals.
- Remove the bleeder valve and cap from the caliper.
- Clean the brake caliper piston bores and seal counterbores, and the caliper pistons with denatured alcohol, or equivalent.
- Dry the caliper piston bores and counterbores, and the pistons with non-lubricated, filtered compressed air.
- Inspect the caliper bores for cracks, scoring, pitting, excessive rust, and/or excessive corrosion.
- If light rust or light corrosion are present in the caliper bores, attempt to remove the imperfection with a fine emery paper. If the imperfection cannot be removed, replace the caliper assembly.
- If cracks, scoring, pitting, excessive rust, and/or excessive corrosion are present in the caliper bores, replace the caliper assembly.
- Inspect the caliper pistons for cracks, scoring, and/or damage to the chrome plating. Replace the caliper pistons if any of these conditions exist.
- Lubricate the new piston seals with GM approved brake fluid from a clean, sealed brake fluid container. Refer to Fluid and Lubricant Recommendations.
- Install the lubricated, new piston seals into the caliper bores.
- Install the new piston dust boot seal over the piston.
- Install the caliper pistons into the caliper bores.
- Install the caliper bleed screw and tighten to 12 N·m (106 lb in).
- Install the caliper bleed screw cap.
- Install the caliper to the vehicle. Refer to Front Brake Caliper Replacement.
Note: Do not use abrasives to clean the brake caliper pistons.
| 15.1. | Install the boots over the ends of the pistons so that the fold will face toward the brake caliper housing piston bore openings. |
| 15.2. | Seat the boots into the brake caliper bore grooves and slide the pistons into the brake caliper bores. |
| 15.3. | Push the pistons down to the bottom of the brake caliper bores. |
| 15.4. | Make sure the boots are properly seated into the piston grooves and into the groove in the brake caliper bores. |
Caution: Refer to Fastener Caution in the Preface section.
