Engine Mount Replacement Right Side
Tools Required
J 28467-B Universal Engine Support Fixture
Removal Procedure
- Disconnect the negative battery cable.
- Support the engine assembly using the J 28467-B .
- Remove the right front wheel well splash shield. Refer to Wheelhouse Splash Shield Replacement in Body Front End.
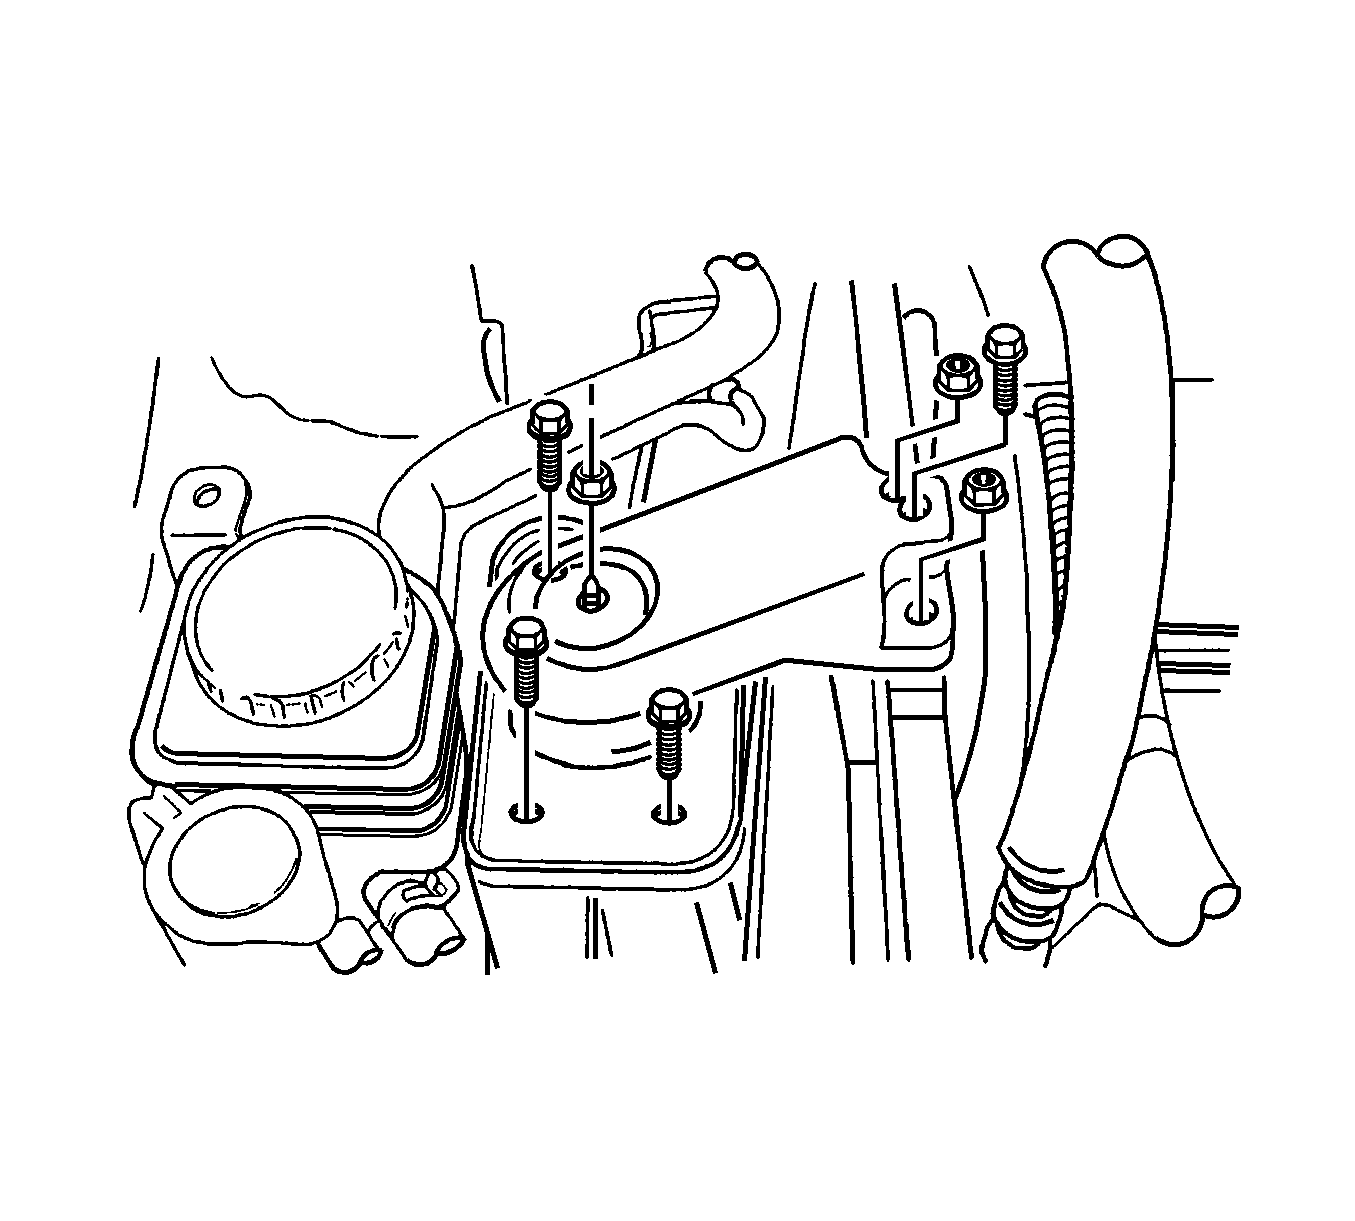
- Remove the engine mount bracket retaining bolts.
- Remove the engine mount bracket.
- Remove the power steering pump drive belt. Refer to Power Steering Pump Belt Replacement in Power Steering System.
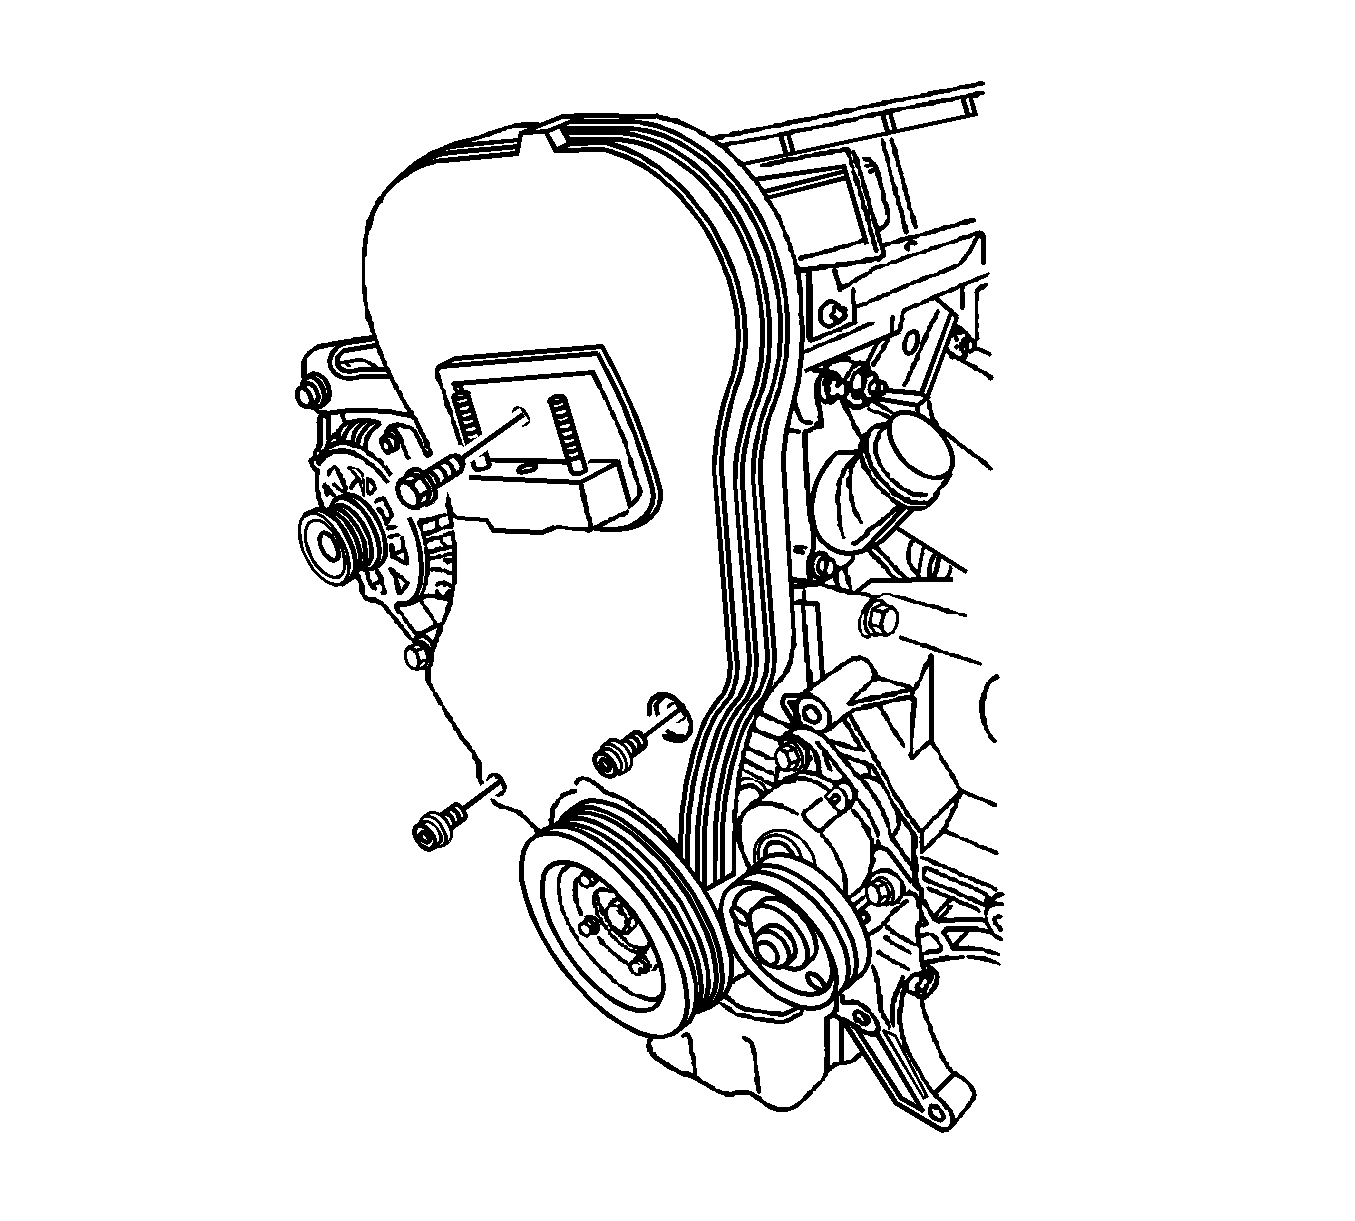
- Remove the front timing belt cover bolts and the front timing belt cover.
- Align the crankshaft pulley timing mark with the pointer, and the camshaft gears with the timing marks on the rear cover, by turning the crankshaft gear bolt.
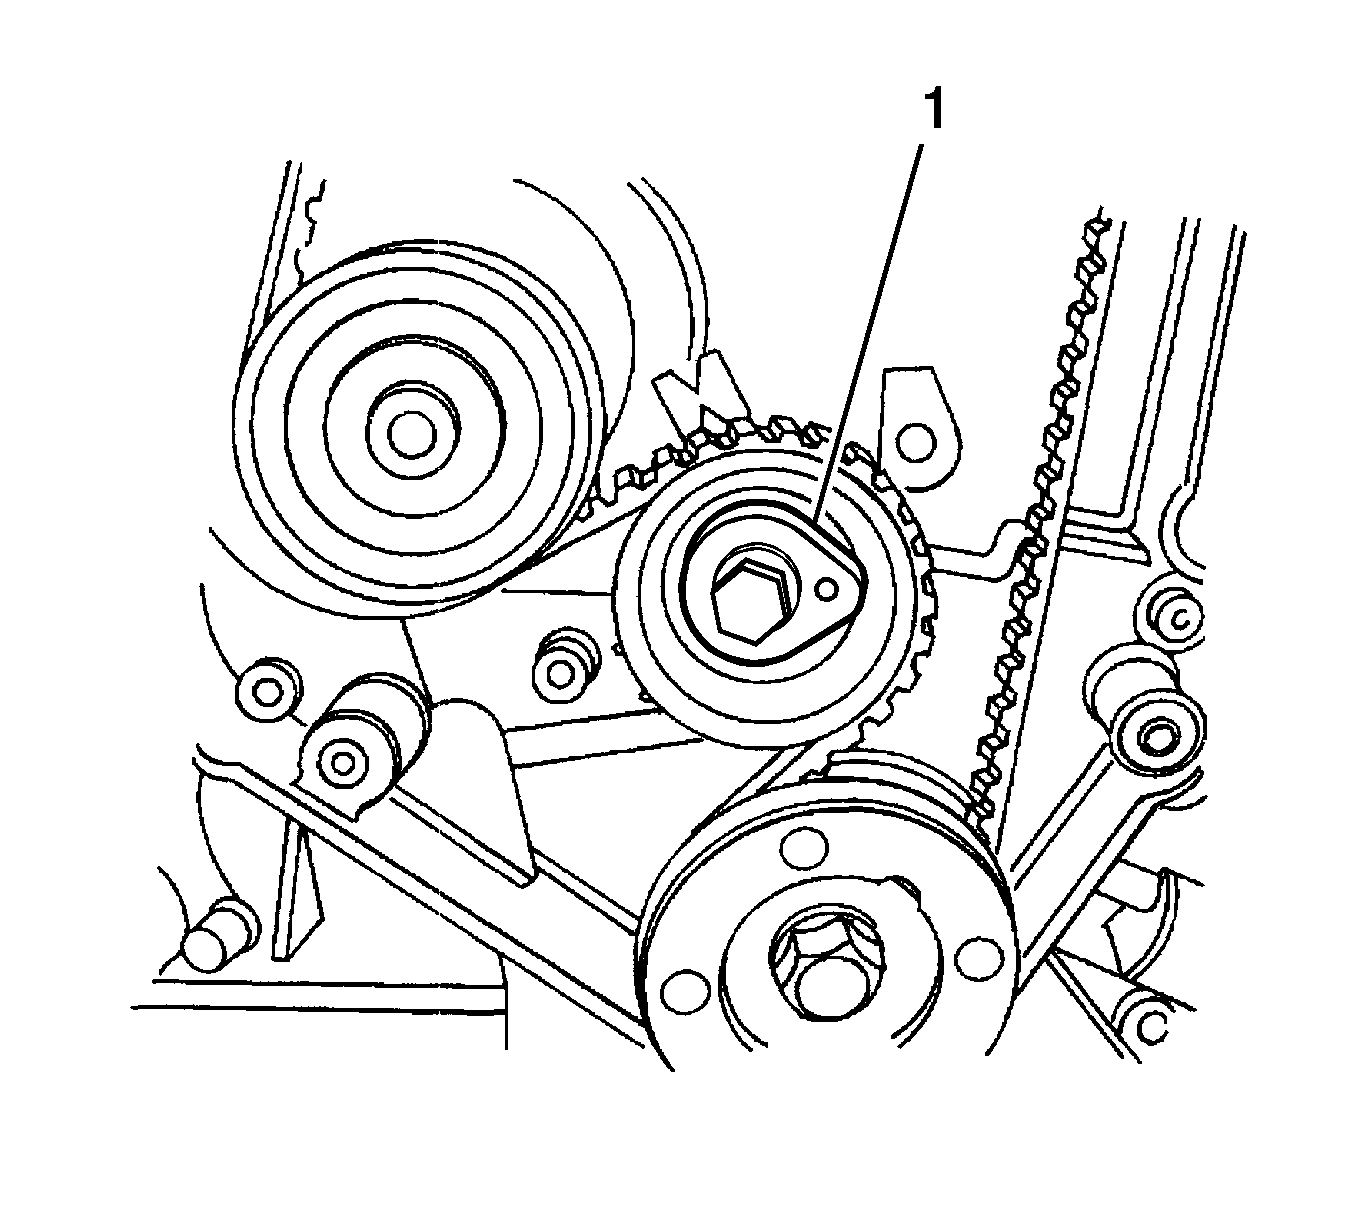
- Loosen the timing belt automatic tension bolt.
- Turn the hex-key tab to relieve belt tension.
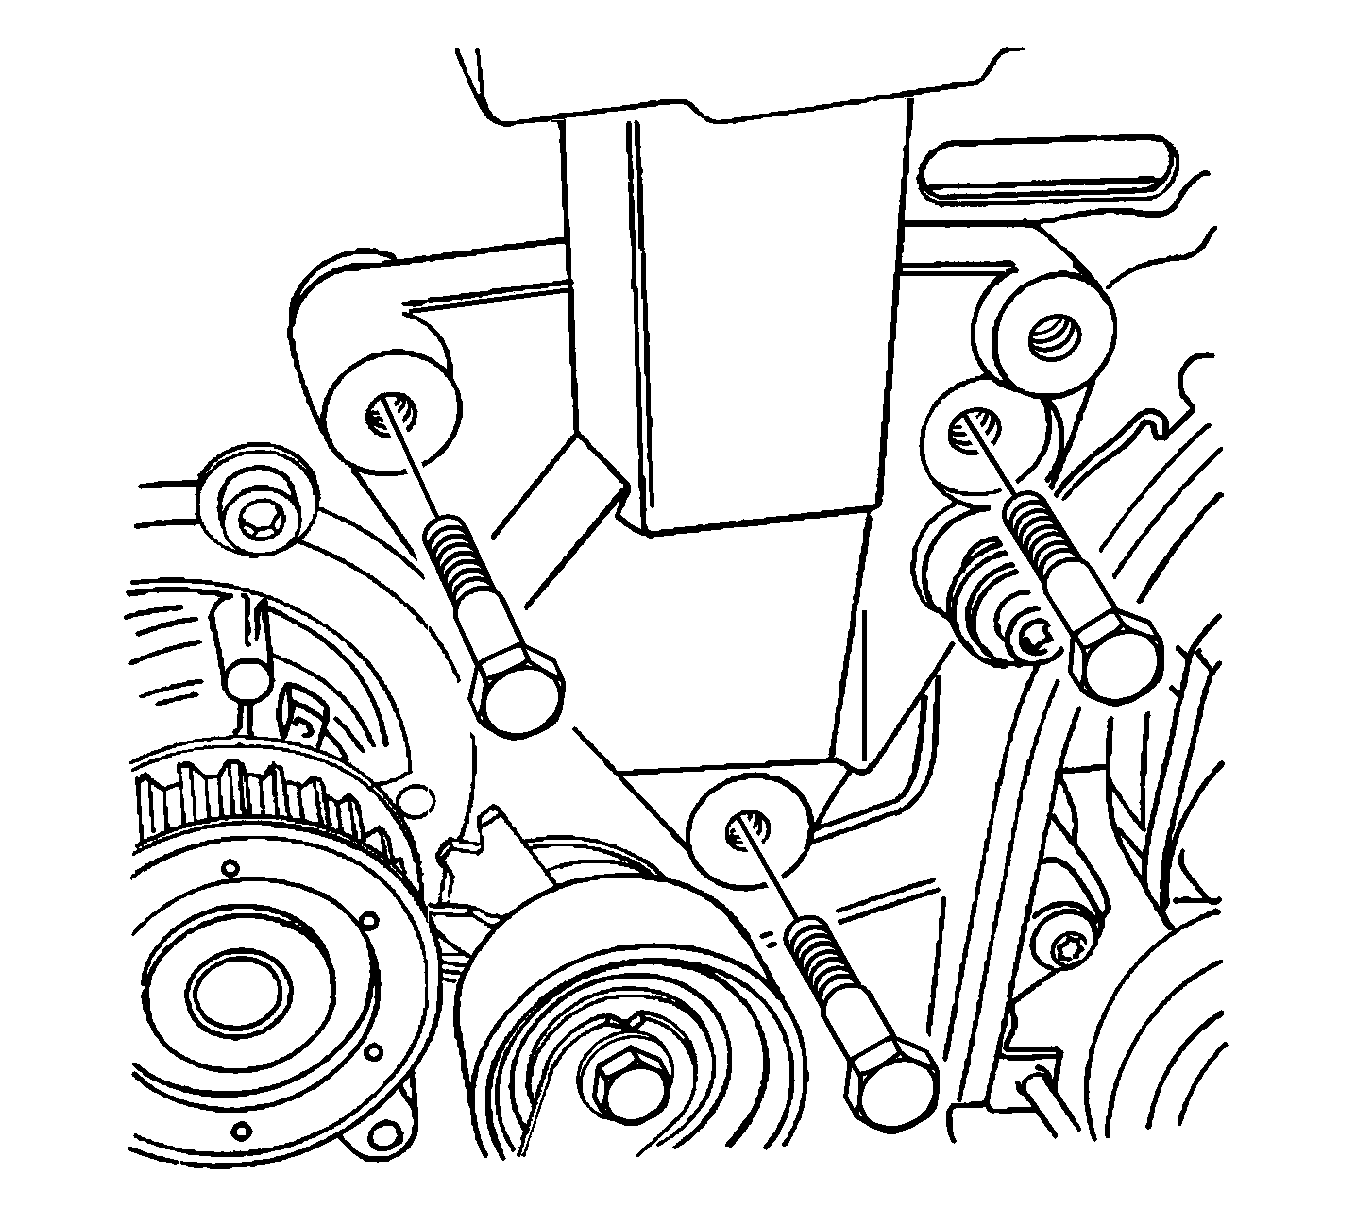
- Remove the timing belt idler pulley nuts.
- Remove the timing belt idler pulley.
- Remove the engine mount retaining bolts.
- Remove the engine mount.
Notice: Refer to Engine Mounting Notice in the Preface section.
Caution: Refer to Battery Disconnect Caution in the Preface section.
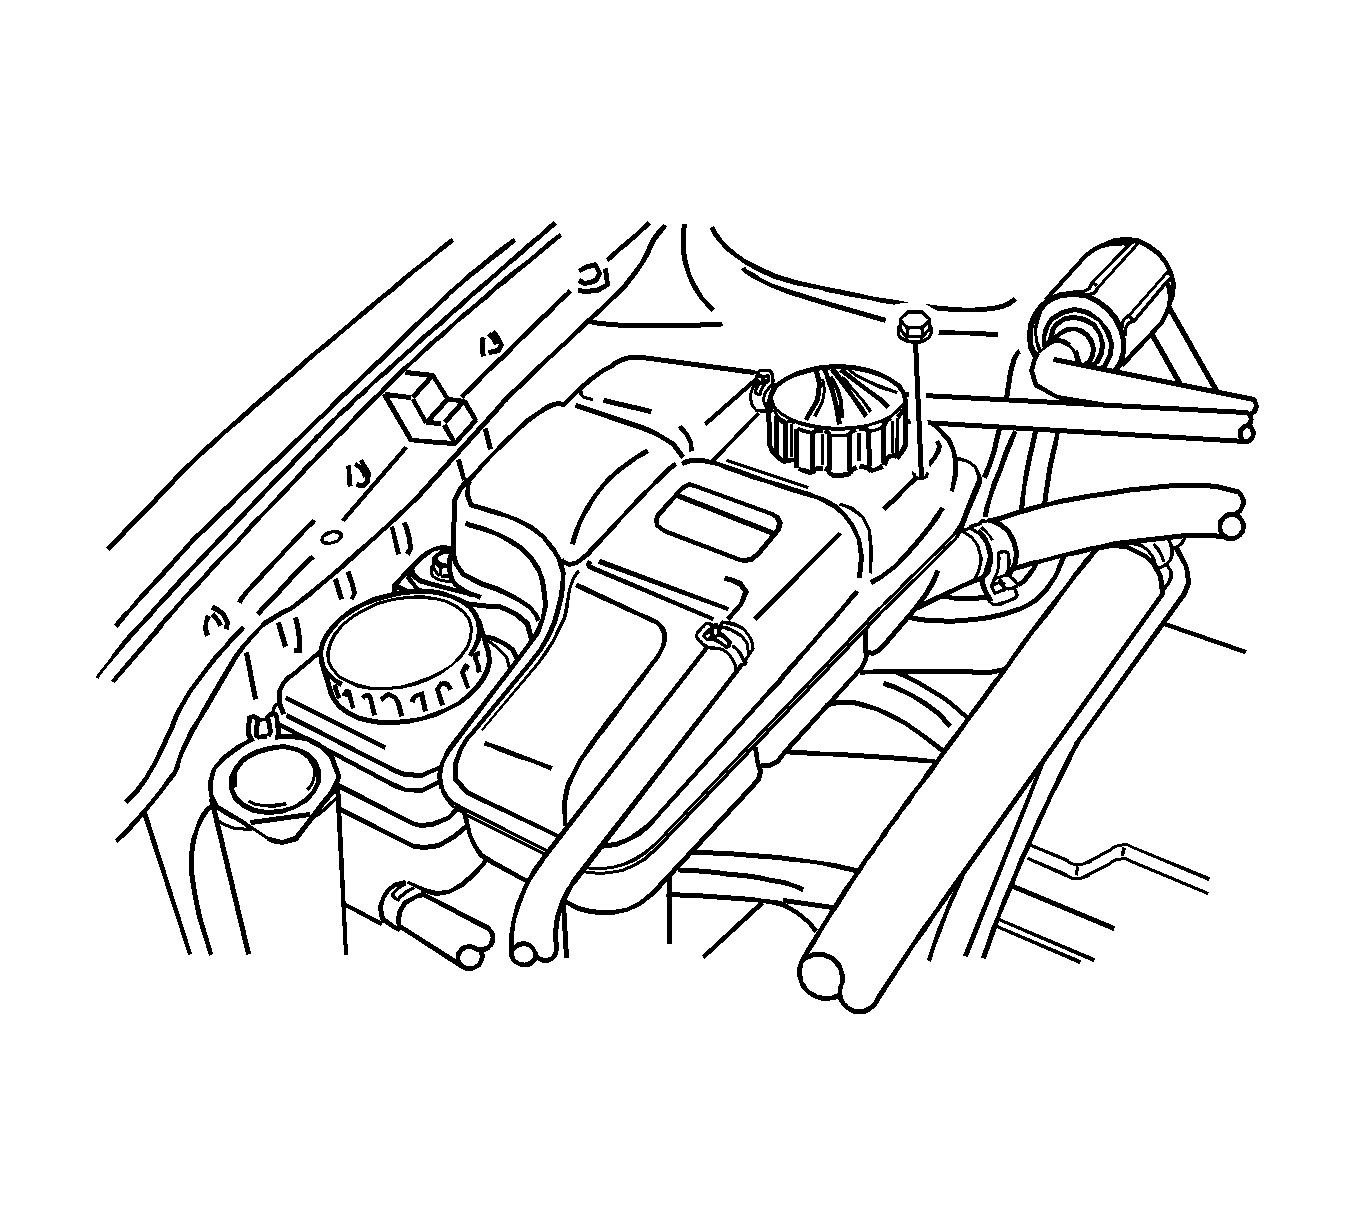
Notice: When raising or supporting the engine for any reason, do not use a jack under the oil pan, any sheet metal, or crankshaft balancer. Jacking against the oil pan may cause it to crack or break.
Installation Procedure
- Install the engine mount.
- Install the engine mount retaining bolts.
- Install the timing belt idler pulleys.
- Install the timing belt idler pulley nuts.
- Tension the timing belt by turning the timing belt automatic tensioner hex-key tab counterclockwise until the pointer is aligned to the indicator.
- Install the front timing belt cover.
- Install the front timing belt cover bolts.
- Install the engine mount bracket and retaining bolts.
- Remove the J 28467-B .
- Install the power steering pump drive belt. Refer to Power Steering Pump Belt Replacement in Power Steering System.
- Install the right front wheel well splash shield. Refer to Wheelhouse Splash Shield Replacement in Body Front End.
- Install the air filter housing assembly with the bolts.
- Connect the negative battery cable.
Notice: Refer to Fastener Notice in the Preface section.
Tighten
Tighten the engine mount retaining bolts to 60 N·m
(44 lb ft).
Tighten
Tighten the timing belt idler pulley nuts to 25 N·m
(44 lb ft).
Tighten
Tighten the timing belt automatic tensioner bolt
to 25 N·m (18 lb ft).
Tighten
Tighten the front timing belt cover bolts to 6 N·m
(53 lb in).

Tighten
Tighten the engine mount bracket retaining bolts
to 60 N·m (44 lb ft).
Tighten
Tighten the air filter housing assembly bolts to
6 N·m (53 lb in).
Engine Mount Replacement Forward
Removal Procedure
- Disconnect the negative battery cable.
- Raise and suitably support the vehicle. Refer to Lifting and Jacking the Vehicle in General Information.
- Remove the front engine crossmember. Refer to Engine Front Crossmember Replacement in Frame and Underbody.
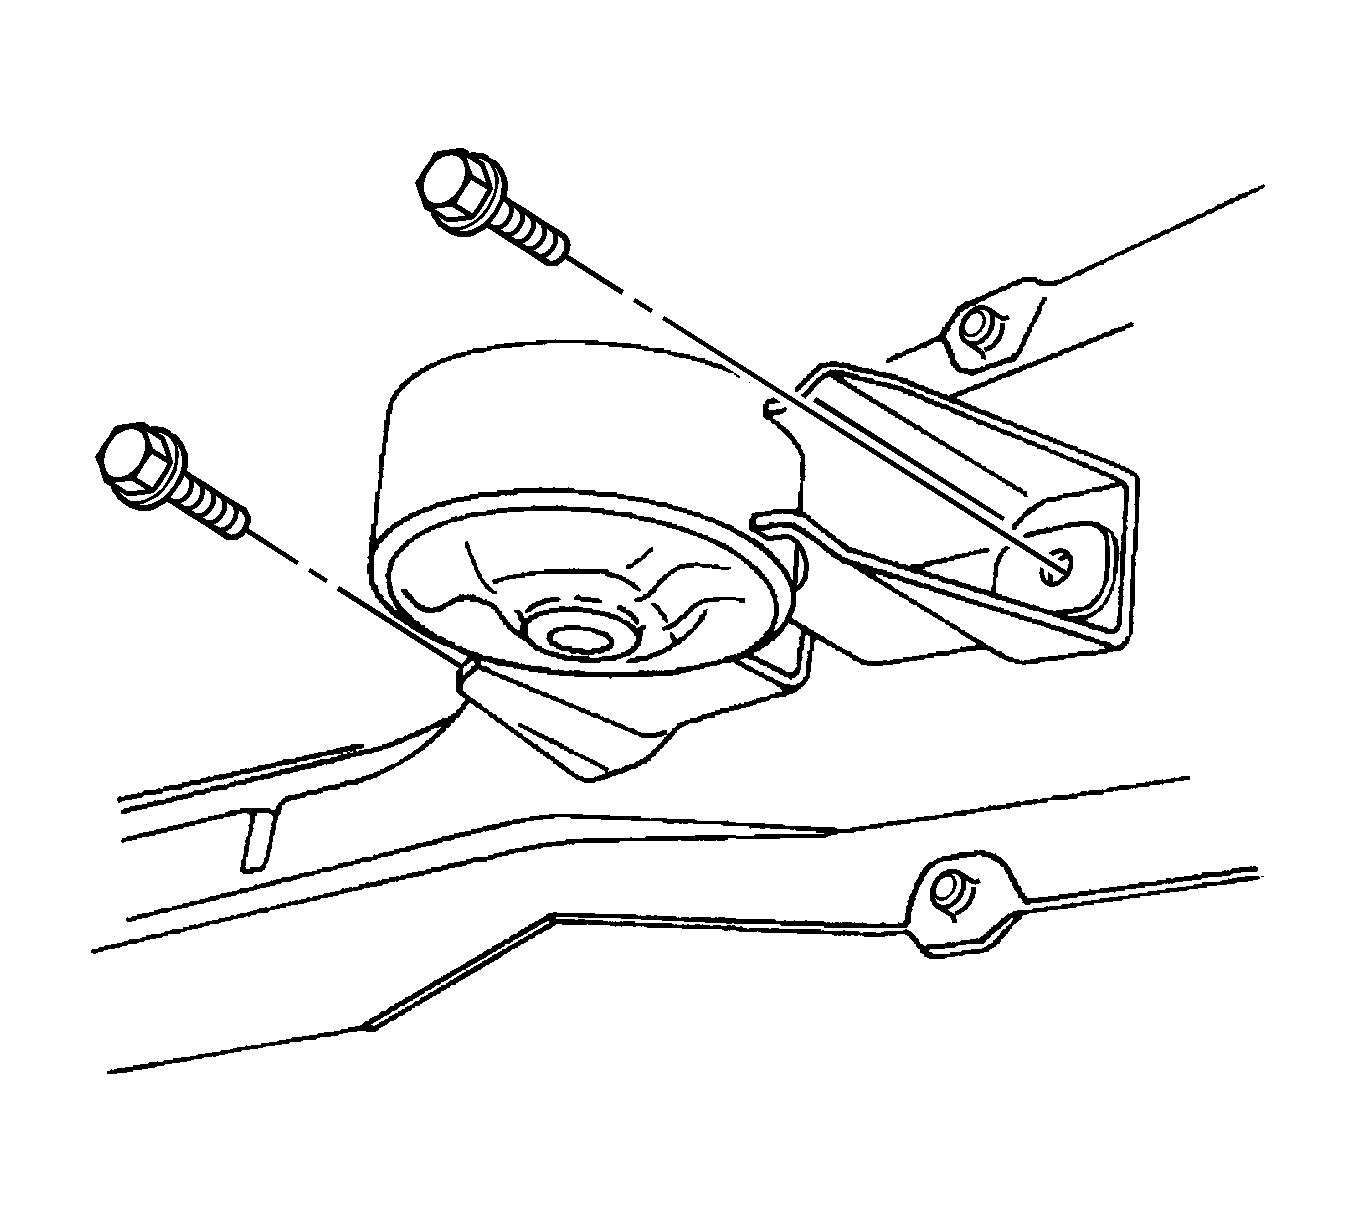
- Remove the bolts securing the engine mount to the center member.
- Remove the engine mount.
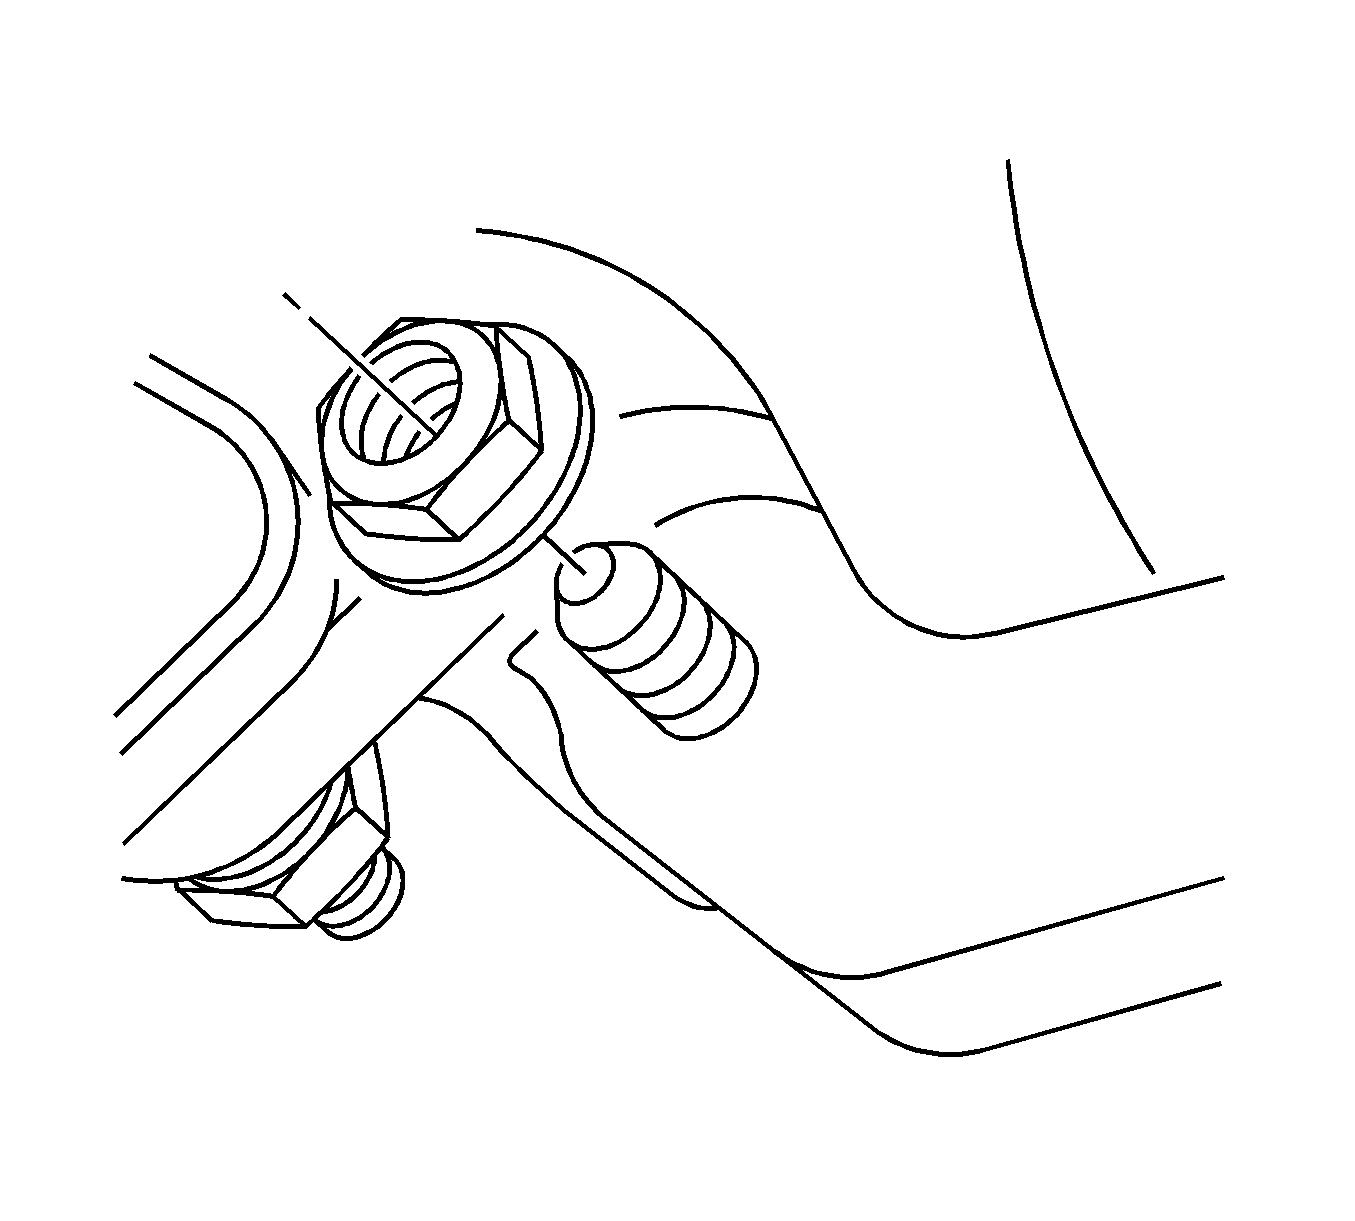
- Remove the engine mount bracket-to-engine block nuts.
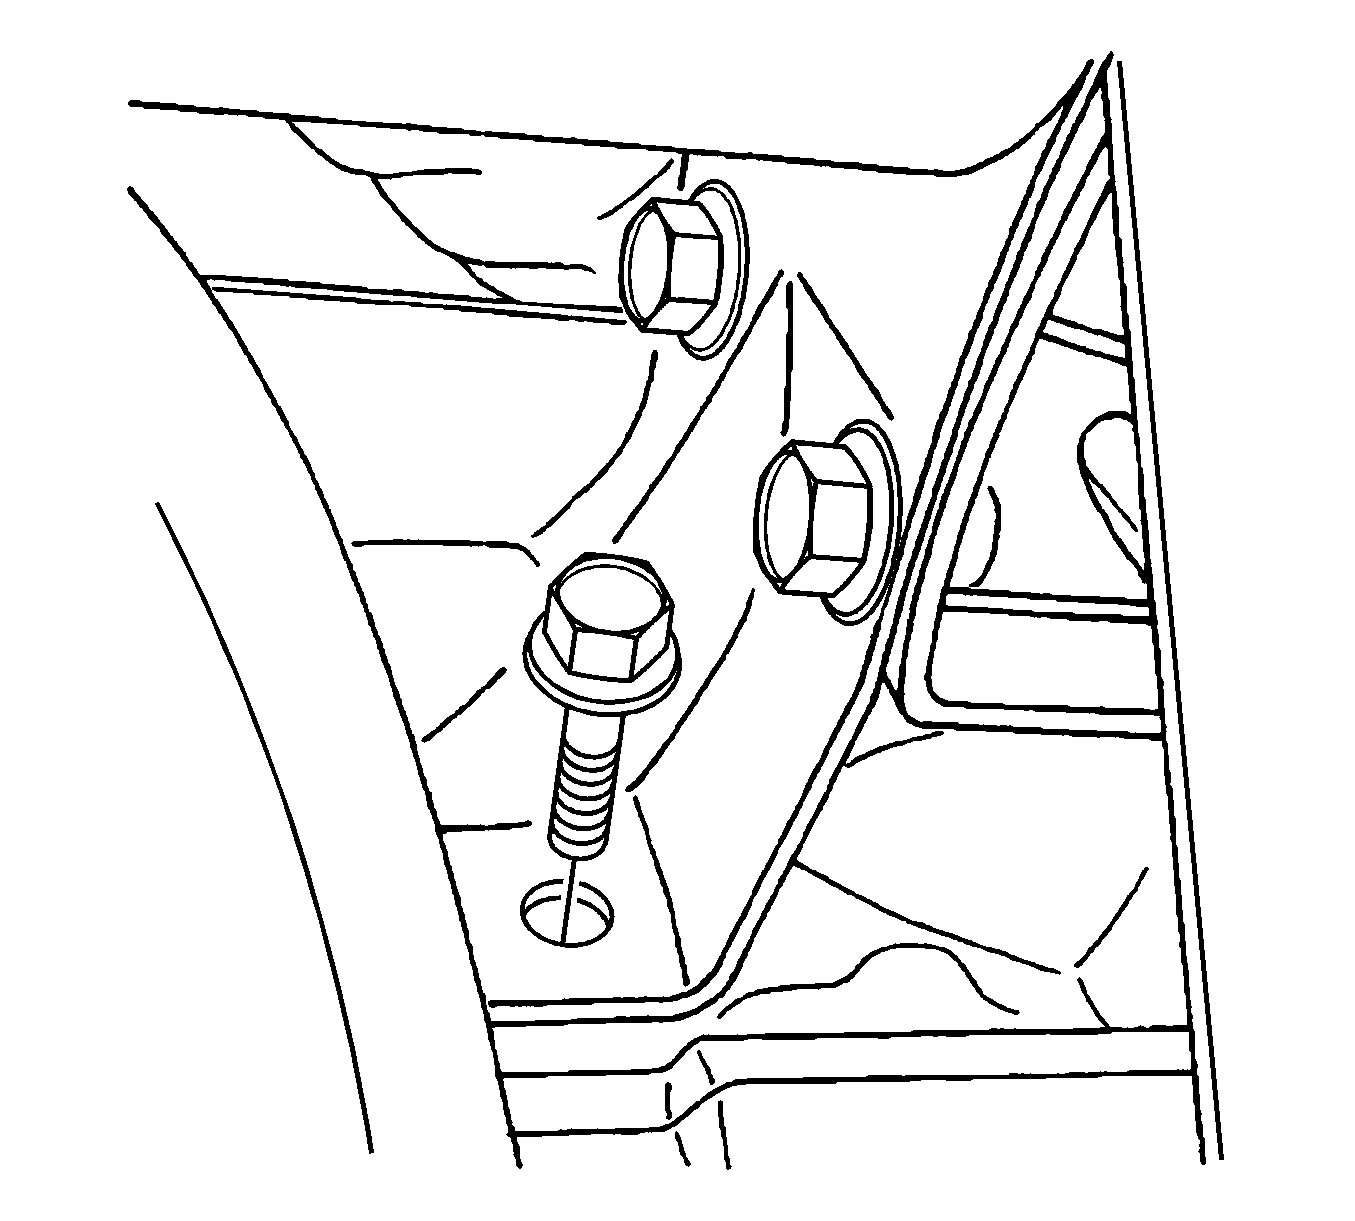
- Remove the engine mount bracket-to-engine block bolts.
- Remove the engine mount bracket.
Notice: Refer to Engine Mounting Notice in the Preface section.
Notice: Refer to Battery Disconnect Caution in the Preface section.
Installation Procedure
- Install the engine mount and bolts to the front engine crossmember.
- Install the engine mount bracket-to-engine block bolts.
- Install the engine mount bracket-to-engine block nuts.
- Install the front engine crossmember. Refer to Engine Front Crossmember Replacement in Frame and Underbody.
- Lower the vehicle.
- Connect the negative battery cable.
Notice: Refer to Fastener Notice in the Preface section.

Tighten
Tighten the engine mount bolts to 60 N·m
(44 lb ft).


Tighten
Tighten the engine mount bracket-to-engine block
bolts and nuts to 80 N·m (59 lb ft).
