For 1990-2009 cars only
Intake Manifold Replacement - Left Side LMM
Removal Procedure
- Remove the center intake manifold. Refer to Center Intake Manifold Replacement.
- Remove the auxiliary generator, if equipped. Refer to Auxiliary Generator Replacement.
- Remove the left fuel rail. Refer to Fuel Injection Fuel Rail Assembly Replacement - Bank 2.
- Remove the injection pump. Refer to Fuel Injection Pump Replacement.
- Remove the intake manifold bolts/nuts.
- Remove the intake manifold.
- To prevent entry of debris into the cylinder head, tape the openings.
- Clean the gasket surfaces.
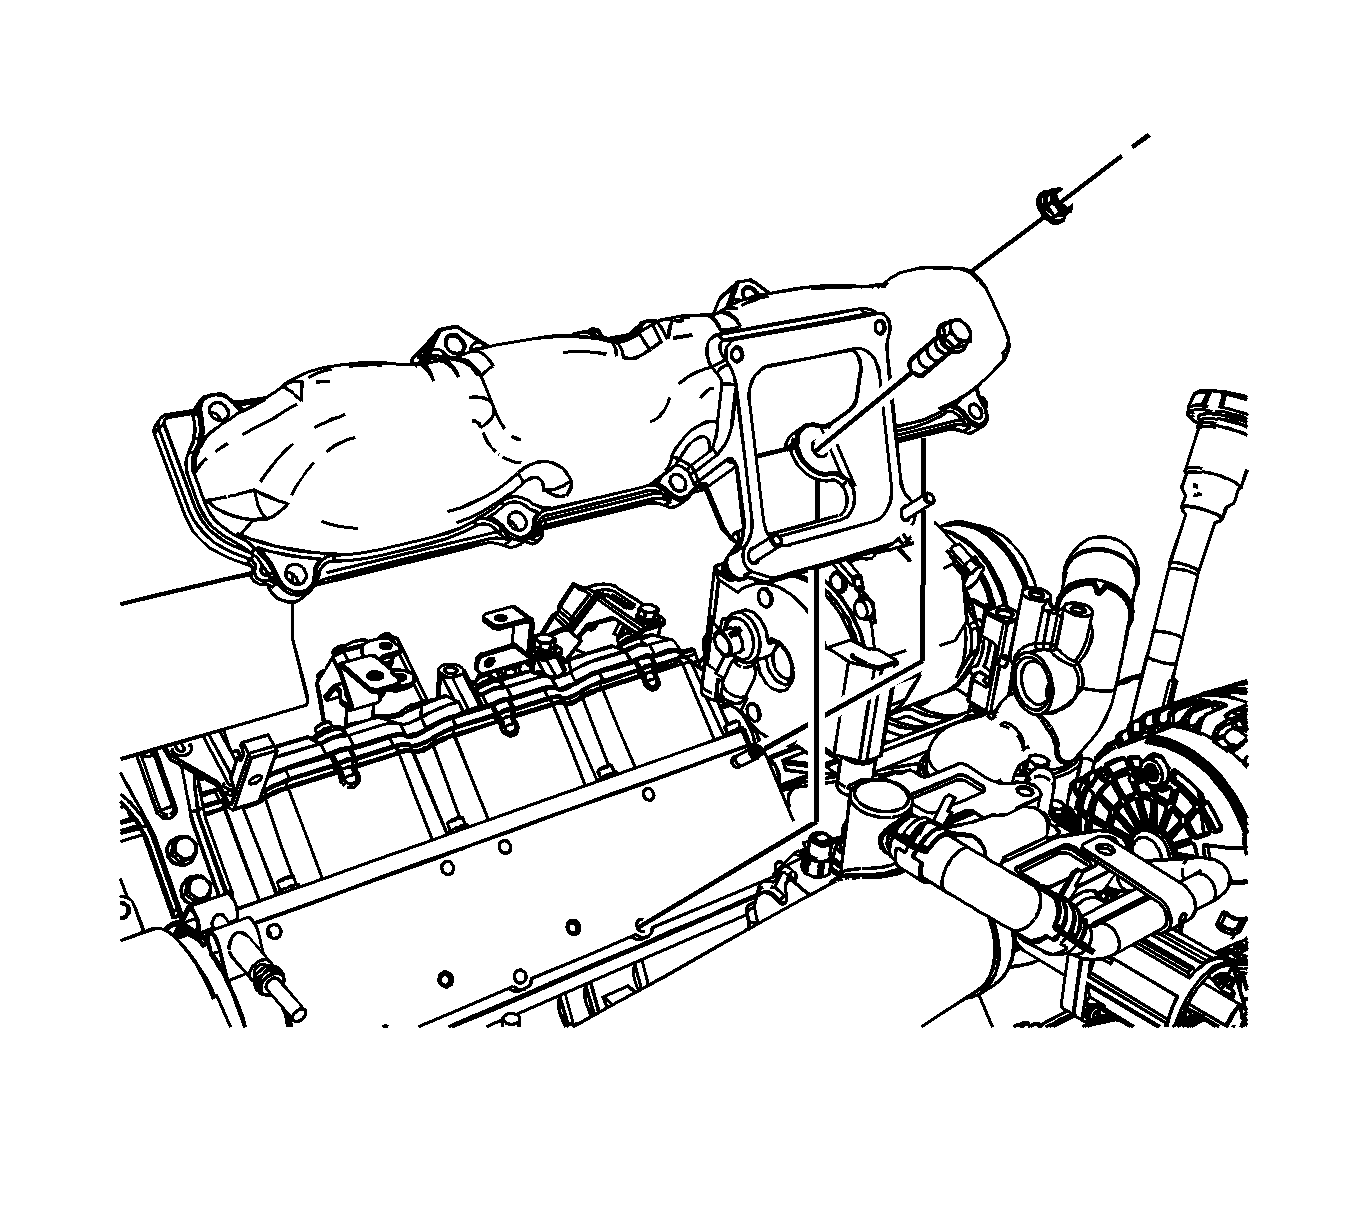
Note: The intake manifold uses sealer. Pry at the area by the fuel rail bolt holes in order to avoid damage to the sealing surface.
Installation Procedure
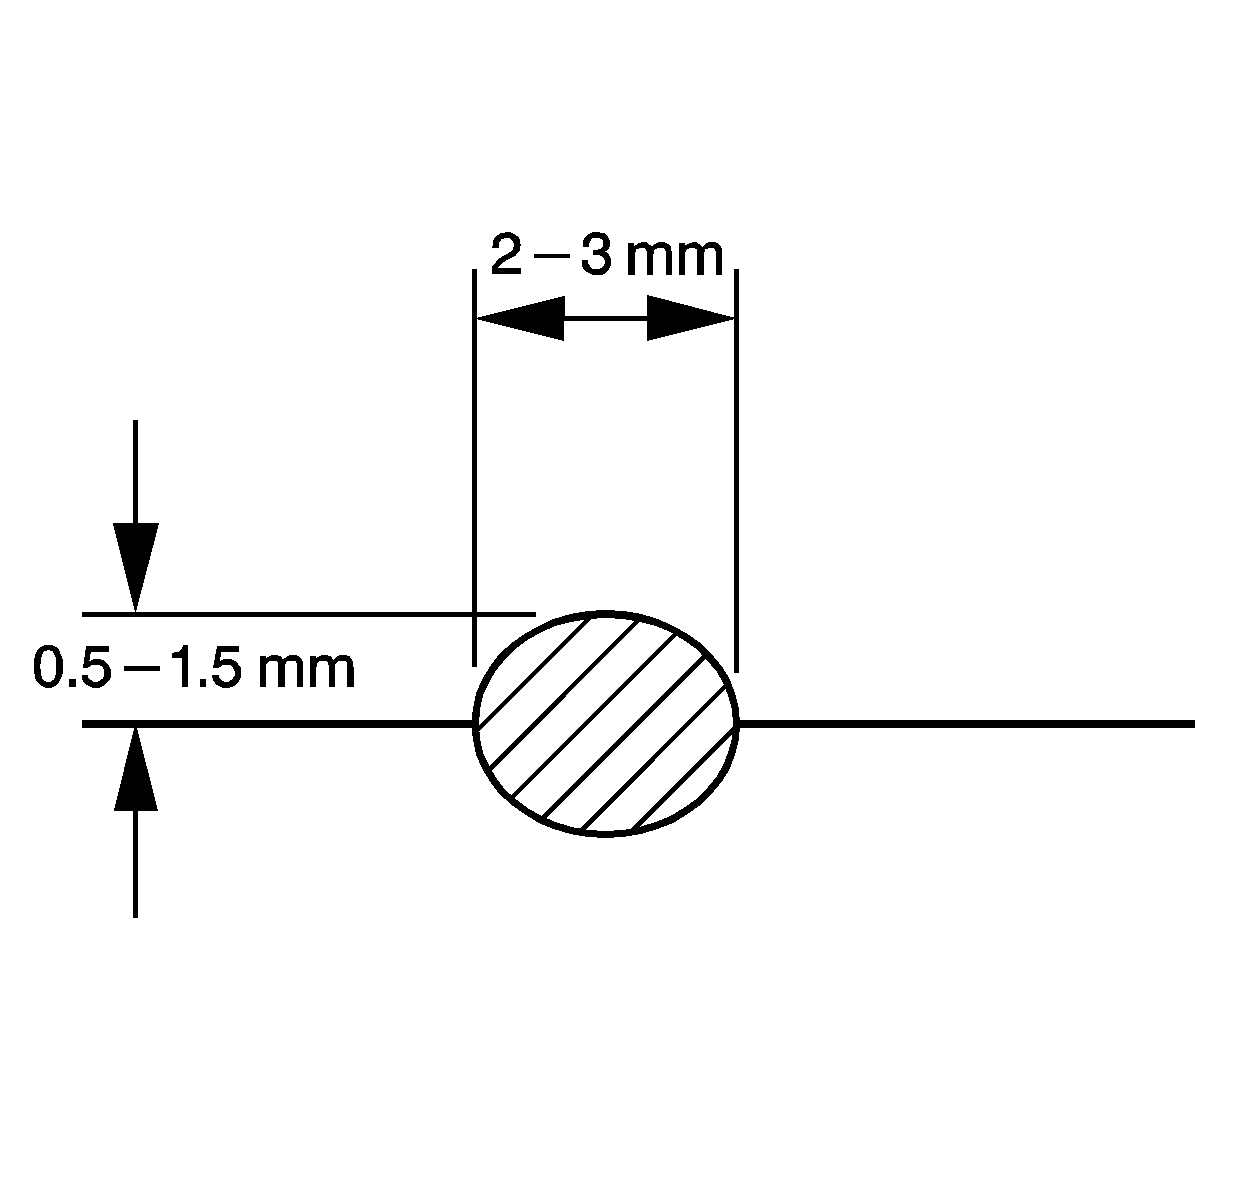
- Apply a 2-3 mm (1/8 in) wide, by 0.5-1.5 mm (1/16 in) high bead of sealant to the intake manifold. Refer to Adhesives, Fluids, Lubricants, and Sealers.
- Install the intake manifold.
- Install the intake manifold bolts/nuts.
- Tighten the intake manifold bolts/nuts in the sequence shown to 25 N·m (18 lb ft).
- Install the fuel injector pump. Refer to Fuel Injection Pump Replacement.
- Install the left fuel rail. Refer to Fuel Injection Fuel Rail Assembly Replacement - Bank 2.
- Install the auxiliary generator, if equipped. Refer to Auxiliary Generator Replacement.
- Install the center intake manifold. Refer to Center Intake Manifold Replacement.
Caution: Refer to Fastener Caution in the Preface section.

