For 1990-2009 cars only
Tools Required
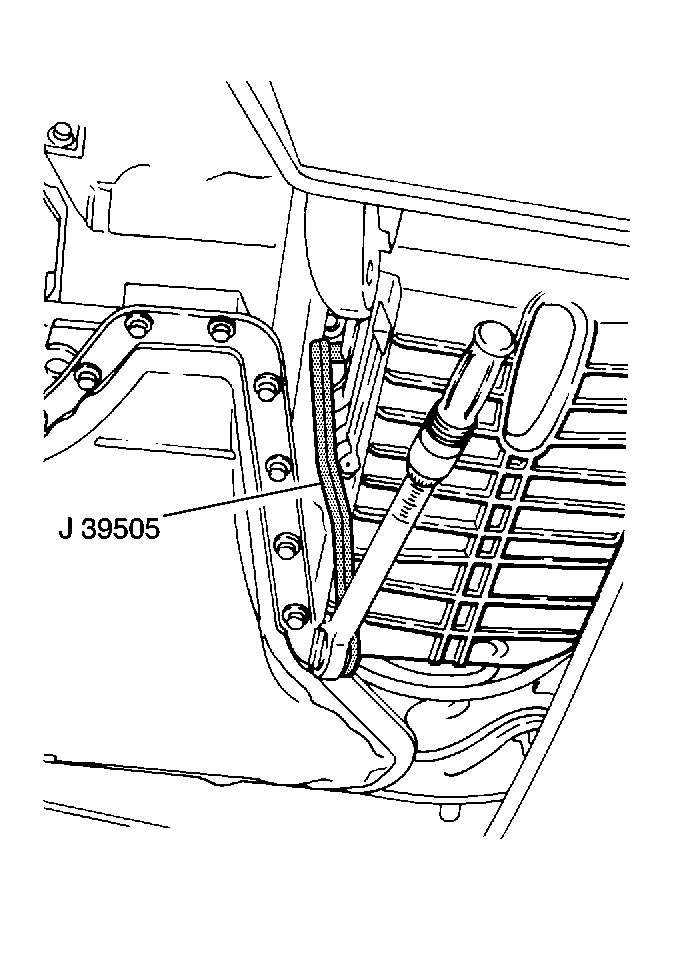
J 39505 Torque Wrench Adapter
Removal Procedure
- Disconnect the negative battery cable. Refer to Battery Negative Cable Disconnection and Connection in Engine Electrical.
- Remove the engine mount struts. Refer to Engine Mount Strut Replacement - Left Side and Engine Mount Strut Replacement - Right Side .
- Install the engine support fixture. Refer to Engine Support Fixture .
- Raise and support the vehicle. Refer to Lifting and Jacking the Vehicle in General Information.
- Remove the A/C compressor and reposition the A/C compressor. Refer to Air Conditioning Compressor Replacement in Heating, Ventilation and Air Conditioning.
- Remove the catalytic converter pipe from the right exhaust manifold. Refer to Catalytic Converter Replacement in Engine Exhaust.
- Drain the engine oil. Refer to Engine Oil and Oil Filter Replacement .
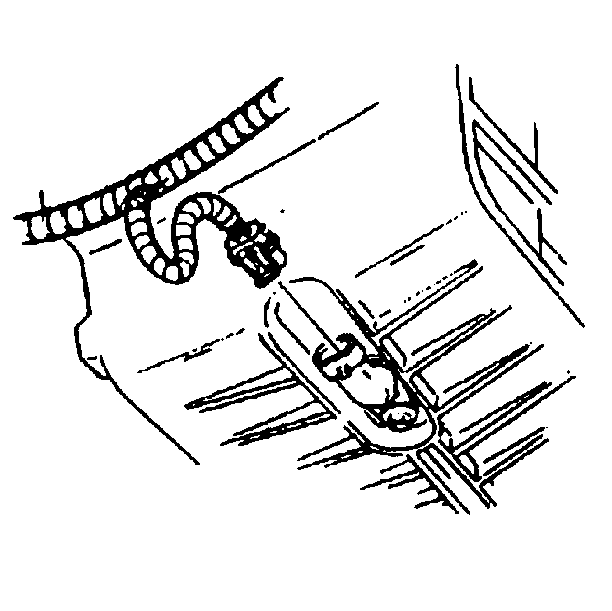
- Disconnect the oil level sensor electrical connector.
- Remove the starter motor. Refer to Starter Motor Replacement in Engine Electrical.
- Remove the transaxle brace from the oil pan. Refer to Transmission Brace Replacement in Automatic Transaxle - 4T65 - E.
- Loosen the transaxle mount lower nuts. Refer to Transmission Mount Replacement - Left Side in Automatic Transaxle - 4T65 - E.
- Remove the engine mount lower nuts. Refer to Engine Mount Replacement - Right Side .
- Lower the vehicle.
- Use the engine support fixture to raise the engine.
- Raise the vehicle.
- Remove the steering shaft intermediate pinch bolt. Refer to Intermediate Steering Shaft Replacement in Steering Wheel and Column.
- Remove the engine mount bracket with the engine mount from the oil pan. Refer to Engine Mount Bracket Replacement - Right Side .
- Remove the right side lower ball joint from the steering knuckle. Refer to Lower Control Arm Ball Joint Replacement in Front Suspension.
- Remove the right side outer tie rod from the steering knuckle. Refer to Rack and Pinion Outer Tie Rod End Replacement in Power Steering System.
- Remove the right side stabilizer link. Refer to Stabilizer Shaft Link Replacement in Front Suspension.
- Install the jackstands to the frame assembly.
- Remove the right side frame bolts and loosen the left side frame bolts. Refer to Frame Replacement in Frame and Underbody.
- Using the jackstands lower the right side of the frame assembly.
- Use the J 39505 to remove the right oil pan side bolts.
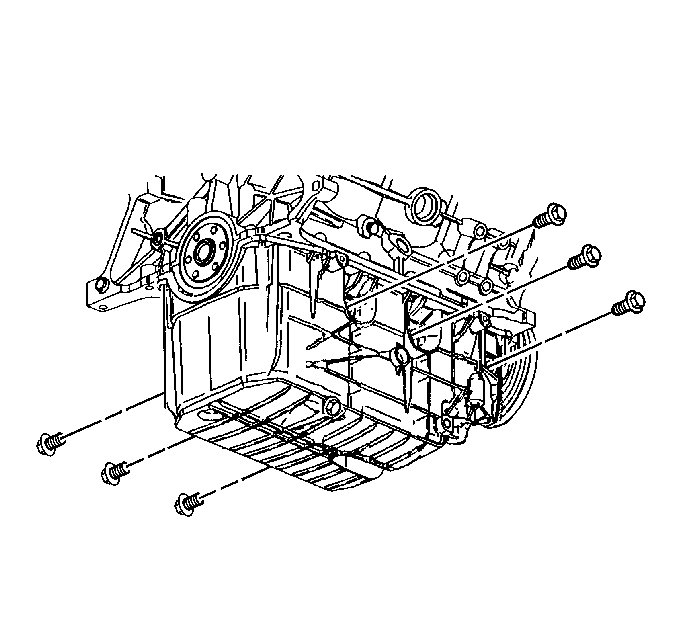
- Remove the left oil pan side bolts.
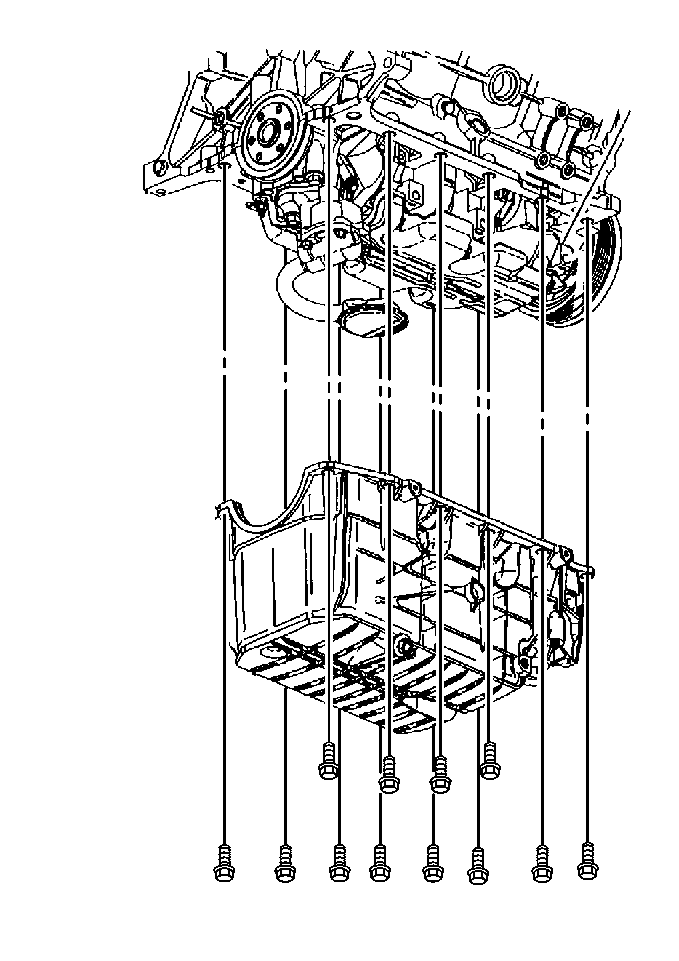
- Remove the oil pan bolts.
- Remove the oil pan.
- Remove the oil pan gasket.
- Clean and inspect the oil pan and the engine block gasket mating surfaces.
Installation Procedure
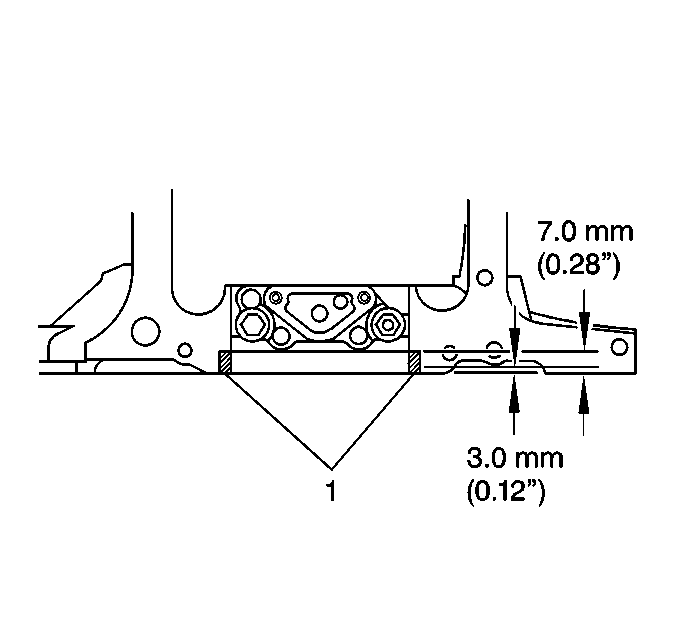
- Apply sealant GM P/N 12345739 (Canadian P/N 10953541) at the rear main bearing cap and the engine block (1).
- Install the oil pan gasket.
- Install the oil pan.
- Install the oil pan bolts.
- Install the left oil pan side bolts.
- Install the right side oil pan bolts.
- Using the jackstands raise the frame assembly to the original position.
- Install the right side and tighten the left side frame bolts. Refer to Frame Replacement in Frame and Underbody.
- Remove the jackstands from the frame assembly.
- Install the right side stabilizer link. Refer to Stabilizer Shaft Link Replacement in Front Suspension.
- Install the right side outer tie rod to the steering knuckle. Refer to Rack and Pinion Outer Tie Rod End Replacement in Power Steering System.
- Install the right side lower ball joint to the steering knuckle. Refer to Lower Control Arm Ball Joint Replacement in Front Suspension.
- Install the engine mount bracket with the engine mount to oil pan. Refer to Engine Mount Bracket Replacement - Right Side .
- Install the steering shaft intermediate pinch bolt. Refer to Intermediate Steering Shaft Replacement in Steering Wheel and Column.
- Lower the vehicle.
- Use the engine support fixture to lower the engine to the original position.
- Raise the vehicle.
- Install the transaxle mount lower nuts. Refer to Transmission Mount Replacement - Left Side in Automatic Transaxle - 4T65 - E.
- Install the engine mount lower nuts. Refer to Engine Mount Replacement - Right Side .
- Install the transaxle brace to the oil pan. Refer to Transmission Brace Replacement in Automatic Transaxle - 4T65 - E.
- Install the starter motor. Refer to Starter Motor Replacement in Engine Electrical.
- Connect the oil level sensor electrical connector.
- Install the catalytic converter pipe to the right exhaust manifold. Refer to Catalytic Converter Replacement in Engine Exhaust.
- Install the A/C compressor. Refer to Air Conditioning Compressor Replacement in Heating, Ventilation and Air Conditioning.
- Lower the vehicle.
- Remove engine support fixture.
- Install the engine mount struts to the engine. Refer to Engine Mount Strut Replacement - Left Side and Engine Mount Strut Replacement - Right Side .
- Fill the crankcase with new engine oil. Refer to Engine Oil and Oil Filter Replacement .
- Connect the negative battery cable. Refer to Battery Negative Cable Disconnection and Connection in Engine Electrical.

Notice: Refer to Fastener Notice in the Preface section.
Tighten
Tighten the bolts to 25 N·m (18 lb ft).


Tighten
| • | Use the J 39505 to tighten the right side oil pan bolts to 50 N·m (37 lb ft). |
| • | Tighten the left side oil pan bolts to 50 N·m (37 lb ft). |

