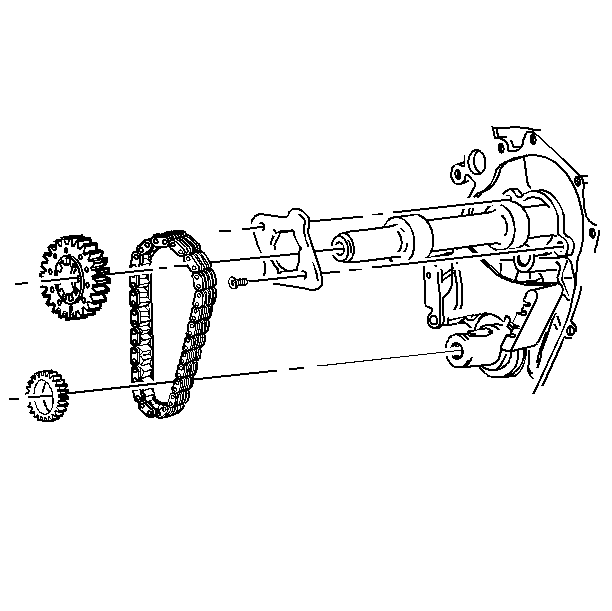
Removal Procedure
Tools Required
| • | J 8433 Universal
Puller Bridge |
| • | J 38611 Crankshaft
Sprocket Puller Legs and Center |
| • | J 38612 Crankshaft
Sprocket Installer |
- Remove the front cover. Refer to
Engine Front Cover Replacement
.
- Retract the timing chain tensioner.
- Remove the timing chain tensioner bolts.
- Raise the vehicle. Suitably support the vehicle. Refer to General
Information.

- Remove the timing chain, the crankshaft sprocket, and the intermediate shaft
sprocket as an assembly, using the J 8433
and the J 38611
on the crankshaft sprocket.
- If the intermediate gear does not slide off easily with the timing
chain, rotate the crankshaft back and forth in order to help loosen the tight
fit.
- Remove the timing chain tensioner.
- Inspect the crankshaft alignment key for burrs or marks that could
affect the assembly.
Installation Procedure
Tools Required
J 38612 Crankshaft
Sprocket Installer

- Make sure that the crankshaft key is installed and fully seated, and that
the chain tensioner is installed and the blade retracted.
- Slip both sprockets and the chain over the proper shaft and engage
the slot in the key. The intermediate shaft may move against the rear cover.
Slide the sprocket and chain on the shafts maintaining the parallel alignment
of the sprockets.
- Make sure that the rubber and tension blade of the tensioner does
not become caught, misaligned, or dislodged.
- The larger chamfer and the counterbore of the crankshaft sprocket
are installed toward the crankshaft. The intermediate sprocket spline sockets
are installed away from the case.
- The crankshaft sprocket must be pressed on for the final 8 mm
(0.31 in) to the seated position using the J 38612
.
- Verify that the timing is maintained.
- Pull the retaining pin from the tensioner.
- Install the front cover. Refer to
Engine Front Cover Replacement
.


