Removal Procedure
- Park the vehicle in a well ventilated area, away from any ignition source.
- Disconnect the battery ground cable. Refer to Battery Negative Cable Disconnection and Connection.
- Raise and support the vehicle. Refer to Lifting and Jacking the Vehicle.
- Remove the right rear wheel. Refer to Tire and Wheel Removal and Installation.
- Remove the right rear wheel house liner. Refer to Rear Wheelhouse Panel Liner Replacement.
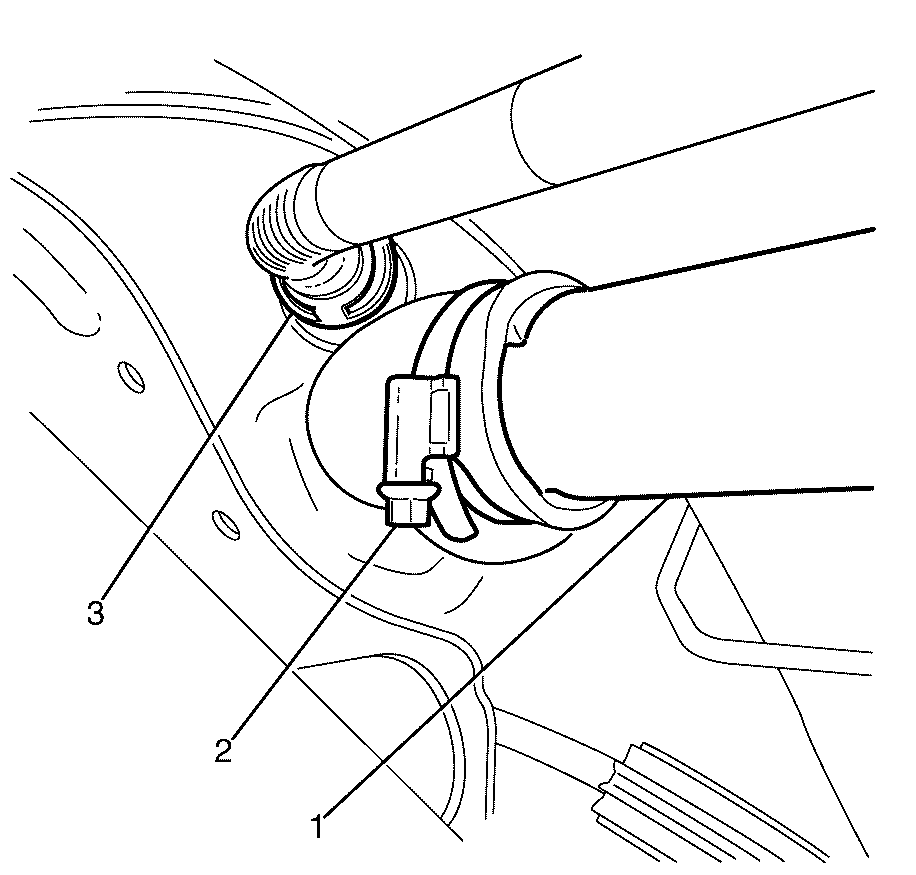
- Loosen filler tube retaining clamp (2).
- Disconnect the filler tube (1) from the fuel tank.
- Disconnect the evaporative emission (EVAP) line (3), by squeezing both sides of the line and pulling it toward the rear of the vehicle.
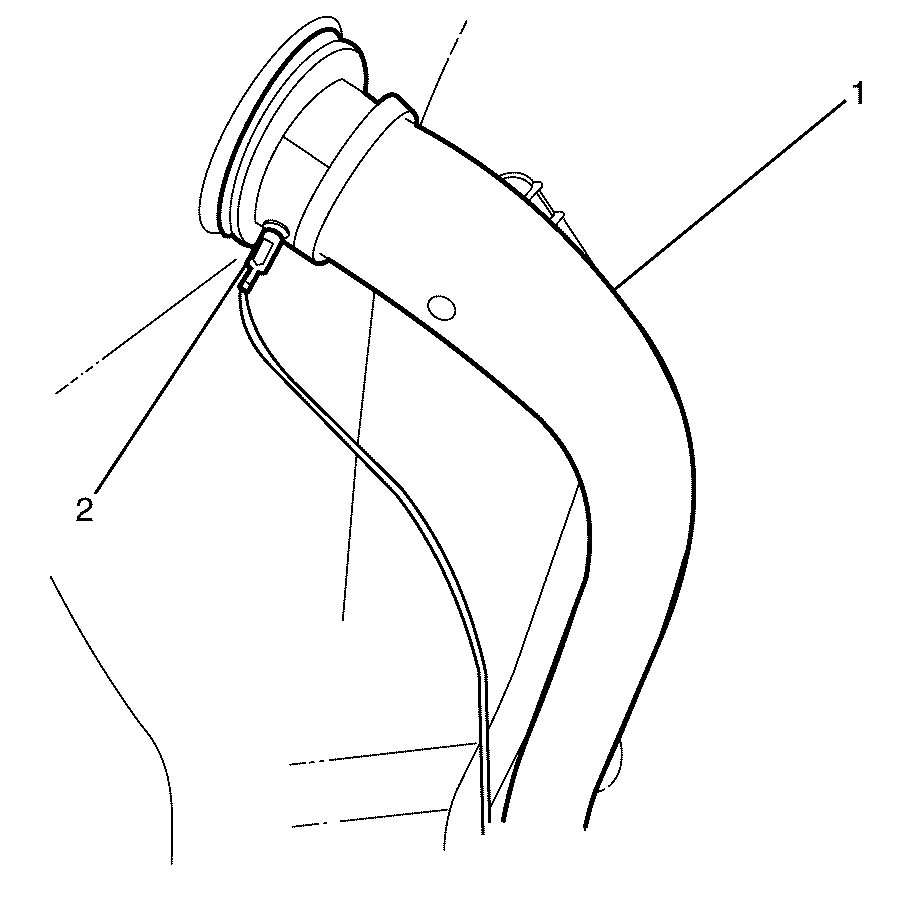
- Disconnect the rubber seal surround from the fuel filler tube (1).
- Disconnect the earth lead (2) from the fuel filler tube (1).
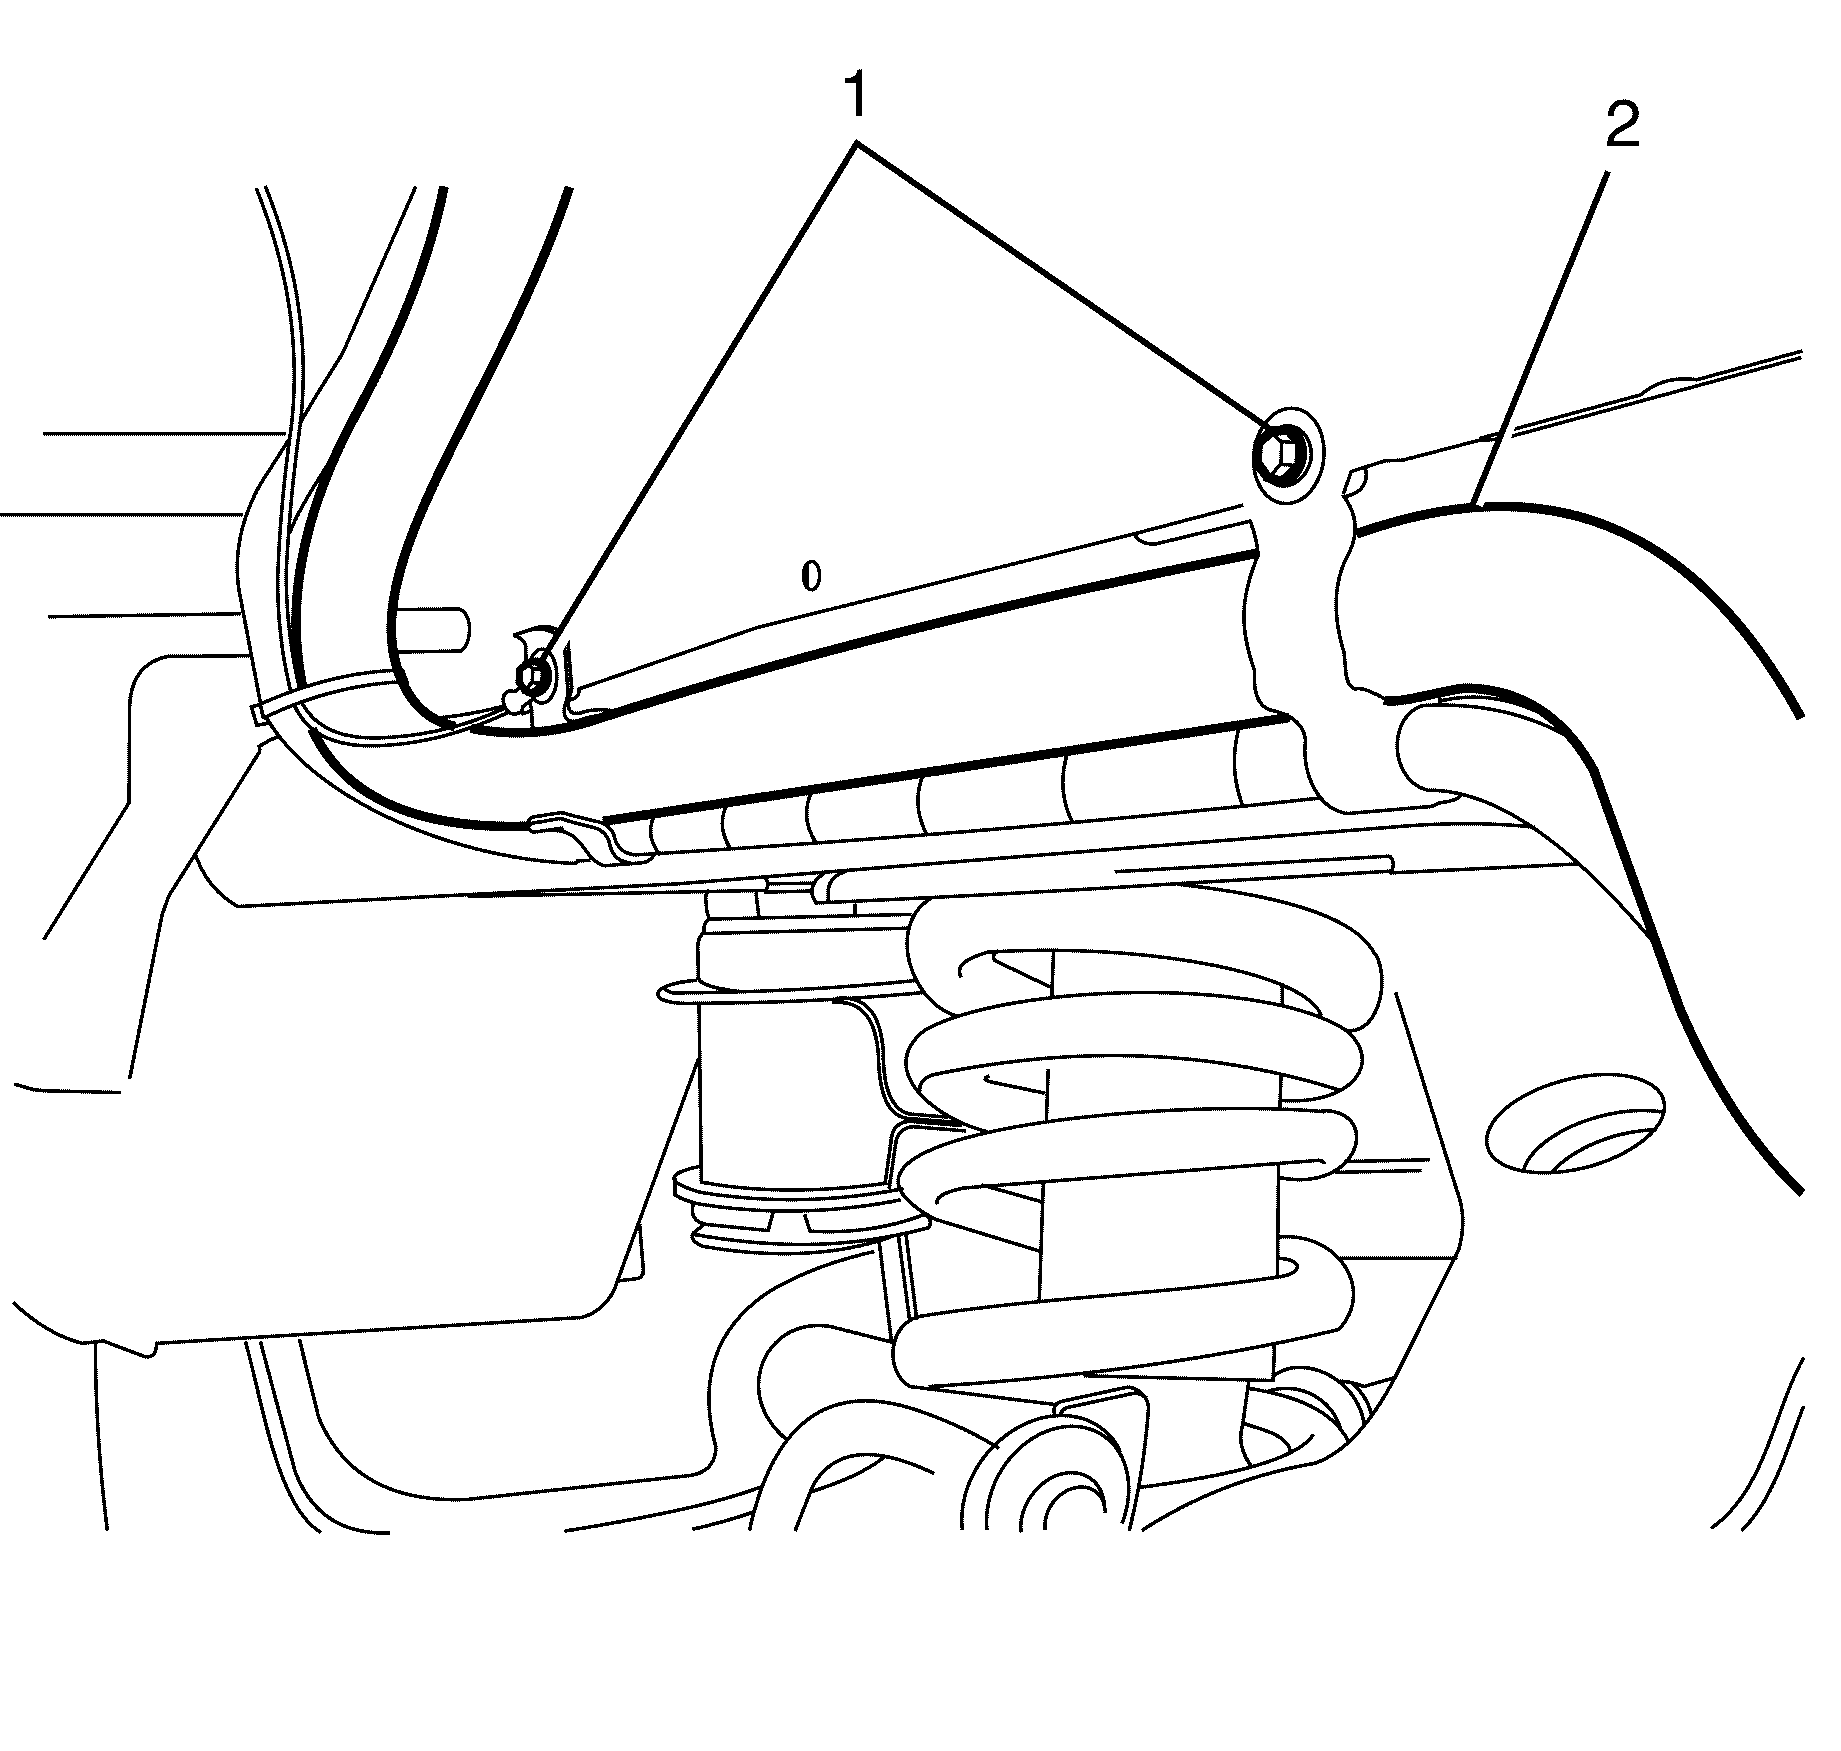
- Remove the filler tube (2) to chassis retaining bolts (1).
- Remove the LPG fill line (1) from the LPG fill valve (2).
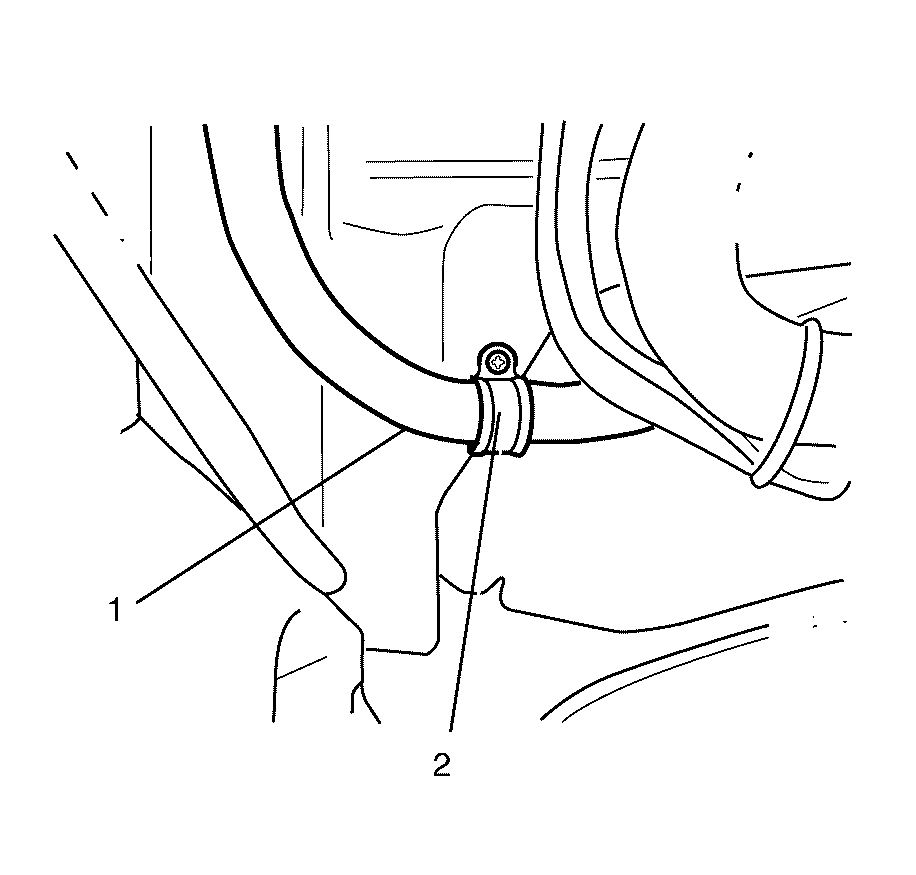
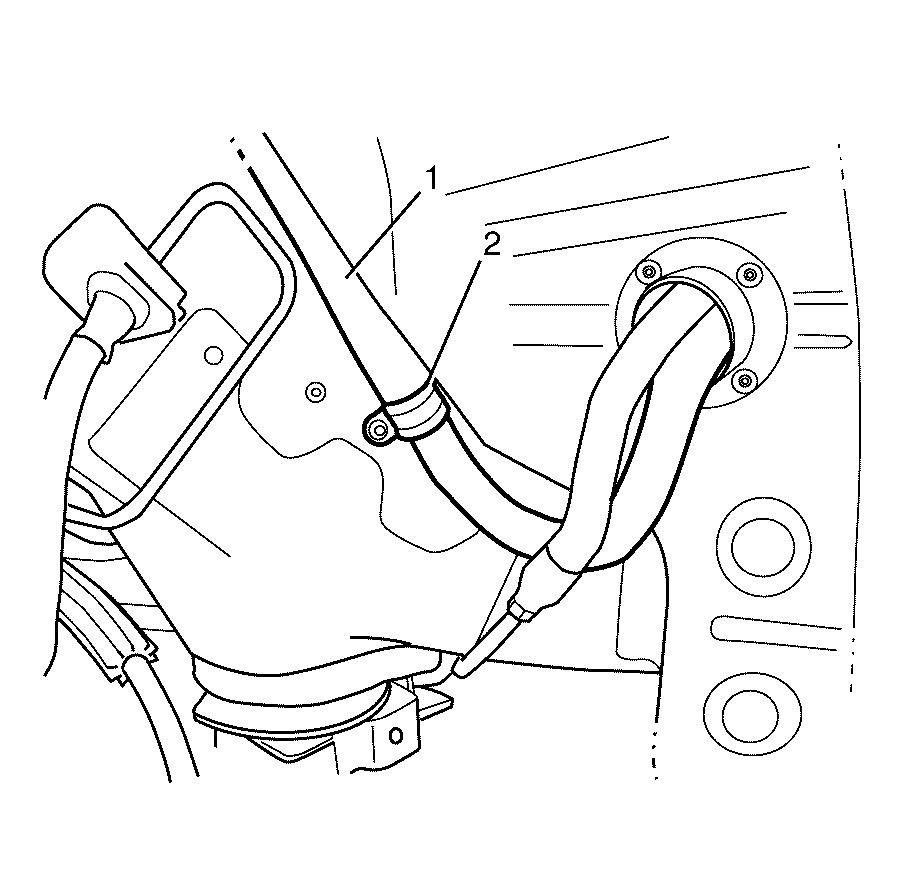
- Remove the LPG fill line (1) to body retaining clamp (2).
- Remove the LPG fill line (1) to body retaining clamp (2).
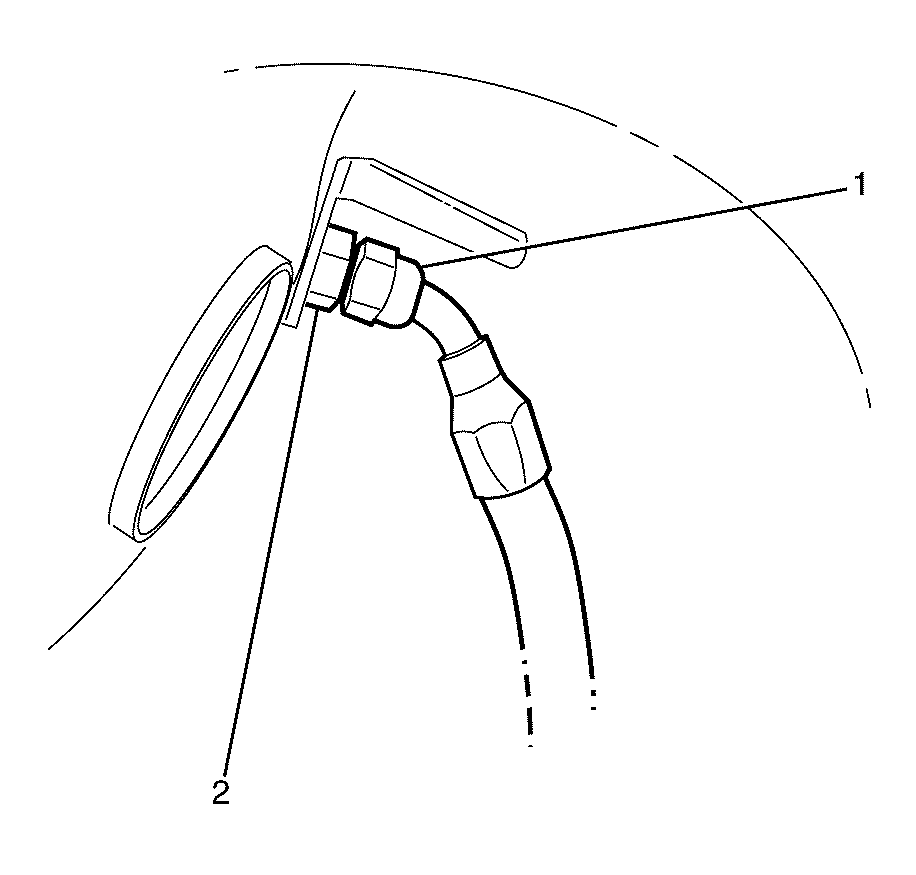
- Remove the LPG fill line (2) from LPG tank fitting (1).
- Remove the LPG fill line (2) from the vehicle.
Caution: Refer to Safety Glasses Caution in the Preface section.
Caution: Refer to Liquefied Petroleum Gas (LPG) Caution in the Preface section.
Caution: Refer to Battery Disconnect Caution in the Preface section.
Caution: Refer to Vehicle Lifting Caution in the Preface section.
Important: Hold the LPG fill valve (2) with a suitable tool when disconnecting the LPG fill line (1), to prevent damage to the LPG fill line.
Important: The LPG fill line should be cracked open to allow it to be emptied of LPG in accordance with the current Australian Standards AS 2746-1985.
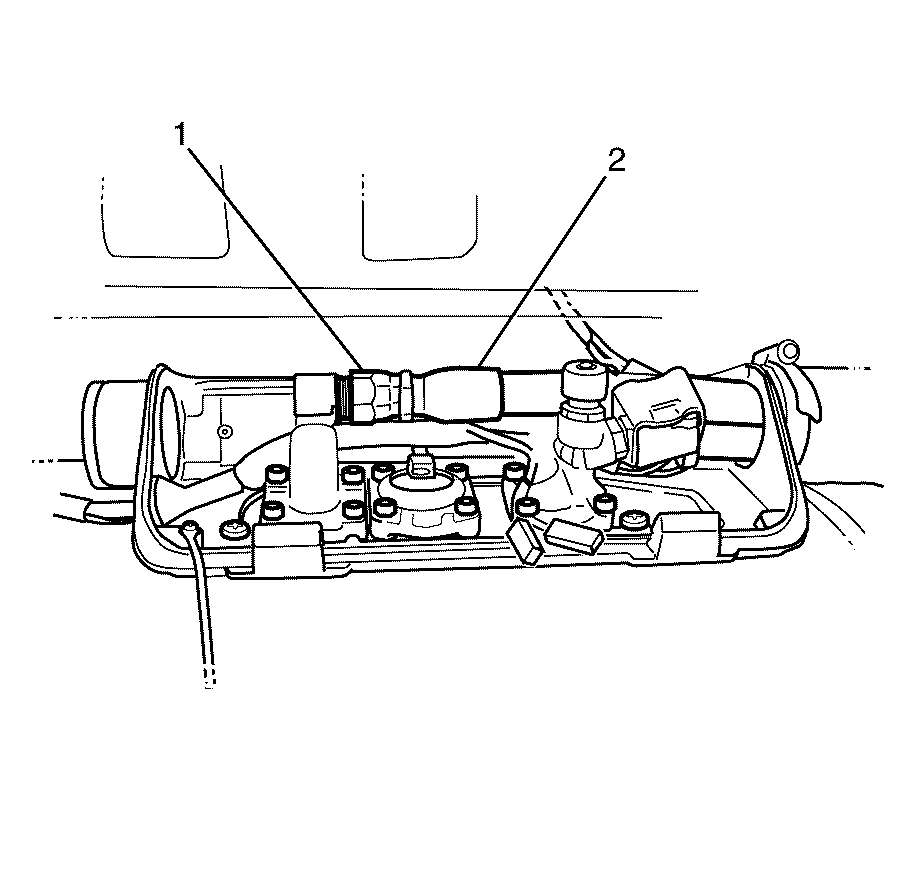
Important: Hold the LPG tank fitting (1) with a suitable tool when disconnecting the LPG fill line (2), to prevent damage to the LPG fill line.
Important: Attach a piece of string to the LPG tank end of the LPG fill line before removing to aid in installation.
Installation Procedure
- Position the LPG fill line to the vehicle.
- Install the LPG fill line (2) to the LPG tank fitting (1).
- Install the LPG fill line (1) to body retaining clamp (2).
- Install the LPG fill line (1) to body retaining clamp (2).
- Install the LPG fill line (1) to the LPG fill valve (2).
- Connect the filler tube (1) to the fuel tank.
- Connect the evaporative emission (EVAP) line (3), listen for an audible click to confirm fitting.
- Install rubber seal surround to the filler tube (1).
- Connect the earth lead (2) to the filler tube (1).
- Install the filler tube (2) to chassis retaining bolts (1).
- Check the clearance between the LPG fill valve (1) and the petrol filler tube (2).
- Install a small amount of LPG to pressurise the LPG fill line and inspect for LPG fuel leaks at the serviced fitting's and the LPG fill valve using the combustible gas detector or an equivalent liquid leak detector.
- Connect the battery ground cable. Refer to Battery Negative Cable Disconnection and Connection.
- Install the right rear wheel house liner. Refer to Rear Wheelhouse Panel Liner Replacement.
- Install the right rear wheel. Refer to Tire and Wheel Removal and Installation.
Important: Attach the piece of string to the LPG tank end of the NEW LPG fill line and pull through.
Notice: Refer to Fastener Notice in the Preface section.

Important: Hold the LPG tank fitting (1) with a suitable tool whilst connecting the LPG fill line (2), to prevent damage to the LPG fill line.
Tighten
Tighten the fitting to xx N·m (xx lb ft).

Tighten
Tighten the fitting to xx N·m (xx lb ft).

Tighten
Tighten the fitting to xx N·m (xx lb ft).

Important: Hold the LPG filler valve (2) whilst connecting the LPG fill line (1) to prevent damage to the LPG fill line (1).
Tighten
Tighten the fitting to xx N·m (xx lb ft).

Tighten
Tighten the filler tube retaining clamp (2)
to 5 N·m (31 lb ft).


Tighten
Tighten the bolts (1) to 9 N·m
(80 lb ft).
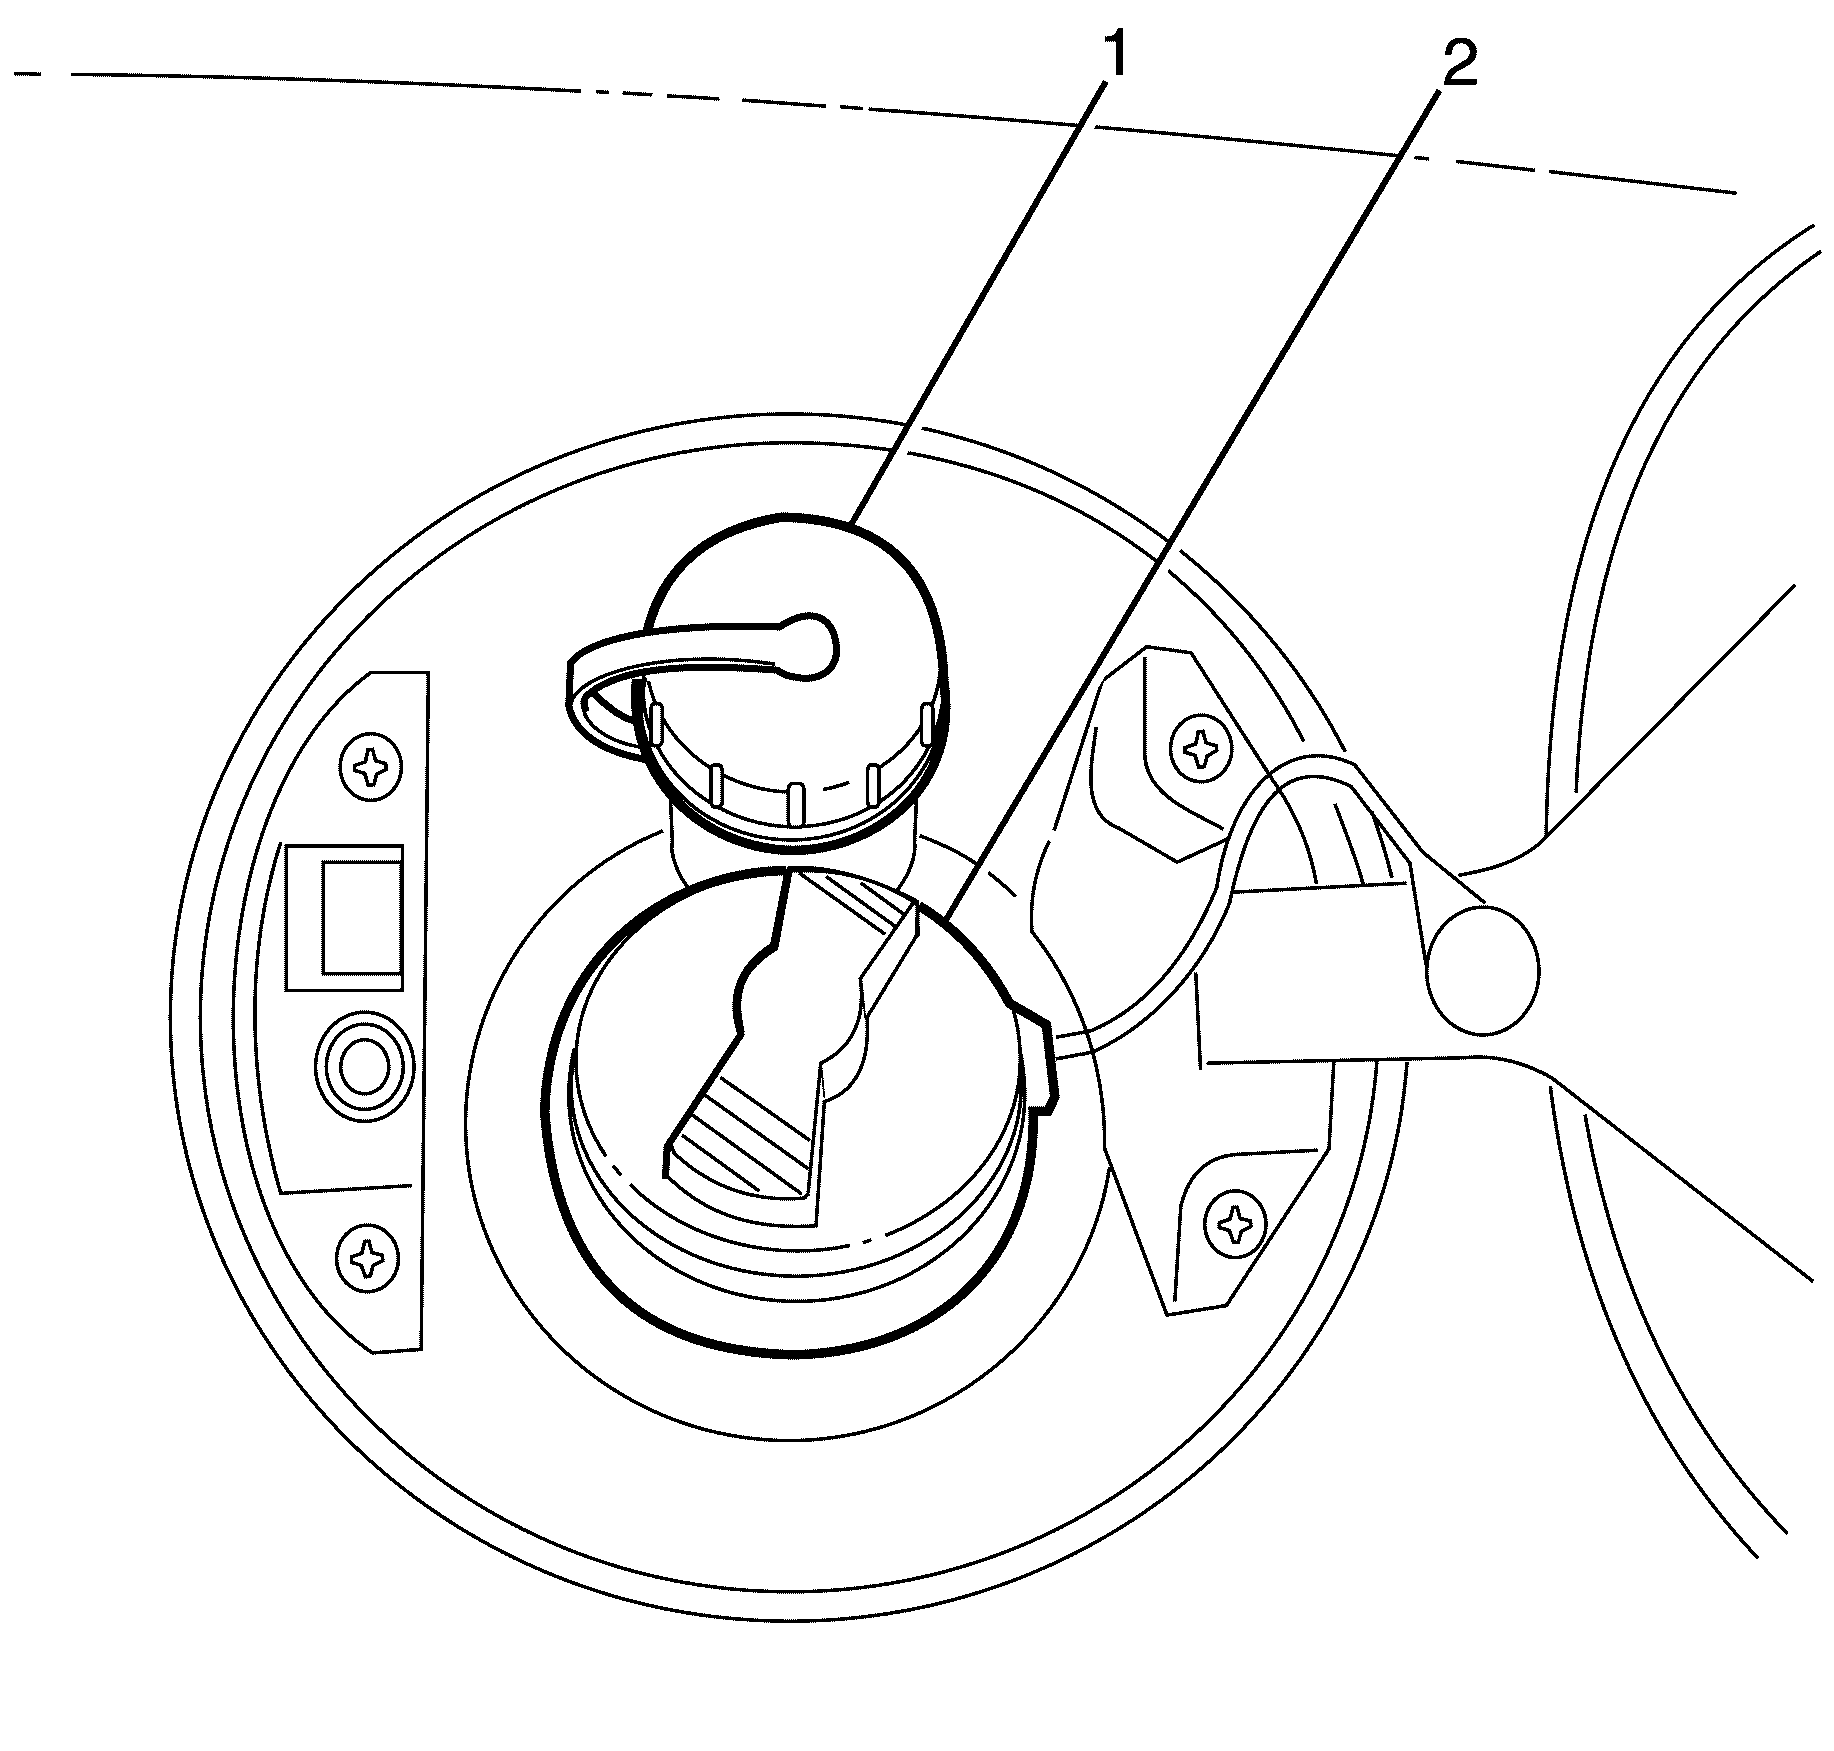
Important: Make sure that both of the filler caps can be removed.
