For 1990-2009 cars only
Removal Procedure
- Remove the roof drip moulding. Refer to Body Side Roof Drip Molding Replacement .
- Remove the centre pillar upper trim panel. Refer to Center Pillar Upper Trim Panel Replacement .
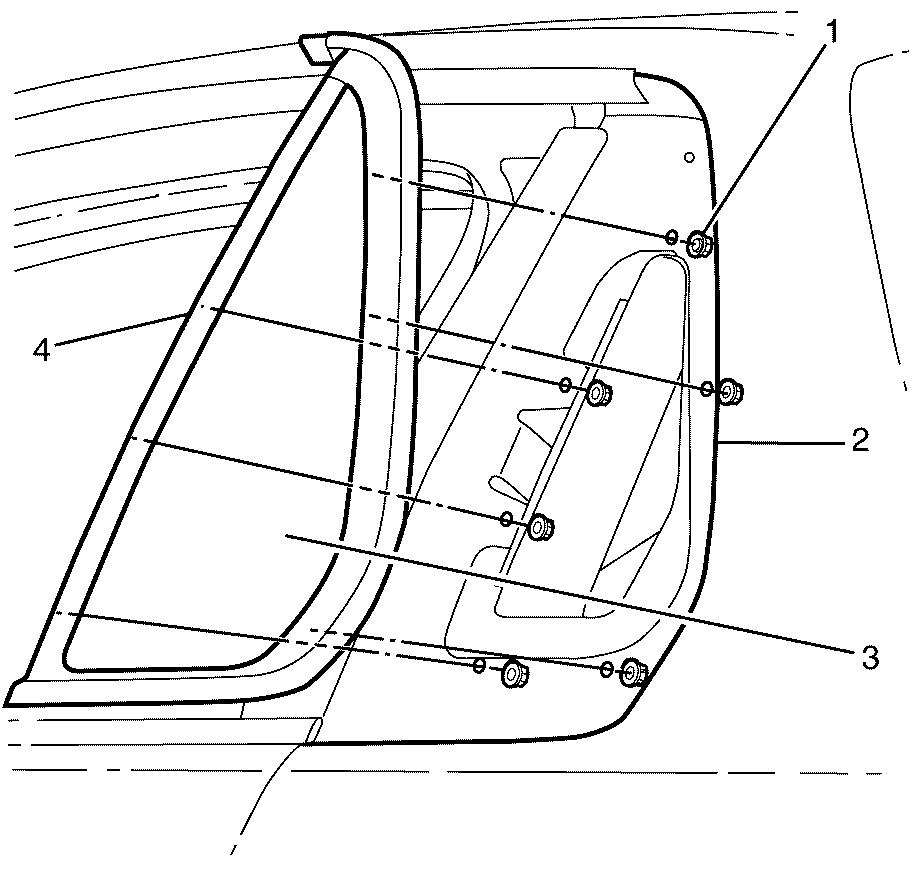
- Remove the body side stationary window (3) to body (2) retaining nuts (1).
- Remove the body side stationary window (3) from the vehicle (2).
- Inspect the body side stationary window seal (4) for excessive wear and/or damage. Replace if necessary.
Caution: When working with any type of glass or sheet metal with exposed or rough edges, wear approved safety glasses and gloves in order to reduce the chance of personal injury.
Caution: If a window is cracked but still intact, crisscross the window with masking tape in order to reduce the risk of damage or personal injury.

Important: Nuts with micro-encapsulated thread sealant are single use parts and must be discarded after removal.
Discard the nuts.
Installation Procedure
- Install the body side stationary window seal (4) to the body side stationary window (3).
- Install the body side stationary window (3) to the vehicle (2).
- Install the body side stationary window to body retaining nuts (1).
- Install the centre pillar upper trim panel. Refer to Center Pillar Upper Trim Panel Replacement .
- Install the roof drip moulding. Refer to Body Side Roof Drip Molding Replacement .

Important: Inspect the body side stationary window seal (4) for excessive wear and/or damage. Replace if necessary.
Notice: Refer to Fastener Notice in the Preface section.
Tighten
Tighten to 3 N·m (27 lb in).
