Removal Procedure
- Apply tape to the corners of the adjacent surfaces.
- Raise and support the vehicle. Refer to
Lifting and Jacking the Vehicle
in General Information.
- Remove the headlamps. Refer to
Headlamp Assembly or Headlamp Bulb and/or Cornering, Sidemarker, Park, Turn Signal Bulb Replacement
in Lighting Systems.
- Disconnect the fog lamps electrical connectors, if equipped. Refer to
Front Fog Lamp Replacement
in Lighting Systems, if equipped.
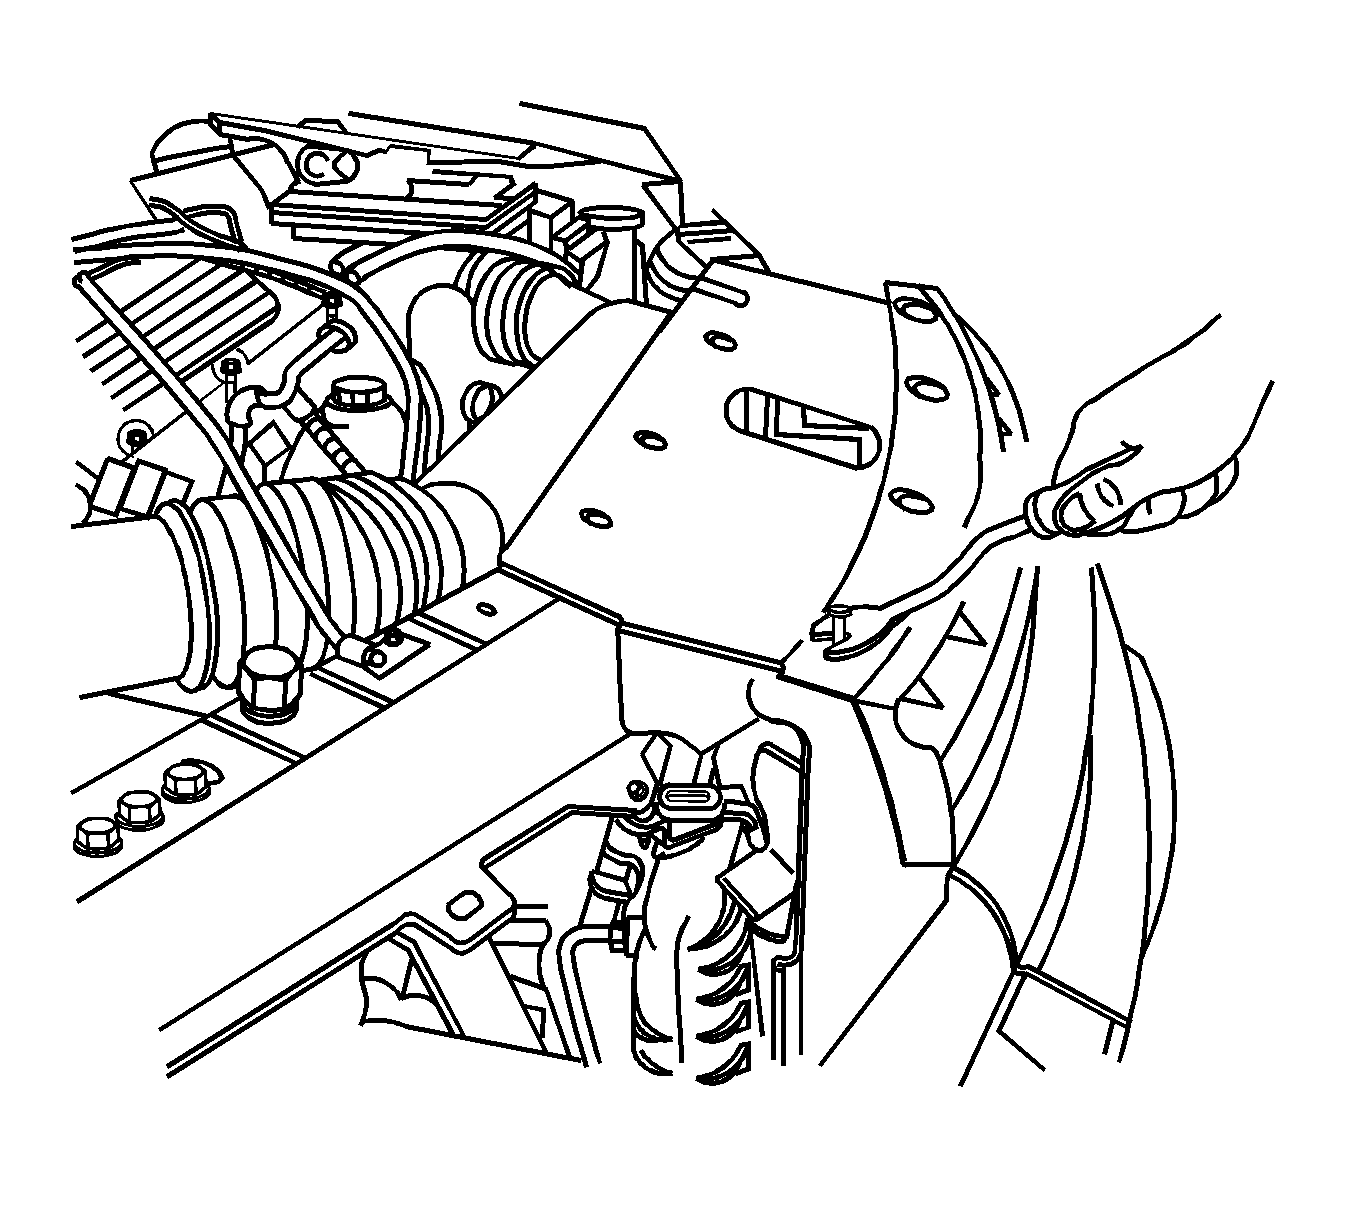
- Remove the push-in retainers from the front
bumper fascia upper support.
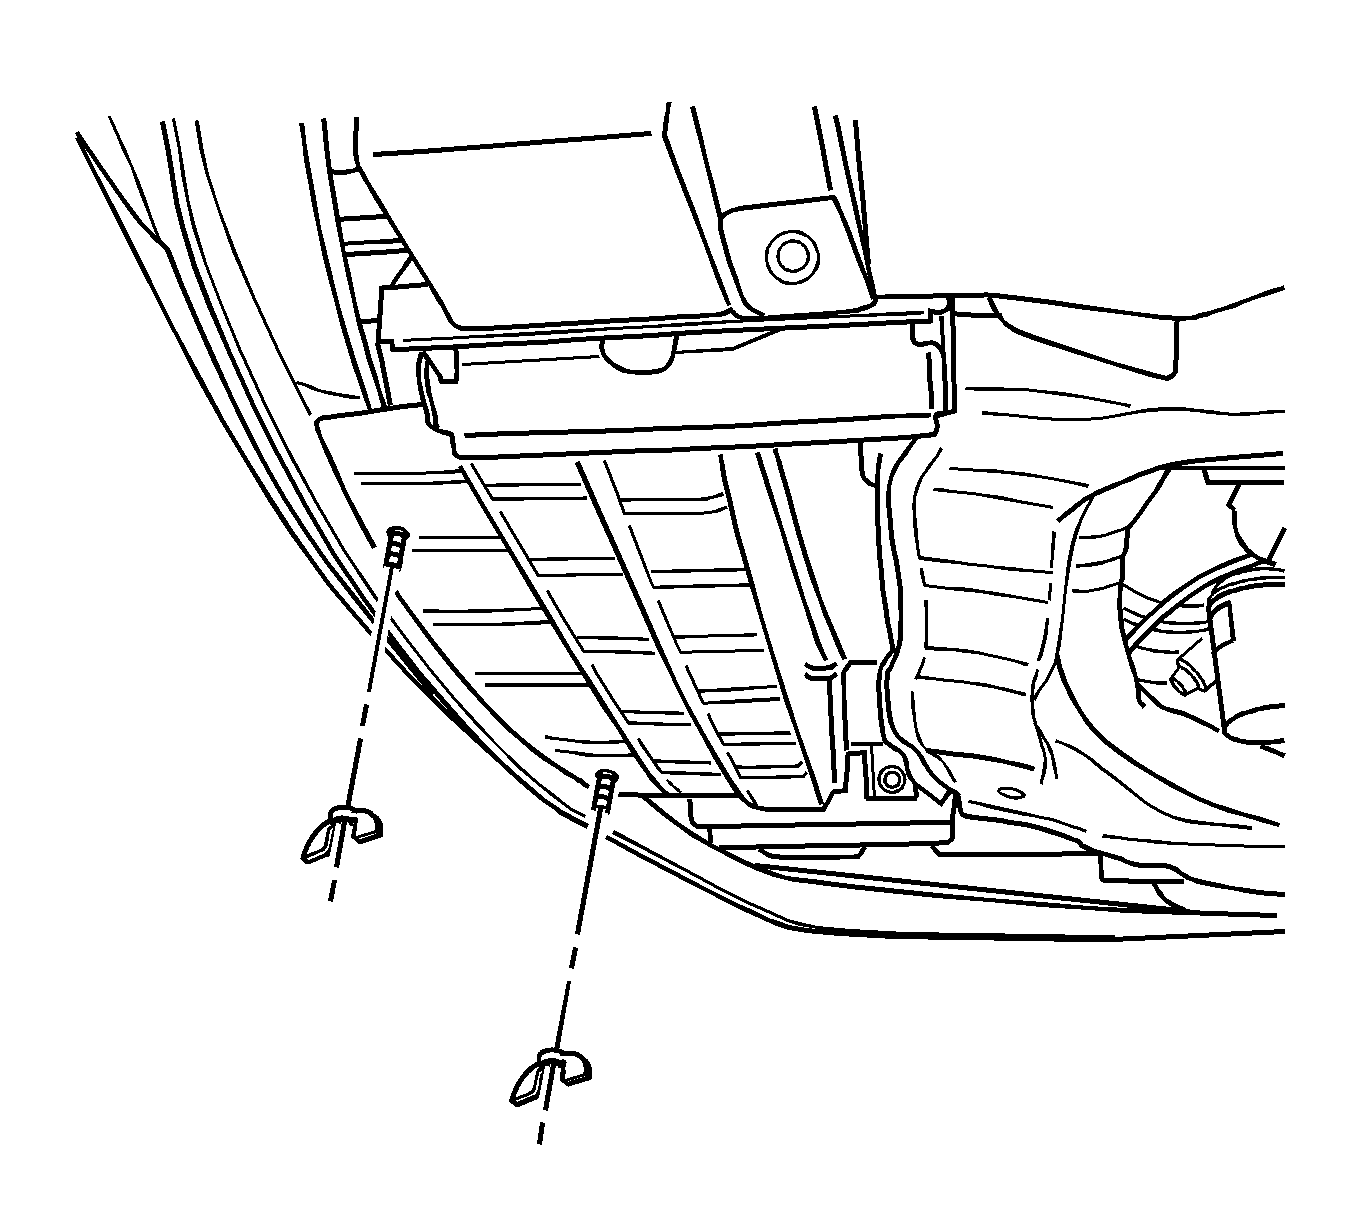
- Remove the front wing nuts from the lower air deflector baffle.
- Reposition the lower air deflector baffle from the front fascia.
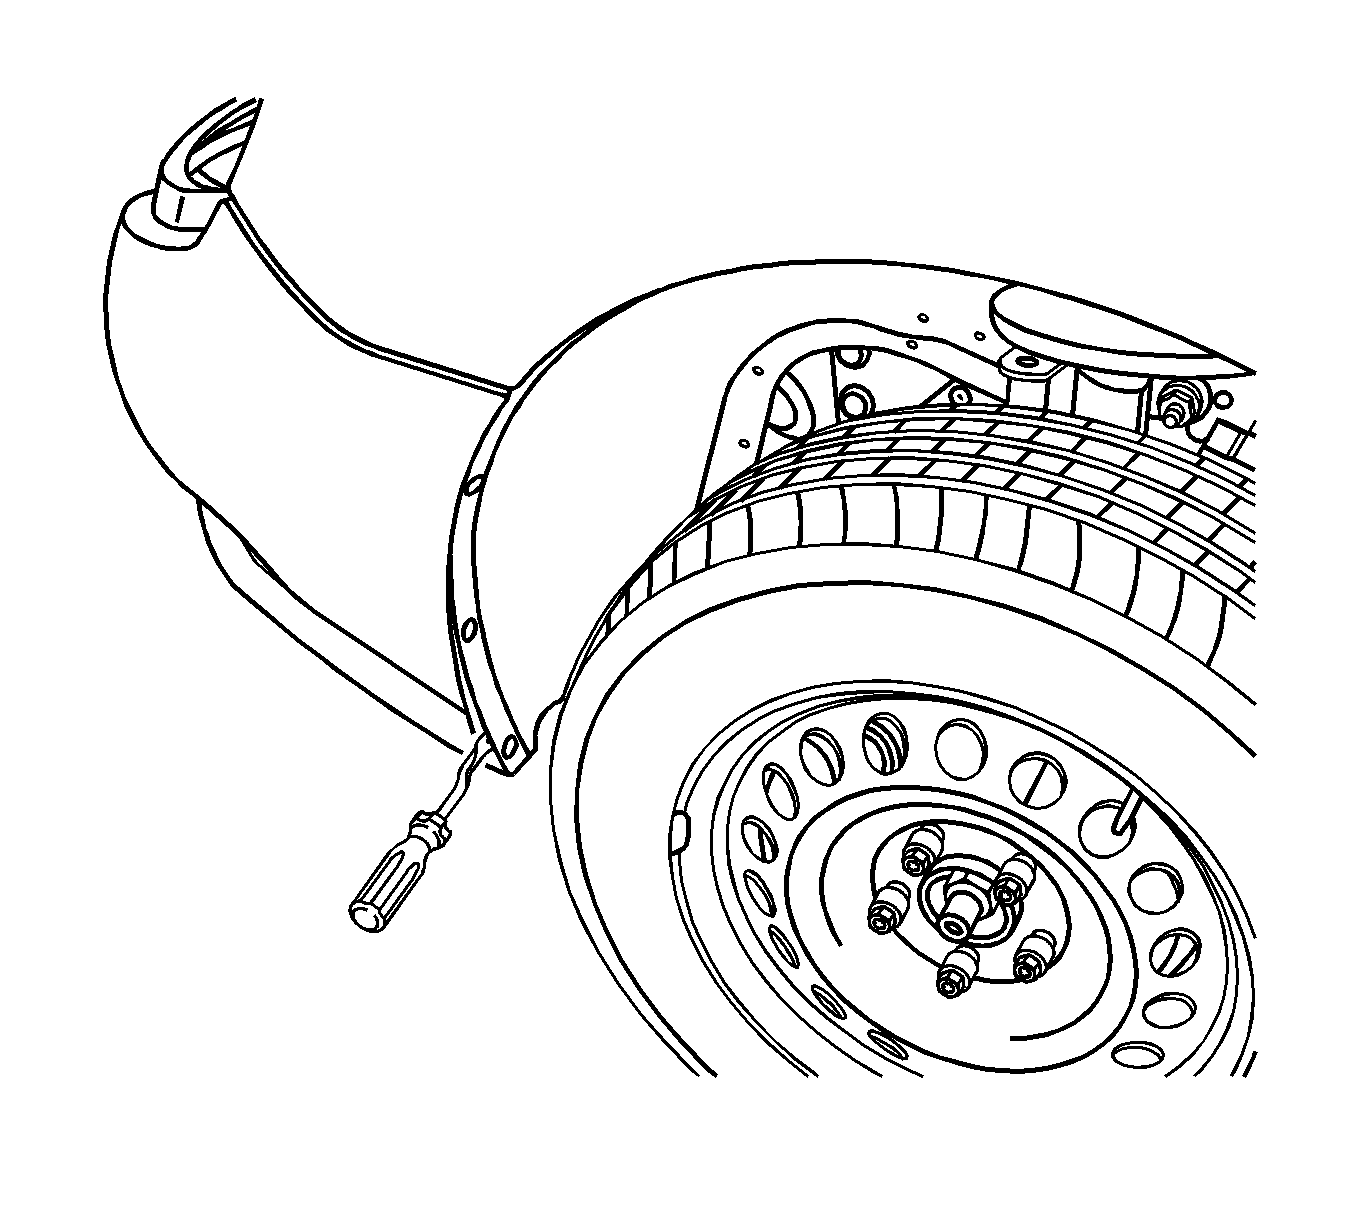
- Remove the push-in retainers from the front bumper fascia to the front fender
liner.
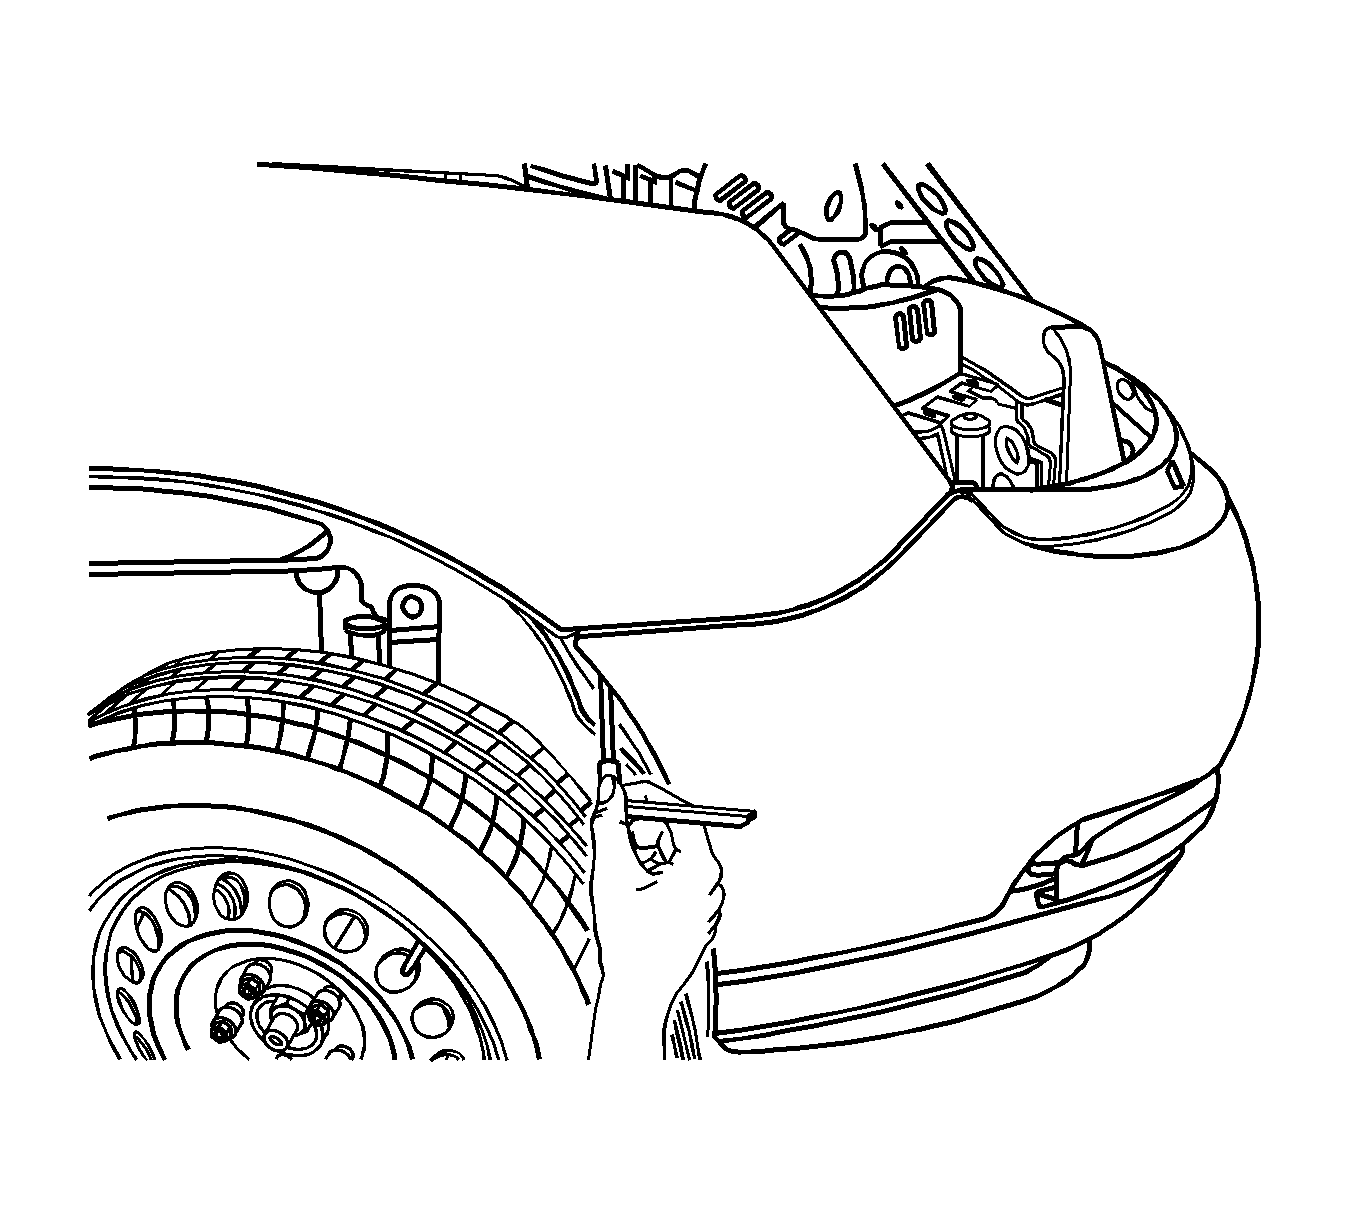
- Pull back the front fender liner and remove the bolt from the front bumper fascia
to the front fender.
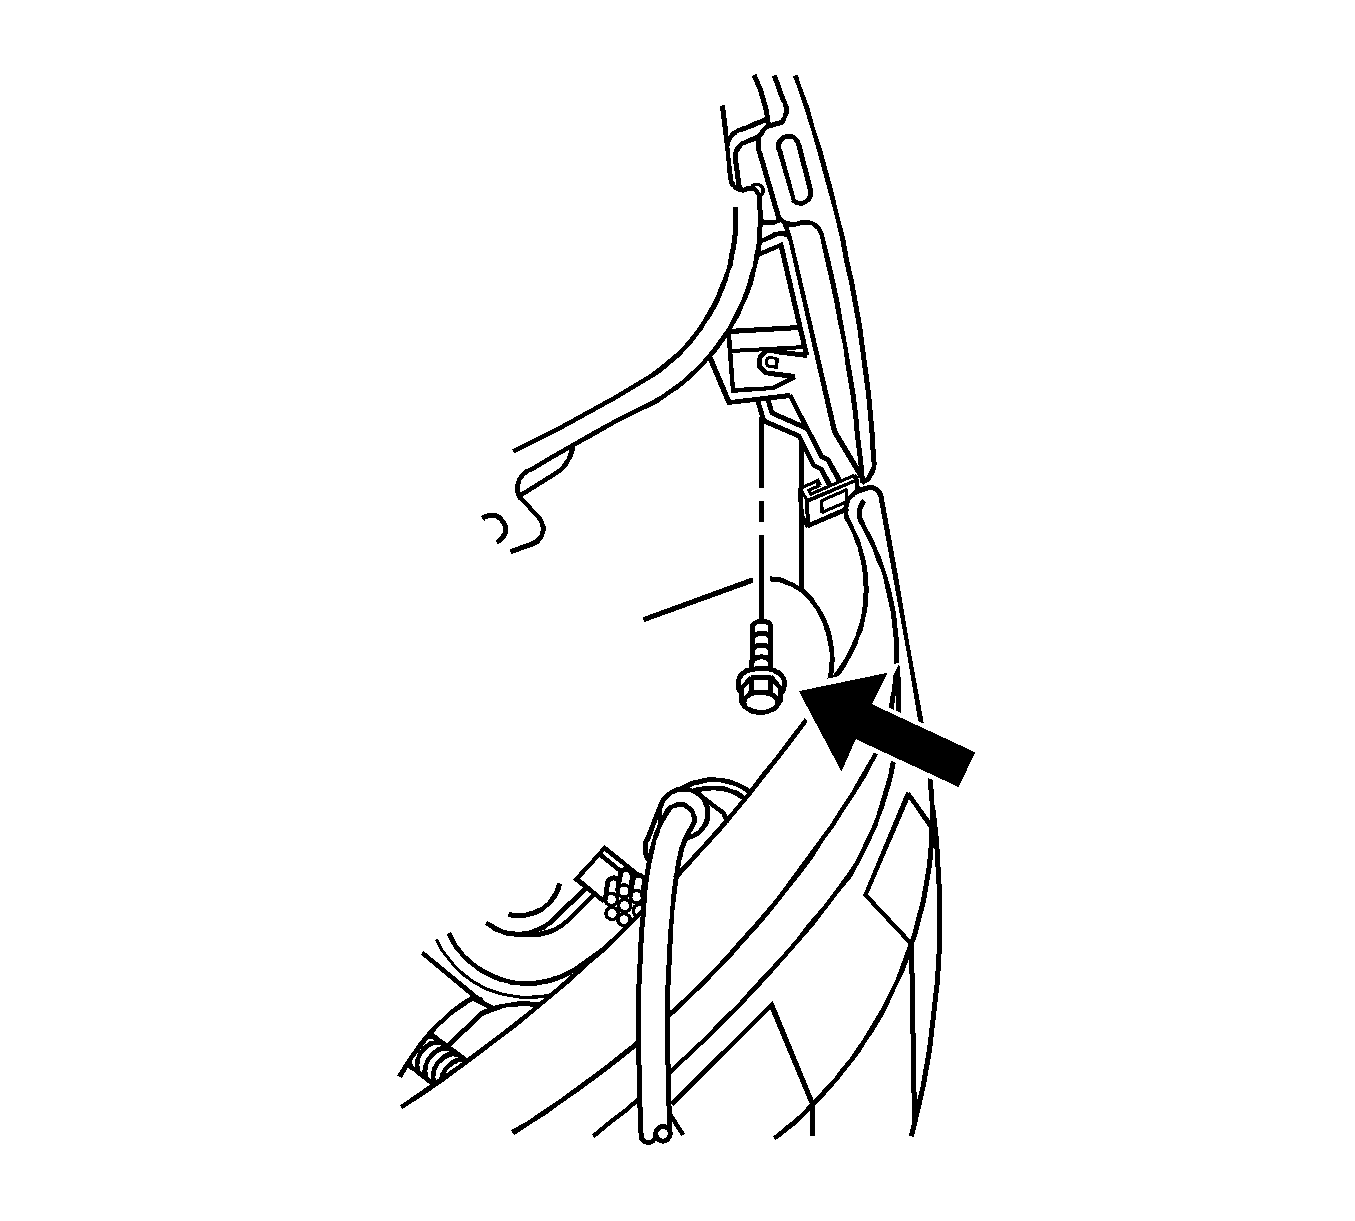
- Remove the bolt from the front bumper fascia to the front fender.
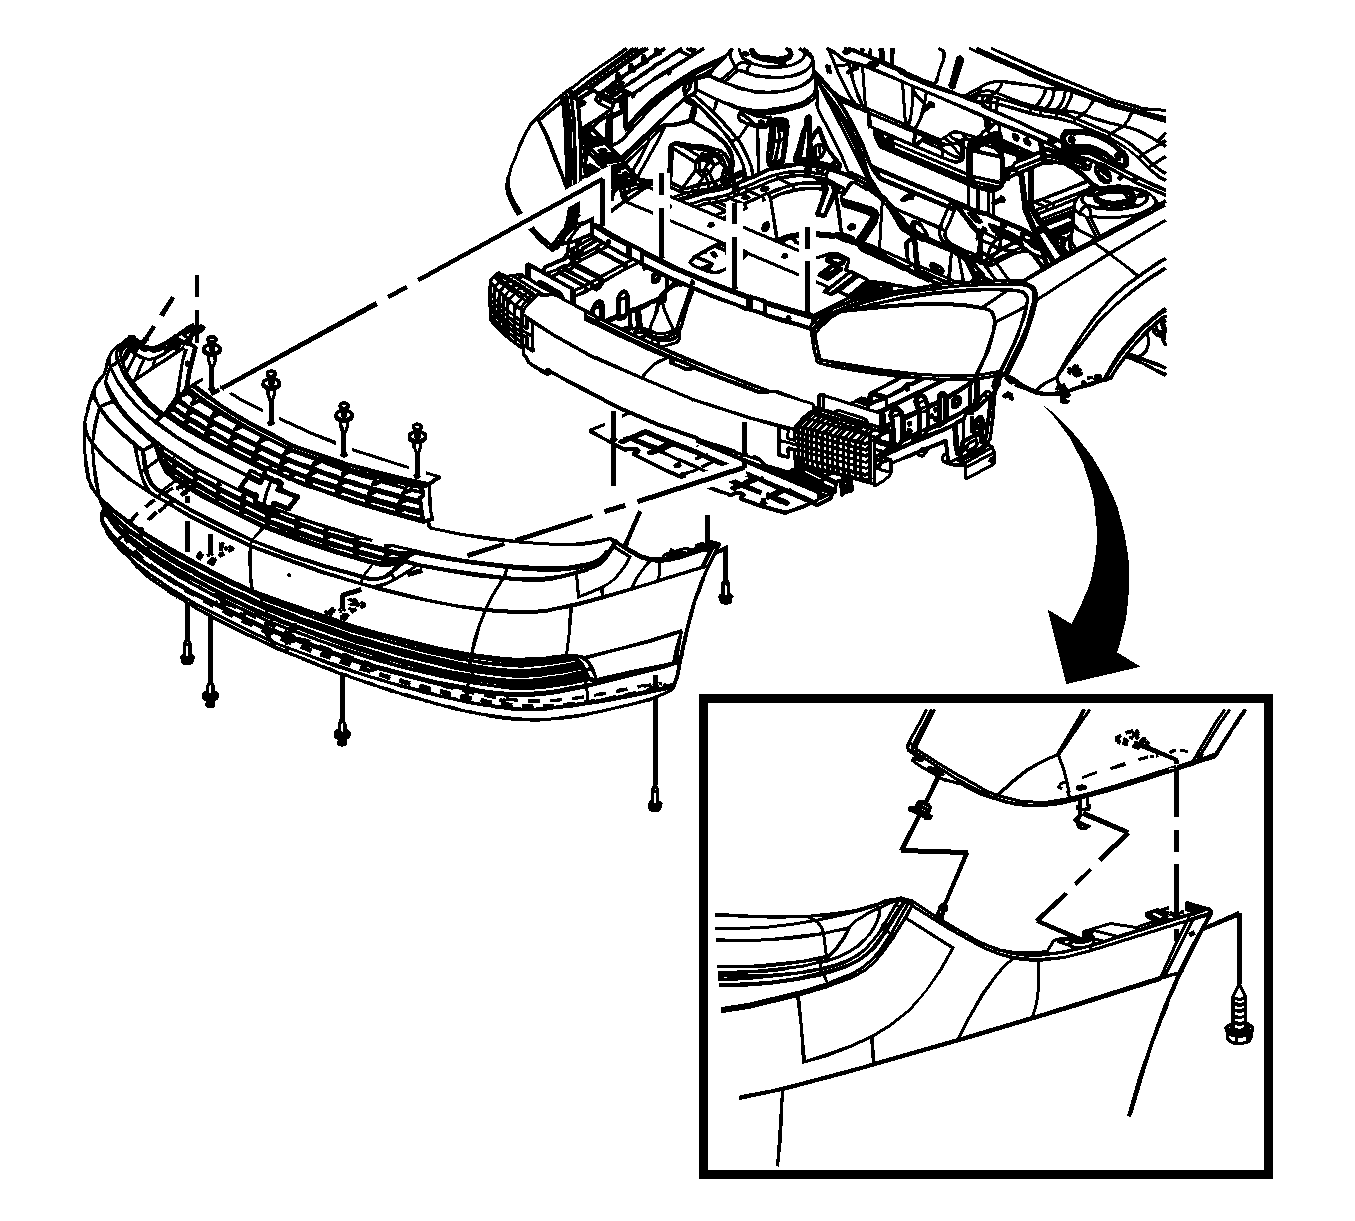
- With
an assistant, remove the front bumper fascia from the vehicle.
- If replacing the front fascia remove the following parts:
Installation Procedure
- If replacing the front fascia install the following parts:

- With
an assistant, position the front bumper fascia to the vehicle. Ensure that the fascia
is engaged to the shoulder bolts at the front of the fenders.

- Install the push-in retainers to the front
bumper fascia to front bumper fascia upper support .
Notice: Refer to Fastener Notice in the Preface section.

- Pull back the front fender liner and install the bolt from the front bumper
fascia to the front fender.
Tighten
Tighten the bolts to 10 N·m (89 lb in).

- Install the push-in retainers to the front bumper fascia to the front fender
liner.

- Install the bolts to the front bumper fascia to the front fender.
Tighten
Tighten the bolts to 10 N·m (89 lb in).
- Install the headlamps. Refer to
Headlamp Assembly or Headlamp Bulb and/or Cornering, Sidemarker, Park, Turn Signal Bulb Replacement
in Lighting Systems.
- Connect the fog lamps electrical connectors, if equipped. Refer to
Front Fog Lamp Replacement
in Lighting Systems, if equipped.

- Reposition the lower air deflector baffle to the front fascia.
Install the wing nuts to the lower air deflector baffle and hand tighten.
- Lower the vehicle.
- Remove the protective tape.


