Battery Tray Replacement LZ4, LY7, and LE5
Removal Procedure
- Remove the battery. Refer to Battery Replacement.
- Remove the engine control module (ECM). Refer to one of the following:
- Remove the junction block. Refer to Underhood Electrical Center or Junction Block Replacement.
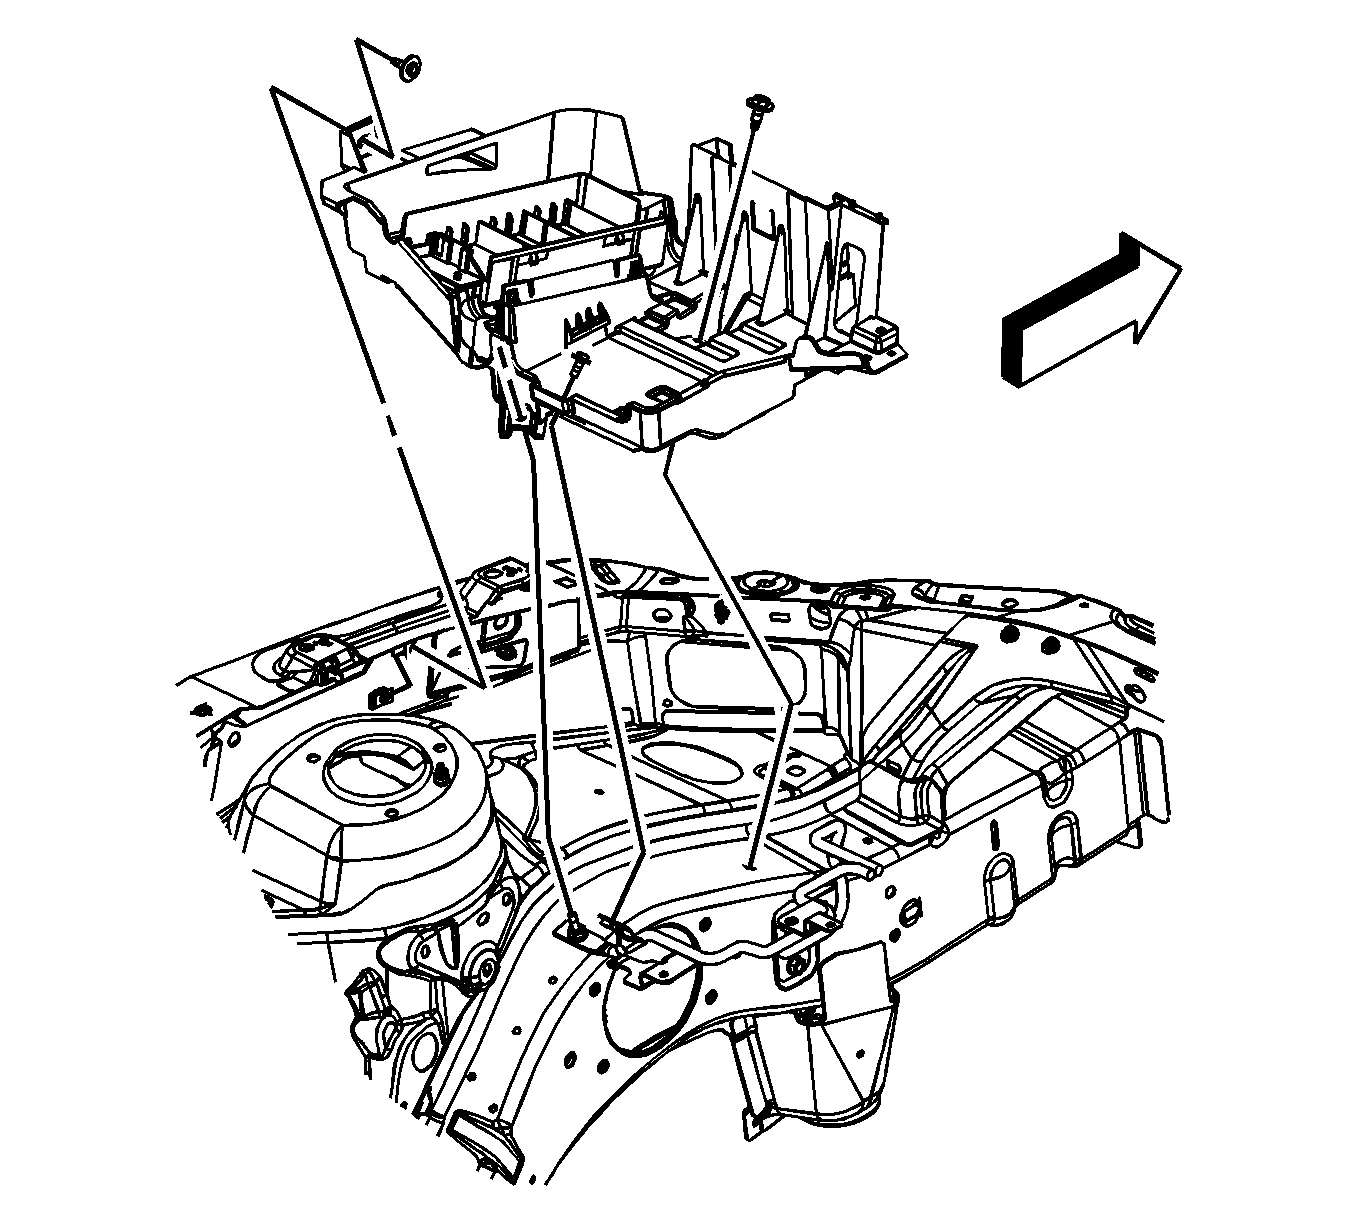
- Remove the air duct retainer, if equiped.
- Remove the air duct from the battery tray, if equiped.
- Remove the mounting bolts for the battery tray.
- Remove the battery tray.
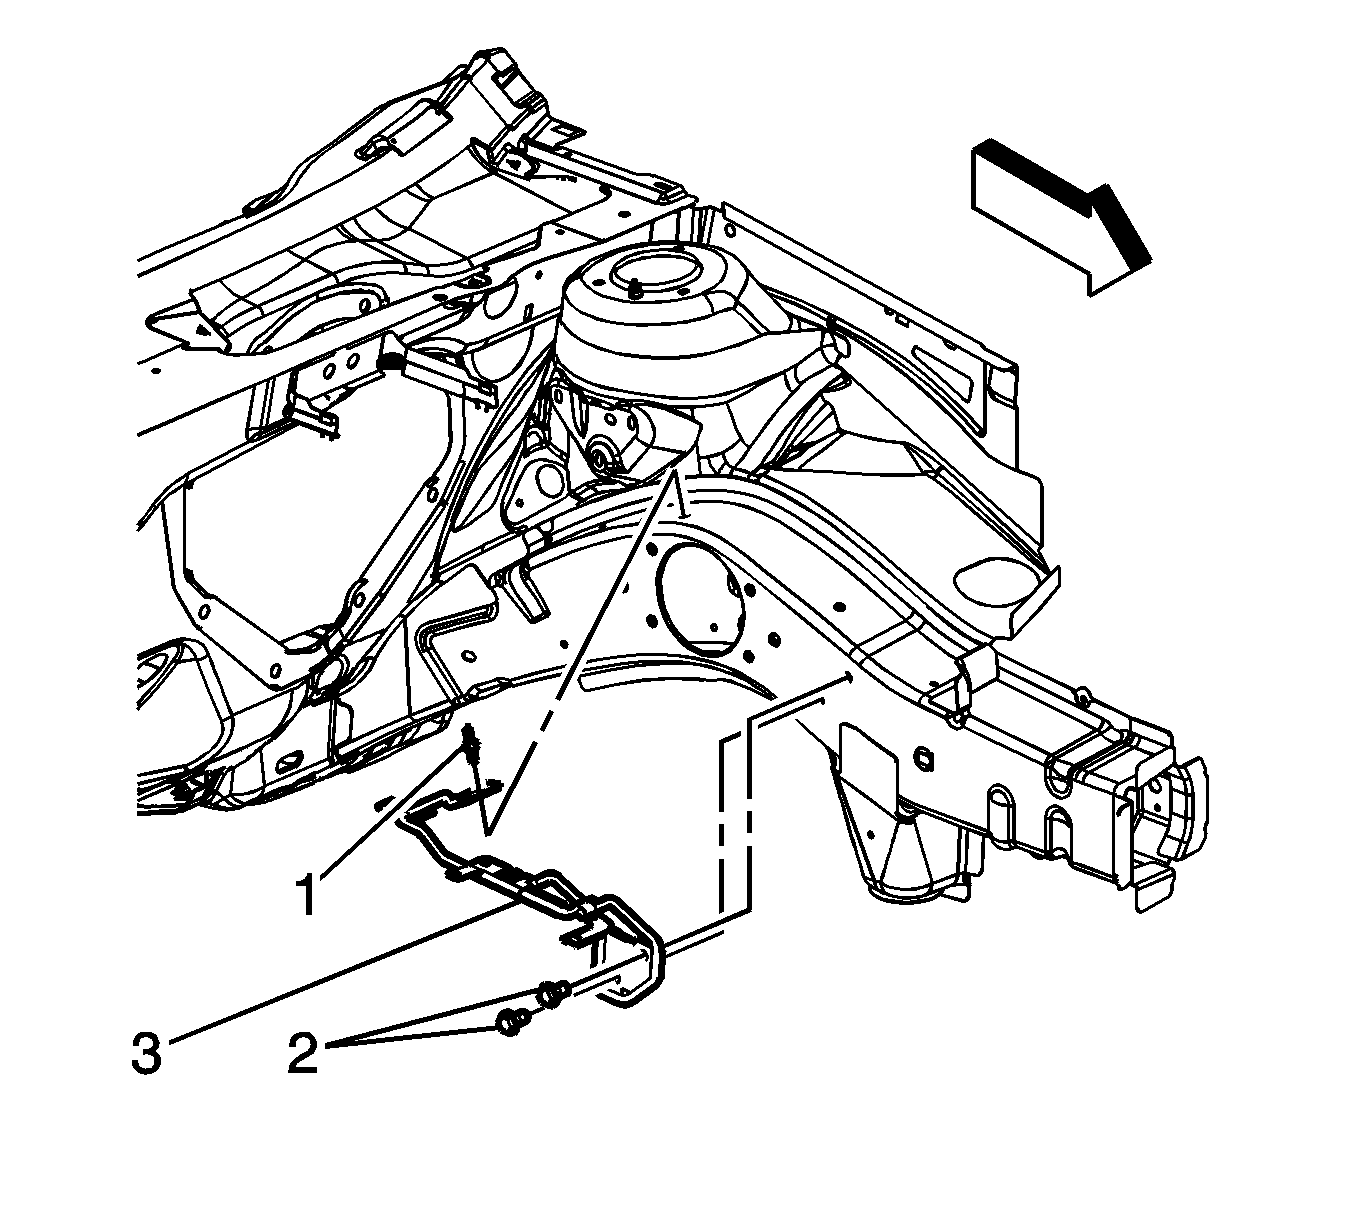
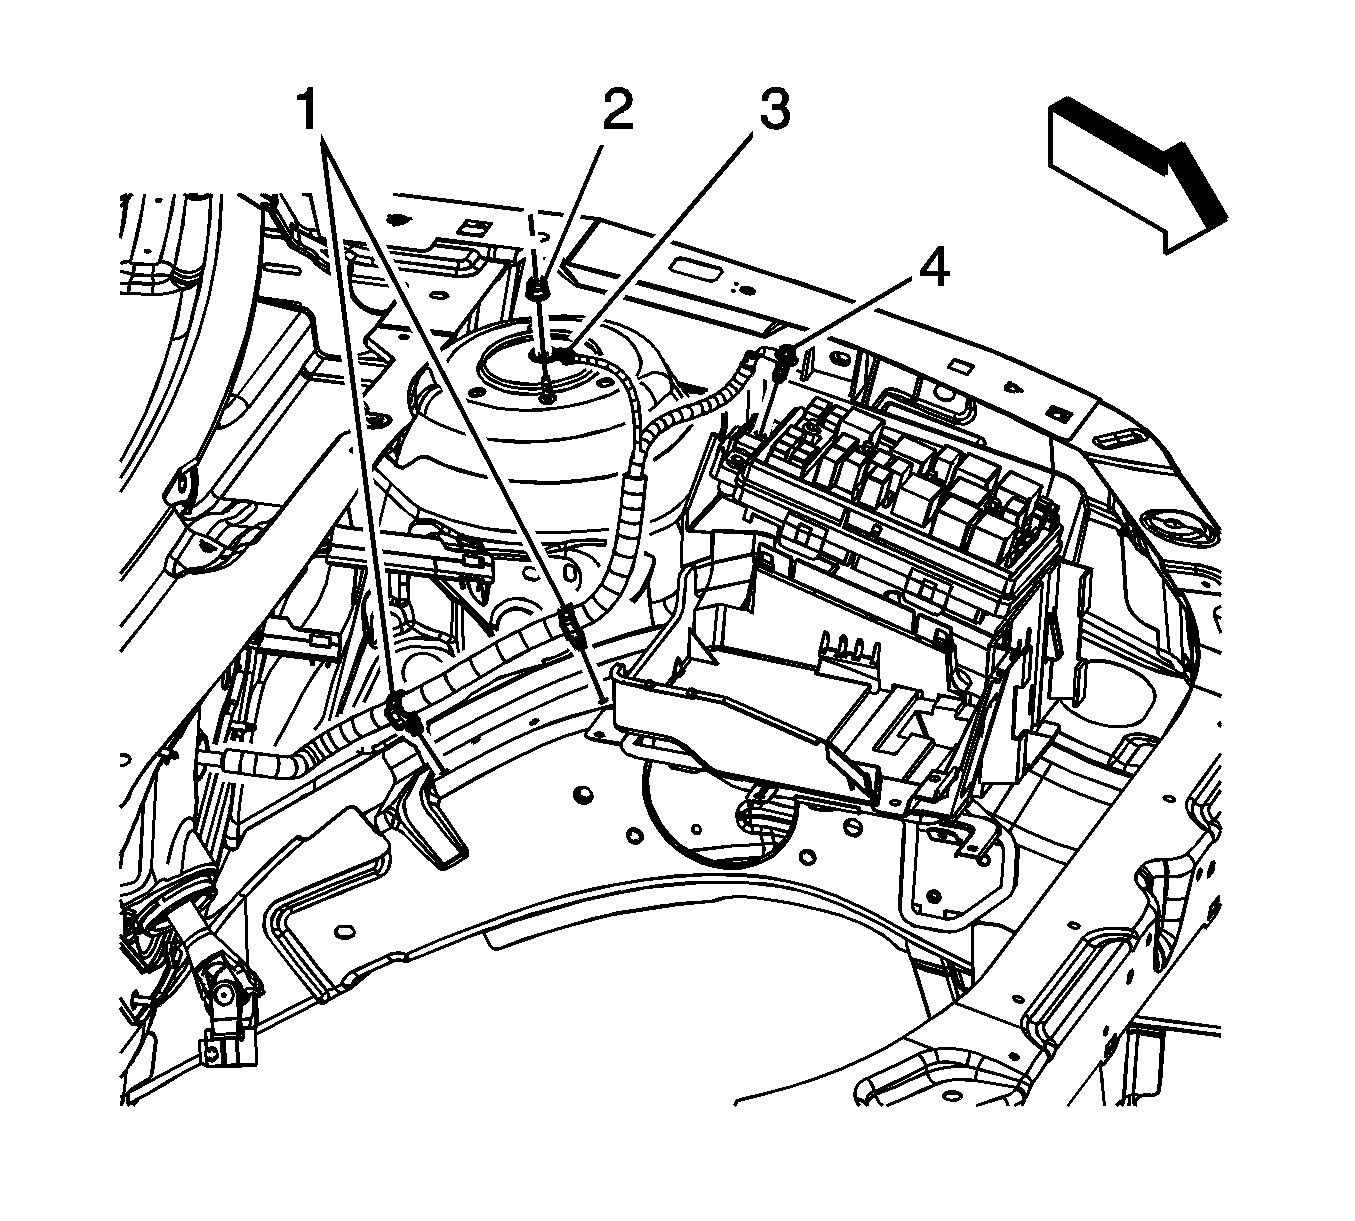
- Remove the stud nut (1) from the frame rail.
- Remove the mounting bolts (2).
- Remove the battery tray support.
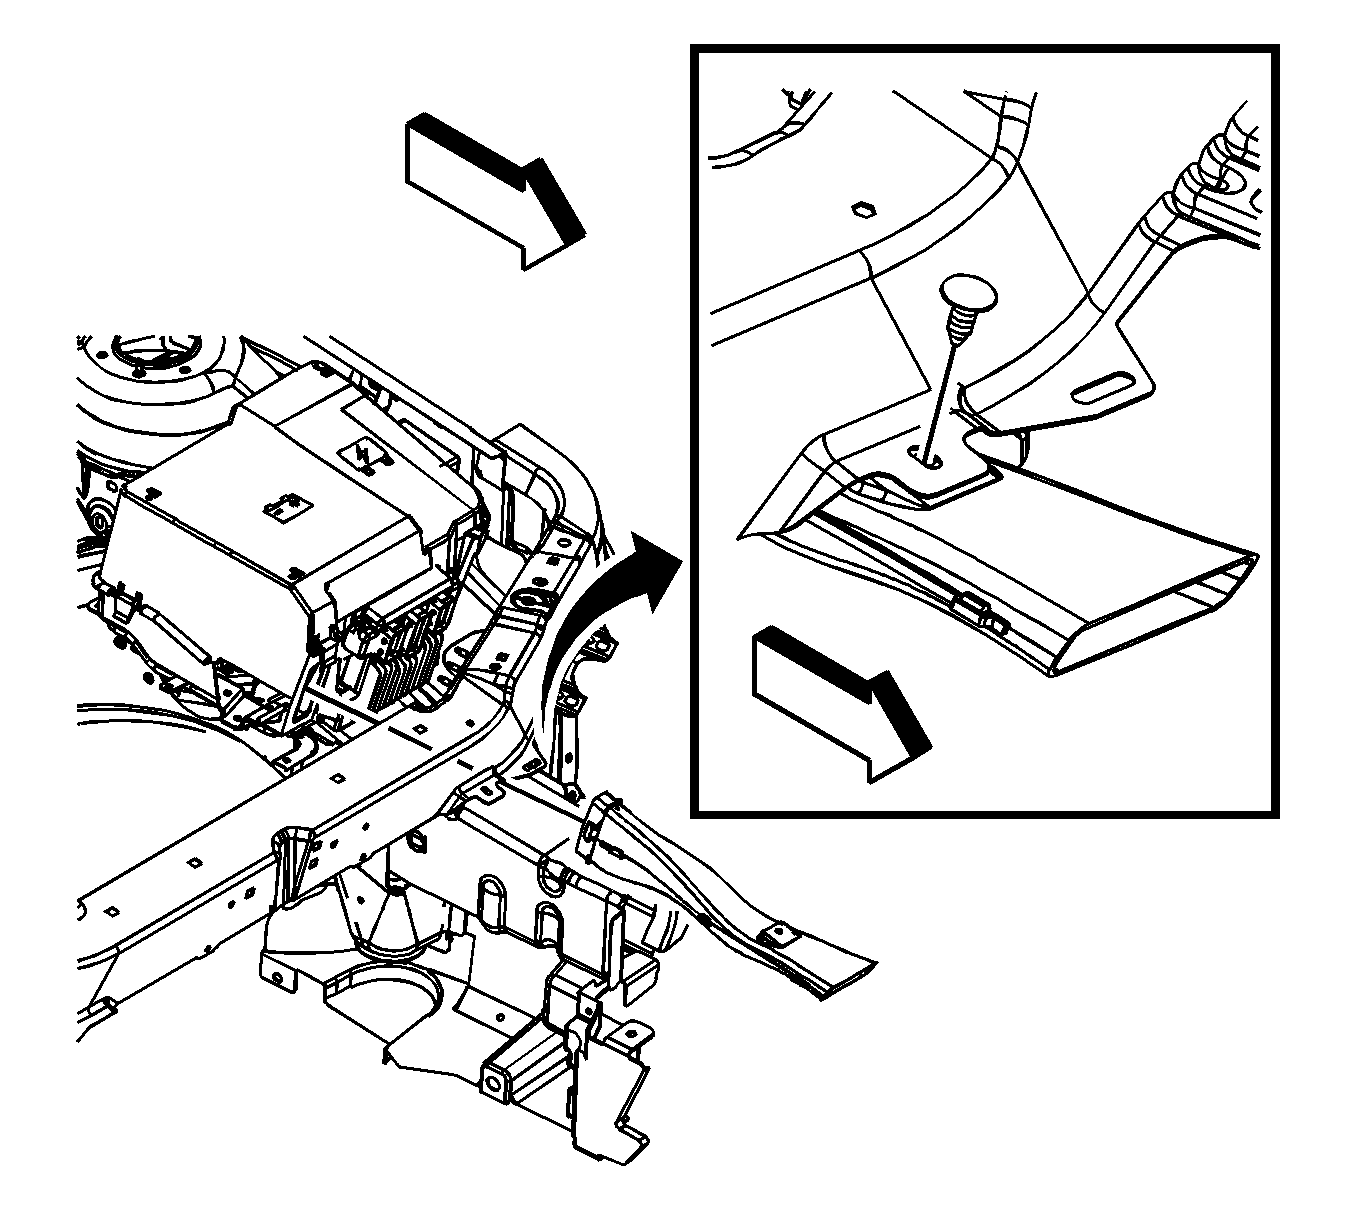
| • | Engine Control Module Replacement for the 2.4L engine |
| • | Engine Control Module Replacement for the 3.5L engine |
| • | Engine Control Module Replacement for the 3.6L engine |
Important: The following service procedure are to be used if the battery tray support needs to be serviced.
Installation Procedure
- Position the battery tray support on the frame rail.
- Install the stud nut (1).
- Install the mounting bolts (2).
- Position the battery tray on the support.
- Install the mounting bolts for the battery tray.
- Install the air duct into the battery tray, if equiped.
- Install the air duct retainer, if equiped.
- Install the junction block. Refer to Underhood Electrical Center or Junction Block Replacement.
- Install the ECM. Refer to one of the following:
- Install the battery. Refer to Battery Replacement.

Notice: Refer to Fastener Notice in the Preface section.
Important: When tightening the mounting bolts and the nut stud, they must be tightened in sequence.
Tighten
Tighten the nut to 25 N·m (18 lb ft).
Tighten
Tighten the nut to 25 N·m (18 lb ft).

Tighten
Tighten the nut to 16 N·m (12 lb ft).

| • | Engine Control Module Replacement for the 2.4L engine |
| • | Engine Control Module Replacement for the 3.5L engine |
| • | Engine Control Module Replacement for the 3.6L engine |
Battery Tray Replacement LAT
Removal Procedure
- Remove the battery. Refer to Battery Replacement.
- Remove the underhood bussed electrical center (UBEC) cover.
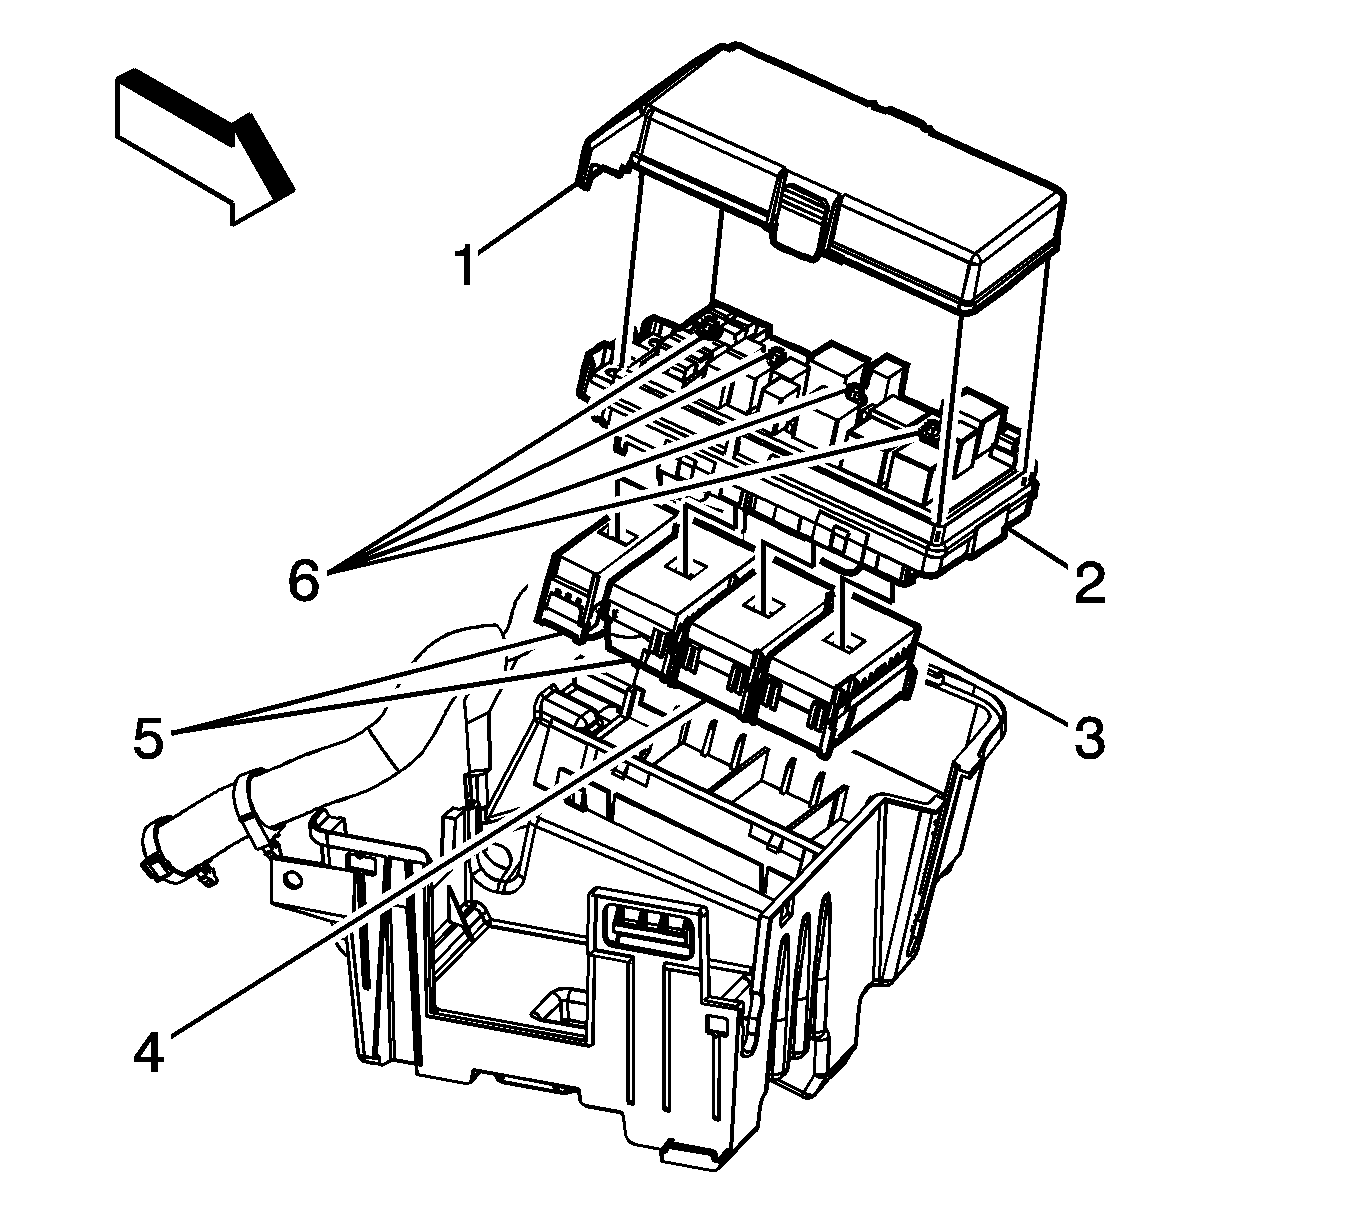
- Loosen the integral bolt (5) on the positive battery cable lead (4) and remove the lead from the UBEC.
- Reposition the positive battery cable out of the way.
- Loosen the integral bolt (4) on the steering column harness package lead and remove the lead from the UBEC.
- Loosen the junction block bolts (6), once loose, tap the bolts once in order the disengage the bolts from the electrical connectors.
- Remove the junction block (2).
- Remove the engine wiring harness UBEC electrical connector (3) from the UBEC bracket and secure out of the way.
- Remove the forward lamp wiring harness UBEC electrical connector (4) from the UBEC bracket and secure out of the way.
- Remove the body wiring harness UBEC electrical connectors (5) from the UBEC bracket and secure out of the way.
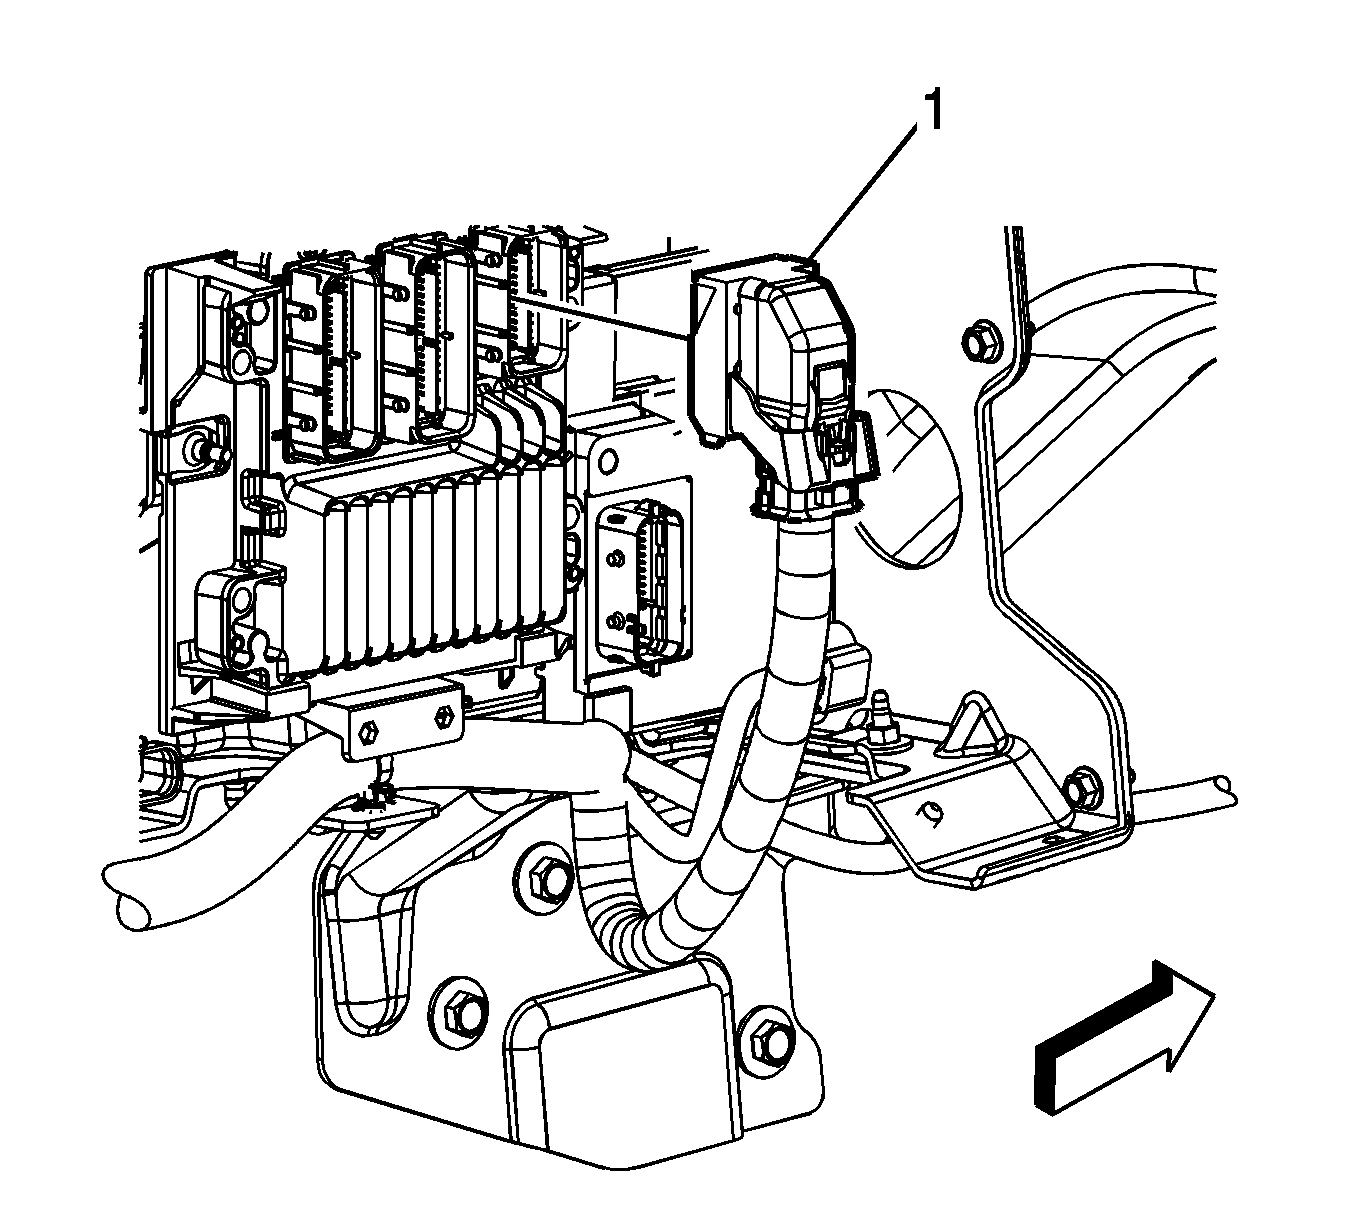
- Disconnect the body wiring harness electrical connector (1) from the engine control module (ECM).
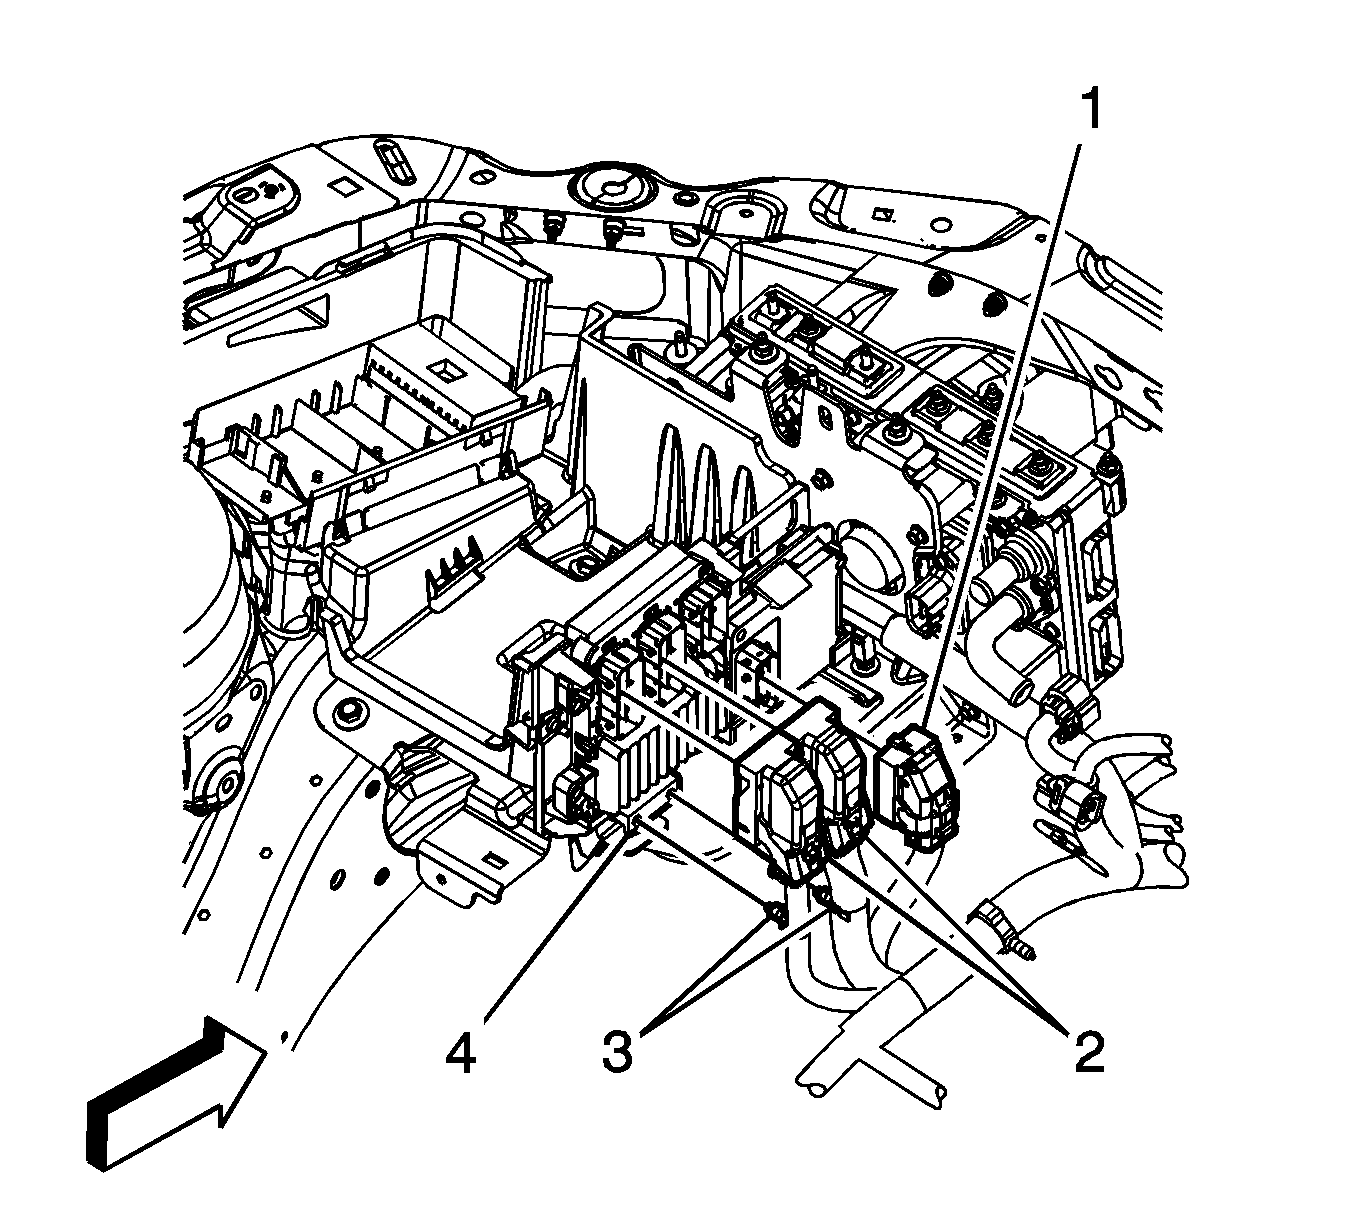
- Disconnect the engine wiring harness electrical connectors (2) from the ECM.
- Remove the engine wiring harness clips (3) from the ECM/transmission control module (TCM) bracket (4).
- Disconnect the engine wiring harness electrical connector (1) from the TCM.
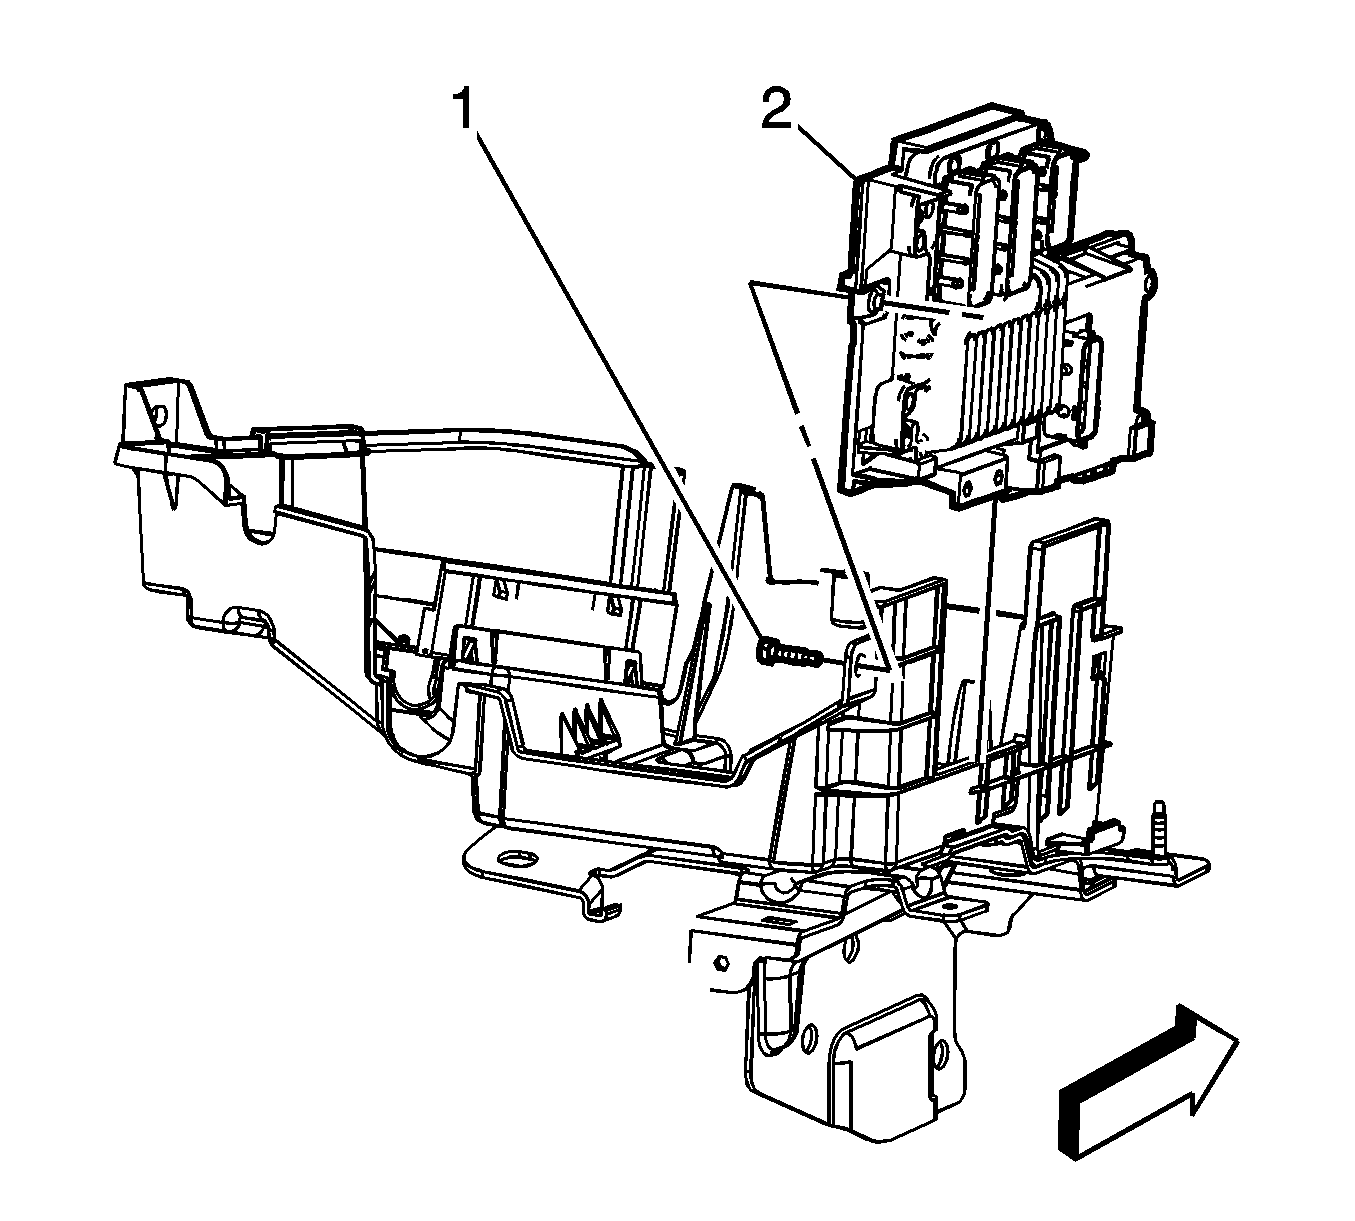
- Remove the ECM/TCM bracket bolt (1).
- Slide the ECM/TCM bracket up and remove the bracket (2) (With the ECM and TCM still attached) from the battery tray.
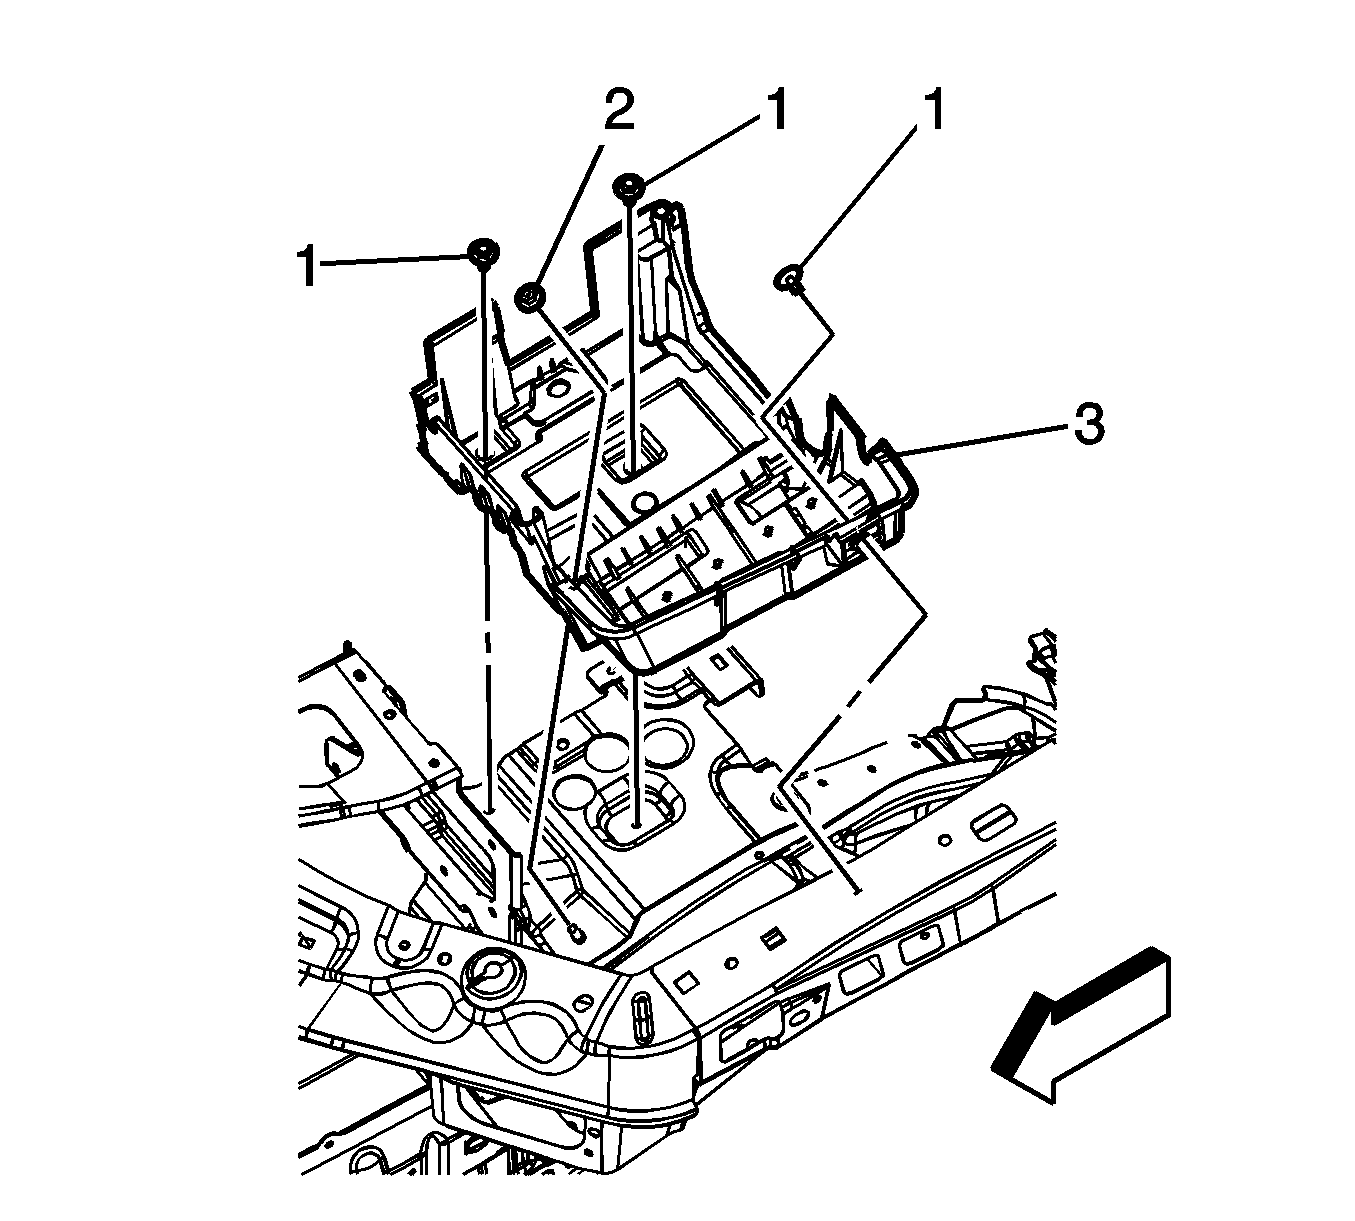
- Remove the battery tray bolts (1), nut (2), and battery tray (3).
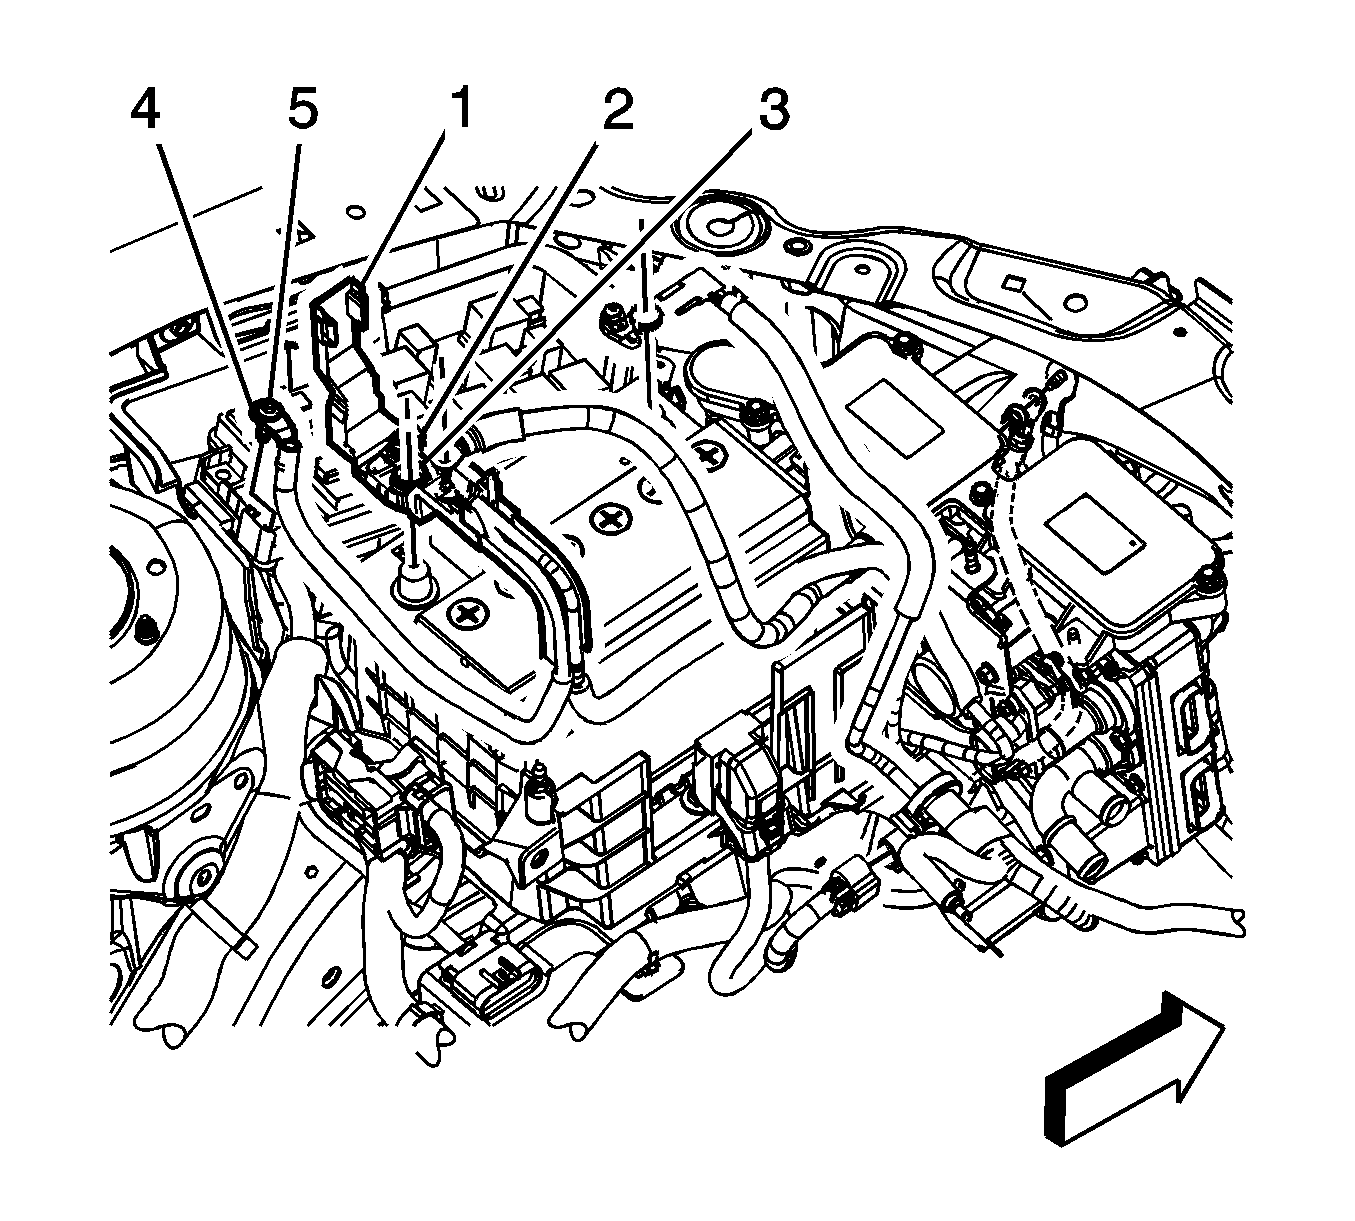
Important: Note the color and location of each electrical connector.
Installation Procedure
- Set the battery tray (3) into position and install the bolts (1), and nut (2).
- Slide the ECM/TCM bracket (2) into position on the battery tray.
- Install the ECM/TCM bracket bolt (1).
- Connect the engine wiring harness electrical connector (1) to the TCM.
- Connect the engine wiring harness electrical connectors (2) to the ECM.
- Install the engine wiring harness clips (3) to the ECM/TCM bracket (4).
- Connect the body wiring harness electrical connector (1) to the ECM.
- Position the body wiring harness UBEC electrical connectors (5) to the UBEC bracket and snap into place.
- Position the forward lamp wiring harness UBEC electrical connector (4) to the UBEC bracket and snap into place.
- Position the engine wiring harness UBEC electrical connector (3) to the UBEC bracket and snap into place.
- Install junction block (12).
- Tighten the junction block bolts (6) until the bolts engage the electrical connectors, an audible click will be heard.
- Position the steering column harness package lead to the UBEC and tighten the integral bolt (4).
- Position the positive battery cable to the battery.
- Position positive battery cable lead (4) to the UBEC and tighten the integral bolt (5).
- Install the UBEC cover.
- Install the battery. Refer to Battery Replacement.
Notice: Refer to Fastener Notice in the Preface section.

Tighten
Tighten the bolts to 25 N·m (18 lb ft).

Tighten
Tighten the bolt to 8 N·m (71 lb in).


Tighten
Tighten the bolts to 4 N·m (35 lb in).

Tighten
Tighten the bolt to 5 N·m (44 lb in).

Tighten
Tighten the bolt to 5 N·m (44 lb in).
