For 1990-2009 cars only
Removal Procedure
- Raise and support the vehicle. Refer to Lifting and Jacking the Vehicle.
- Remove the rear tire and wheel assembly. Refer to Tire and Wheel Removal and Installation.
- Using a suitable jack stand, support the knuckle.
- Remove the lower control arm to knuckle bolt and nut. Refer to Rear Axle Lower Control Arm Replacement.
- Using a adjustable jack stand, slowly lower control arm downward.
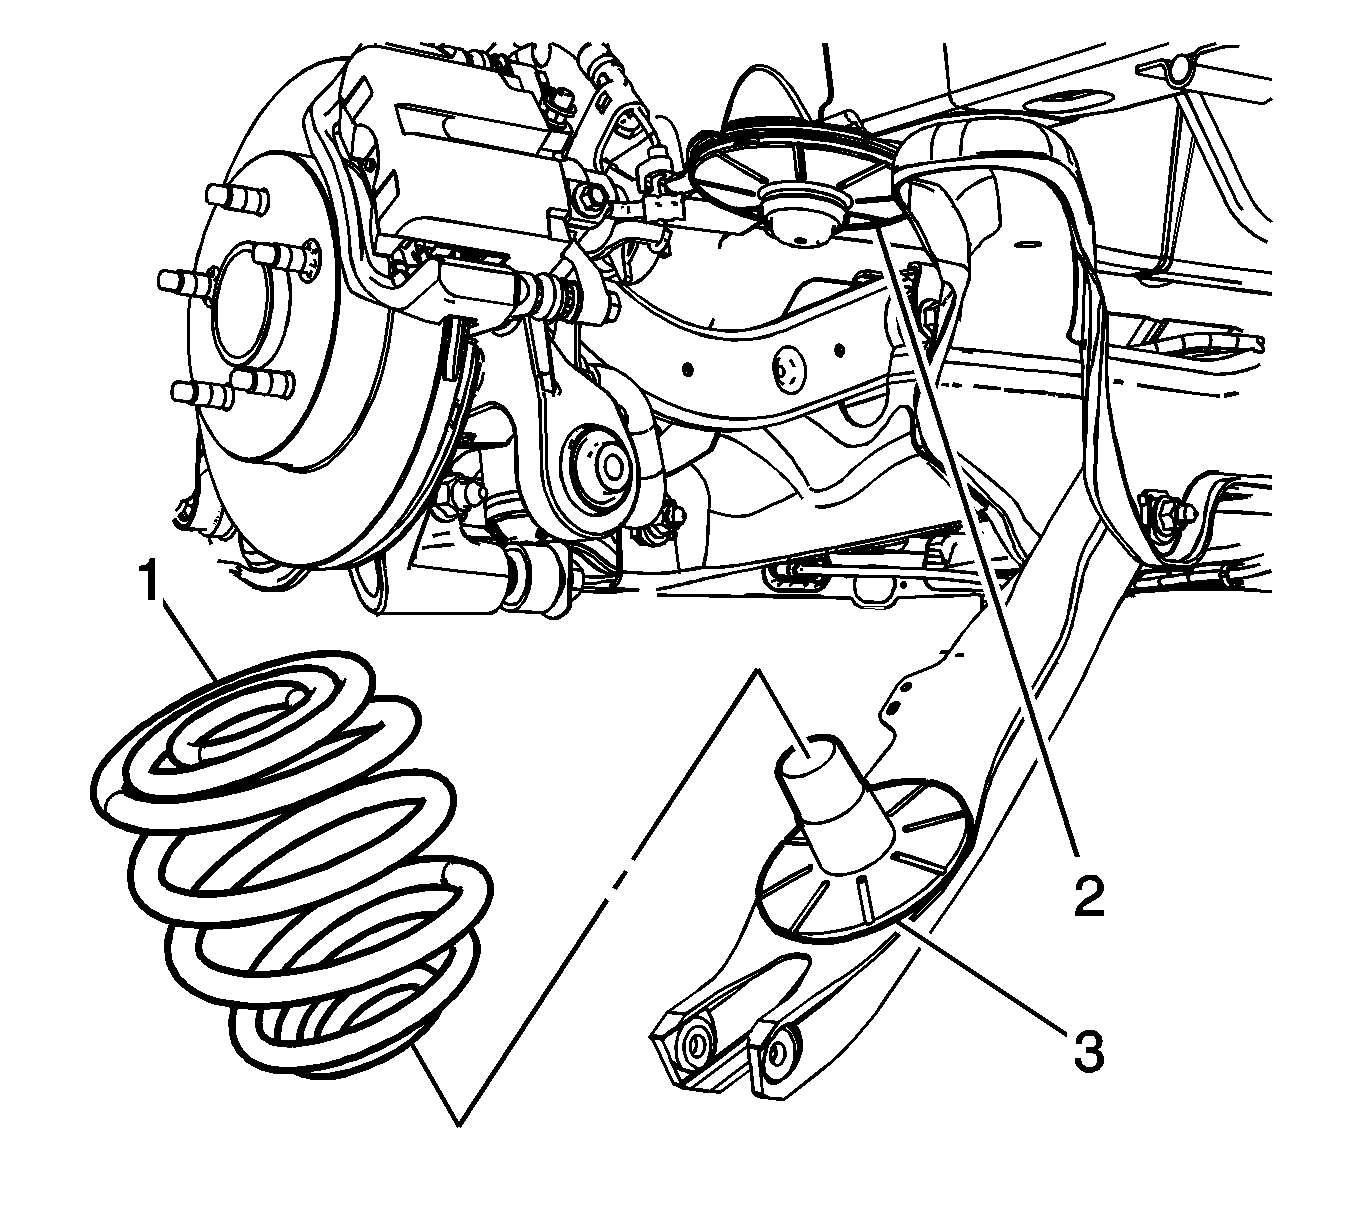
- Remove the coil spring (1) from the lower control arm.
- If needed, remove the rear spring upper insulator (2) or the lower spring insulator (3).

Caution: To prevent personal injury and/or component damage, use the proper tools to support the lower control arm when removing the coil spring. The coil spring is under extreme pressure and can become a projectile should the spring separate from the lower control arm before all of the tension is relieved.
Installation Procedure
- If needed, replace the upper (2) or the lower (3) spring insulator.
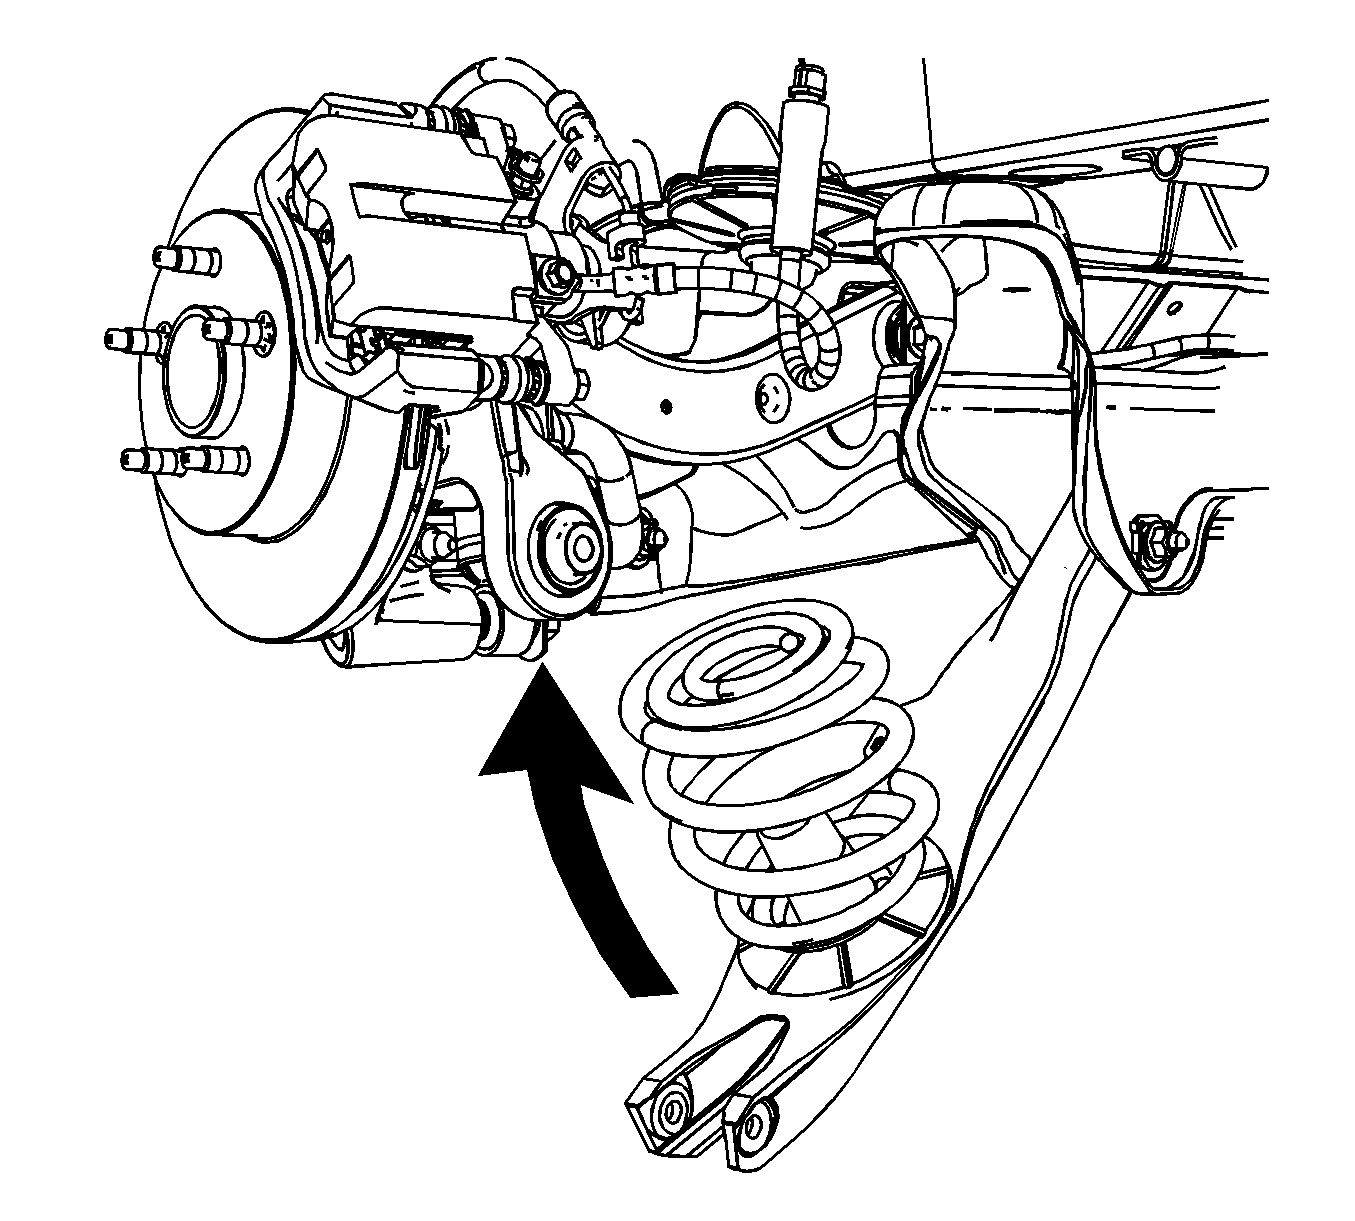
- Position the rear spring (1) on the lower control arm.
- Using an adjustable jack stand, raise the lower control arm.
- Install the lower control arm to knuckle bolt and nut. Refer to Rear Axle Lower Control Arm Replacement.
- Remove the jack stands from the knuckle vehicle and the lower control arm.
- Install the rear tire and wheel assembly. Refer to Tire and Wheel Removal and Installation.
- Lower the vehicle.
- Check the rear wheel alignment. Refer to Wheel Alignment Measurement.

Important: When installing the rear spring, ensure that the spring is positioned so that bolt for the rear stabilizer shaft can be serviced and that the rear spring is properly seated in the upper and lower insulators.
