Removal Procedure

- Open the hood.
- Remove the washer container filler tube. Refer to
Windshield Washer Solvent Container Filler Tube Replacement.
- Remove the front wheelhouse panel splash shield. Refer to
Front Wheelhouse Panel Splash Shield Replacement.
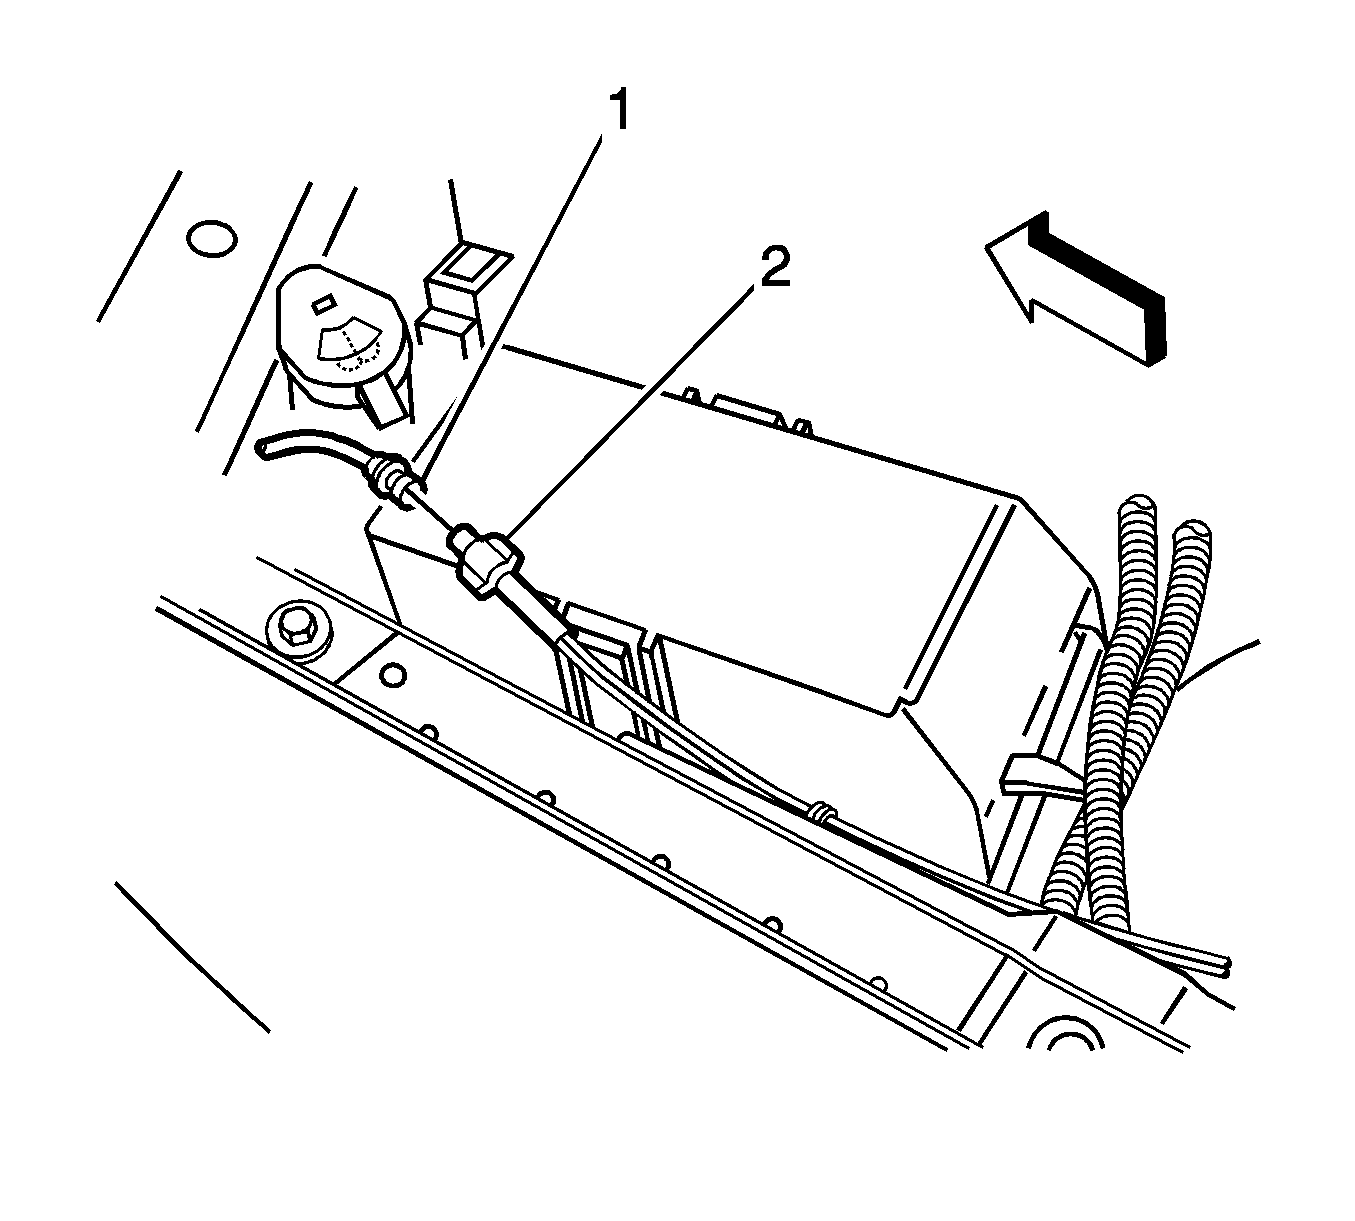
- Disconnect the washer pump hose (1) from the windshield washer hose (2).
- Disengage the hose from the washer container.
- Drain the washer solvent in a suitable clean container.

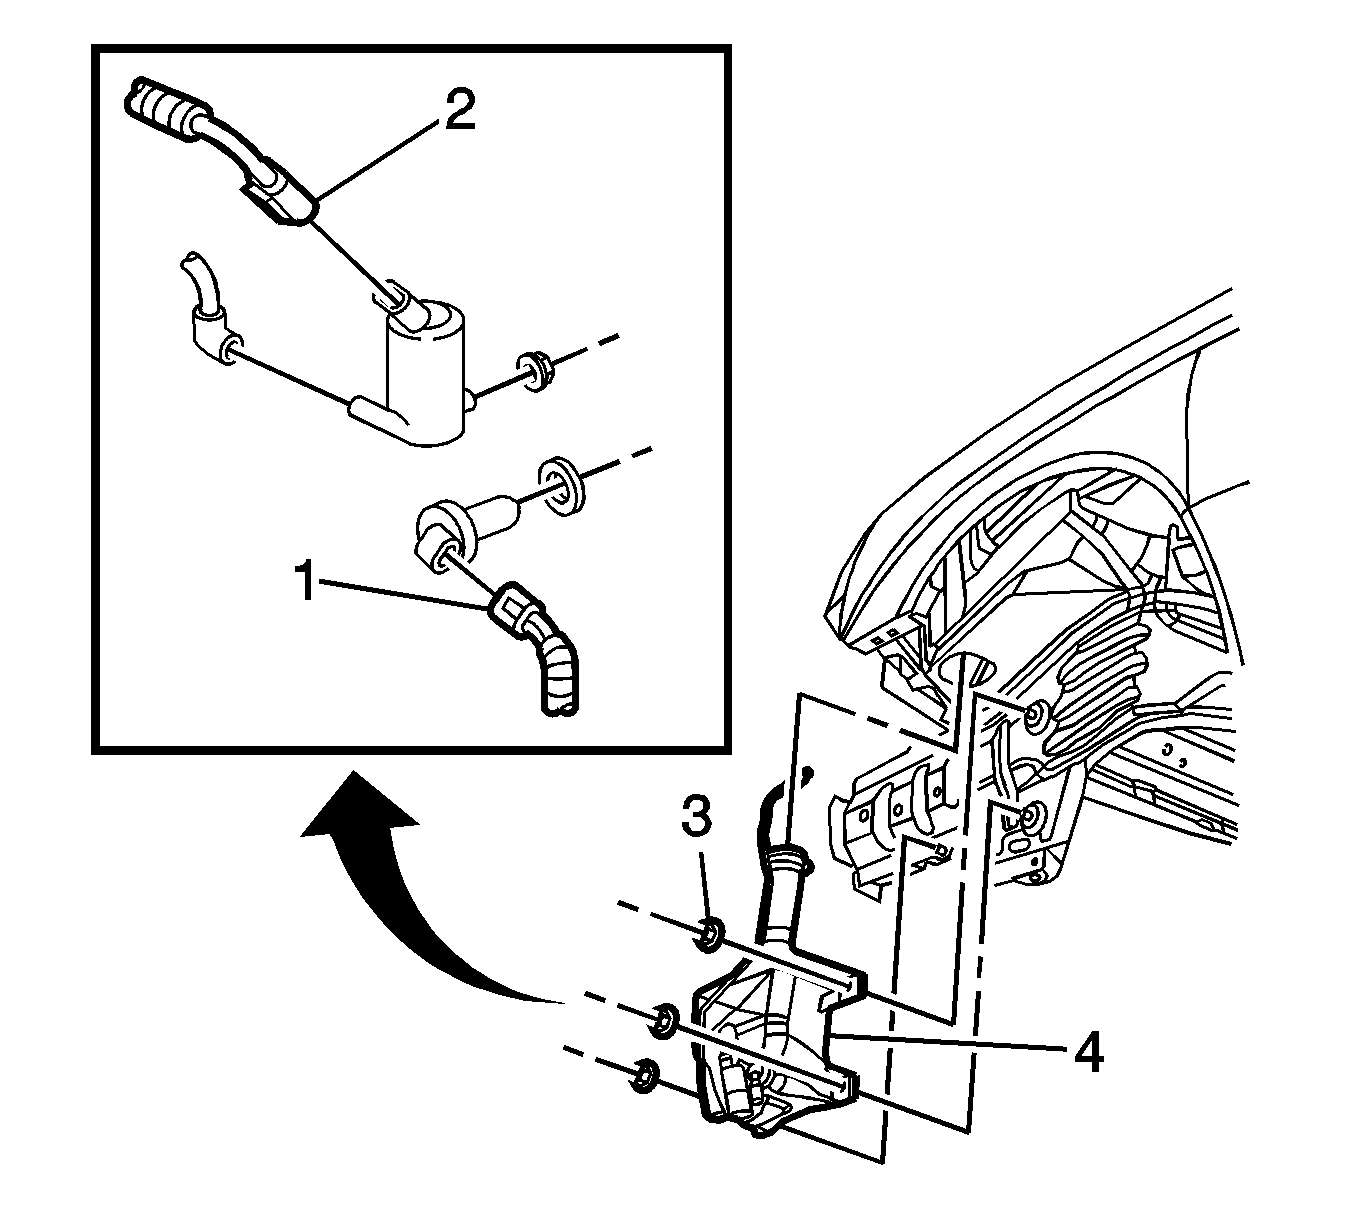
- Disconnect the washer level indicator electrical connector (1).
- Disconnect the washer pump electrical connector (2).
- Remove the washer solvent container nuts (3).
- Remove the washer solvent container (4) from the left frame rail.
- Remove and transfer the following components from the washer solvent container:
Installation Procedure
- Install the following components to the washer solvent container:

- Position the washer solvent container (4) to the left frame rail mounting studs.
Notice: Refer to Fastener Notice in the Preface section.
- Install the washer solvent container nuts (3).
Tighten
10 N·m (89 lb in).
- Connect the washer pump electrical connector (2).
- Connect the washer level indicator electrical connector (1).
- Connect the washer pump hose to the pump spout.
- Engage the washer pump hose to the washer container.
- Install the front wheelhouse panel splash shield. Refer to
Front Wheelhouse Panel Splash Shield Replacement.
- Lower the vehicle.
- Install the washer container filler tube. Refer to
Windshield Washer Solvent Container Filler Tube Replacement.
- Fill the windshield washer container with clean windshield washer solvent.
- Inspect the washers for proper operation.
- Close the hood.


