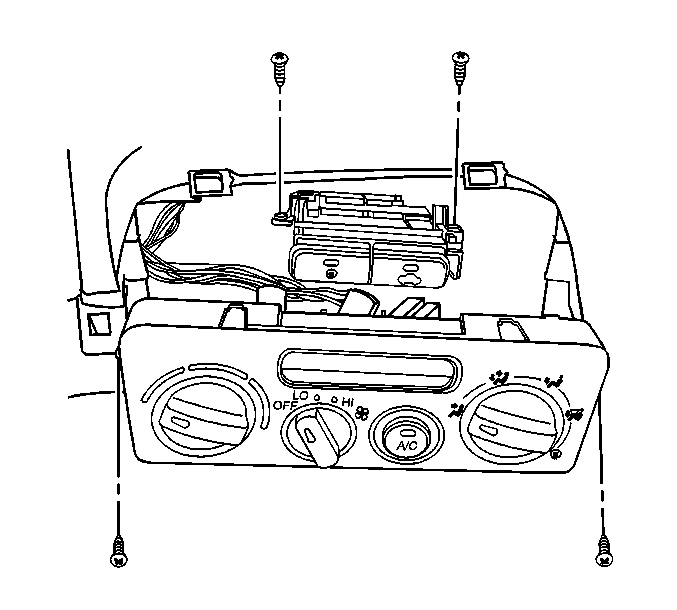
For 1990-2009 cars only
Removal Procedure
- Remove the center console trim bezel. Refer to Instrument Panel Center Trim Panel Replacement in Instrument Panel, Gages and Console.
- Remove the 3 knobs by pulling the knobs away from the HVAC control unit.
- Remove the 2 screws and pull the HVAC control unit forward.
- Remove the 2 screws and move the defogger and air inlet control switch to the side.
- Remove the 2 illumination bulbs.
- Disconnect the blower speed switch electrical connector.
- Disconnect the A/C switch electrical connector.
- Remove the bezel with the A/C switch from the HVAC control unit.
- Remove the two screws and the blower speed switch from the HVAC control unit.

Installation Procedure
- Install the blower speed switch to the HVAC control unit. Secure the blower speed switch with the 2 screws.
- Install the illumination bulbs.
- Install the bezel with the A/C switch to the HVAC control unit.
- Connect the A/C switch electrical connector.
- Connect the blower speed switch electrical connector.
- Install the defogger and air inlet control switch. Secure with the 2 screws.
- Install the HVAC control unit to the instrument panel. Secure with the two screws.
- Install the 3 knobs.
- Install the center console trim bezel. Refer to Instrument Panel Center Trim Panel Replacement in Instrument Panel, Gages and Console.

