Removal Procedure
- Evacuate air conditioning system. Refer to Refrigerant Recovery and Recharging in Heating, Ventilation and Air Conditioning.
- Drain cooling system. Refer to Cooling System Draining and Filling in Engine Cooling.
- Remove air cleaner housing assembly.
- Remove upper radiator support.
- Disconnect electrical from cooling fans.
- Remove transmission cooler lines from radiator. Refer to Transmission Fluid Cooler Hose/Pipe Replacement in Automatic Transmission - 4L60-E/4L65-E.
- Remove A/C line from condenser.
- Remove A/C line by surge tank.
- Remove lower radiator hose from thermostat housing.
- Remove upper radiator hose from water pump outlet.
- Remove surge tank hose from radiator.
- Remove condenser/radiator/fan module as an assembly.
- Remove the timing chain and camshaft sprocket. Refer to Timing Chain and Sprocket Replacement .
- Remove the valve lifters from both cylinder heads. Refer to Valve Lifter Replacement .
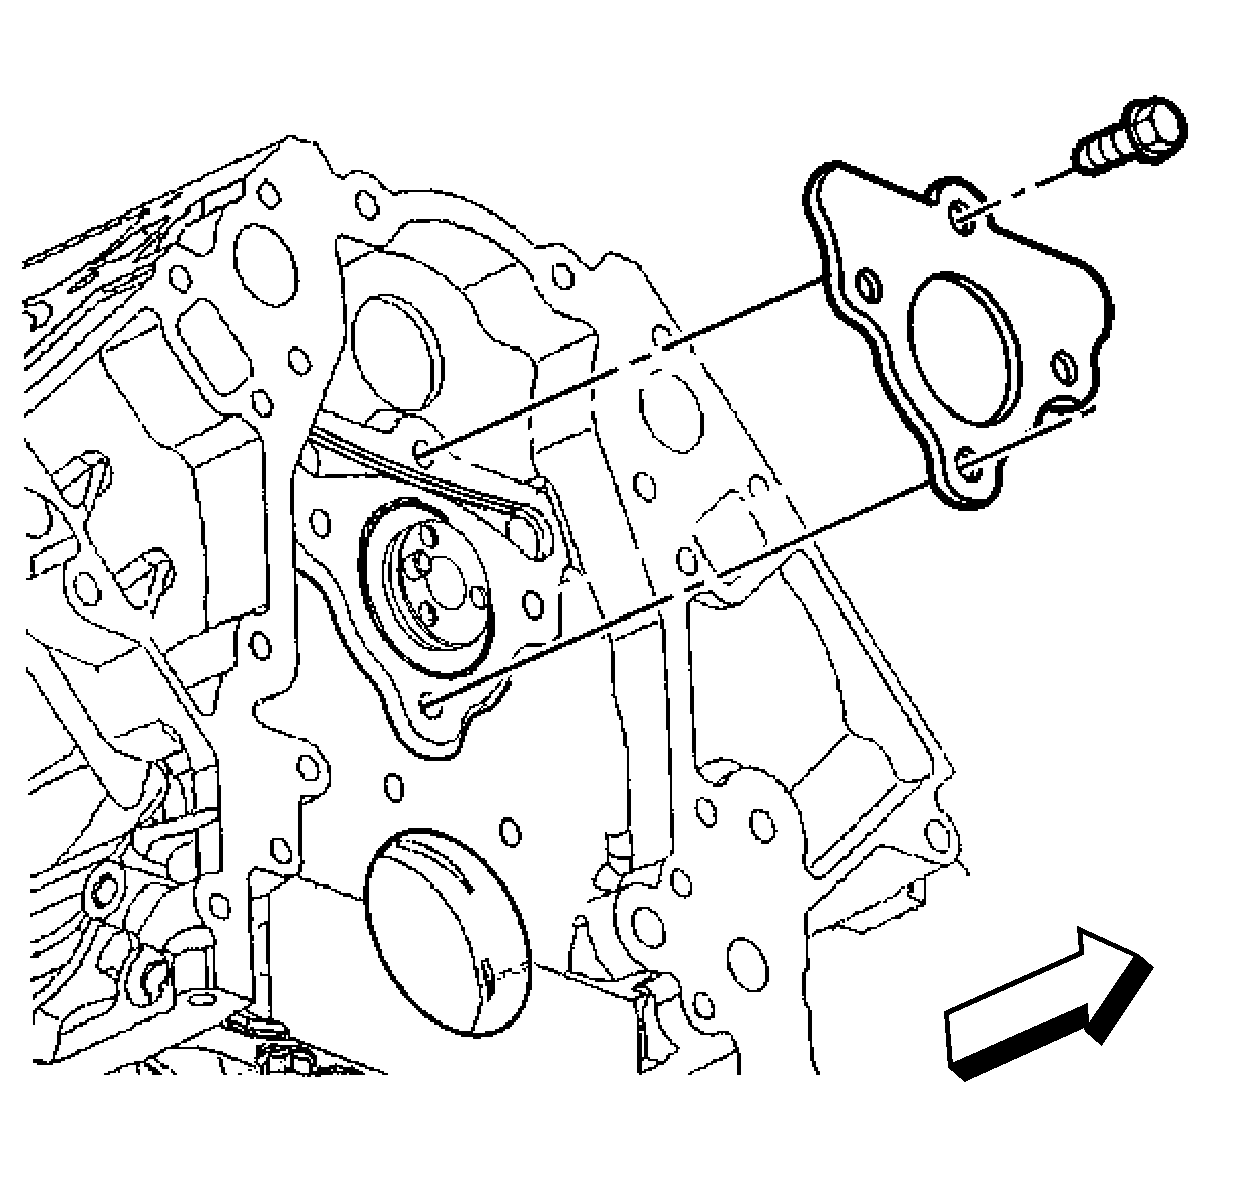
- Remove the camshaft retainer bolts and retainer.
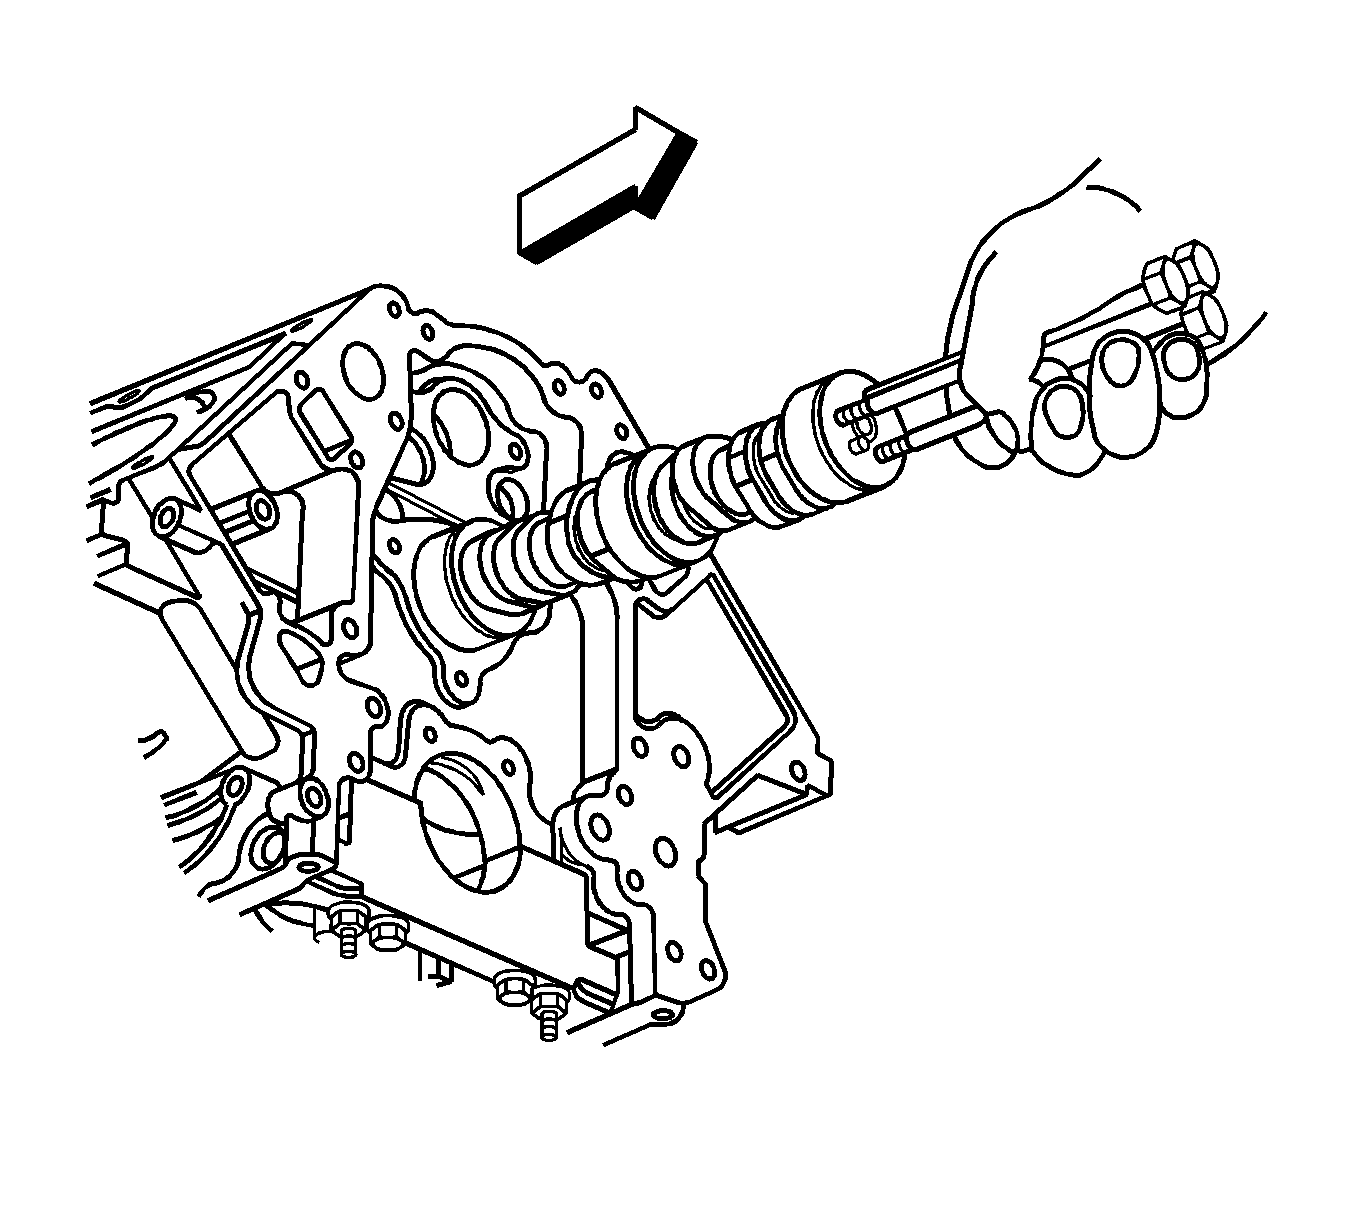
- Remove the camshaft.
- Clean and inspect the camshaft and bearings. Refer to Camshaft and Bearings Cleaning and Inspection .

Notice: All camshaft journals are the same diameter, so care must be used in removing or installing the camshaft to avoid damage to the camshaft bearings.

| 16.1. | Install three M8-1.25 x 100 mm (M8-1.25 x 4.0 in) bolts to the bolt holes in the front of the camshaft. |
| 16.2. | Using the bolts as a handle, carefully rotate and pull the camshaft out of the engine block. |
| 16.3. | Remove the three bolts from the camshaft. |
Installation Procedure
Important: If camshaft replacement is required, the valve lifters must also be replaced.
- Lubricate the camshaft journals and the bearings with clean engine oil.
- Install three M8-1.25 x 100 mm (M8-1.25 x 4.0 in) bolts to the bolt holes in the front of the camshaft.
- Using the bolts as a handle, carefully install the camshaft into the engine block.
- Remove the three bolts from the front of the camshaft.
- Install the camshaft retainer and bolts.
- Install the timing chain and camshaft sprocket. Refer to Timing Chain and Sprocket Replacement .
- Install the valve lifters. Refer to Engine Oil Pressure Sensor and/or Switch Replacement .
- Install condenser/radiator/fan module as an assembly.
- Install surge tank hose to radiator.
- Install upper radiator hose to water pump outlet.
- Install lower radiator hose to thermostat housing.
- Install A/C line by surge tank.
- Install A/C line to condenser.
- Install transmission cooler lines to radiator. Refer to Transmission Fluid Cooler Hose/Pipe Replacement in Automatic Transmission - 4L60-E/4L65-E.
- Connect electrical to cooling fans.
- Install upper radiator support.
- Install air cleaner housing assembly.
- Recharge air conditioning system. Refer to Refrigerant Recovery and Recharging in Heating, Ventilation and Air Conditioning.
- Fill cooling system. Refer to Cooling System Draining and Filling in Engine Cooling.

Notice: All camshaft journals are the same diameter, so care must be used in removing or installing the camshaft to avoid damage to the camshaft bearings.

Important: Install the retainer plate with the sealing gasket facing the engine block.
The gasket surface on the engine block should be clean and free of dirt and/or debris.Notice: Use the correct fastener in the correct location. Replacement fasteners must be the correct part number for that application. Fasteners requiring replacement or fasteners requiring the use of thread locking compound or sealant are identified in the service procedure. Do not use paints, lubricants, or corrosion inhibitors on fasteners or fastener joint surfaces unless specified. These coatings affect fastener torque and joint clamping force and may damage the fastener. Use the correct tightening sequence and specifications when installing fasteners in order to avoid damage to parts and systems.
Tighten
Tighten the camshaft retainer bolts to 25 N·m
(18 lb ft).
