For 1990-2009 cars only
Tools Required
J 25070 Heat Gun -- 500-750F
Removal Procedure
- Remove the grille applique molding. Refer to Front Bumper Fascia Molding Replacement in Exterior Trim.
- Remove the front bumper fascia. Refer to Front Bumper Fascia Replacement .
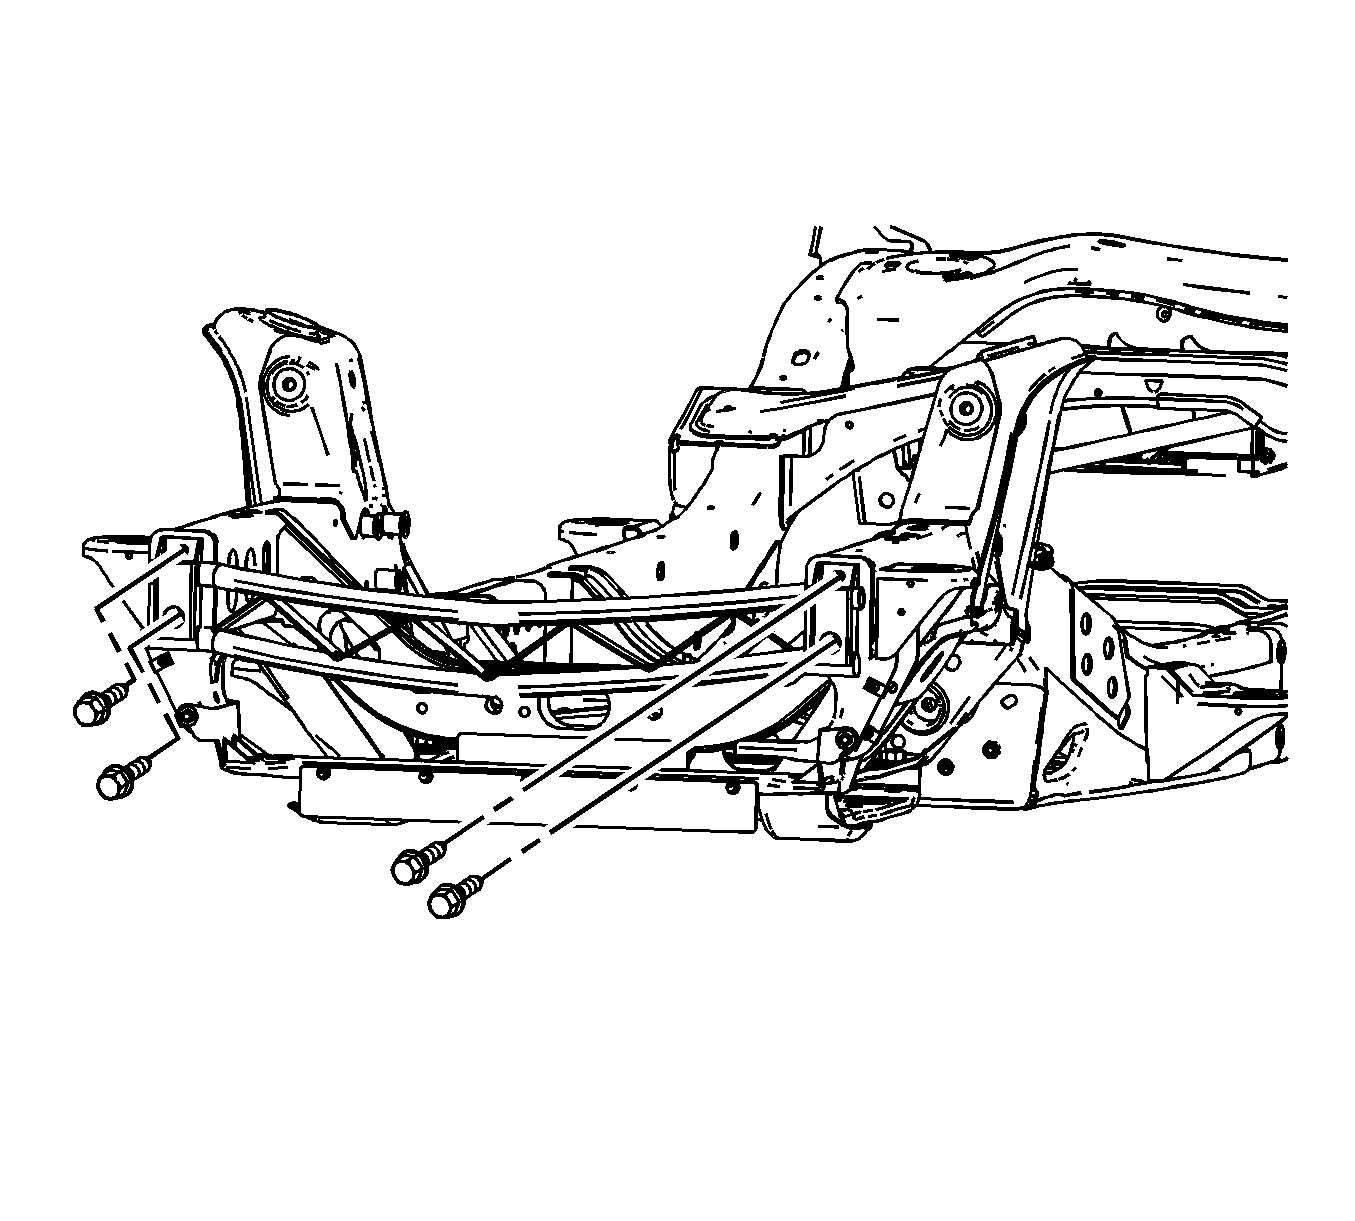
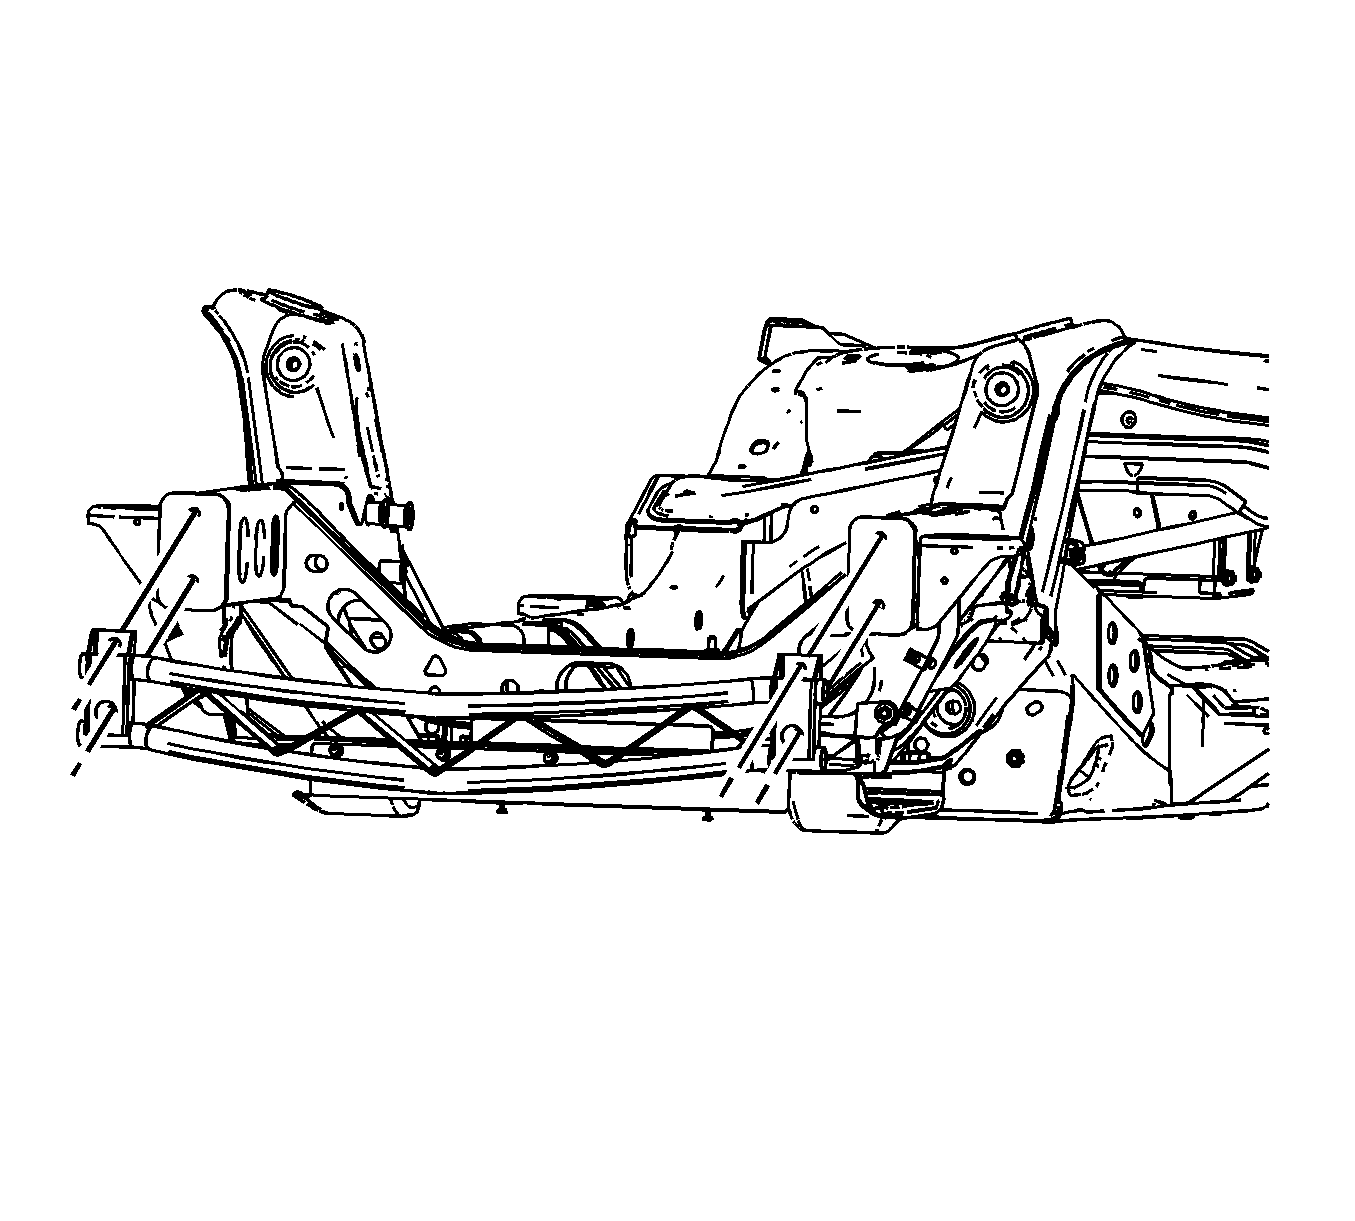
- Remove the bracket fasteners from the front bumper.
- Heat the bumper beam mounting pad using a J 25070 . Heat the area to 149°C (300°F).
- Using a flat-bladed tool or suitable device, pry the bumper beam off the bumper mounting pad.
- Remove the front bumper from the vehicle.
Installation Procedure
- Clean the mating surfaces.
- Apply a 3-6 mm (1/8-1/4 in) bead of metal bonding adhesive, GM P/N 12378566/7 (Canadian P/N 88901674/5) or equivalent, to both of the mating surfaces.
- Using a small acid brush, spread a coat of adhesive to both of the mating surfaces.
- Apply 9-13 mm (3/8-1/2 in) bead of metal bonding adhesive GM P/N 12378566/7 (Canadian P/N 88901674/5) or equivalent, to the bumper mounting pad and bumper beam.
- Install the bracket to the vehicle.
- Install the bracket fasteners.
- Install the front bumper fascia. Refer to Front Bumper Fascia Replacement .
- Install the grille applique molding. Refer to Front Bumper Fascia Molding Replacement in Exterior Trim.
Important: The adhesive has a 40-50 minute working time. Do not allow the adhesive to totally cure off the vehicle.
Important: DO NOT pull the bumper beam apart after joined to the bumper beam.
Notice: Refer to Fastener Notice in the Preface section.
Tighten
Tighten the bracket fasteners to 50 N·m
(36 lb ft).
