Removal Procedure
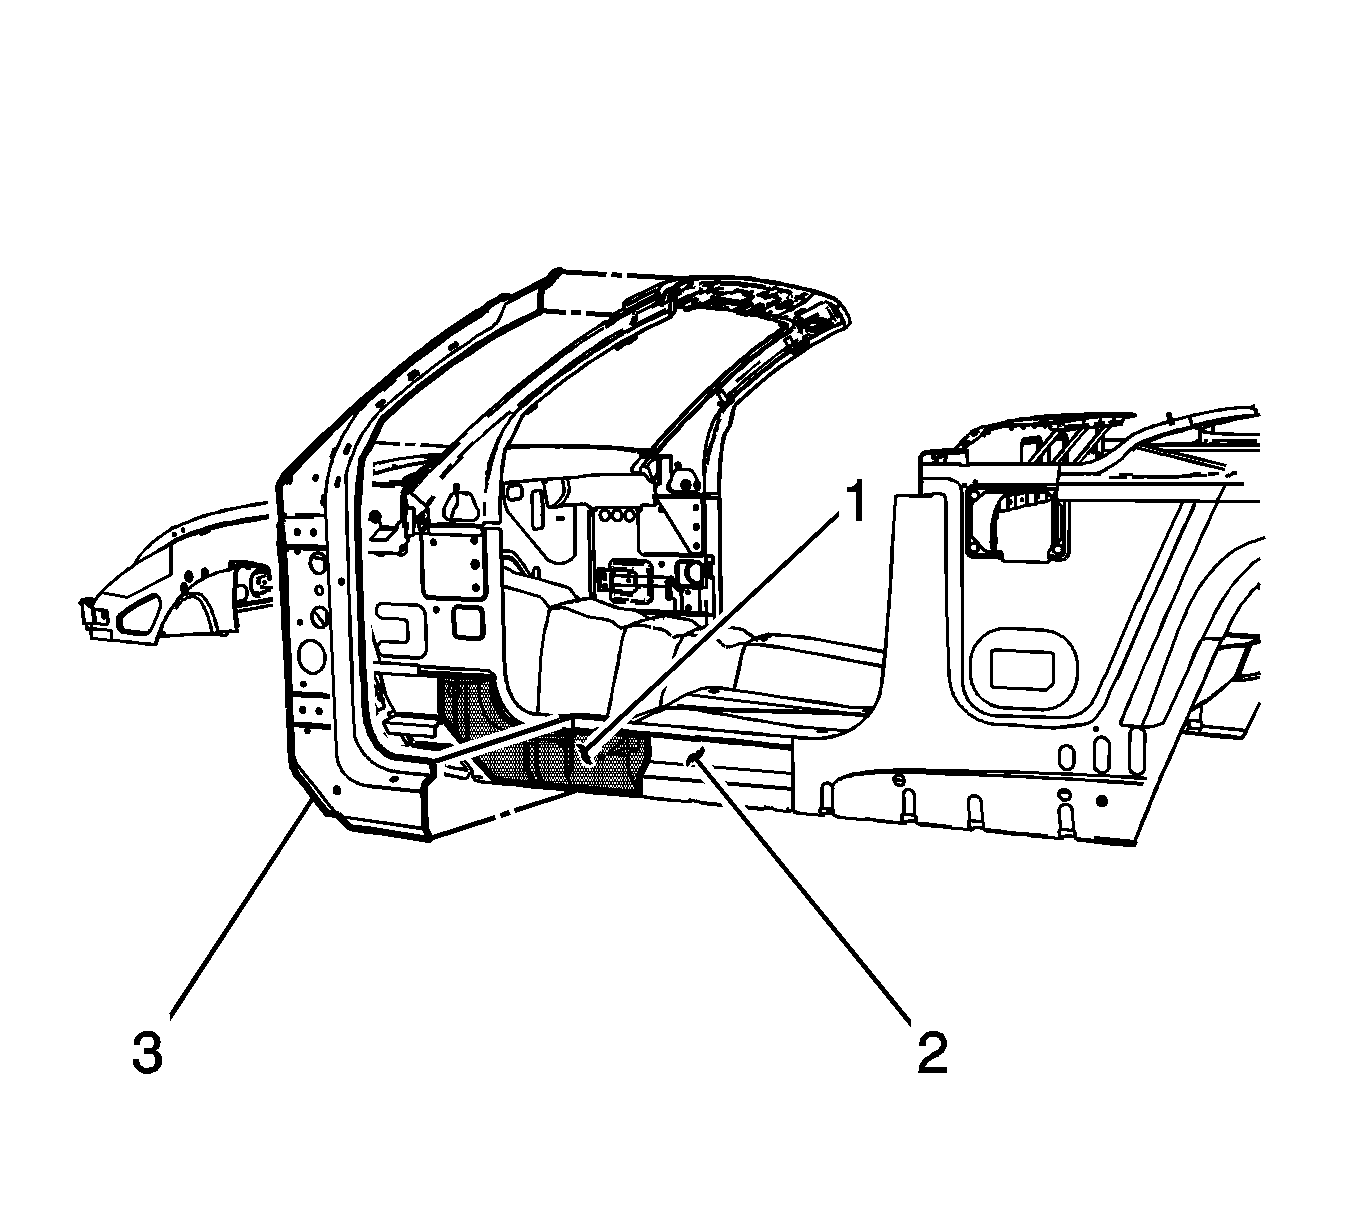
Important: Structural foam (1) is located between the inner rocker (2) and the inner hinge pillar reinforcements (3) on both the right and the left side of the vehicle. Precast structural foam replacement blocks are available if necessary, and can be ordered separately.
Failure to replace any damaged structure foam reinforcement as described could compromise the structural integrity of the vehicle.- Remove the outer rocker panel. Refer to Body Side Outer Panel Replacement or to Body Side Outer Panel Sectioning .
- Remove the inner hinge pillar reinforcement assembly. Refer to Front Inner Hinge Pillar Body Replacement .
- Remove the damaged structural foam reinforcement.
- If the inner rocker panel is not being replaced, use a chisel or equivalent to remove the excess and loose adhesive from the inner rocker panel.
Caution: Refer to Approved Equipment for Collision Repair Caution in the Preface section.
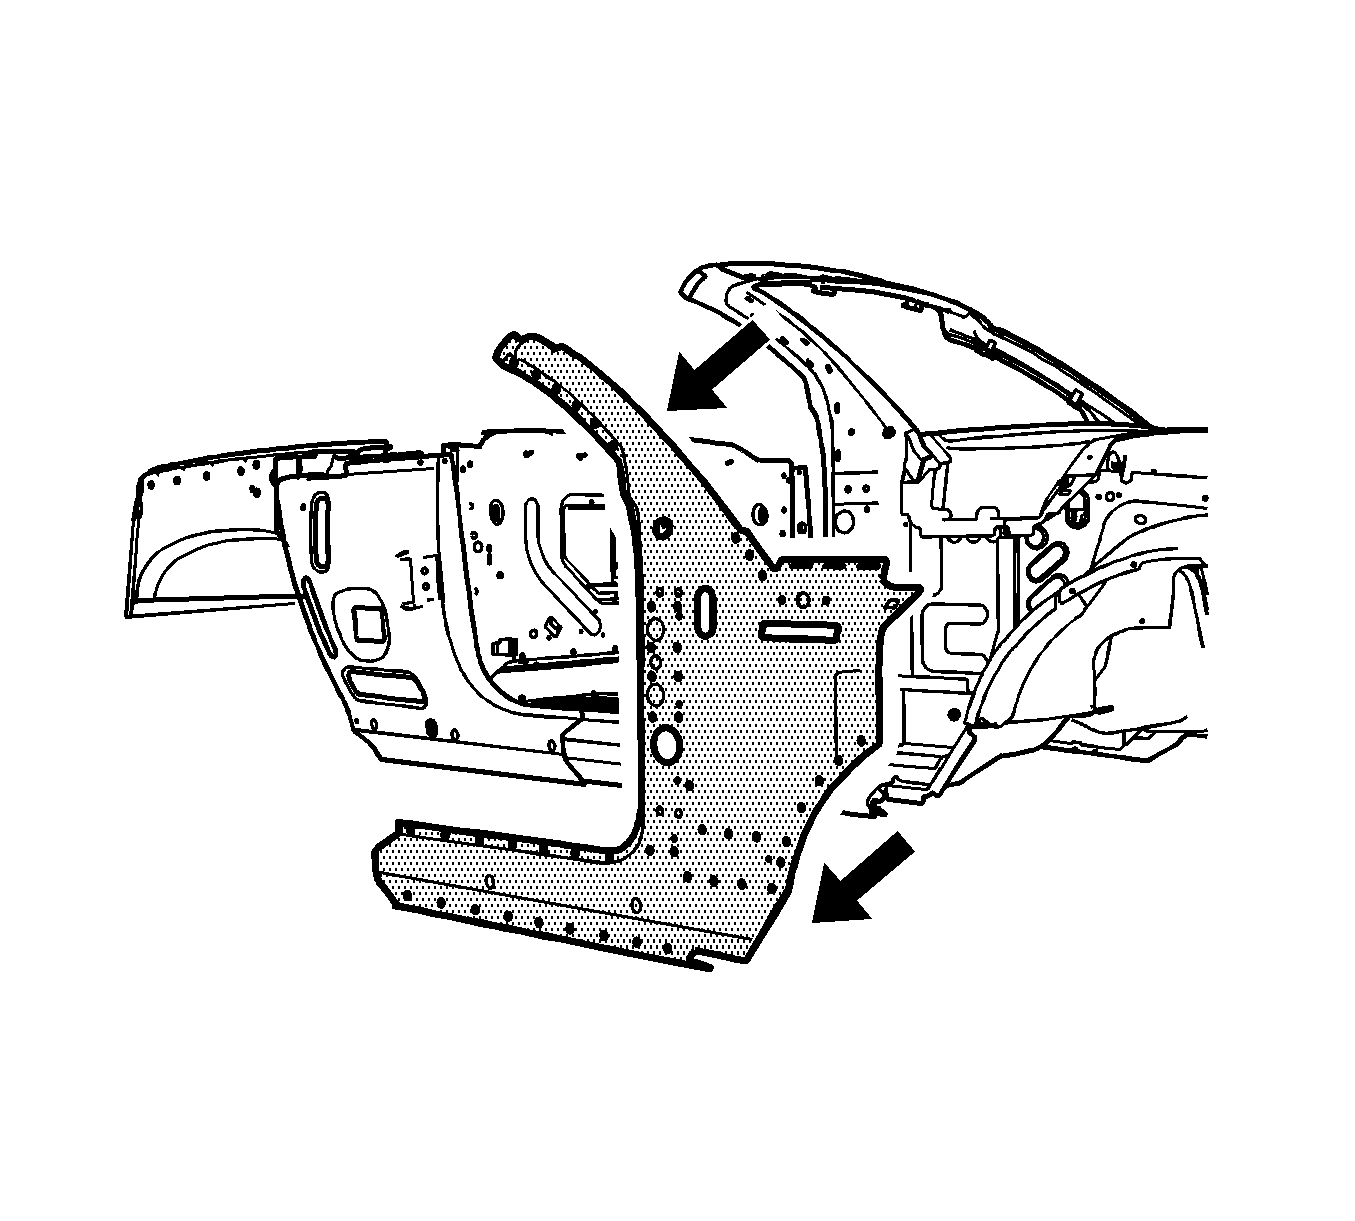
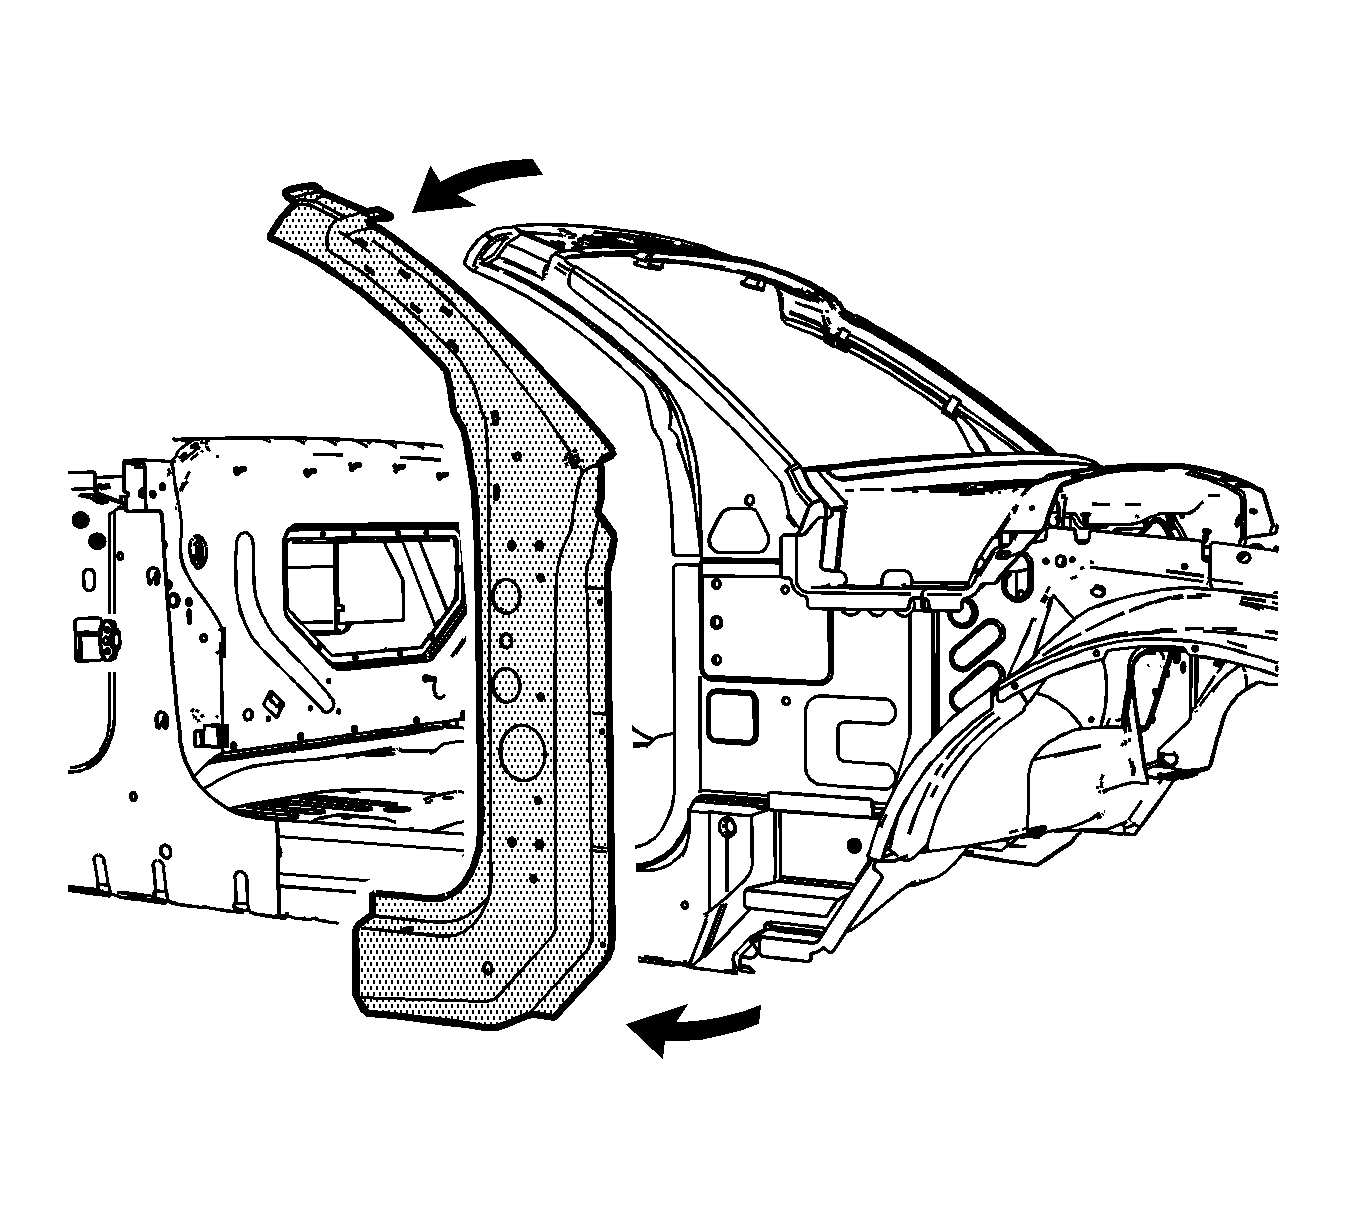
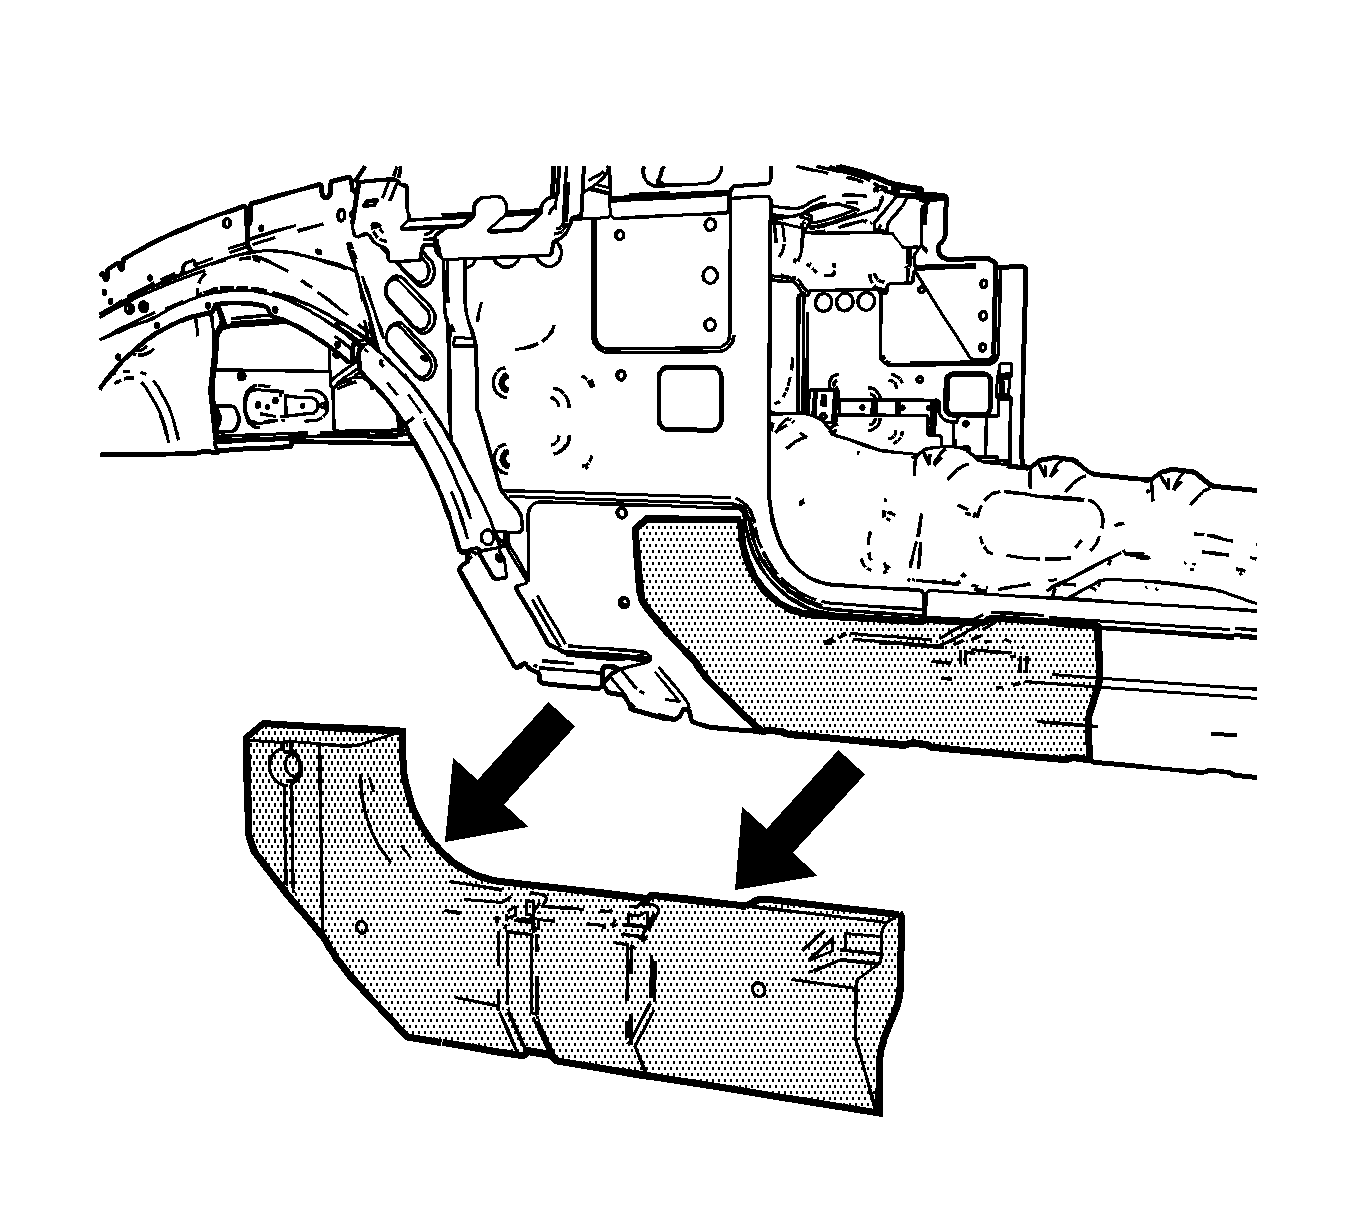
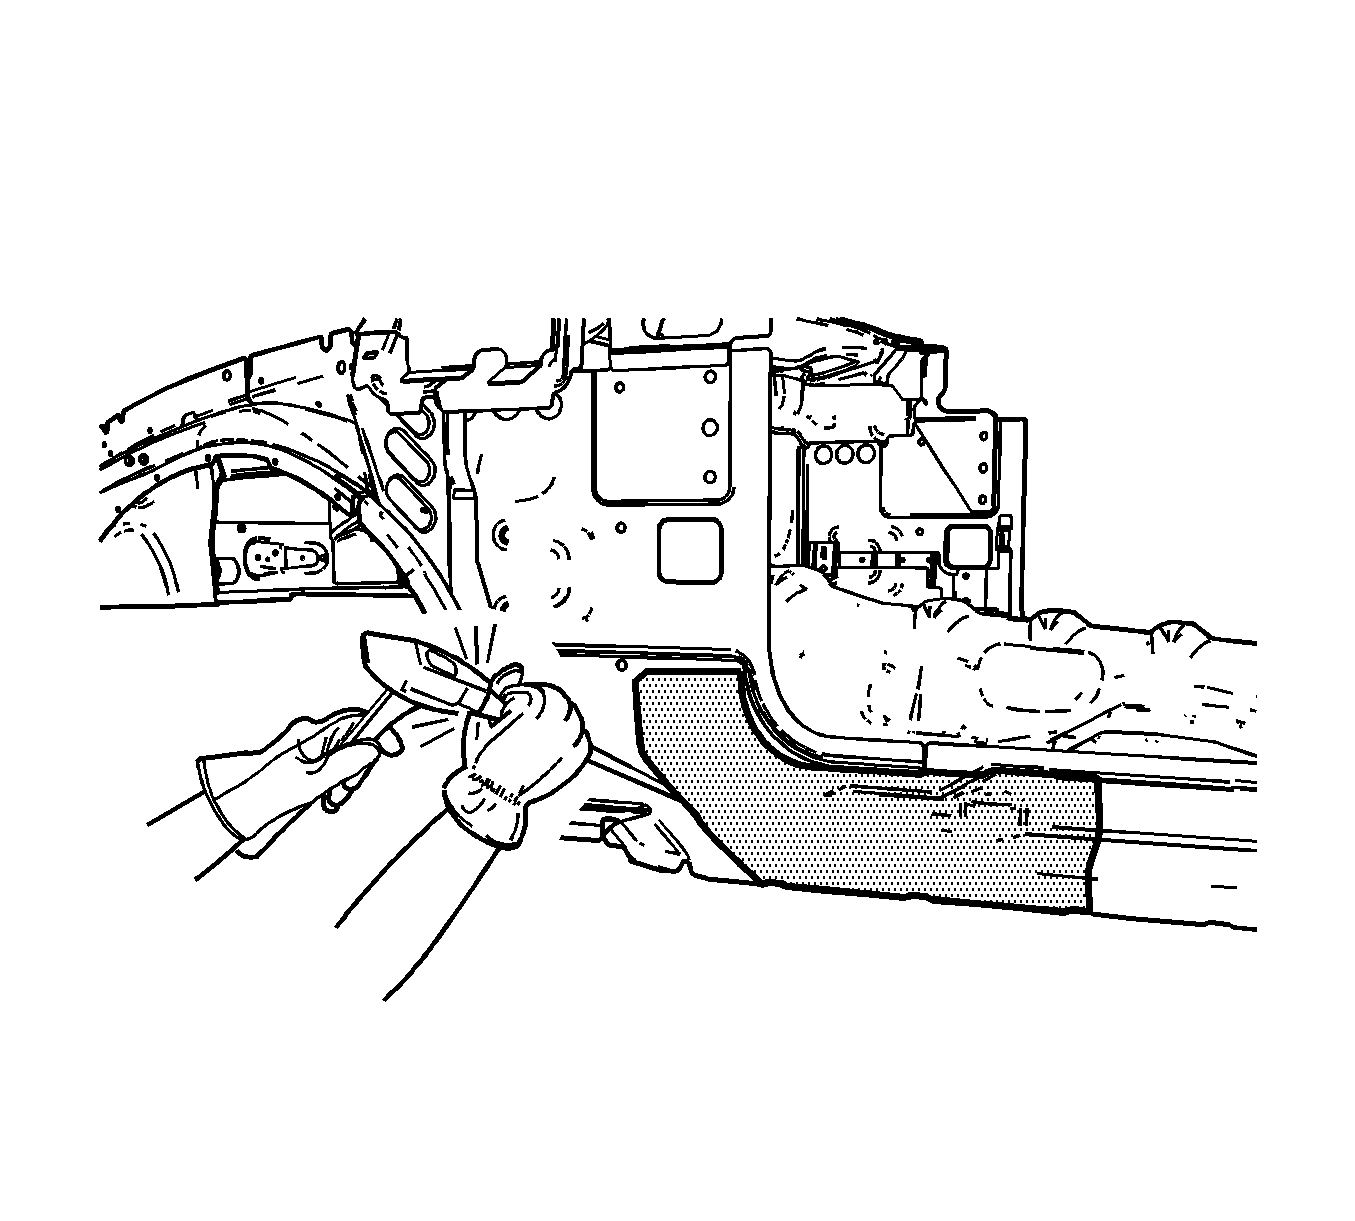
Important: Do NOT remove existing primer from the inner panels when removing the adhesive. You do not need to completely remove all of the adhesive.
Installation Procedure
- Clean the replacement structural foam reinforcement and all of the mating surfaces with naphtha solvent and allow to dry thoroughly.
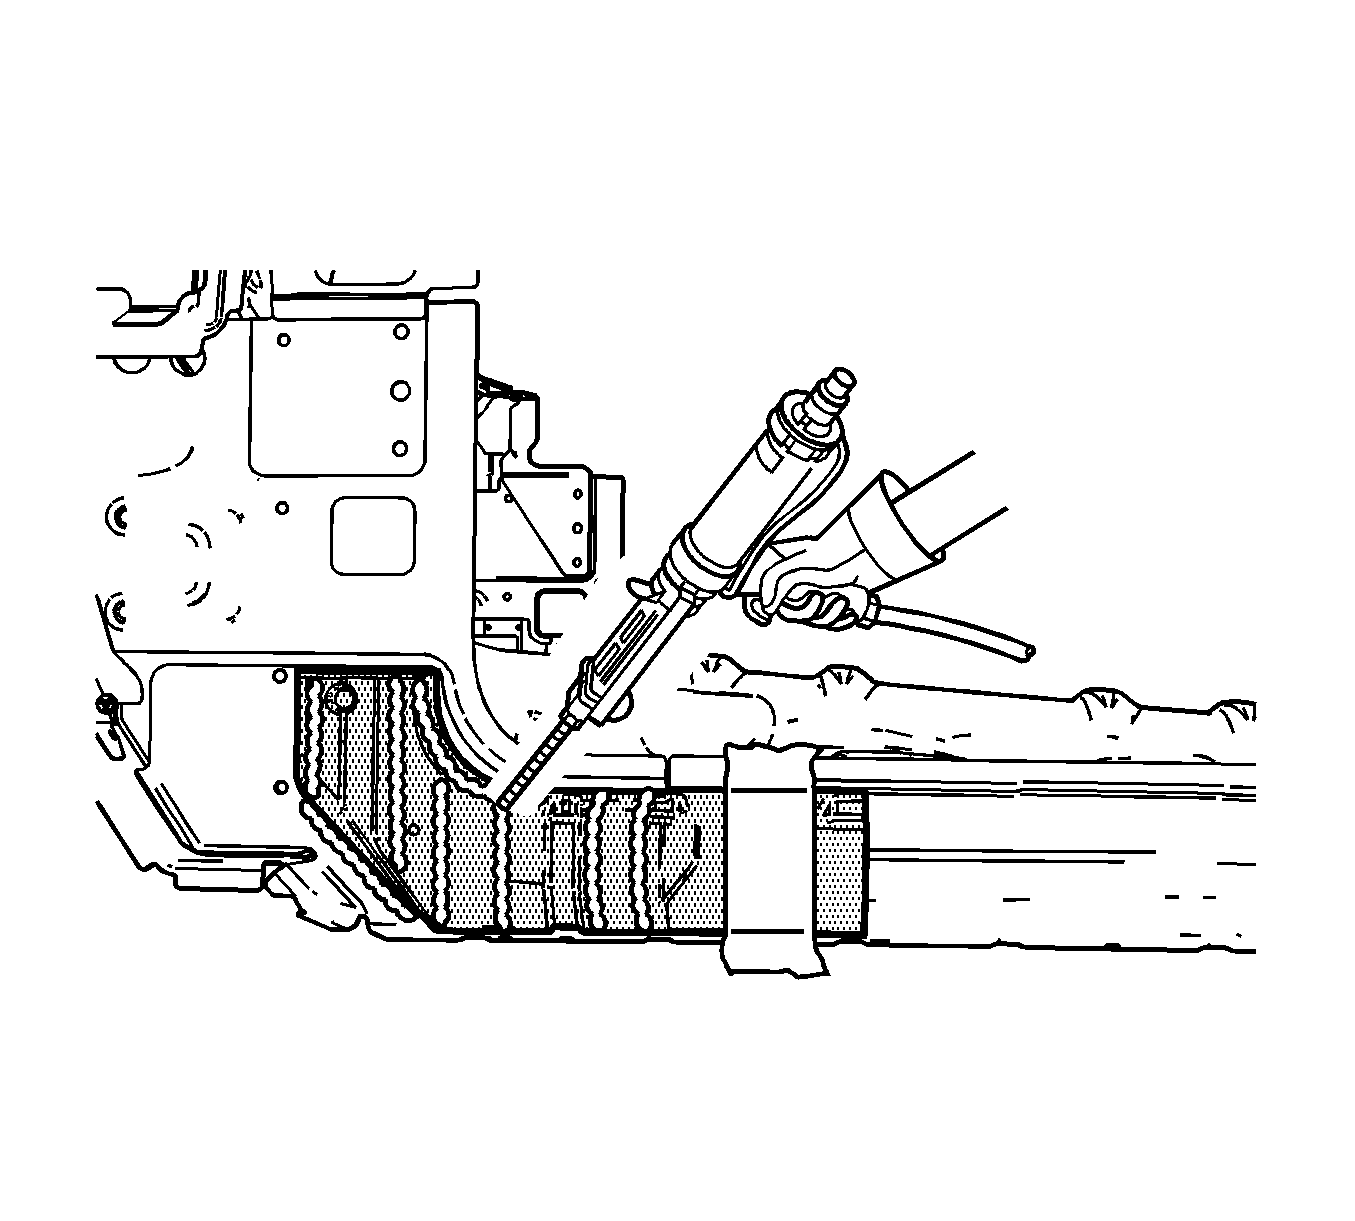
- Apply 9-13 mm beads of Fusor 120 adhesive GM P/N 12345726 to the reinforcement mating surface of the inner rocker and the hinge pillar, as shown.
- Position the structural foam reinforcement to the body and push firmly into place.
- Place tape across the rear portion of the structural foam reinforcement to temporarily hold the reinforcement in place until the inner hinge pillar reinforcement is installed.
- Apply 9-13 mm beads of Fusor 120 adhesive GM P/N 12345726 (Canadian P/N 10953521) to the reinforcement mating surface of the hinge pillar reinforcement as shown.
- Position the inner hinge pillar reinforcement assembly and clamp into place. Refer to Front Inner Hinge Pillar Body Replacement .
- Remove the tape from the structural foam block.
- Apply 9-13 mm beads of Fusor 120 adhesive GM P/N 12345726 (Canadian P/N 10953521) to the reinforcement mating surface of the outer body side, as shown.
- Position the body side outer assembly and clamp into place. Refer to Body Side Outer Panel Replacement or to Body Side Outer Panel Sectioning .
Important: Use only enough naphtha solvent to dampen a cloth. Too much solvent may saturate the structural foam reinforcement and may migrate out later, affecting the bond strength of the adhesive.
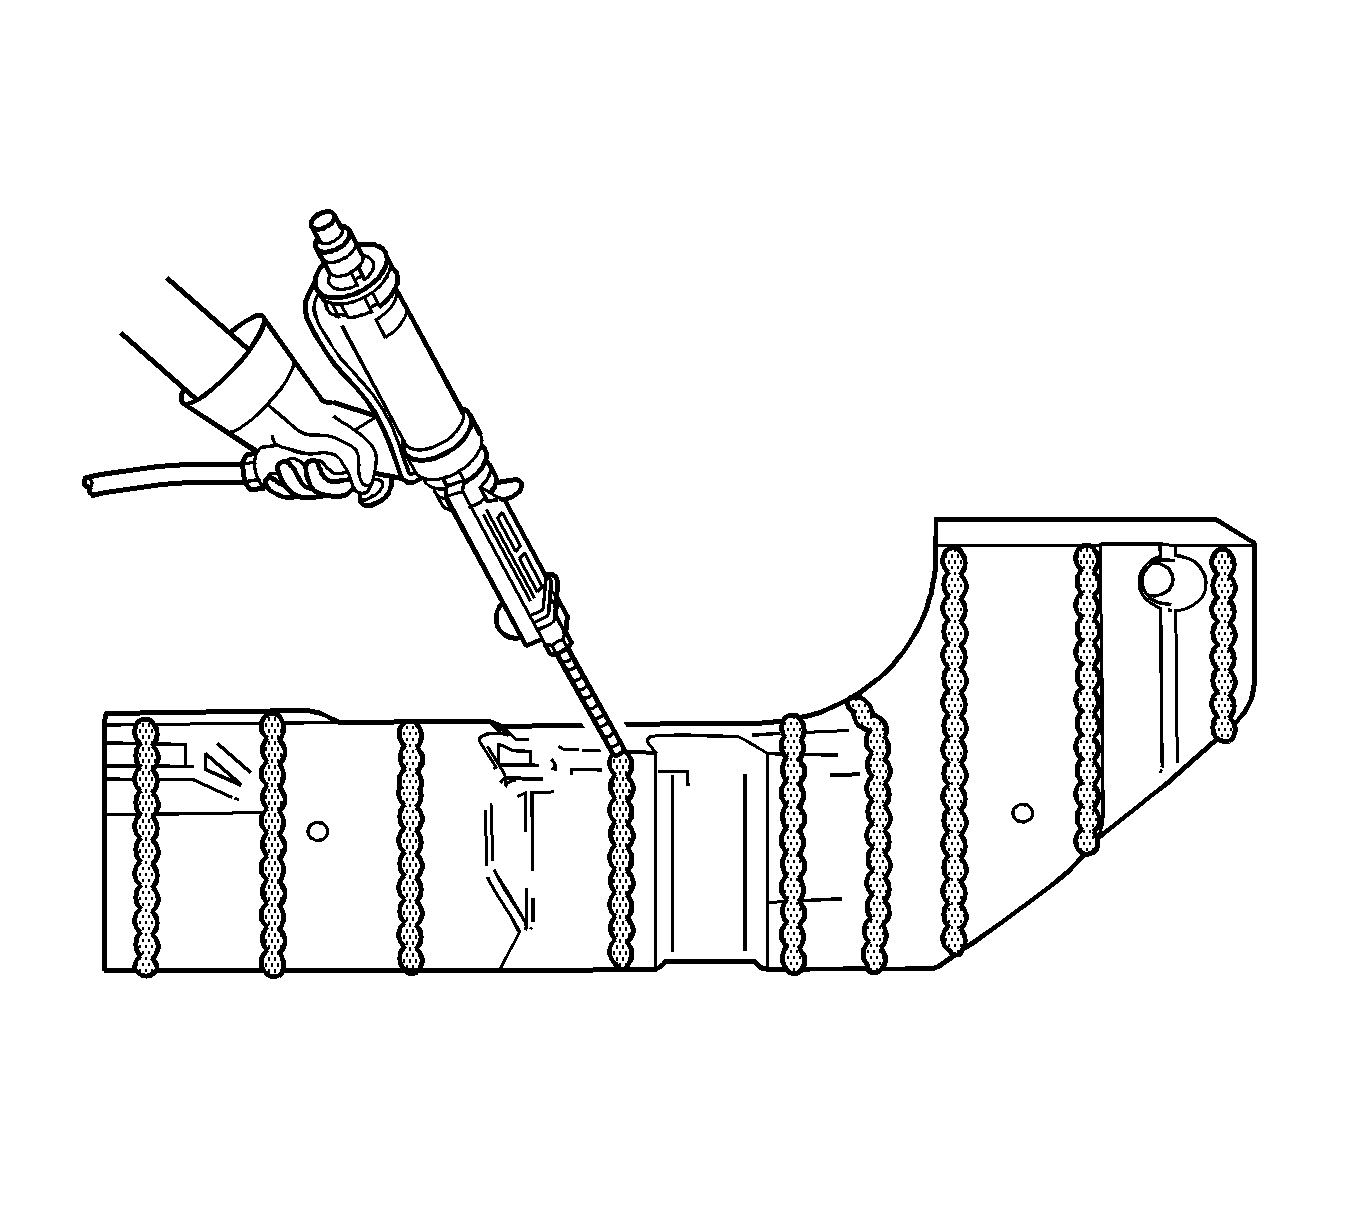
Important: The adhesive has a 40-50 minute work time. Do NOT allow the adhesive to cure prior to installing the structural foam reinforcement to the vehicle and to the inner hinge pillar reinforcement.
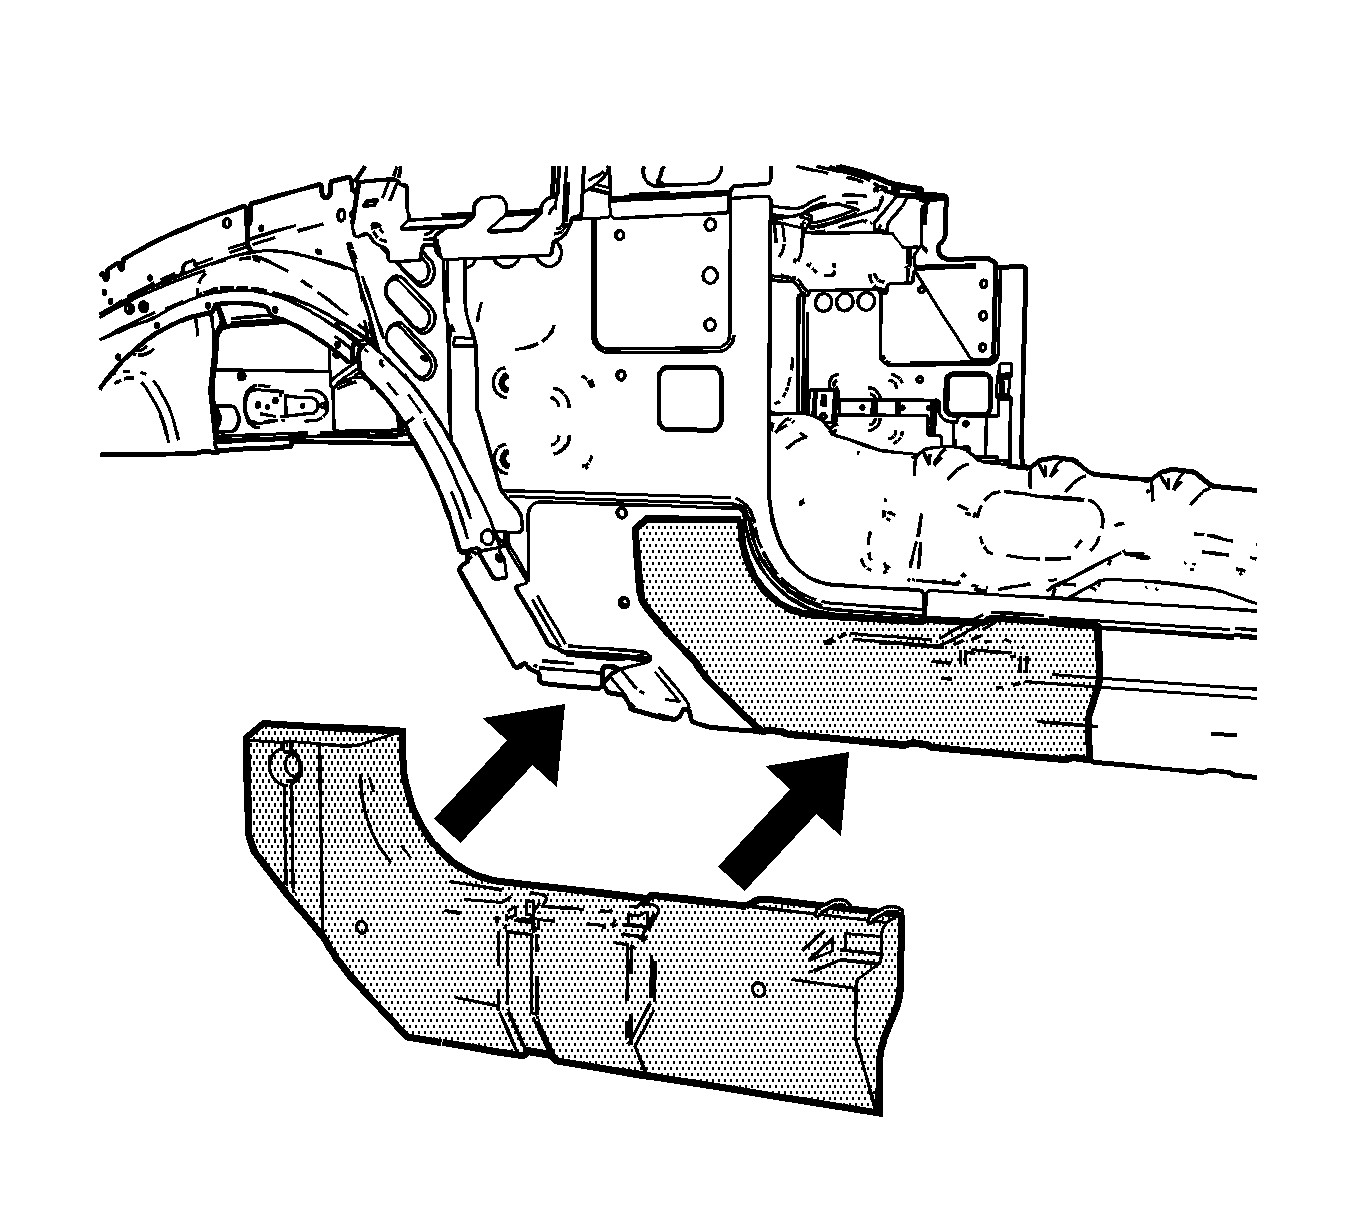
Important: Do NOT pull the structural foam reinforcement apart from the adjacent panels after the panels have been joined together. Slide the reinforcements from side to side, or up and down, for proper alignment.
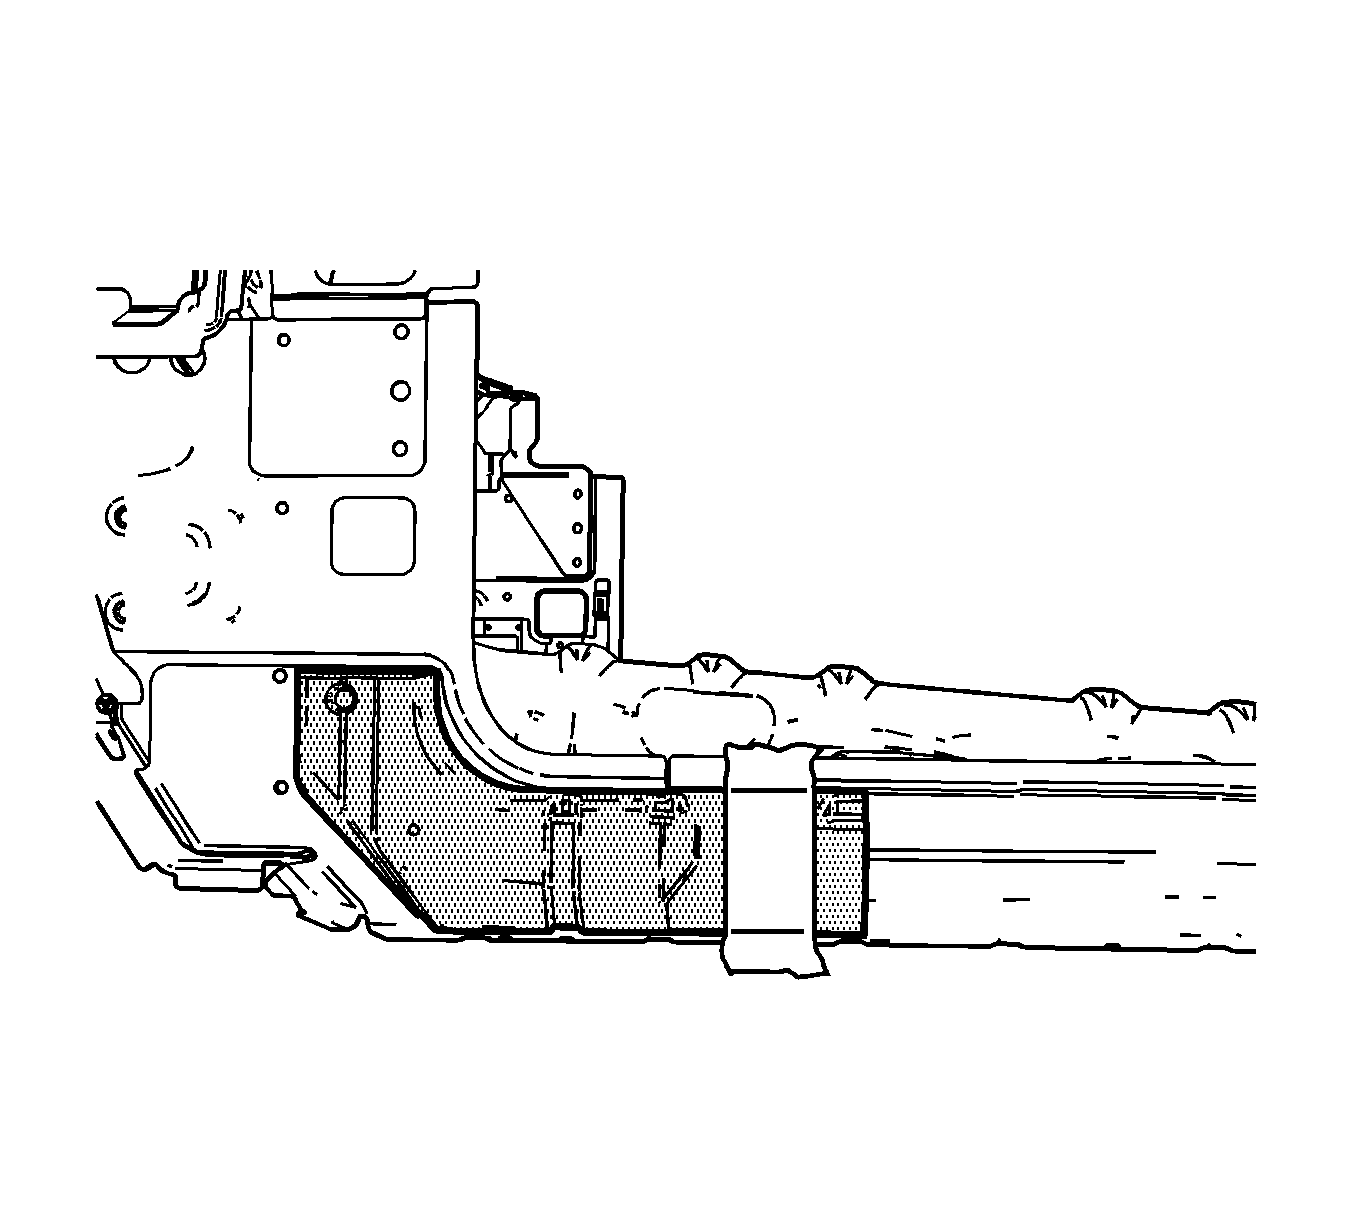
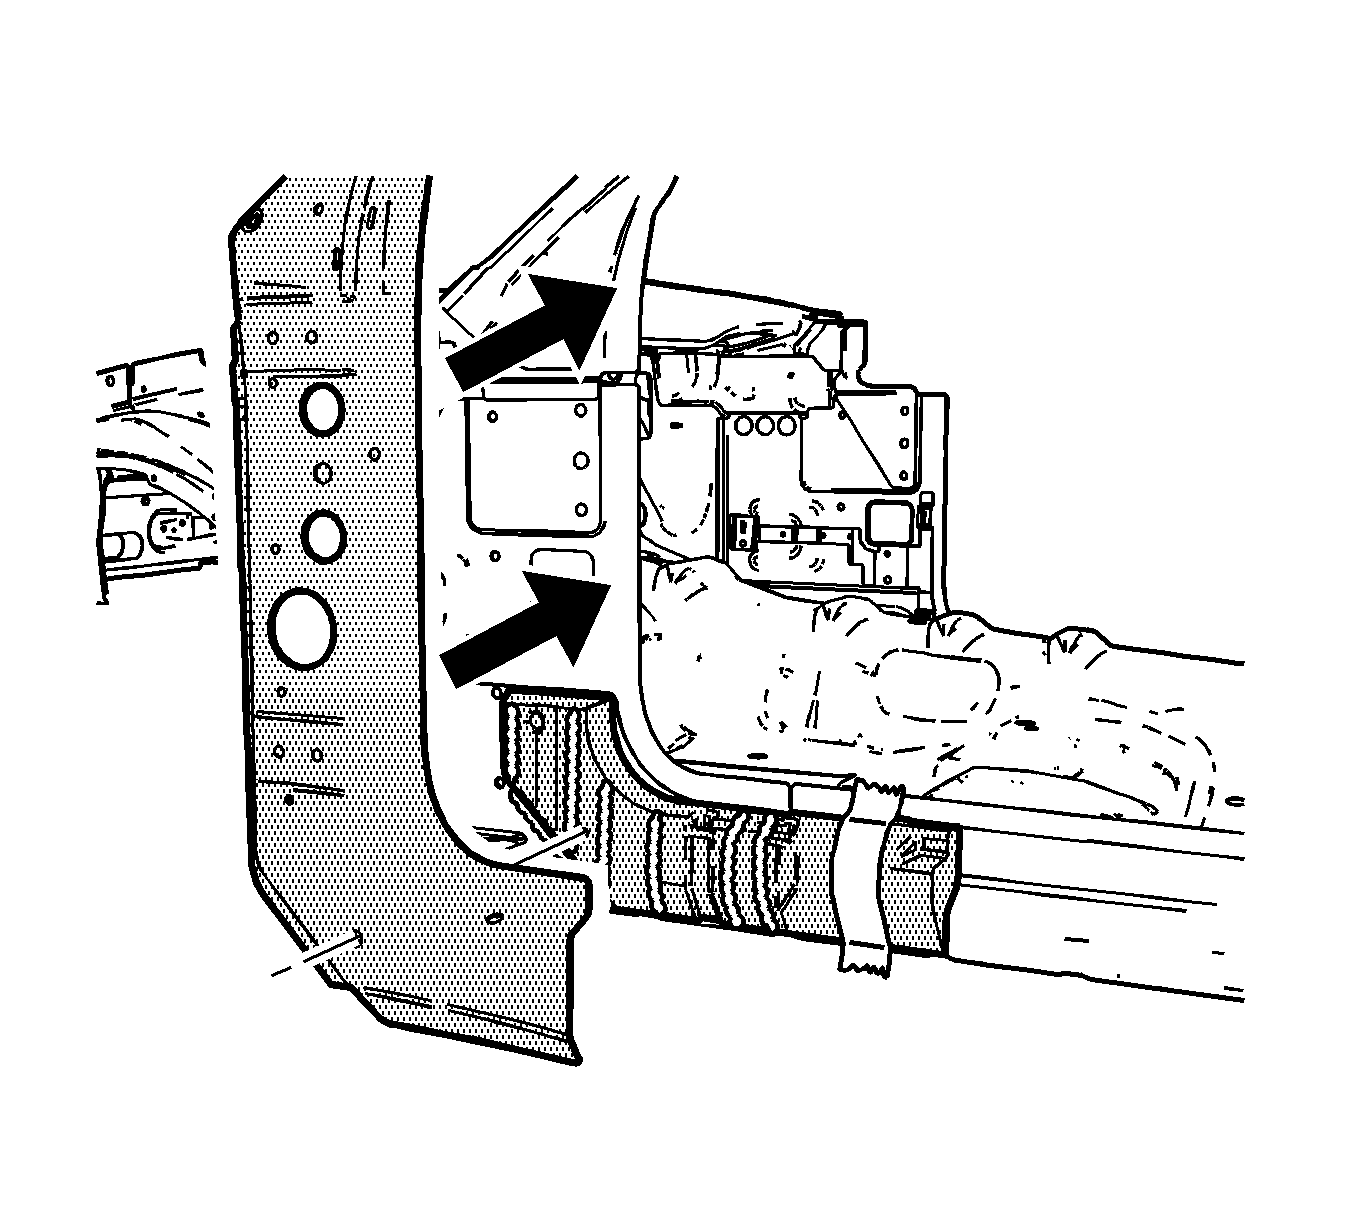
Important: Do NOT pull the inner hinge pillar reinforcement apart from the structural foam reinforcement after the parts have been joined together. Slide the reinforcements from side to side, or up and down, for proper alignment.
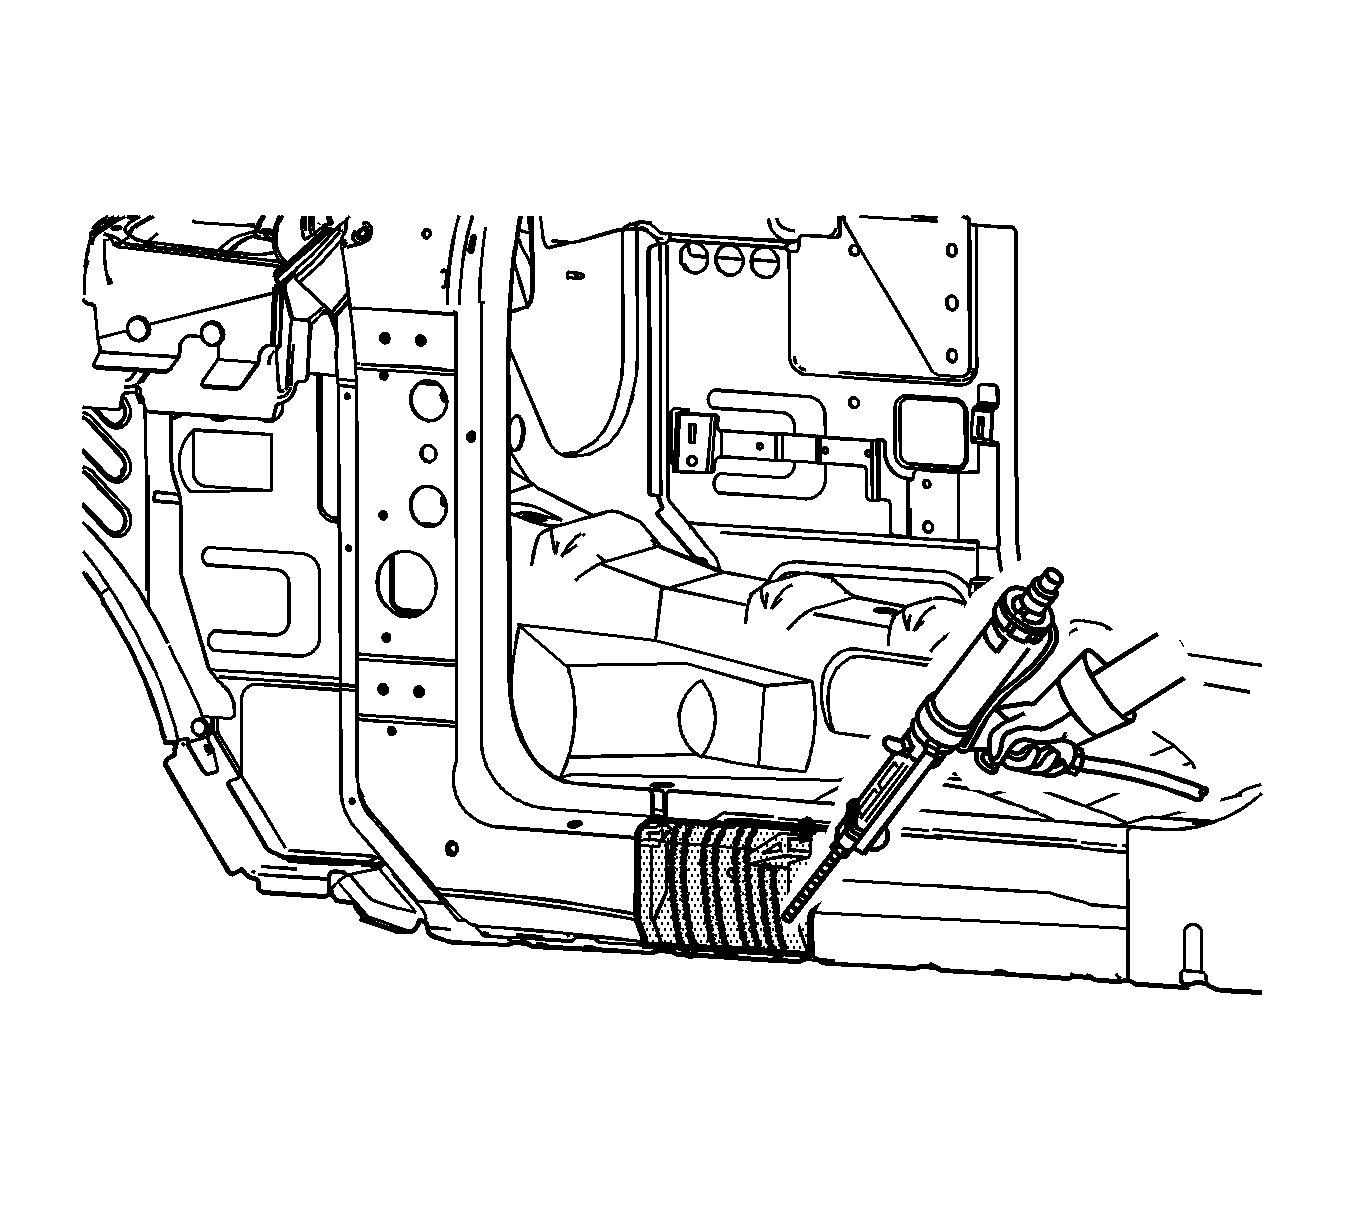
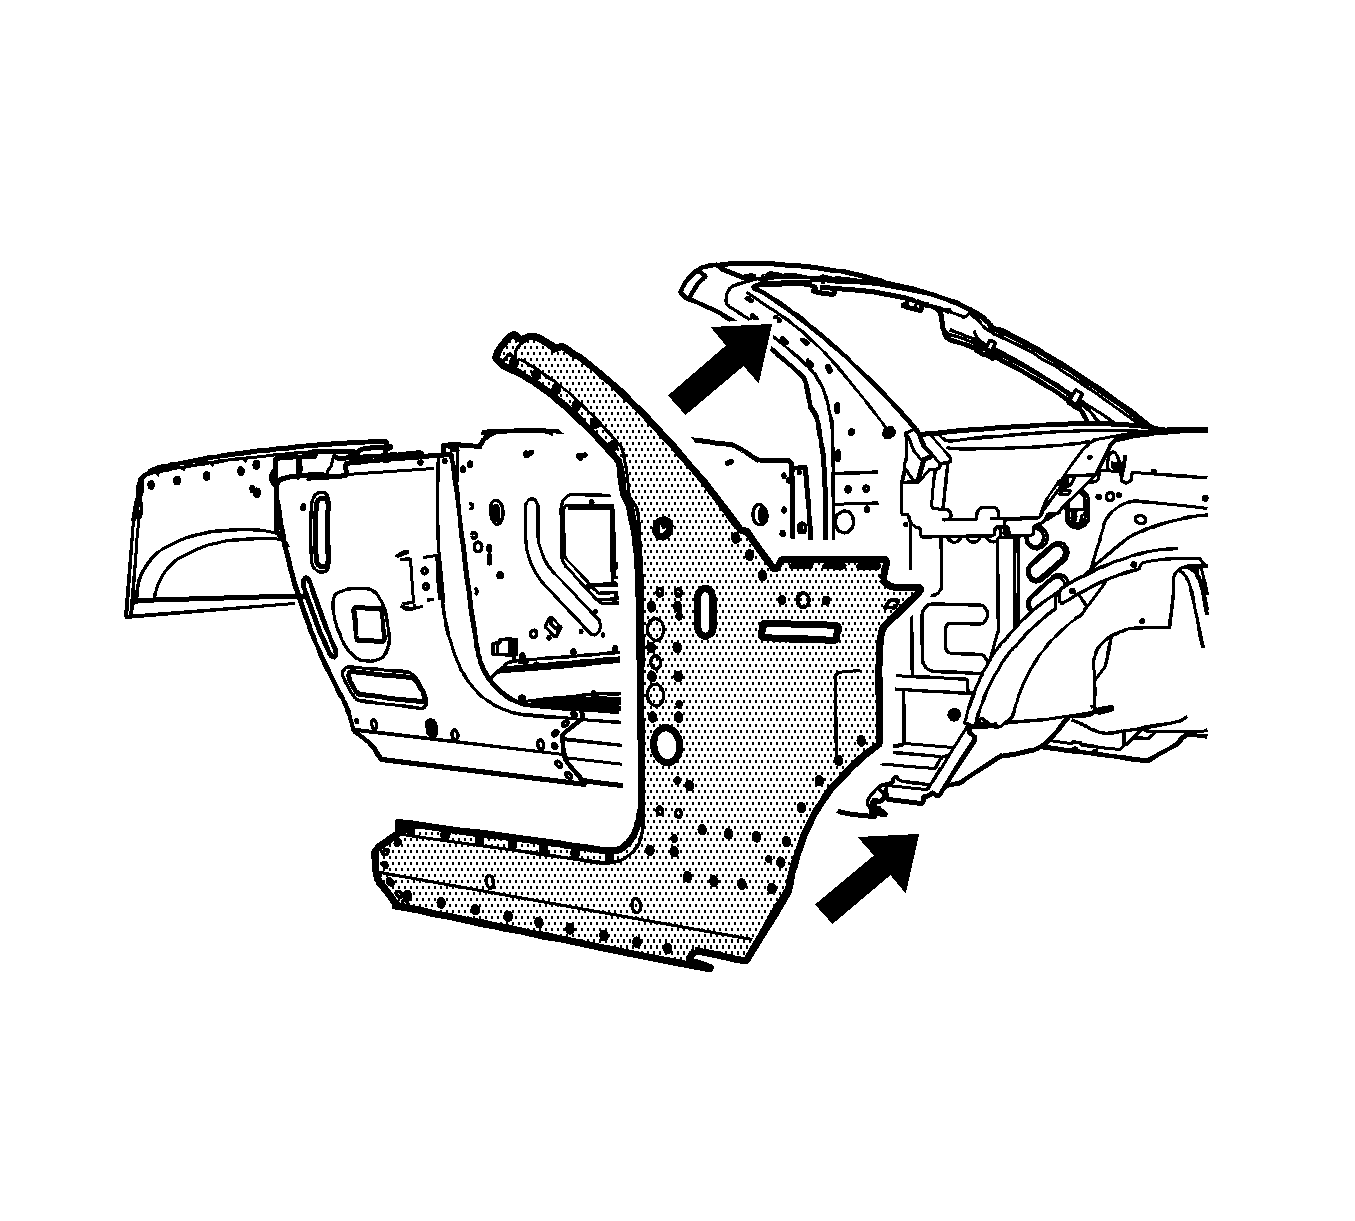
Important: Do NOT pull the outer body side assembly apart from the structural foam reinforcement after the parts have been joined together. Slide the outer panel from side to side, or up and down, for proper alignment.
