For 1990-2009 cars only
Removal Procedure
- Raise the vehicle. Refer to Lifting and Jacking the Vehicle.
- Remove the transfer case shields. Refer to Shield Replacement.
- Remove the front propeller shaft. Refer to Front Propeller Shaft Replacement.
- Remove the rear propeller shaft. Refer to One-Piece Propeller Shaft Replacement or Two-Piece Propeller Shaft Replacement.
- Remove the shift rod from the transfer case. Refer to Shift Lever Replacement - On Vehicle.
- Disconnect the vehicle speed sensor electrical connectors.
- Disconnect any wiring harness from the transfer case.
- Support the transfer case with a transmission jack.
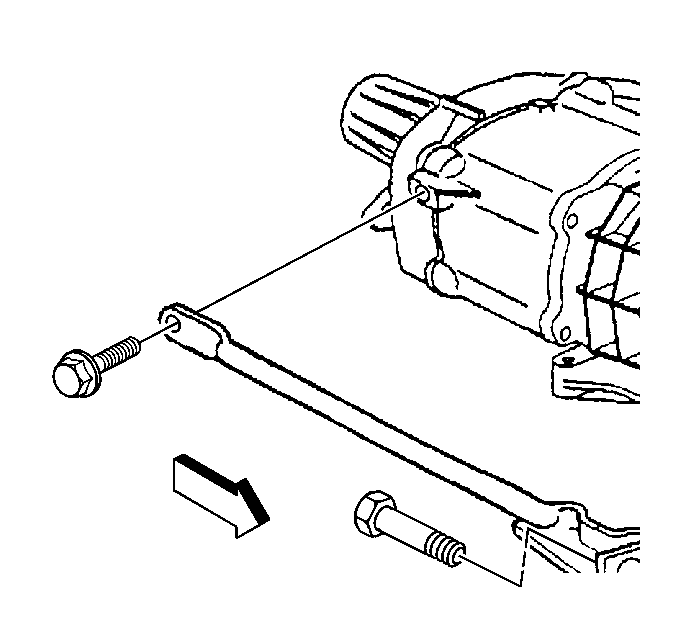
- If equipped with a NV3500 manual transmission, remove the bolt securing the left side support brace to the transmission.
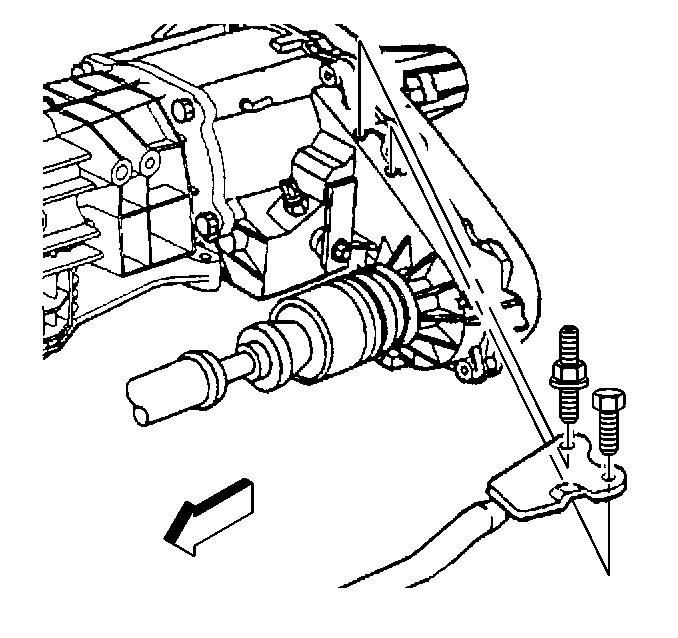
- If equipped with a NV3500 manual transmission, remove the bolt and stud securing the left side support brace to the transfer case.
- If equipped with a NV3500 manual transmission, remove the 2 bolts securing the right side support brace to the transmission and transfer case.
- For vehicles equipped with a manual transmission, remove the 6 nuts securing the transfer case and bracket to the transmission.
- Remove the transfer case.
- For vehicles equipped with a automatic transmission, remove the 6 nuts securing the transfer case and bracket to the transmission adaptor.
- Remove the transfer case.
- Remove and discard the gasket.
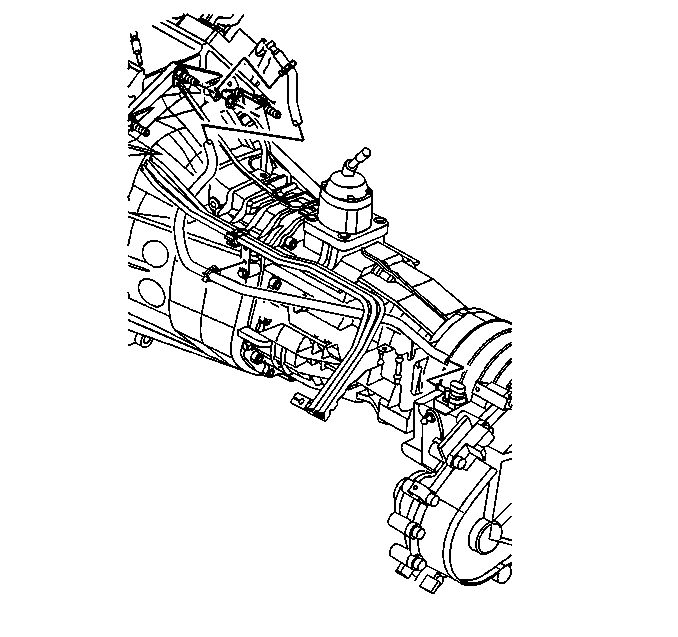
Remove the vent hose from the transfer case.
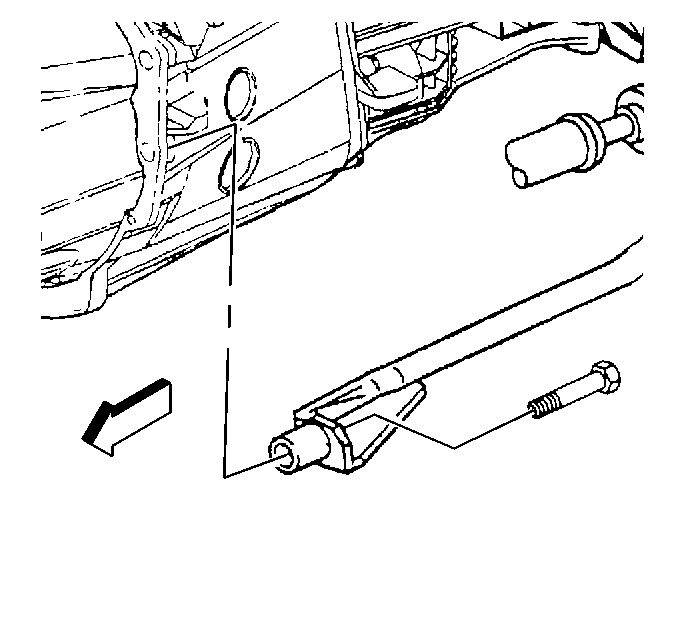
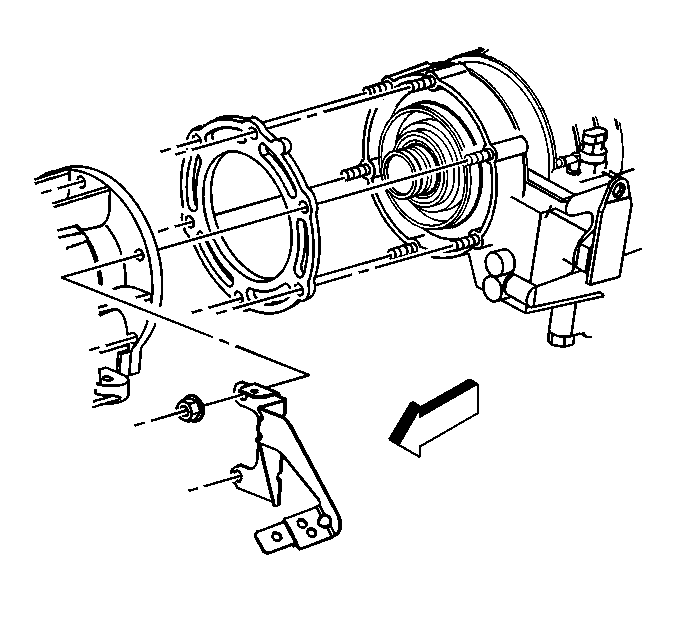
| • | Start by pulling the transfer case straight back from the transmission. |
| • | After the transfer case is pulled out from the transmission turn and lower the transfer case. |
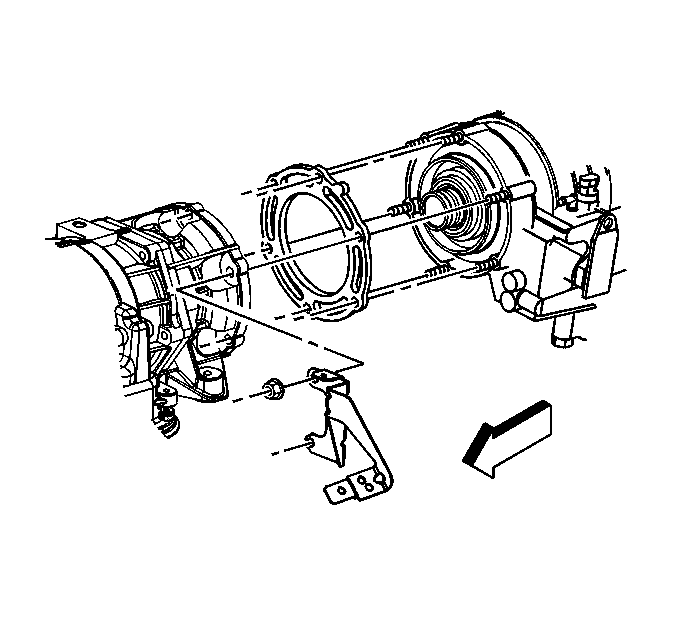
| • | Start by pulling the transfer case straight back from the transmission. |
| • | After the transfer case is pulled out from the transmission turn and lower the transfer case. |
Installation Procedure
- Apply GM /P/N 12345879 (Canadian P/N 10953511) or equivalent lubricant meeting GM Specification 9985830 to the input shaft splines.
- Install a new gasket to the transmission. Use Teflon pipe sealant GM P/N 12346004 in order to hold the gasket in place.
- Raise and position the transfer case to the vehicle
- For vehicles equipped with a automatic transmission, install the 6 nuts securing the transfer case and bracket to the transmission adaptor.
- For vehicles equipped with a manual transmission, install the 6 nuts securing the transfer case and bracket to the transmission.
- If equipped with a NVG 261 manual transmission, install the bolt securing the left side support brace to the transmission.
- If equipped with a NVG 261 manual transmission, Install the bolt and stud securing the left side support brace to the transfer case.
- If equipped with a NVG 261 manual transmission, install the 2 bolts securing the right side support brace to the transmission and transfer case.
- Install the vent hose to the transfer case.
- Check the transfer case oil level. Refer to Oil Replacement.
- Connect the speed sensor electrical connectors.
- Connect wiring harness to the transfer case.
- Install the shift rod to the transfer case. Refer to Shift Lever Replacement - On Vehicle.
- Install the rear propeller shaft. Refer to One-Piece Propeller Shaft Replacement or Two-Piece Propeller Shaft Replacement.
- Install the front propeller shaft. Refer to Front Propeller Shaft Replacement.
- Install the transfer case shields. Refer to Shield Replacement.
- Lower the vehicle.
Notice: Refer to Fastener Notice in the Preface section.

Tighten
Tighten the nuts to 50 N·m (37 lb ft).

Tighten
Tighten the nuts to 50 N·m (37 lb ft).

Tighten
Tighten the bolt to 50 N·m (37 lb ft).

Tighten
Tighten the bolt and stud to 50 N·m (37 lb ft).

Tighten
Tighten the bolts to 50 N·m (37 lb ft).

