For 1990-2009 cars only
Removal Procedure
- Disconnect the negative battery cable.
- Remove the engine front cover. Refer to Engine Front Cover Replacement .
- Remove the spark plugs. Refer to Spark Plug Replacement in Engine Controls - 2.5L.
- Remove the left secondary timing chain. Refer to Secondary Timing Chain Replacement - Left Side .
- Remove the primary timing chain and right sprocket. Refer to Primary Timing Chain Replacement .
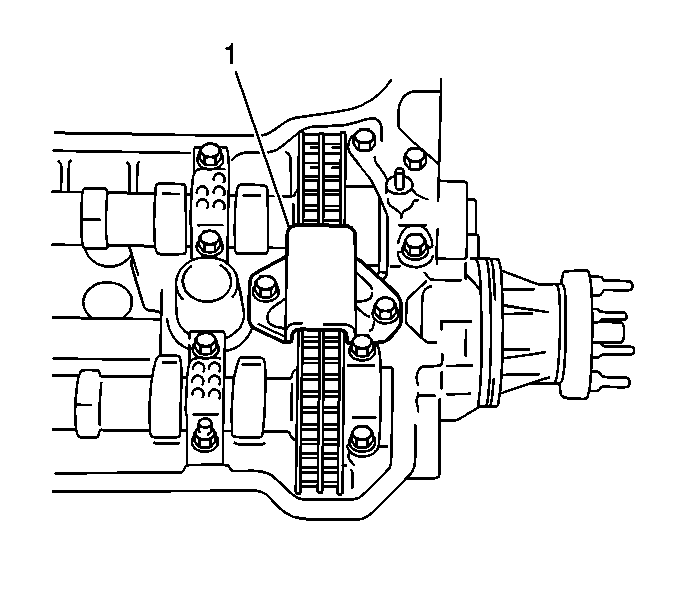
- Remove the 2 bolts and the timing chain guide (1).
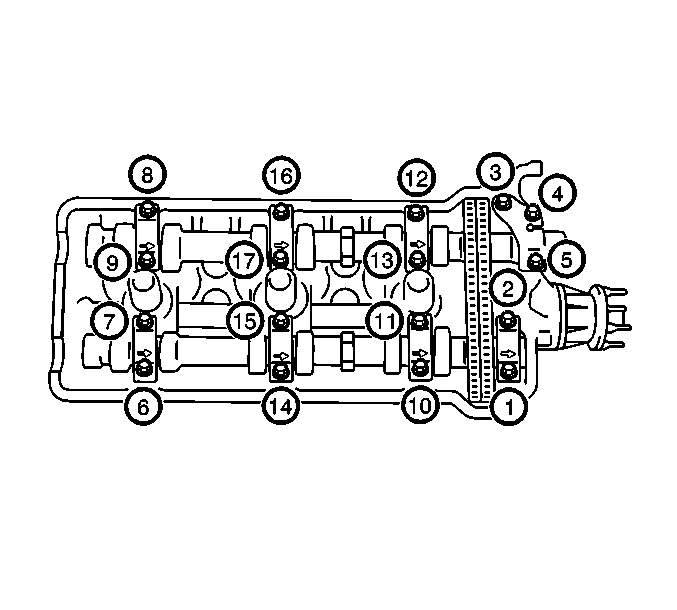
- Remove the camshaft bearing cap bolts in the proper sequence.
- Remove the camshaft bearing caps.
- Remove the camshafts and secondary timing chain as a set.
Caution: Unless directed otherwise, the ignition and start switch must be in the OFF or LOCK position, and all electrical loads must be OFF before servicing any electrical component. Disconnect the negative battery cable to prevent an electrical spark should a tool or equipment come in contact with an exposed electrical terminal. Failure to follow these precautions may result in personal injury and/or damage to the vehicle or its components.
Installation Procedure
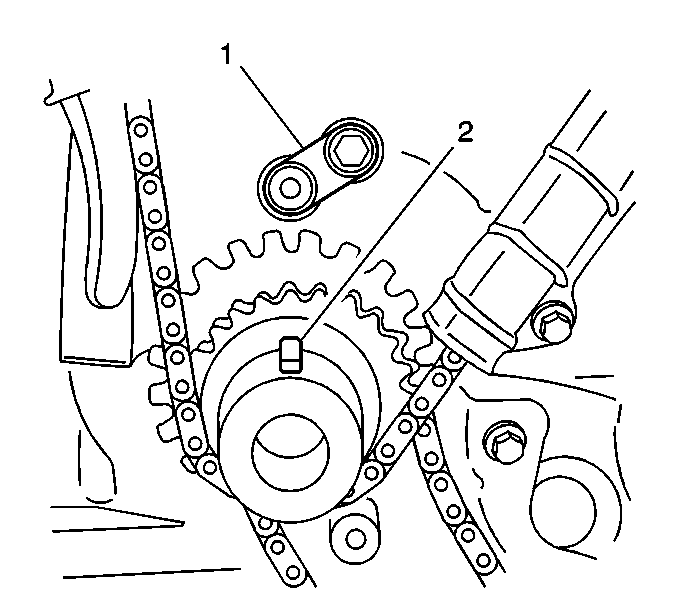
- Verify that the keyway on the crankshaft (2) is properly positioned.
- Apply oil to the camshaft lobes and journals.
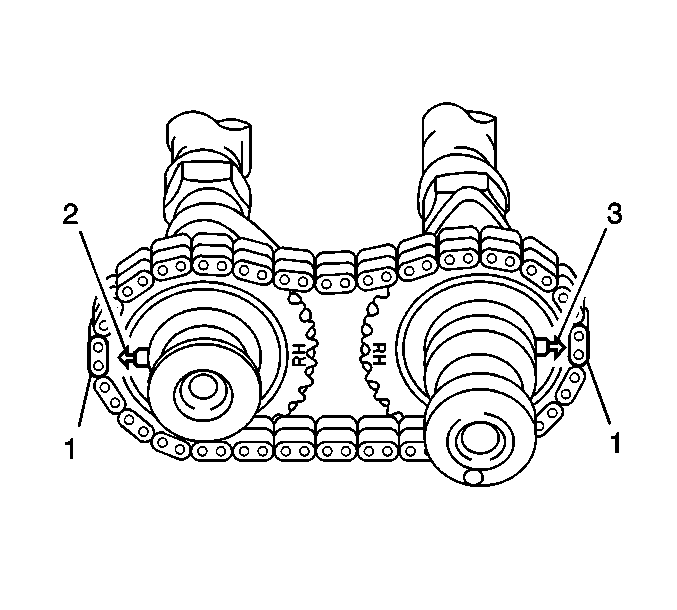
- Install the right timing chain to the camshaft sprockets by aligning the silver or yellow links (1) with the marks (2,3) on the camshaft sprockets.
- Install the camshafts with the timing chain to the cylinder head.
- Install the dowel pins (2) to the cylinder head.
- Apply oil to the camshaft bearing cap bolts.
- Install the camshaft bearing caps. The caps are marked intake or exhaust (1), position away from the timing chain (2), and direction toward the timing chain (3).
- Tighten the camshaft bearing caps.
- Install the right secondary timing chain guide (1). Secure with the 2 bolts.
- Install the right sprocket and primary timing chain. Refer to Primary Timing Chain Replacement .
- Install the left secondary timing chain. Refer to Secondary Timing Chain Replacement - Left Side .
- Install the engine front cover. Refer to Engine Front Cover Replacement .
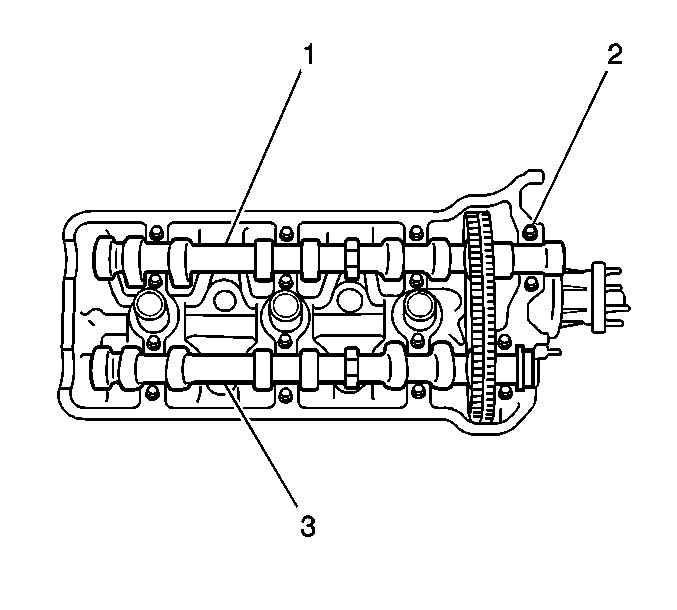
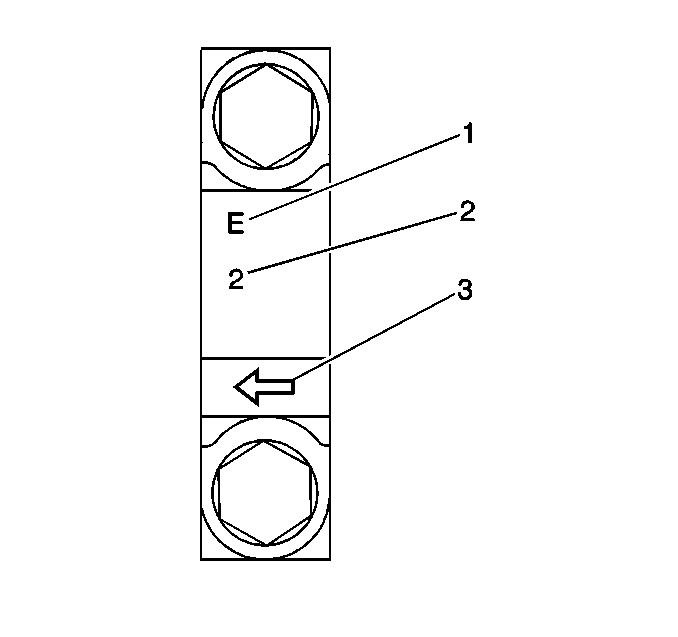
Notice: Avoid installing the bearing caps incorrectly. Cylinder head and camshaft damage may result.
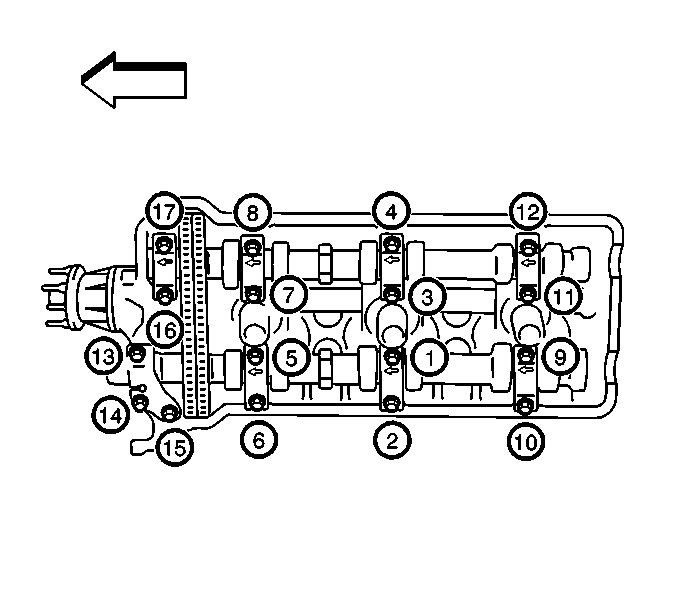
Tighten
Tighten the camshaft bearing caps in 3 progressive steps in the sequence shown
to 12 N·m (8.5 lb ft).

Tighten
Tighten the bolts to 11 N·m (7.5 lb ft).
