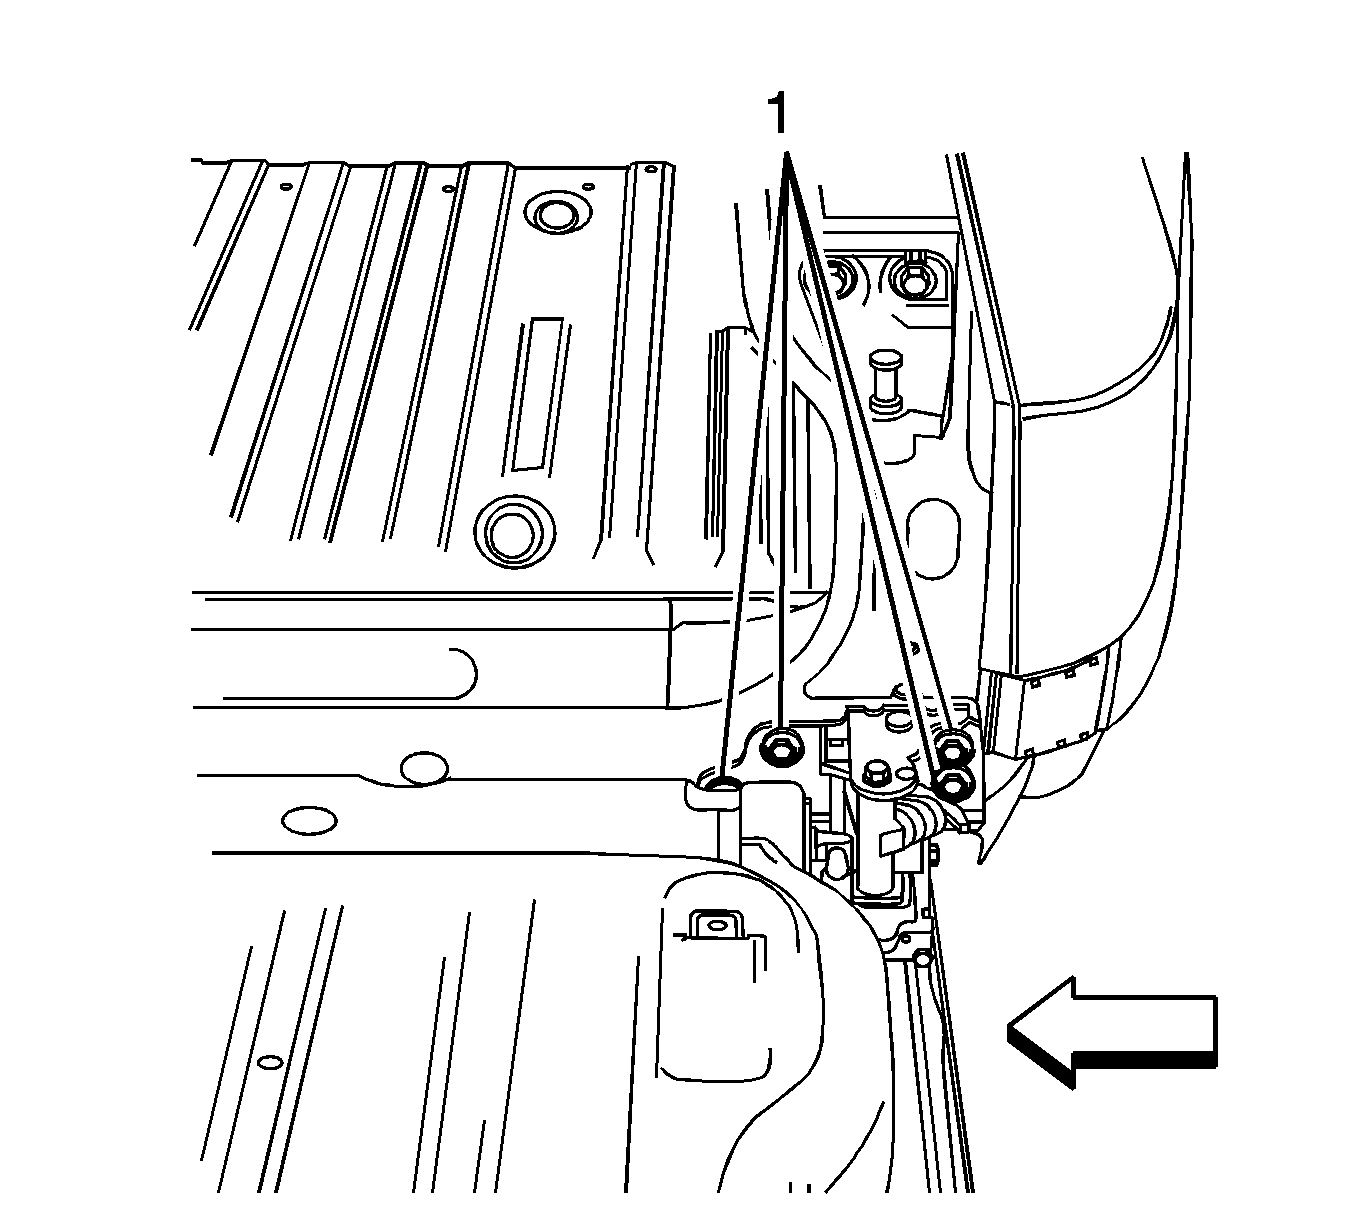
- Adjust the cross car position at the endgate.
| 1.1. | Open the endgate (drop position). |
| 1.2. | Loosen the bolts (1) retaining the endgate hinge to the body. |
Notice: Refer to Fastener Notice in the Preface section.
| 1.3. | Adjust the endgate position to center the endgate in the body opening. |
Tighten
Tighten the endgate hinge bolts to 25 N·m
(18 lb ft).
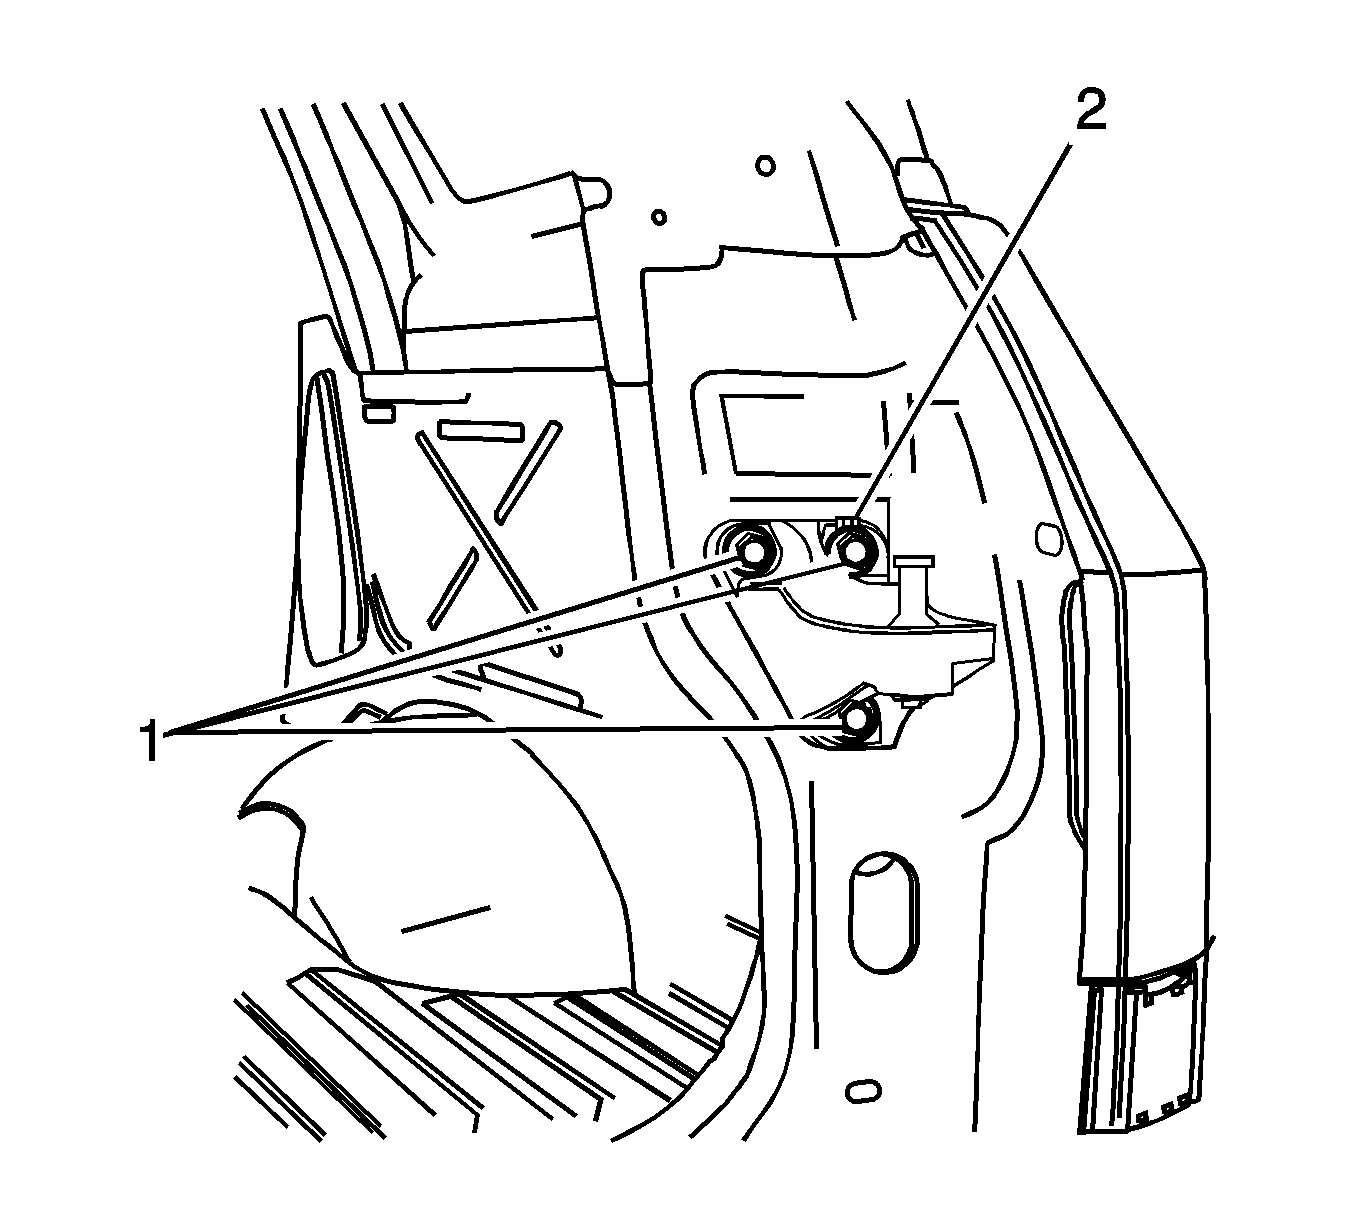
- Adjust the right upper striker position.
| 2.1. | Loose the bolts (1) retaining the right upper striker. |
| 2.2. | Carefully close the endgate to center the striker in the latch opening. |
| 2.3. | Open the endgate (drop position). |
| 2.4. | Note the position of the right upper striker adjustment marks (2). |
| 2.5. | Adjust the kick-up position of the right upper striker by moving the right
upper striker outboard in small increments until the left lower latch engages the
latch smoothly when the gate is swung closed. |
| 2.6. | The in/out position of the right upper striker can be adjusted by adding
or removing shims, GM P/N 15077306, as necessary. |
| 2.7. | Tighten the right upper striker bolts. |
Tighten
Tighten the right upper striker bolts to 25 N·m
(18 lb ft).
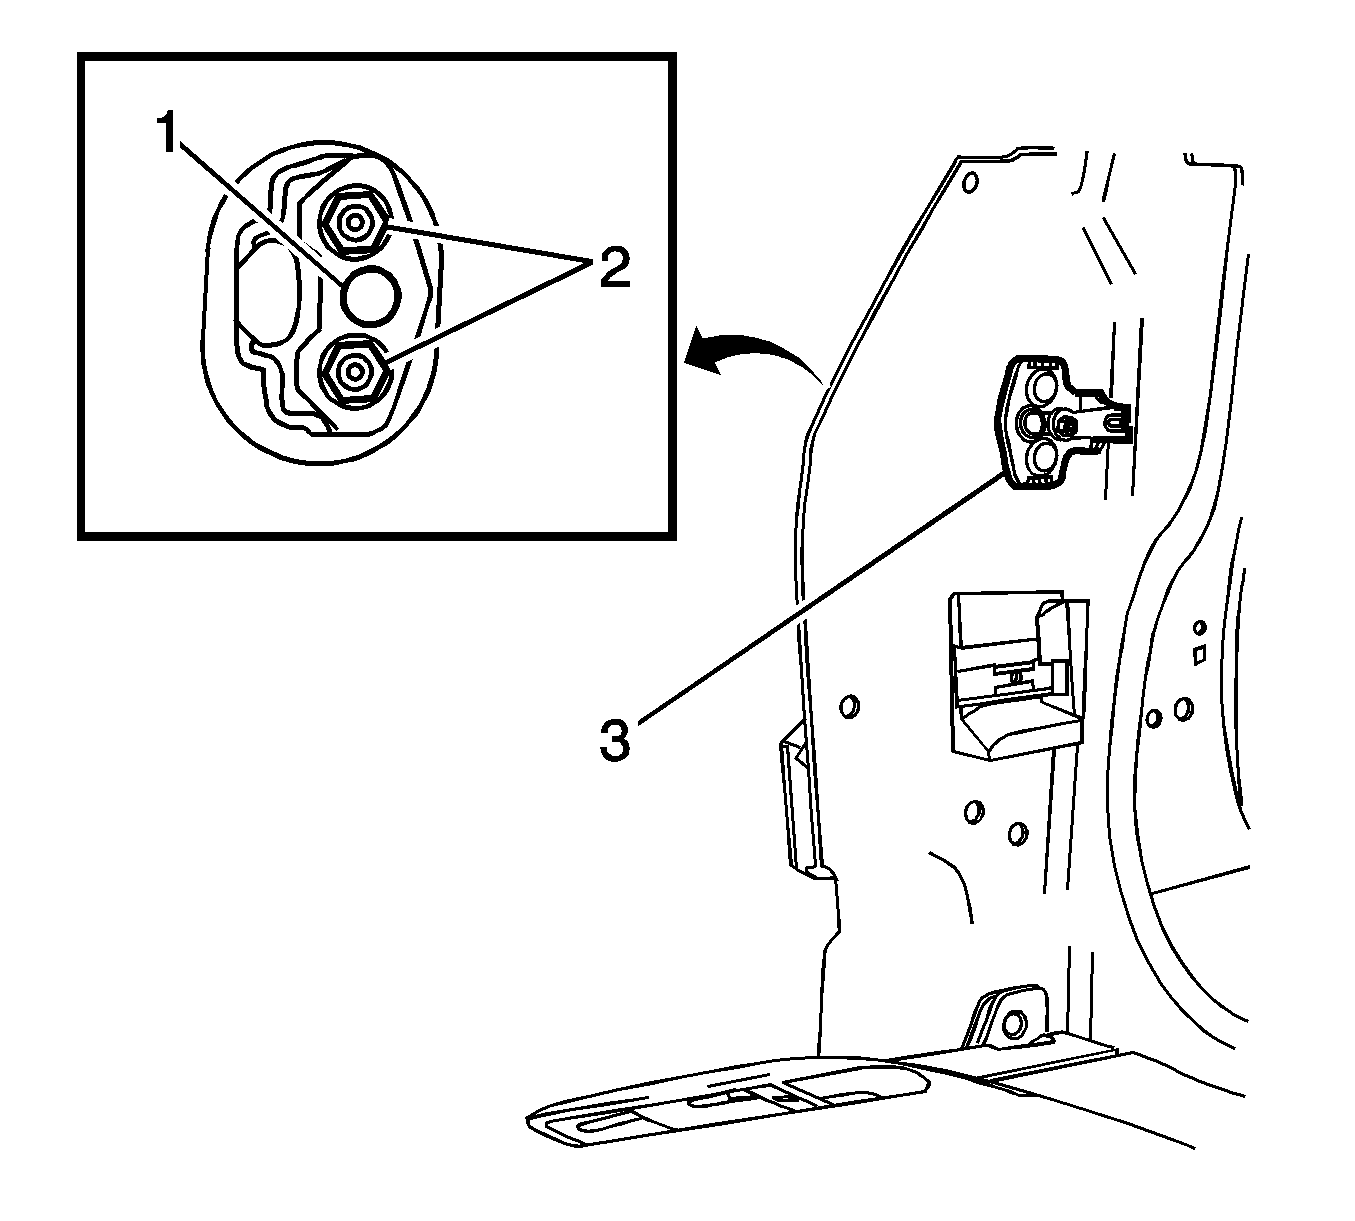
- Adjust the left upper striker position.
| 3.1. | Open the endgate (drop position). |
| 3.4. | Loosen the nuts (2) retaining the left upper striker (3)
to the body. |
| 3.5. | The in/out adjustment of the left upper striker can be adjusted by carefully
bending the bendable striker plate (1) in/out as necessary. |
| 3.6. | Carefully close the endgate to center the left upper striker to the latch. |
| 3.7. | Tighten the nuts retaining the left upper striker to the body. |
Tighten
Tighten the nuts to 25 N·m (18 lb ft).
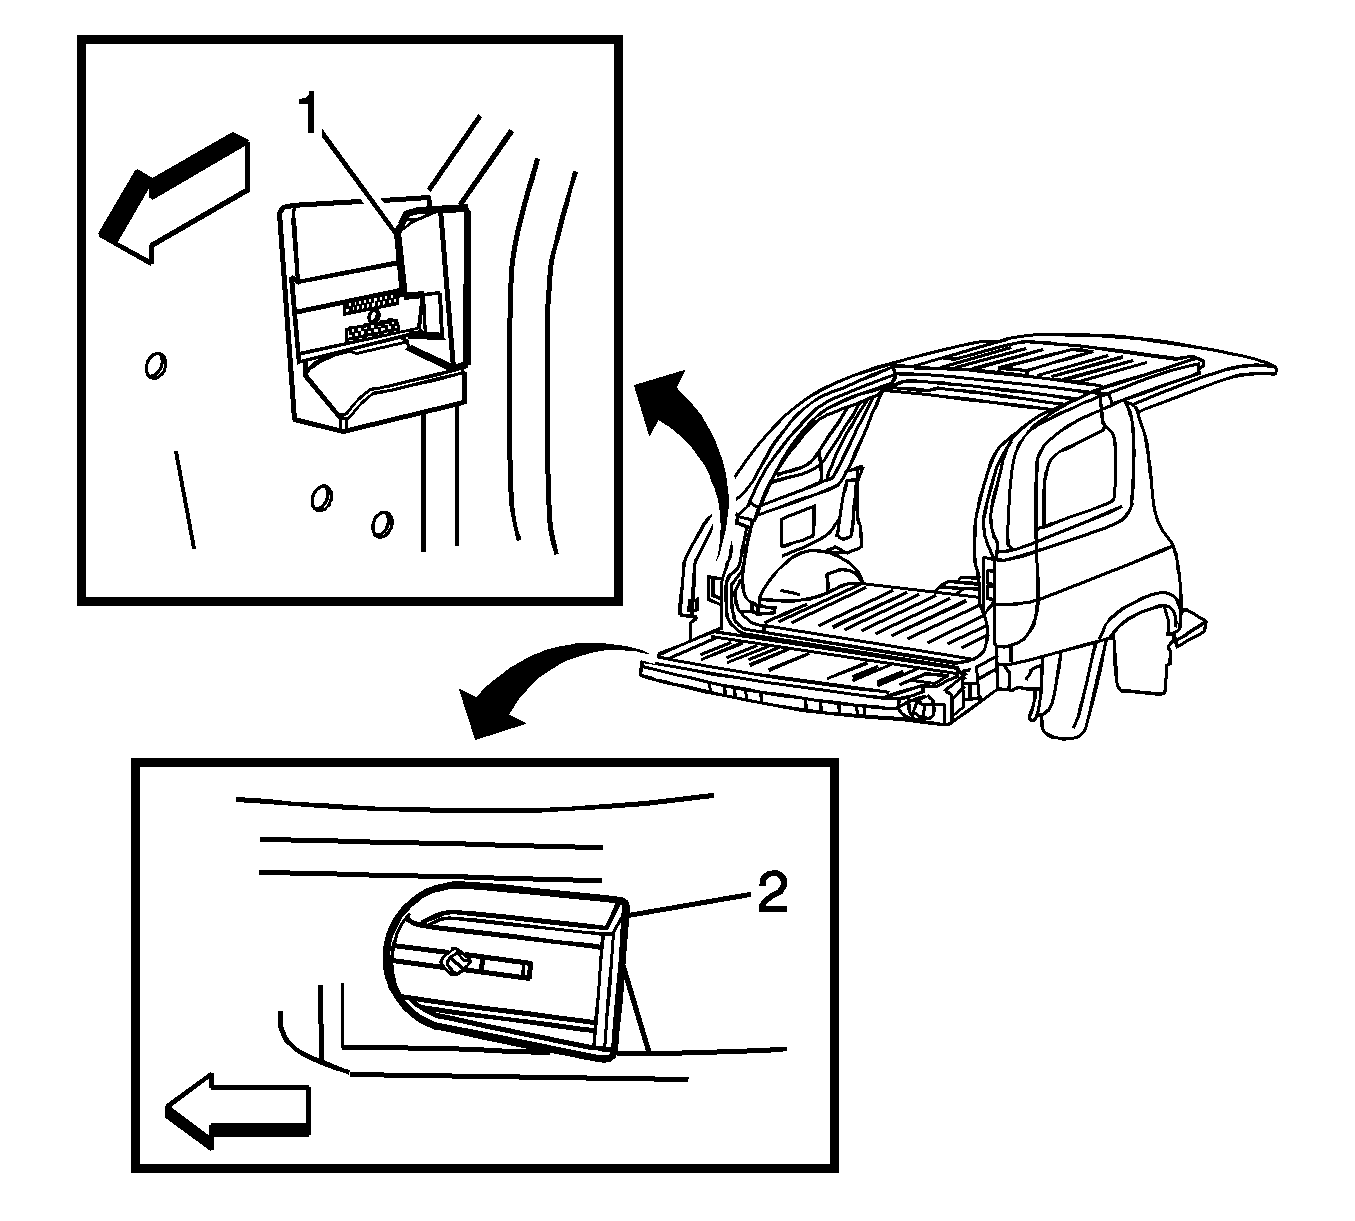
- Adjust the endgate wedges.
| 4.1. | Open the endgate (drop position). |
| 4.2. | Loosen the screws on both the endgate mounted wedge and the body mounted
wedge. |
| 4.3. | Slide the endgate mounted wedge (2) fully forward. |
| 4.4. | Slide the body mounted wedge (1) fully rearward. |
| 4.5. | Close the endgate to set the endgate wedge positions. |
| 4.7. | Tighten the screws on both the endgate mounted wedge and the body mounted
wedge. |
Tighten
Tighten the endgate wedge to 10 N·m
(89 lb in).
- Inspect and adjust the endgate window. Refer to
Endgate Window Cross Car Adjustment
, to
Endgate Window Fore/Aft Adjustment
and to
Endgate Window Up/Down Adjustment
.
