Removal Procedure
- Disconnect the battery negative cable.
- Disable the SIR. Refer to Disabling the SIR System .
- Remove the front seats. Refer to Front Seat Replacement - Bucket in Seats.
- If replacing the IP harness on a TrailBlazer, Envoy or Bravada, remove the rear seat cushions. Refer to Rear Seat Cushion Replacement in Seats
- If replacing the IP harness on TrailBlazer EXT or Envoy XL, remove the second row seats. Refer to Rear Seat Replacement in Seats
- Remove the center console. Refer to Console Replacement
- Remove the instrument panel (IP). Refer to Instrument Panel Assembly Replacement .
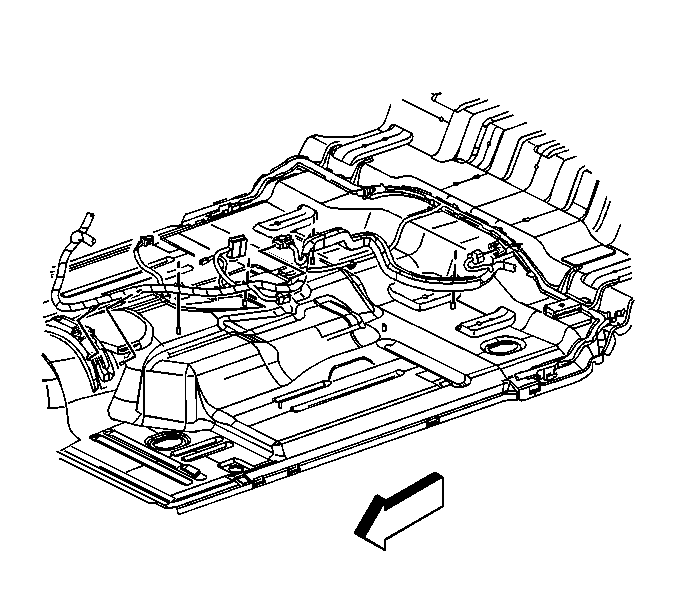
- Fold the front portion of the rear carpet in order to reveal the IP harness connected to the rear electrical center. Refer to Rear Floor Panel Carpet Replacement in Interior Trim.
- Remove the IP harness from the rear electrical center. Refer to Rear Electrical Center or Junction Block Replacement in Wiring Systems.
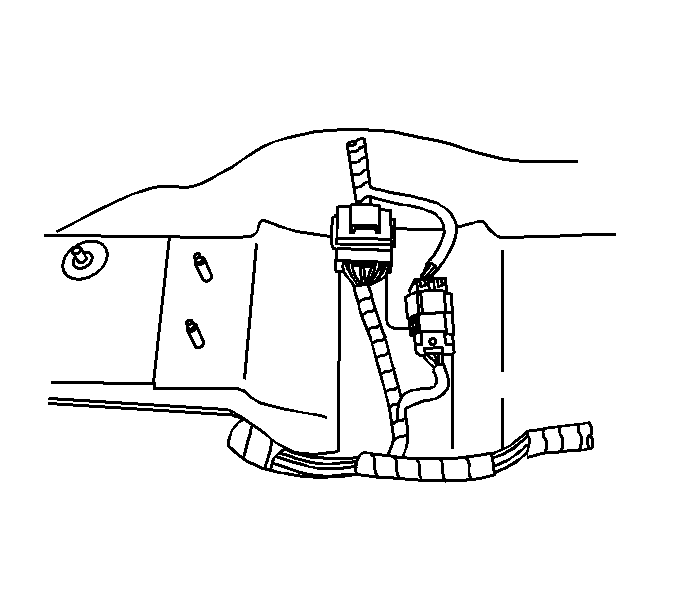
- Disconnect the inline IP harness electrical connectors from the body wiring harness electrical connector.
- If replacing the IP harness on a TrailBlazer, Envoy or Bravada, remove the IP harness electrical connectors from the cellular communication Module. Refer to Communication Interface Module Replacement in Cellular Communication.
- If replacing the IP harness on a TrailBlazer EXT or Envoy XL, disconnect the two inline IP wire harness electrical connectors from the body harness.
- Remove the HVAC support bracket from the IP substrate. Refer to Instrument Panel Carrier Replacement .
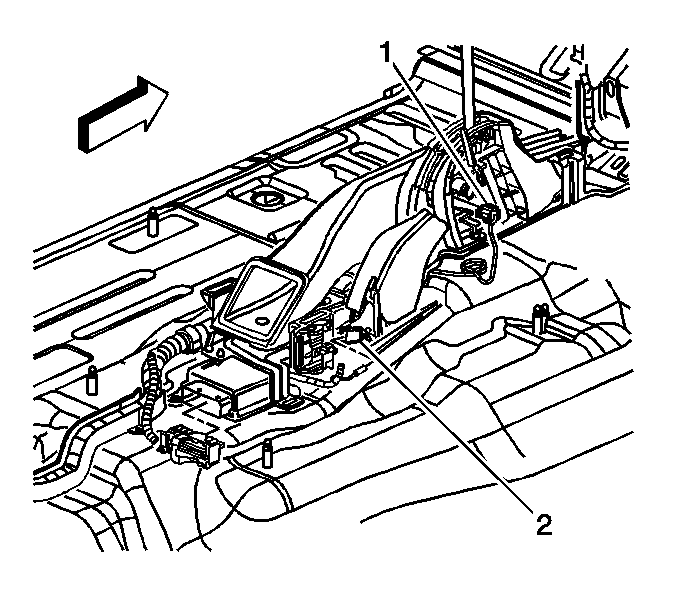
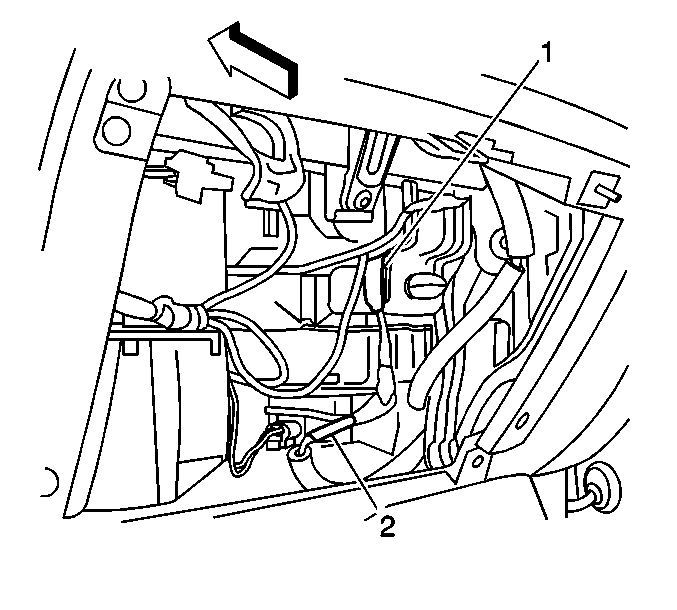
- Disconnect the park brake electrical connector (2).
- Disconnect the automatic transmission shift interlock electrical connector (1).
- Disconnect the sensing diagnostic module (SDM) electrical connectors.
- Disconnect the 10-way in line electrical connector located near the SDM.
- Disconnect the 4-way in line electrical connector located near the SDM.
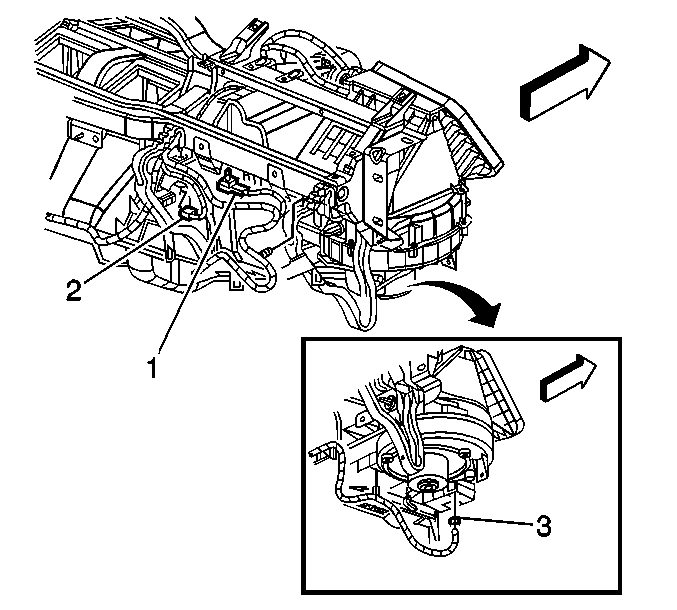
- Disconnect the electrical connector (3) from the HVAC evaporator blower motor resister pack.
- Disconnect the electrical connector (2) from the passenger temperature valve.
- If equipped, release the rosebud that retains the theft deterrent shock sensor to the IP support bracket.
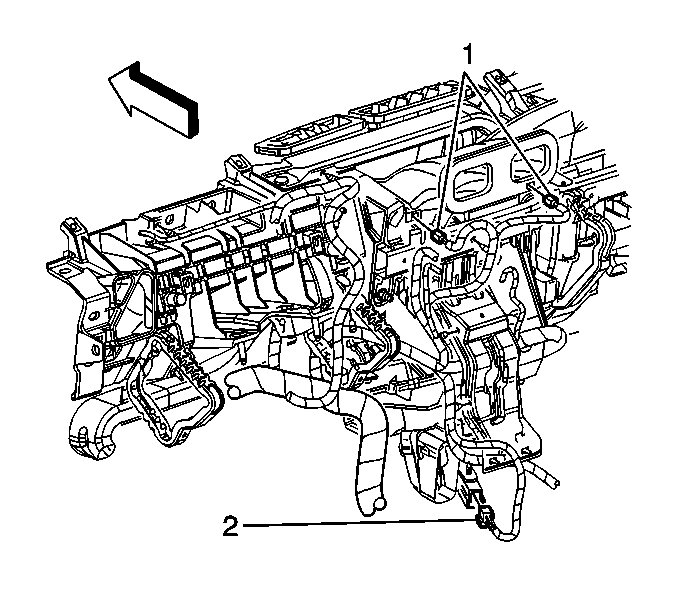
- Disconnect the SIR electrical connector (1).
- Remove the splice pack retaining bolt located at the front of the shift lever bracket.
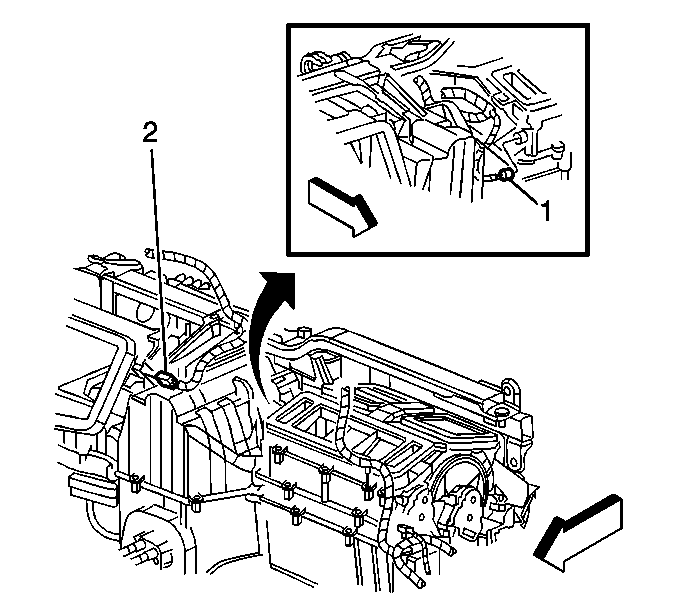
- Disconnect the headliner harness electrical connector (1) and diversity antenna coax cable connector (2) located near the HVAC evaporator blower motor.
- Disconnect the electrical connectors (1) from the discharge air temperature sensors.
- Disconnect the electrical connector (2) from the auxiliary blower motor.
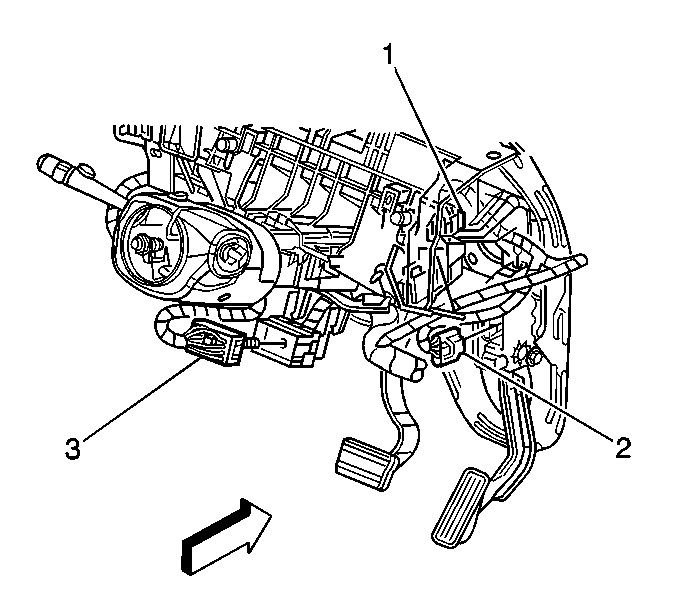
- Disconnect the electrical connector (2) from the accelerator pedal sensor.
- Disconnect the electrical connector from the stop lamp switch (1).
- Remove the connector retaining bolt and disconnect the electrical connector (3) from the steering column.
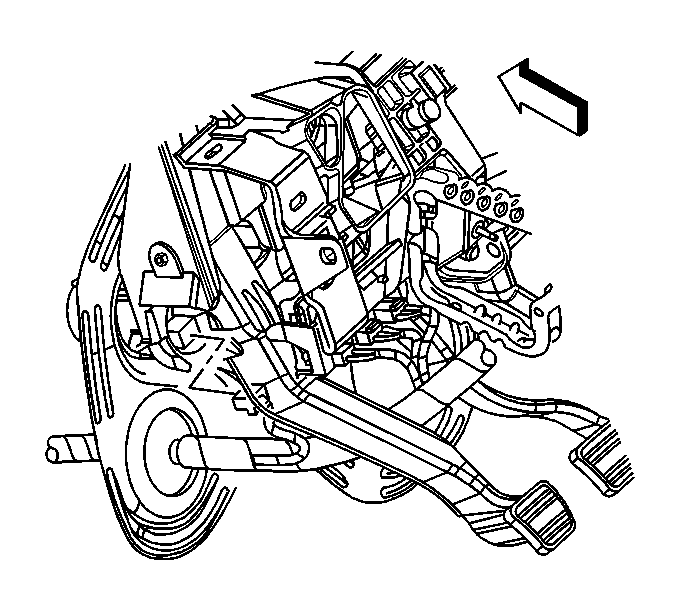
- If equipped, disconnect the electrical connector from the clutch pedal switch.
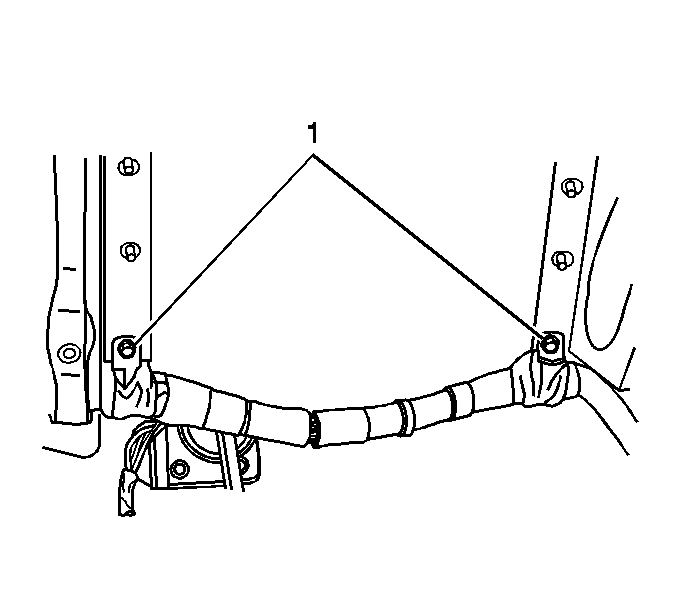
- Remove the bolts (1) that retain the IP wire harness to the left IP support bracket.
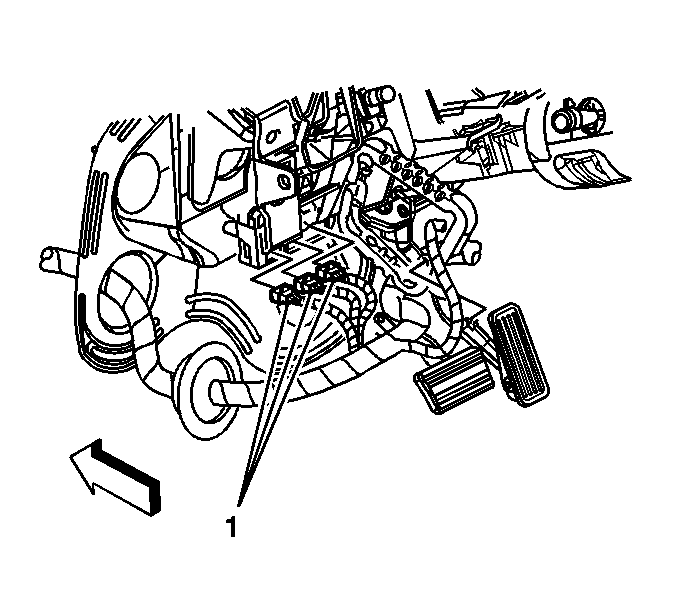
- Disconnect the electrical connectors (1) from the transfer case shift control module, located near the left side of the steering wheel support bracket.
- Partially remove the HVAC module assembly in order to gain access to the remaining electrical connectors. Refer to HVAC Module Assembly Replacement in Heating Ventilation and Air Conditioning.
- Disconnect the electrical connector (1) from the HVAC discharge air temperature sensor.
- Disconnect the air inlet electrical connector (2) from the HVAC actuator.
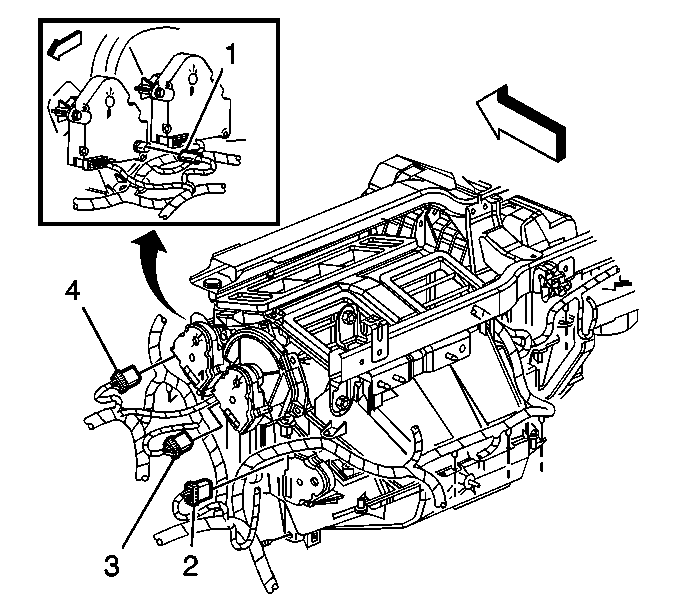
- Disconnect the defroster (4), air conditioning (3), and driver's side temperature valve (2) electrical connectors from the HVAC actuators.
- Disconnect the discharge air temperature electrical connector (1) from the HVAC actuator.
- Open the hood.
- Remove the air inlet grille in order to gain access to the windshield wiper motor. Refer to Air Inlet Grille Panel Replacement in Wipers/Washer Systems.
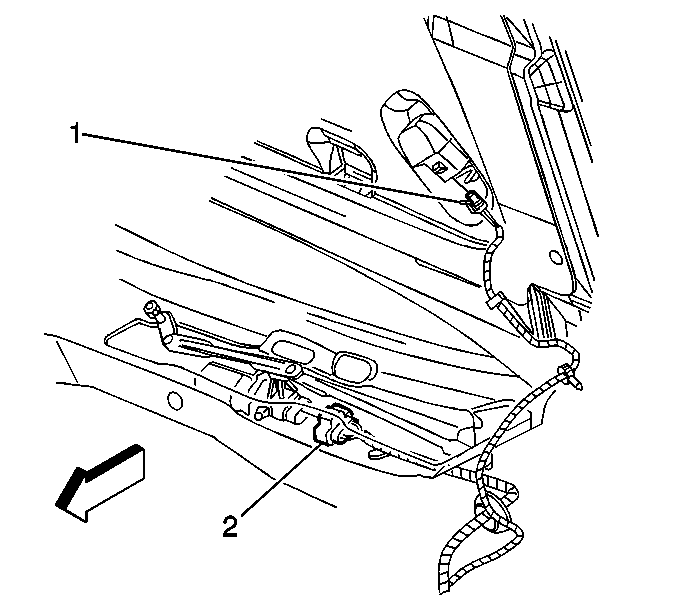
- Remove the IP harness retaining clip from the plenum weld stud.
- Disconnect the IP harness electrical connector (2) from the windshield wiper motor.
- Remove the clip that retains the IP harness to the hood hinge.
- Disconnect the IP harness electrical connector (1) from the underhood lamp harness.
- Disconnect the IP harness inline electrical connector (1) from the forward lamp harness.
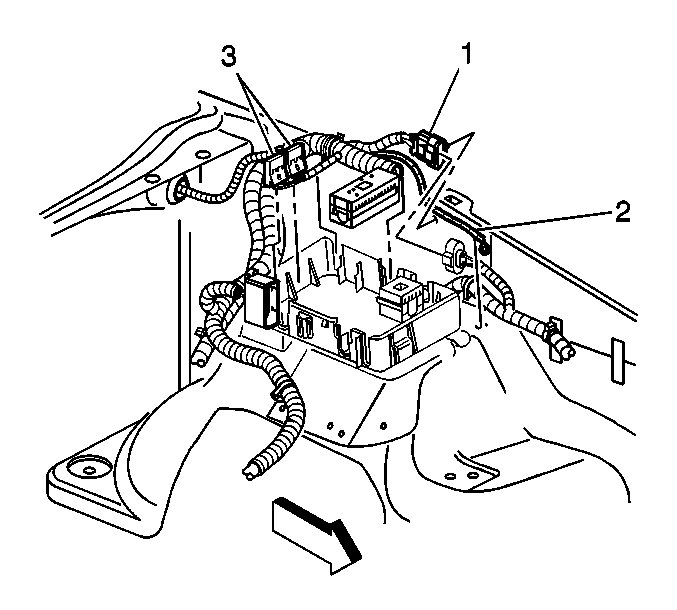
- Disconnect the battery positive cable terminal (2) from the underhood junction block.
- Disconnect the 2 IP harness two-way electrical connectors (3) from the underhood junction block base.
- Disconnect the IP harness inline electrical connector from the chassis inline wiring harness.
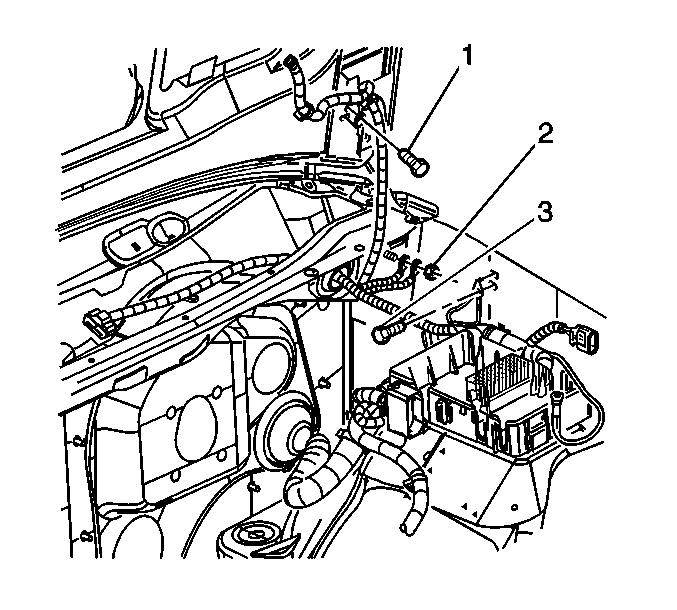
- Remove the grounding nut (3) that retains the ground terminal to the hood.
- Remove the grounding nut (2) that retains the ground terminals to the front fender.
- Remove the grounding nut that retains the ground terminals to the weld stud located on the front plenum.
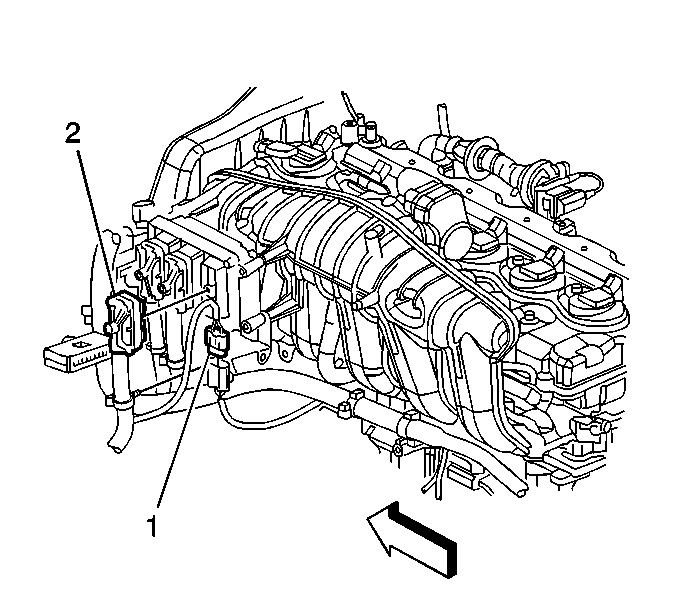
- Disconnect the IP harness electrical connector (2) from the powertrain control module.
- Disconnect the IP harness inline electrical connector (1) from the engine harness inline electrical connector.
- Remove the IP harness grommet from the bulkhead.
- Pass the exterior portion of the IP harness through the bulkhead.
- Remove the IP harness from the vehicle.
Caution: Unless directed otherwise, the ignition and start switch must be in the OFF or LOCK position, and all electrical loads must be OFF before servicing any electrical component. Disconnect the negative battery cable to prevent an electrical spark should a tool or equipment come in contact with an exposed electrical terminal. Failure to follow these precautions may result in personal injury and/or damage to the vehicle or its components.
Installation Procedure
- Position the IP harness to the vehicle.
- Pass the exterior portion of the IP harness through the bulkhead.
- Install the IP harness grommet to the bulkhead.
- Connect the IP harness inline electrical connector (1) to the engine harness inline electrical connector.
- Connect the IP harness electrical connector (2) to the powertrain control module.
- Install the grounding nut (2) that retains the ground terminals to the weld stud located on the front plenum.
- Install the grounding bolt (3) that retains the ground terminals to the front fender.
- Install the grounding bolt (1) that retains the ground terminal to the hood.
- Connect the IP harness inline electrical connector to the chassis inline wiring harness.
- Connect the 2 two-way IP harness electrical connectors (3) to the underhood junction block base.
- Connect the battery positive cable terminal (2) to the underhood junction block.
- Install the battery cable terminal nut.
- Connect the IP harness in line electrical connector (1) to the forward lamp harness.
- Connect the IP harness electrical connector (1) to the underhood lamp harness.
- Install the clip that retains the IP harness to the hood hinge.
- Connect the IP harness electrical connector (2) to the windshield wiper motor.
- Install the IP harness retaining clip to the plenum weld stud.
- Install the air inlet grille. Refer to Air Inlet Grille Panel Replacement in Wipers/Washer Systems
- Close the hood.
- Install the HVAC module assembly to the vehicle. Refer to HVAC Module Assembly Replacement in Heating Ventilation and Air Conditioning.
- Connect the discharge air temperature electrical connector (1) to the HVAC actuator.
- Connect the defroster (4), air conditioning (3), and drivers side temperature valve (2) electrical connectors to the HVAC actuators.
- Connect the air inlet electrical connector to the HVAC actuator.
- Connect the electrical connector (1) to the HVAC discharge air temperature sensor.
- Connect the electrical connectors (2) to the transfer case shift control module, located near the left side of the steering wheel support bracket.
- Install the bolts (1) that retain the IP wire harness to the IP support bracket.
- If equipped, connect the electrical connector to the clutch pedal switch.
- Connect the electrical connector (3) to the steering column.
- Install the steering column electrical connector bolt.
- Connect the electrical connector to the stop lamp switch (1).
- Connect the electrical connector (2) to the accelerator pedal sensor.
- Connect the electrical connector (2) to the floor auxiliary blower motor.
- Connect the electrical connectors (1) to the discharge air temperature sensors.
- Install the splice pack retaining bolt located at the front of the shift lever bracket.
- Connect the headliner harness electrical connector (1) and diversity antenna coax cable connector (2) located near the HVAC evaporator blower motor.
- Connect the 4-way in line electrical connector located near the SDM.
- Connect the 10-way in line electrical connector located near the SDM.
- Connect the SDM electrical connectors.
- Connect the park brake electrical connector (2).
- Connect the automatic transmission shift interlock electrical connector (1).
- Connect the SIR electrical connector (1).
- Attach the rosebud that retains the theft deterrent shock sensor to the IP support bracket, if equipped.
- Connect the electrical connector (2) to the passenger temperature valve.
- Connect the electrical connector (3) to the HVAC evaporator blower motor resister pack.
- Install the HVAC support bracket to the IP substrate. Refer to Instrument Panel Carrier Replacement .
- If replacing the IP harness on a TrailBlazer, Envoy or Bravada, install the IP harness electrical connectors to the cellular communication module. Refer to Communication Interface Module Replacement in Cellular Communications.
- Connect the inline body electrical connector from the body wiring harness electrical connector.
- If replacing the IP harness on a TrailBlazer EXT or Envoy XL, connect the two inline IP wire harness electrical connectors to the body harness.
- Pass the IP wire harnesses through the rear carpet in order to install the IP harness to the rear electrical center.
- Install the rear carpet. Refer to Rear Floor Panel Carpet Replacement in Interior Trim.
- Install the IP harness to the rear electrical center. Refer to Rear Electrical Center or Junction Block Replacement in Wiring Systems.
- Install the IP. Refer to Instrument Panel Assembly Replacement .
- Install the center console. Refer to Console Replacement .
- If replacing the IP harness on a TrailBlazer, Envoy or Bravada, install the rear seat cushions. Refer to Rear Seat Cushion Replacement in Seats .
- If replacing the IP harness on TrailBlazer EXT or Envoy XL, install the second row seats. Refer to Rear Seat Replacement in Seats
- Install the front seats. Refer to Front Seat Replacement - Bucket in Seats.
- Enable the SIR. Refer to Disabling the SIR System in SIR.
- Connect the negative battery cable. Refer to Battery Negative Cable Replacement in Engine Electrical.


Notice: Use the correct fastener in the correct location. Replacement fasteners must be the correct part number for that application. Fasteners requiring replacement or fasteners requiring the use of thread locking compound or sealant are identified in the service procedure. Do not use paints, lubricants, or corrosion inhibitors on fasteners or fastener joint surfaces unless specified. These coatings affect fastener torque and joint clamping force and may damage the fastener. Use the correct tightening sequence and specifications when installing fasteners in order to avoid damage to parts and systems.
Tighten
Tighten the nut to 10 N·m (88 lb in).
Tighten
Tighten the bolt to 10 N·m (88 lb in).
Tighten
Tighten the bolt to 10 N·m (88 lb in).


Tighten
Tighten the nut to 10 N·m (88 lb in).


Tighten
Tighten the bolts to 2.5 N·m (22 lb in).


Tighten
Tighten the bolt to 6 N·m (53 lb in).

Tighten
Tighten the bolt to 10 N·m (88 lb in).


