Diagnostic Information
The diagnostic tables and functional checks locate faulty circuits or components through logic based on the process of elimination.
The tables are prepared with the requirement that the vehicle functioned correctly at the time of assembly and that there are no multiple failures.
The ECM performs a continual self-diagnosis on certain control functions. The diagnostic procedures complement this diagnostic capability. The ECM's language for communicating the source of a malfunction is a system of Diagnostic Trouble Codes (DTCs). The DTCs are two or three digit numbers that can range from 12 to 999. When the ECM detects a malfunction, a DTC sets and the Malfunction Indicator Lamp (MIL) illuminates.
Malfunction Indicator Lamp (MIL)
This light on the instrument panel has the following functions:
| • | Informs the driver that a problem has occurred and that the owner should take the vehicle in for service as soon as reasonably possible. |
| • | Displays the DTCs stored by the ECM which helps the technician diagnose the system problems. |
| • | Indicates an Open Loop or a Closed Loop operation. |
As a bulb and system check, the light comes ON with the key ON and the engine not running. When the engine starts, the light turns OFF. If the light remains ON, the self-diagnostic system has detected a problem. If the problem goes away, the light will turn off in most cases after 10 seconds, but a DTC remains stored in the ECM.
When the light remains ON while the engine runs, or when a malfunction is suspected due to a driveability or emissions problem. Perform an On-Board Diagnostic (OBD) System Check. This check will expose malfunctions which you may not detect if other diagnostics are performed prematurely.
On-Board Diagnostic (OBD) System Check
After the visual/physical underhood inspection, the On-Board Diagnostic (OBD) system check is the starting point for all diagnostic procedures or finding the cause of an emissions test failure.
Scan Tool Diagnostic Computer
The diagnostic procedures in this manual assume the use of a scan tool. Since the scan tool, produced by Expertec, performs functions, such as, bidirectional communication that other scan tools are unable to perform it has been made an essential tool. Although, the term scan tool will continue to be used for simplicity's sake, we recommend the scan tool be used when ever possible. The scan tool owner's manual contains explicit instructions on connections and using the various scan tool functions.
The ECM can communicate a variety of information through the Data Link Connector (DLC) engine data circuit. This data, transmitted at a high frequency, requires a scan tool for interpretation.
With an understanding of the data which the scan tool displays and knowledge of the circuits involved, the scan tool can be very useful in obtaining information which would be difficult or impossible to obtain with other equipment.
Scan tools do not make the use of diagnostic tables unnecessary, nor can the scan tools indicate exactly where a problem is in a particular circuit. Diagnostic tables incorporate diagnosis procedures using a scan tool where possible and most tables require the use of a scan tool when it is applicable.
Do not use a scan tool that displays faulty data. Report the problem to the manufacturer. The use of a faulty scan tool can result in misdiagnosis and unnecessary part replacement.
The scan tool can save time in diagnosis and can prevent the replacement of good parts. The key to using the scan tool successfully for diagnosis lies in the technician's ability to understand the system being diagnosed, as well as an understanding of the scan tool's limitations.
ECM Information Modes
ECM has three modes for transmitting information. The following information will describe the system operation in each of the three modes.
Road Test (Open) Mode
On engines that can be monitored in the Open mode, certain parameters can be observed without changing the engine operating characteristics. The parameters capable of being read vary with engine families. Most scan tools are programmed so that the system will go directly into the DLC mode if the Open mode is not available.
Diagnostic (10K) Mode
When the diagnostic terminal is grounded with the ignition ON and the engine OFF, the system will enter what is called the diagnostic mode. In this mode the ECM will perform the following items:
- Display a DTC 12 by flashing the MIL.
- Display any stored DTC by flashing the MIL. Each DTC will be flashed three times, then DTC 12 will be flashed again.
- Energize all ECM controlled relays and solenoids except the fuel pump relay. This allows checking circuits which may be difficult to energize without driving the vehicle and being under particular operating conditions.
- The IAC valve moves to its fully extended position on most models, blocking the idle air passage. This is useful in checking the minimum idle speed.
In this mode, all obtainable data is readable. In this mode, the system operating characteristics are modified as follows:
| • | The Closed Loop timers are bypassed. |
| • | The ignition is advanced. |
| • | The IAC valve controls the engine idle to 1000 RPM + 50 RPM (if applicable). |
Field Service Mode
If you select this mode using a scan tool or if the diagnostic terminal is grounded with the engine running, the system enters the field service mode. In this mode, the MIL indicates whether the system is in an Open Loop or a Closed Loop. In an Open Loop the MIL flashes two and one-half times per second. In a Closed Loop the light flashes once per second. Also, in Closed Loop, the light stays OFF most of the time if the system is running lean. The MIL stays ON most of the time if the system is running rich. While the system is in field service mode, the new DTCs cannot be stored in the ECM and the Closed Loop timer is bypassed.
Reading Diagnostic Trouble Codes (DTCs)
The provision for communicating with the ECM is the Data Link Connector (DLC) located under the instrument panel. The DLC, used in the assembly plant, receives information in checking that the engine operates properly before it leaves the plant. The DTCs stored in the ECM's memory can be read either through a scan tool plugged into the DLC or by counting the number of flashes of the MIL when the diagnostic test circuit at the DLC is grounded. Ground the terminal by connecting it to the ground circuit at the DLC.
Once you have connected the diagnostic test and ground circuits, move the ignition switch to the ON position with the engine not OFF. At this point, the MIL should flash DTC 12 three times consecutively. This has the following flash sequence: flash, pause, flash--flash, long pause, flash, pause, flash--flash, long pause, flash, pause, flash--flash. DTC 12 indicates that the ECM's diagnostic system is operating. If the scan tool does not indicated a DTC 12, a problem exists within the diagnostic system. Consult the appropriate diagnostic table.
Following the output of DTC 12, the MIL indicates a DTC three times if a DTC is present, or it will simply continue to output DTC 12. If more than one DTC has been stored in the ECM's memory, the DTC will be output from the lowest to the highest, with each DTC being displayed three times.
Clearing Diagnostic Trouble Codes (DTCs)
Clear the Diagnostic Trouble Codes (DTCs) after the repairs have been completed. Also, some diagnostic tables will tell you to clear the DTCs before using the table. This allows the ECM to set the DTC while going through the table, which will help to find the cause of the problem more quickly.
In order to clear the DTCs from the memory of the ECM, either to determine if the malfunction will occur again or because the repair has been completed, disconnect the ECM battery feed for at least 30 seconds. The ECM battery feed can be disconnected by removing the appropriate fuse in the fuse block. Refer to the ECM wiring diagrams in this section.
Notice: Turn off the ignition key when disconnecting or reconnecting battery power in order to prevent system damage.
If you disconnect the negative battery terminal, other on-board memory data, such as the preset radio tuning, will also be lost.)
When using a hand-held scan tool in order to read the DTCs, clearing the DTCs is done in the same manner as in the above procedure.
Intermittents
In the case of an Intermittent problem, the MIL will illuminate for 10 seconds and then will go out. The corresponding DTC will store in the memory of the ECM until the battery voltage to the ECM has been removed. When unexpected DTCs appear during the code reading process, one can assume that these DTCs were set by an intermittent malfunction and could be helpful in diagnosing the system.
An intermittent Diagnostic Trouble Code (DTC) may or may not re-set. If there is an intermittent failure, do not use a DTC table. Consult the Diagnostic Aids on the page facing the diagnostic table corresponding to the intermittent DTC. Refer to Intermittent Conditions . A physical inspection of the applicable sub-system most often will resolve the problem.
Scan Tool Use With Intermittents
In some scan tool applications, the data update rate makes the tool less effective than a voltmeter, such as when trying to detect an intermittent problem which lasts for a very short time. The scan tool allows the manipulation of the wiring harnesses or components with the engine not running while observing the scan tool readout.
The scan tool can be plugged in and observed while driving the vehicle under the conditions when the MIL light turned ON momentarily or when the engine driveability was momentarily poor. If the problem seems to be related to certain parameters that can be checked on the scan tool, check them while driving the vehicle. If there is not any correlation between the problem and any specific circuit, check the scan tool on each position, watching for a period of time to see if there is any change in the readings that indicates an intermittent operation.
The scan tool is also an easy way to compare the operating parameters of a poorly operating engine with those of a known good one. For example, a sensor may shift in value but not set a DTC. Comparing the sensor's readings with those of a known good vehicle may uncover the problem.
The scan tool has the ability to save time in the diagnosis and prevent the replacement of good parts. The key to using the scan tool successfully for a diagnosis lies in the technician's ability in order to understand the system he is trying to diagnose as well as an understanding of the scan tool operation and limitations. The technician should read the tool manufacturer's operating manual to become familiar with the tool's operation.
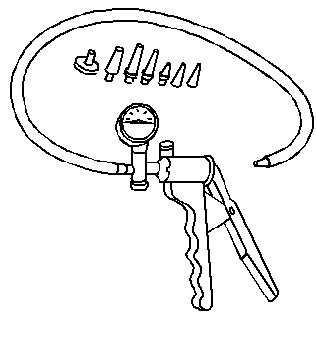
Also needed are a test lamp, an ohmmeter, a digital voltmeter with 10 megohms impedance (J 39200 ), hand held vacuum pump with a gauge (J 23738-A ), and jumper wires for the diagnosis. For a list of the special tools which are required for system service and the ones described above are illustrated in Special Tools .
Engine Control Module
Since the ECM can have a failure which may affect only one circuit, following the diagnostic procedures in this section can reliably tell when a failure has occurred in the ECM. Also, a DTC 55 indicates a failure of the ECM.
If a diagnostic table indicates that the ECM connections or ECM is the cause of a problem and you have replaced the ECM, but this does not correct the problem, one of the following may be the reason:
| • | There is a problem with the ECM terminal connections -- The diagnostic table will say ECM connections or ECM. You may have to remove the terminals from the connector in order to check them properly. |
| • | The ECM or PROM is not correct for the application. The incorrect ECM or PROM may cause a malfunction and may or may not set a DTC. |
| • | The problem is an intermittent. This means that the problem is not present at the time the system is being checked. In this case, refer to Symptoms and make a careful physical inspection of all portions of the system involved. |
| • | A shorted solenoid, relay coil, or harness -- The ECM turns ON and OFF the solenoids and the relays, using the internal electronic switches called Drivers. Each driver is part of a group of four called Quad-Drivers (QDR). |
A shorted solenoid, relay coil, or harness will not damage the ECM but will cause the circuit and controlled component to be inoperative. When the circuit fault is not present or has been repaired, the QDR will again operate in a normal manner due to it's fault protected design. If a fault has been repaired in a circuit controlled by a QDR, the original ECM should be reinstalled and the circuit checked for proper operation. TheECM replacement will not be necessary if the repaired circuit or component now operates correctly.
The J 34636 tester or equivalent provide a fast, accurate means of checking for a shorted coil or a short to battery voltage.
| • | The PROM may be faulty. The PROM rarely fails and operates as part of the ECM; however, the PROM could cause the problem. Substitute a known good PROM. |
| • | The replacement ECM may be faulty. After the ECM is replaced, the system should be rechecked for proper operation. If the diagnostic table again indicates the ECM is the problem, substitute a known good ECM. Although this is a rare condition, it could happen. |
The components or circuits and the DTCs or tables, related to them are the following items:
| • | DTC 55 indicates a failure of the ECM |
| • | PROM DTC 51 |
| • | Engine Coolant Temperature (ECT) sensor DTC 14 or DTC 15 |
| • | MAP sensor DTC 33 or DTC 34. In order to check the sensor with no DTC set, refer to Manifold Absolute Pressure Sensor Output Check Diagnosis . |
| • | Throttle Position (TP) sensor DTC 21 or DTC 22 |
| • | Neutral switch Diagnosis |
| • | Crank signal Diagnosis |
| • | Oxygen Sensor (O2S) DTC 13, 44, 45 |
| • | A/C signal -- If the A/C signal is not reaching the ECM, the signal can cause rough idle, with the A/C ON. Refer Rough, Unstable, or Incorrect Idle and Stalling . |
| • | VSS DTC 24 |
| • | Distributor Ignition System Check Table or DTC 42 |
| • | An ECM will be determined in the diagnostic tables, or by a DTC 55 |
PROM
A fialed or incorrectly installed PROM will generally set a DTC 51 or 52 depending on which PROM failed.
Fuel Control
The control module system controls the fuel delivery.
The diagnosis of fuel control starts with the Engine Cranks But Will Not Run. This table tests the fuel system. If there is a problem, the table will lead you to checking the fuel pump relay circuit, diagnosing the injector circuit or diagnosing the fuel system.
ECM Inputs
With the use of a scan tool, you can diagnose all of the sensors and input signals. The short descriptions below explain how you can diagnose the sensors and signals with the use of a scan tool. You can use a scan tool to compare the values for a normal running engine with the engine you're diagnosing. Refer to Typical Scan Data Values .
Engine Coolant Temperature (ECT) Sensor
A scan tool displays the engine coolant temperature in degrees (celsius and fahrenheit). After you start the engine, the temperature should rise steadily to about 90°C (194°F) then stabilize when thermostat opens.
Oxygen Sensor (O2S)
The scan tool has several positions that will indicate the state of the exhaust gases, the Oxygen Sensor (O2S) voltage, the short term fuel trim, and the long term fuel trim.
Normal scan voltage varies between 10 mV to 1,000 mV (0.01 and 1.0 volt) while in Closed Loop. DTC 13 sets in one minute if voltage remains between 350 mV and 550 mV, but the system will go Open Loop in about 15 seconds. The ECM counts each time the voltage crosses the 450 mV reference signal. These cross counts are indicated on a scan tool.
Disconnecting the O2S and grounding the lead from the ECM will simulate a lean exhaust condition (low voltage signal). Applying voltage to the ECM through a digital voltmeter on the 20 volt scale will simulate a rich exhaust condition (high voltage signal).
The ECM self-diagnostic circuit looks for trends in O2S voltage. If the system detects a trend, the MIL comes ON.
A rich exhaust trend causes the sensor voltage to stay above 700 mV volt for too long. This sets DTC 45.
A lean exhaust causes the voltage to stay below 0.20 volt for too long. This sets a DTC 44. If voltage stays between 350 mV and 550 mV for too long, the ECM sets a DTC 13. This indicates an open O2S circuit.
Response Time
Not only is it necessary for the oxygen sensor to produce a voltage signal for rich or lean exhaust, it is also important to respond quickly to changes. The ECM senses the response times. If the O2S responds slowly the customer may complain of poor fuel economy, rough idle or lack of performance. It may also set false DTCs because the ECM uses O2S voltages for system checks.
Cold Oxygen Sensor
On some engines, the oxygen sensor may cool down after only a short period of operation at idle.
This will put the system into Open Loop. In order to restore a Closed Loop operation, run the engine at part throttle for several minutes and accelerate from idle to part throttle a few times.
Oxygen Sensor Contaminants
Carbon
Black carbon or soot deposits result from over-rich mixtures. However, carbon does not harm a O2S. Deposits can be burned off in the engine by running it at least part throttle for 2 minutes.
Silica
Certain RTV silicone gasket materials give off vapors that contaminate the O2S. The sand-like particles from the RTV silica imbed in the molecules of the sensor element and plug up the surface. This results in lazy O2S response and engine control. The sensor will also have a whitish appearance. There is also a possibility of silica contamination caused by silicone in the fuel. Careless fuel handling practices with the transport containers can result in unacceptable concentrations of silicone in the fuel at the pump.There is also a possibility of silica contamination caused by silicon in lubricants used to install vacuum hoses on fittings.
Lead
Lead glazes the sensors. Lead can be introduced when regular, or leaded fuel is burned. Fuel containing large amounts of methanol will also result in lead contamination. The methanol dissolves the terne coat of the fuel tank, introduces lead into the fuel system, and into the exhaust after combustion. It is difficult to detect lead contamination by visual inspection.
Other Substances
Oil deposits will ultimately prevent sensor operation. The sensor will have a dark brown appearance. Check for the causes of high oil consumption. The additives in ethylene glycol can also affect sensor performance. This produces a whitish appearance. If antifreeze enters the exhaust system, you will likely encounter other, more obvious, symptoms of cooling system trouble.
Multiple Failures
If you encounter multiple or repeat O2S failures on the same vehicle, consider contamination.
Leaded fuel, silica contamination from uncured, low-grade (unapproved) RTV sealant, and high oil consumption are possible.
A problem in the Oxygen Sensor (O2S) circuit or fuel system should set a DTC 13 (open circuit), DTC 44 (lean indication), DTC 45 (rich indication). Refer to the applicable table if any of these codes were stored in memory.
Throttle Position (TP) Sensor
A scan tool reads throttle position in volts. It should read about 0.60 volt with throttle closed and ignition ON or at idle. Voltage should increase at a steady rate as throttle is moved toward WOT.
Scan tools have the ability to display the percentage of throttle angle and should display 0 percent, when the throttle is closed and 100 percent at Wide Open Throttle (WOT).
Scan TP sensor while depressing the accelerator pedal with engine stopped and the ignition ON. The display should vary from below 1.25 volts (2,500 mV) when throttle was closed, to over 4.5 volts (4,500 mV) when throttle is held at wide open throttle position.
A broken TP sensor can cause intermittent bursts of fuel from the injector(s) and an unstable idle because the ECM thinks the throttle is moving.
When a DTC is set, the ECM will use an artificial value for throttle position and some engine performance will return, but the governor will be disabled.
DTC 21 indicates that there is a shorted TP sensor circuit. DTC 22 indicates that there is an open in the TP sensor circuit.
Vehicle Speed Sensor (VSS)
Scan reading should closely match with the speedometer reading, with drive wheels turning.
The Vehicle Speed Sensor (VSS) circuit diagnosis is in DTC 24 Table.
Knock Sensor (KS)
A scan tool will indicate when the KS module signals the ECM that knock is present. Refer to Evaporative Emission Control System Operation Description for further information on the KS system.
Neutral Switch
A scan tool should display neutral when in neutral and R-D321 when in drive or reverse. Refer to Neutral Switch Diagnosis - Automatic Transmission Only for neutral switch diagnosis.
Crank Signal
If there is no crank signal to the ECM, the engine may be hard to start. Refer to Crank Signal Circuit Diagnosis .
Distributor Reference Signal
A scan tool will display this signal in RPM. Refer to Distributor Ignition (DI) System Description .
A/C Signal
If the pressure cycling switch is closed and A/C is ON, the scan tool should indicate A/C ON. Refer to Air Conditioning (A/C) Signal Diagnosis .
