Removal Procedure
- Remove the hood. Refer to Hood Replacement in Body and Accessories.
- Disconnect both the battery negative cables from the batteries. Refer to Battery Cable in Engine Electrical.
- Drain the cooling system. Refer to Cooling System Draining and Filling in Engine Cooling.
- Remove the radiator assembly from the vehicle. Refer to Radiator Replacement in Engine Cooling.
- Remove the air conditioning compressor from the vehicle. Refer to Air Conditioning Compressor Replacement in HVAC.
- Remove the air conditioning condenser from the vehicle. Refer to Air Condenser Replacement in HVAC.
- Remove the generator (single generator) from the accessory bracket. Refer to Generator Replacement in Engine Electrical.
- Remove the generator (dual generator) from the accessory bracket. Refer to Auxiliary Generator Replacement in Engine Electrical.
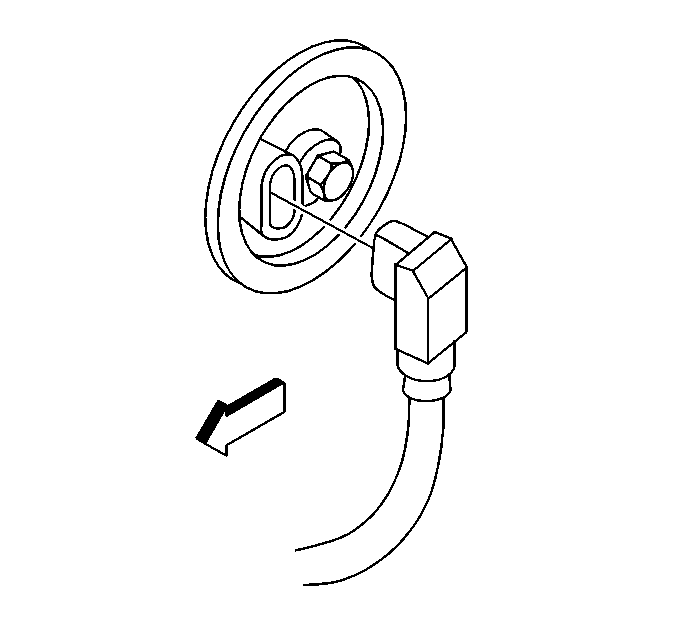
- Remove the power steering lines from the power steering pump. Refer to Power Steering Hoses Replacement in Power Steering.
- Remove the upper intake manifold cover.
- Remove the fuel manager/filter from the engine assembly. Refer to Fuel Manager/Filter Replacement in Engine Controls-6.5L.
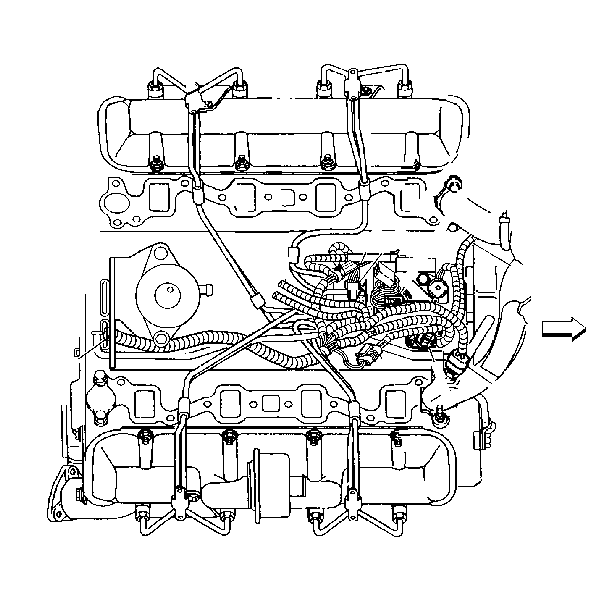
- Disconnect the electrical connector for the engine wiring harness extension harness assembly for the fuel injection pump at the cowl.
- Disconnect the engine wiring harness assembly at the left rear of the engine block.
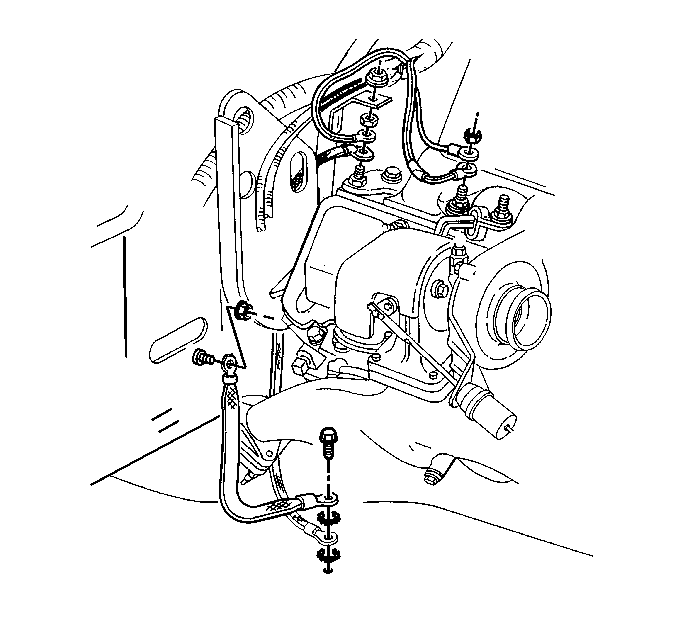
- Remove the ground straps from the right rear cylinder head. Refer to Engine Ground Strap Replacement in Engine Electrical.
- Remove the ground straps at the rear of each cylinder head.
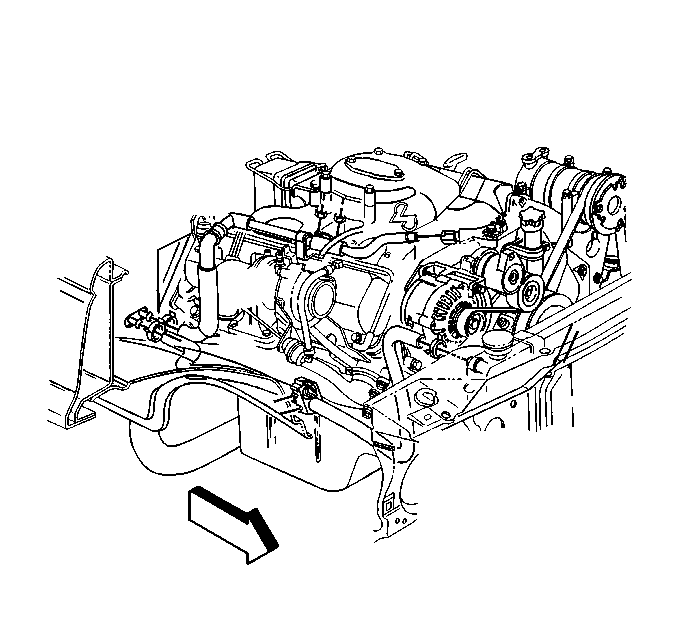
- Remove the heater hoses from the heater core (non-auxiliary shown).
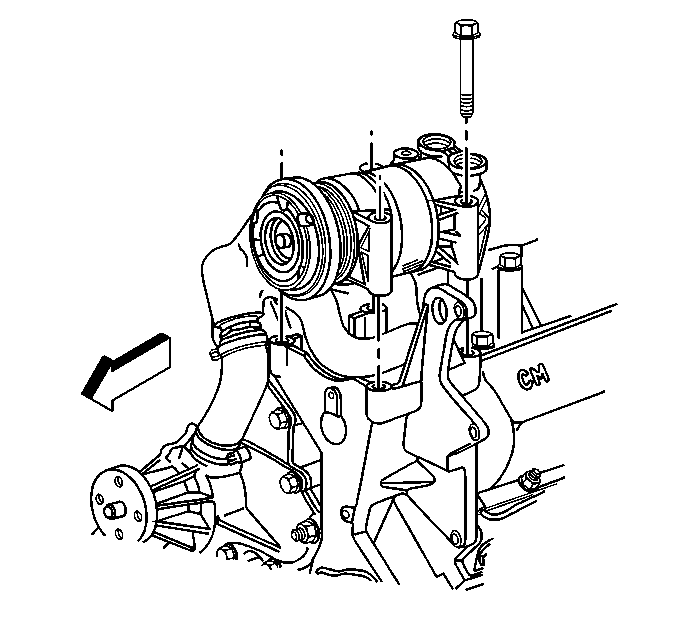
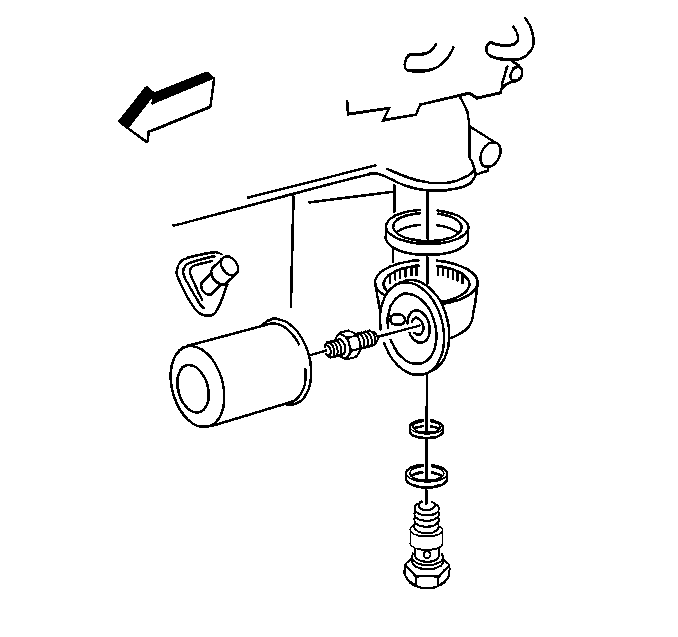
- Install the engine lift bracket to the rear of the right cylinder head.
- Install J 36857 along with GM P/N 94282217 bolt and GM P/N 15650963 washer to the right rear cylinder head.
- Raise the vehicle and support the vehicle with safety stands.
- Remove the starter from the engine block. Refer to Starter Motor Replacement in Engine Electrical.
- Remove the bolts from the torque converter.
- Remove the exhaust pipe from the turbocharger. Refer to Exhaust Manifold Pipe Replacement in Engine Exhaust.
- Remove block heater electrical connection.
- Remove the battery ground in the front of the engine block.
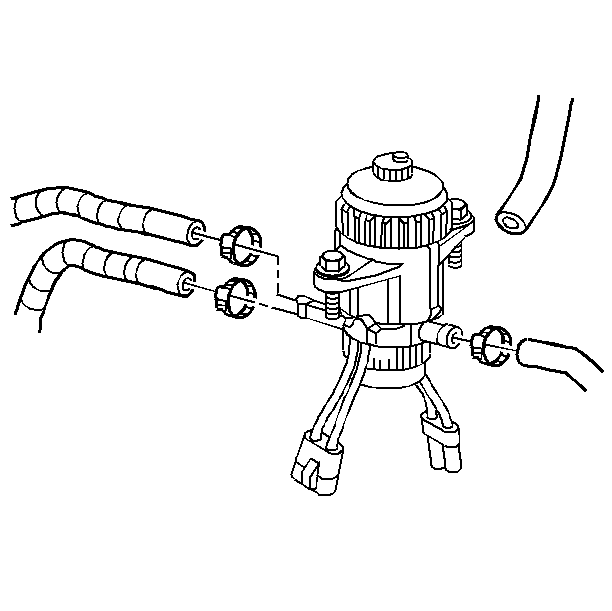
- Disconnect the oil cooler lines from the engine block if equipped. Refer to Engine Oil Cooler Hose/Pipe Replacement in Engine Cooling.
- Remove the transmission cooler lines from the retaining brackets.
- Remove the oil filter and adapter 4 wheel drive models only. Refer to Oil Filter Adapter and Bypass Valve Assembly Replacement .
- Remove the front propeller shaft (4 wheel drive models only). Refer to Front Propeller Shaft Replacement in Driveline/Axle.
- Remove the front differential carrier from the vehicle. Refer to Differential Carrier Assembly Replacement in Front Axle.
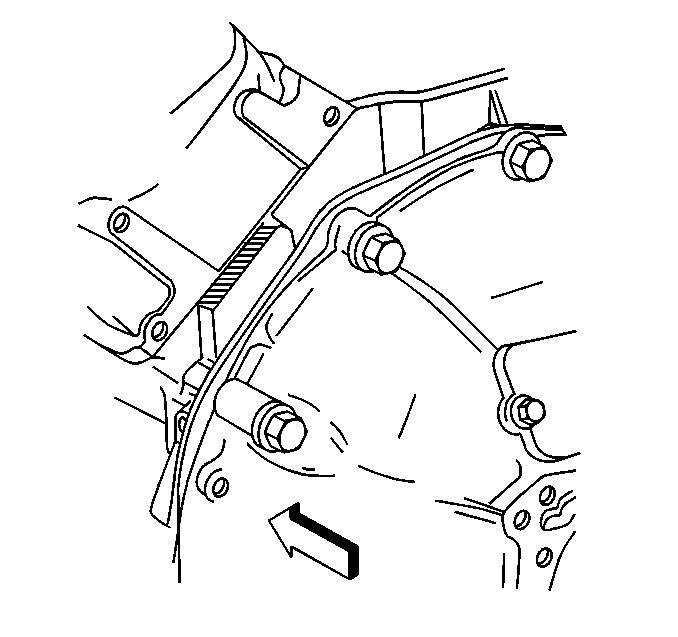
- Remove the bellhousing bolts from the engine block.
- Remove the safety stands and lower the vehicle.
- Support the transmission assembly with a suitable support.
- Attach a suitable lifting devise from the lifting bracket to the A/C mounting bracket.
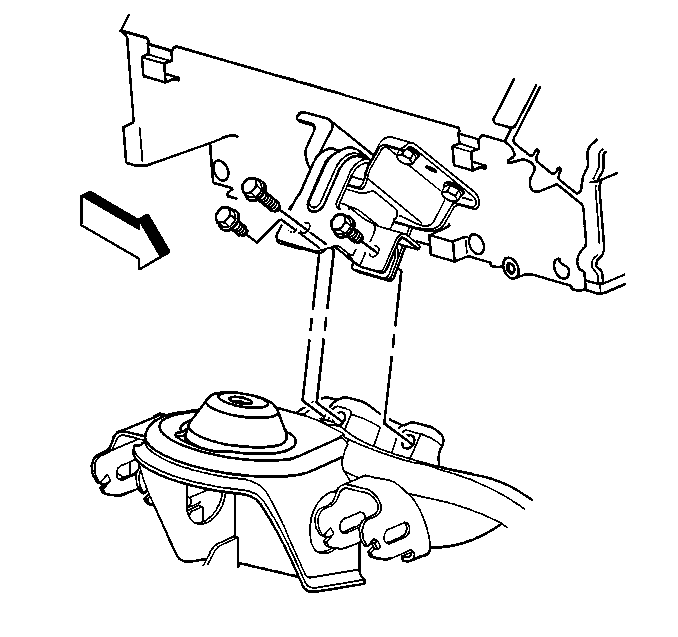
- Raise the engine enough to remove the engine mount through bolt.
- Remove the engine mount bolt to the crossmember.
- Remove the engine from the vehicle.
- Remove the left accessory bracket from the engine block. Refer to Accessory Brackets Replacement .
- Remove the right accessory bracket from the engine block. Refer to Accessory Brackets Replacement .
- Remove the J 36857 from the right rear cylinder head.
- Remove the clutch assembly from the flywheel. Refer to Differential Carrier Assembly Replacement in Clutch.
- Remove the flywheel from the engine assembly.
- Install the engine in a suitable engine stand.
- Remove the lifting devise from the engine.
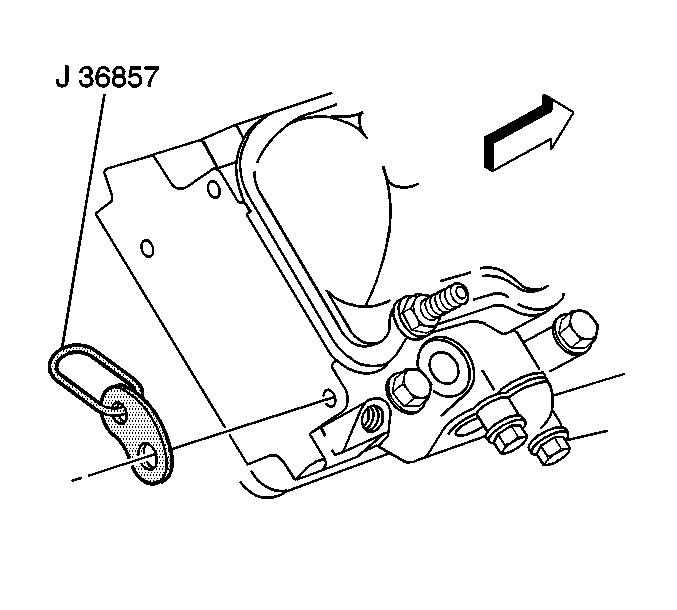
Notice: Damage may result from the use of an improper bolt when attaching J36857 into the cylinder head.
Notice: Use the correct fastener in the correct location. Replacement fasteners must be the correct part number for that application. Fasteners requiring replacement or fasteners requiring the use of thread locking compound or sealant are identified in the service procedure. Do not use paints, lubricants, or corrosion inhibitors on fasteners or fastener joint surfaces unless specified. These coatings affect fastener torque and joint clamping force and may damage the fastener. Use the correct tightening sequence and specifications when installing fasteners in order to avoid damage to parts and systems.
Tighten
Tighten the lift bracket bolt to 40 N·m
(30 lb ft).
Important: Anytime the oil cooler lines are disconnected from the quick connectors or the engine block, the retaining clip must be replaced.
Important: It maybe necessary to remove the clutch assembly (if equipped) and flywheel from the engine assembly before the engine can be installed on the suitable engine stand.
Installation Procedure
- Install the left accessory bracket to the engine block. Refer to Accessory Brackets Replacement .
- Install the right accessory bracket to the engine block. Refer to Accessory Brackets Replacement .
- Install the engine lift bracket to the rear of the right cylinder head.
- InstallJ 36857 along with GM P/N 94282217 bolt and GM P/N 15650963 washer to the right rear cylinder head.
- Attach a suitable lifting devise to the engine assembly.
- Remove the engine from the suitable engine stand.
- Install the flywheel to the engine assembly. Refer to Engine Flywheel Replacement .
- Install the clutch assembly (if equipped) on the flywheel. Refer to Differential Carrier Assembly Replacement in Clutch.
- Install the engine assembly into the vehicle.
- Install the left engine mount through bolt. Refer to Engine Mount Replacement .
- Install the right engine mount through bolt. Refer to Engine Mount Replacement .
- Remove the lifting devise from the engine assembly.
- Remove the engine lift bracket and the bolt and washer, GM P/N 94282217 and GM P/N 15650963 from the cylinder head.
- Remove the support for the transmission.
- Raise the vehicle and support the vehicle with safety stands.
- Reconnect the electrical connector for the block heater.
- Install the bolts into the torque convertor.
- Install bolts from the bellhousing to the engine block.
- Install the starter to the engine block. Refer to Starter Motor Replacement in Engine Electrical.
- Install the oil filter and adapter 4 wheel drive vehicles only. Refer to Oil Filter Adapter and Bypass Valve Assembly Replacement .
- Connect the oil cooler lines to the engine block.
- Install the transmission cooler lines to the retaining brackets.
- Install the battery ground in the front of the cylinder head.
- Install the front propeller shaft (4 wheel drive models only). Refer to Front Propeller Shaft Replacement in Driveline/Axle.
- Install the exhaust pipe to the turbocharger. Refer to Exhaust Manifold Pipe Replacement in Engine Exhaust.
- Remove the safety and lower the vehicle.
- Install the generator to the right accessory bracket. Refer to Generator Replacement in Engine Electrical.
- Install the auxiliary generator to the left accessory bracket (if equipped). Refer to Auxiliary Generator Replacement in Engine Electrical.
- Install the A/C compressor to the left accessory bracket. Refer to Air Conditioning Compressor Replacement in HVAC.
- Install the power steering lines to the power steering pump. Refer to Power Steering Hoses Replacement in Power Steering.
- Install the air conditioning condenser in the vehicle. Refer to Air Condenser Replacement in HVAC.
- Install the radiator in the vehicle. Refer to Radiator Replacement in Engine Cooling.
- Install the heater hoses from the heater core (non-auxiliary shown).
- Reconnect the engine wiring harness extension harness assembly at the rear of the left cylinder head.
- Install the ground straps to the right rear cylinder head. Refer to Engine Ground Strap Replacement in Engine Electrical.
- Install the ground strap at the rear of each cylinder head.
- Install the fuel manager/filter from the engine assembly. Refer to Fuel Manager/Filter Replacement in Engine Controls - 6.5L.
- Install the upper intake manifold cover.
- Connect both the battery negative cables to the batteries. Refer to Battery Cable in Engine Electrical.
- Refill the cooling system. Refer to Cooling System Draining and Filling in Engine Cooling
- Recharge the A/C system. Refer to Refrigerant Recovery and Recharging in HVAC.
- Install the hood to the vehicle. Refer to Hood Replacement in Body and Accessories.
- Install a scan tool and check for any DTC's.
- Adjust the timing for the fuel injection pump. Refer to Fuel Injection Pump Timing Adjustment in Engine Controls - 6.5L.
- Perform TDC offset procedure. Refer to Fuel Injection Pump Top Dead Center Offset Adjustment in Engine Controls - 6.5L
Notice: Use the correct fastener in the correct location. Replacement fasteners must be the correct part number for that application. Fasteners requiring replacement or fasteners requiring the use of thread locking compound or sealant are identified in the service procedure. Do not use paints, lubricants, or corrosion inhibitors on fasteners or fastener joint surfaces unless specified. These coatings affect fastener torque and joint clamping force and may damage the fastener. Use the correct tightening sequence and specifications when installing fasteners in order to avoid damage to parts and systems.
Tighten
Tighten the lift bracket bolt to 40 N·m
(30 lb ft).
Important: Anytime the oil cooler lines are disconnected from the quick connectors or the engine block, the retaining clip must be replaced.
