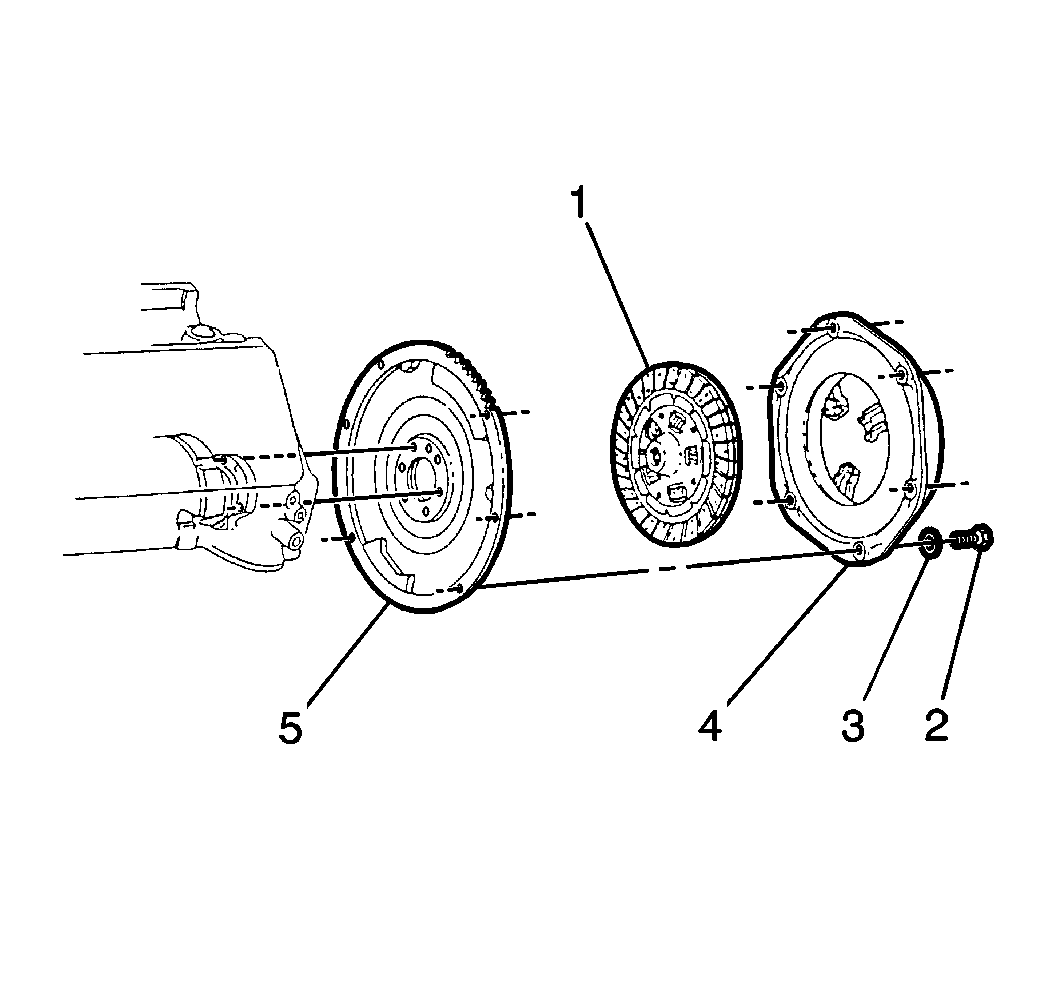
Removal Procedure
Tools Required
J 36221 Clutch Alignment Tool
- Raise the vehicle. Refer to
Vehicle Lifting Caution
in General Information.
- Remove the quick disconnect from the concentric slave cylinder.
Refer to
Clutch Master Cylinder Replacement
.
- Remove the transmission. Refer to
Transmission Replacement
in Manual Transmission.
- Install the J 36221
in order
to support the clutch.

- Mark the flywheel (5) and a clutch
pressure plate lug for the installation alignment.
- Remove the bolts (2) and the washers (3). Secure
the clutch pressure plate (4) and the clutch driven plate (1)
to the flywheel (5).
| 6.2. | Clean all of the parts with a water dampened cloth. |
| 6.3. | Inspect all of the parts for wear and damage. |
| 6.4. | Use a straight edge in order to inspect the contact surfaces for
scoring and flatness. |
| 6.5. | Inspect the friction pads for scoring, gouges, and loose rivets. |
| 6.6. | Inspect the friction pads for oil. Replace the clutch driven plate
if the friction pads are soaked with oil. |
| 6.7. | Inspect all of the splines for the following: |
| 6.8. | Inspect all of the springs for bending and breakage. |
Installation Procedure
Tools Required
J 36221 Clutch Alignment
Tool

- Install the bolts (2) and the
washers (3) that secure the clutch pressure plate (4) and
the clutch driven plate (1) to the flywheel (5).
- Install the J 36221
in order
to support the clutch.
Notice: Use the correct fastener in the correct location. Replacement fasteners
must be the correct part number for that application. Fasteners requiring
replacement or fasteners requiring the use of thread locking compound or sealant
are identified in the service procedure. Do not use paints, lubricants, or
corrosion inhibitors on fasteners or fastener joint surfaces unless specified.
These coatings affect fastener torque and joint clamping force and may damage
the fastener. Use the correct tightening sequence and specifications when
installing fasteners in order to avoid damage to parts and systems.
- Align the marks made during removal or,
if new align the lightest part of the clutch pressure plate, identified
by a yellow dot, to the heaviest part of the flywheel, identified
by an "X".
Tighten
Tighten the clutch pressure plate to the flywheel bolts to 41 N·m
(30 lb ft).
Remove the J 36221
.
- Install the transmission. Refer to
Transmission Replacement
in Manual Transmission.
- Install the hydraulic line fitting to the concentric slave cylinder.
Refer to
Clutch Master Cylinder Replacement
.
- Lower the vehicle.


