For 1990-2009 cars only
Removal Procedure
- Evacuate the air conditioning system, if equipped. Refer to Refrigerant Recovery and Recharging in HVAC.
- Disconnect the battery negative cable.
- Drain the engine oil. Refer to Engine Oil and Oil Filter Replacement .
- Remove the valve rocker arms and pushrods. Refer to Valve Rocker Arm and Push Rod Replacement .
- Remove the lower intake manifold. Refer to Intake Manifold Replacement .
- Remove the valve lifters. Refer to Valve Lifter Removal .
- Remove the engine cooling fan. Refer to Fan Clutch Replacement in Engine Cooling.
- Remove the fan shroud. Refer to Fan Shroud Replacement in Engine Cooling.
- Remove the radiator grille. Refer to Grille Replacement in Body.
- Remove the hood latch bracket. Refer to Hood Primary and Secondary Latch Replacement in Body.
- Remove the radiator. Refer to Radiator Replacement in Engine Cooling.
- Remove the A/C condenser, if equipped. Refer to Condenser Replacement in HVAC.
- Remove the water pump. Refer to Water Pump Replacement in Engine Cooling.
- Remove the crankshaft balancer. Refer to Crankshaft Balancer Replacement .
- Raise the vehicle.
- Remove the following fasteners from the oil pan:
- Lower the vehicle.
- Remove the engine front cover. Refer to Engine Front Cover Replacement .
- Remove the crankshaft position sensor reluctor ring. Refer to Crankshaft Position Sensor Reluctor Ring Replacement .
- Rotate the number one piston to Top Dead Center (TDC).
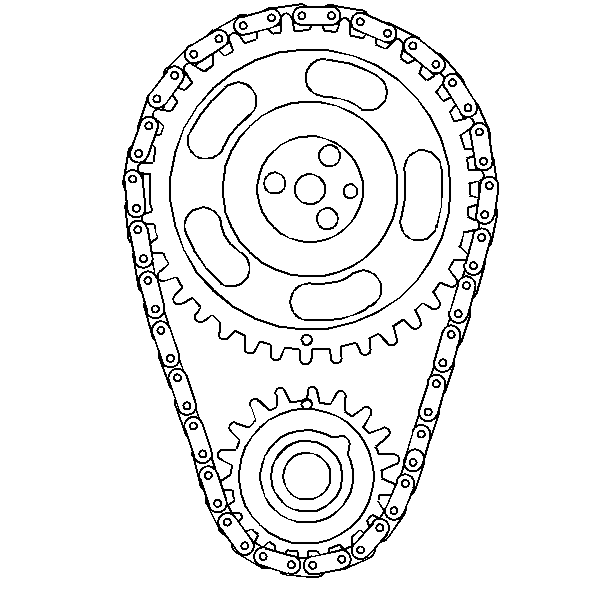
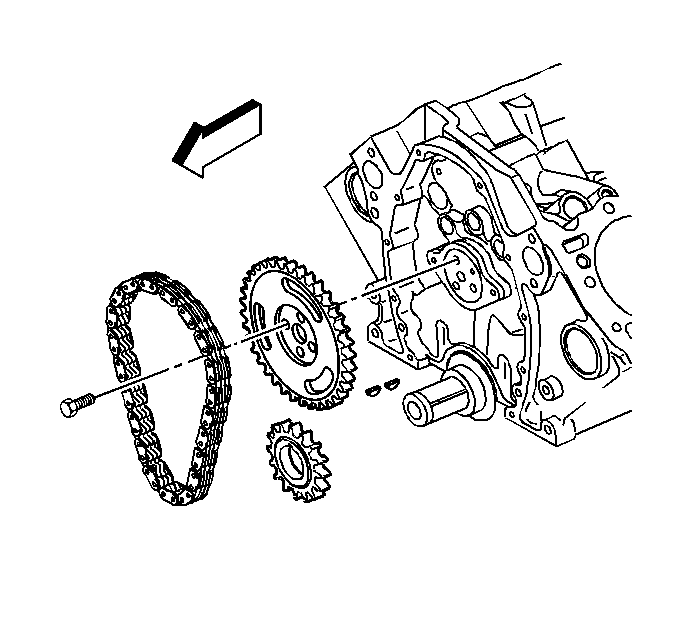
- Align the timing marks on the camshaft and the crankshaft sprockets.
- Remove the camshaft sprocket bolts.
- Remove the camshaft sprocket and the timing chain.
- Remove the camshaft retainer plate and bolts using a T-30 TORX® socket.
- Remove the camshaft.
- Clean all sealing surfaces and inspect for wear. Refer to Camshaft and Bearings Clean and Inspect .
Caution: Before servicing any electrical component, the ignition and start switch must be in the OFF or LOCK position and all electrical loads must be OFF, unless instructed otherwise in these procedures. If a tool or equipment could easily come in contact with a live exposed electrical terminal, also disconnect the negative battery cable. Failure to follow these precautions may cause personal injury and/or damage to the vehicle or its components.
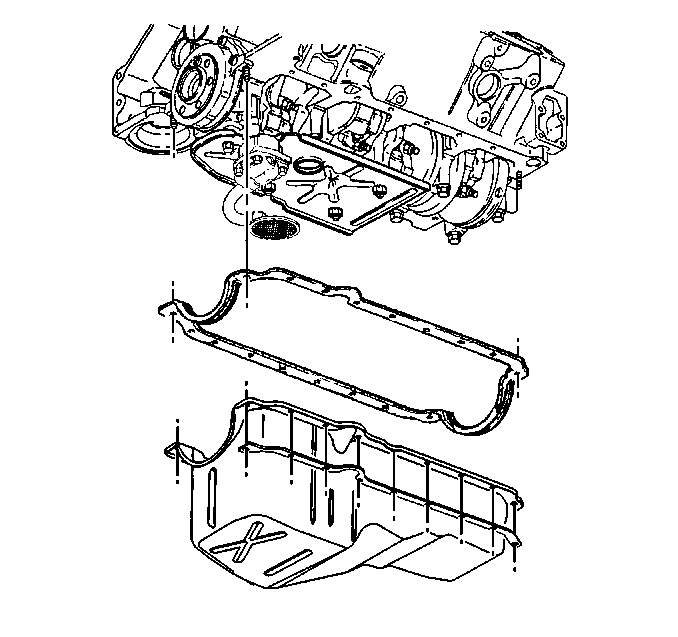
| • | Two nuts at the front of the engine. |
| • | Eleven screws and three studs. |
| Important: Do not remove the two nuts at the rear of the engine. |
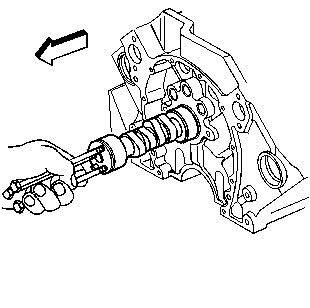
Important: All camshaft journals are the same diameter, so care must be used in removing the camshaft to avoid damage to the bearings.
Use care to prevent damage to the camshaft bearings.
Refer to Camshaft Removal .
Installation Procedure
- Install the camshaft. Refer to Camshaft Installation .
- Install the timing chain and sprockets. Refer to Timing Chain and Sprocket Replacement .
- Install the crankshaft reluctor ring. Refer to Crankshaft Position Sensor Reluctor Ring Replacement .
- Install the engine front cover. Refer to Engine Front Cover Replacement .
- Raise the vehicle.
- Install the fasteners to the oil pan. Refer to Oil Pan Replacement .
- Lower the vehicle.
- Use J 23523-F in order to install the crankshaft balancer. Refer to Crankshaft Balancer Replacement .
- Install the water pump. Refer to Water Pump Replacement in Engine Cooling.
- Install the A/C condenser, if equipped. Refer to Condenser Replacement in HVAC.
- Install the radiator. Refer to Radiator Replacement in Engine Cooling.
- Install the hood latch bracket. Refer to Hood Primary and Secondary Latch Replacement in Body.
- Install the radiator grille. Refer to Grille Replacement in Body.
- Install the engine cooling fan. Refer to Fan Clutch Replacement in Engine Cooling.
- INstall the cooling fan shroud. Refer to Fan Shroud Replacement in Engine Cooling.
- Install the valve lifters. Refer to Valve Lifter Installation .
- Install the lower intake manifold. Refer to Intake Manifold Replacement .
- Install the valve rocker arms and pushrods. Refer to Valve Rocker Arm and Push Rod Replacement .
- Connect the battery negative cable. Refer to Battery Cable in Engine Electrical.
- Recharge the air conditioning system, if equipped. Refer to Refrigerant Recovery and Recharging in HVAC.
- Fill the engine with the proper type and quantity of engine oil and install the oil filter. Refer to Engine Oil and Oil Filter Replacement .
