For 1990-2009 cars only
Rear Bumper Replacement SUT
Removal Procedure
- Lift the vehicle. Refer to Lifting and Jacking the Vehicle .
- Remove both lower rear bolts to the inner wheel house panels.
- Remove the spare tire carrier. Refer to Spare Tire Carrier Replacement .
- Remove the top rear bumper step pad . Refer to Rear Bumper Step Pad Replacement .
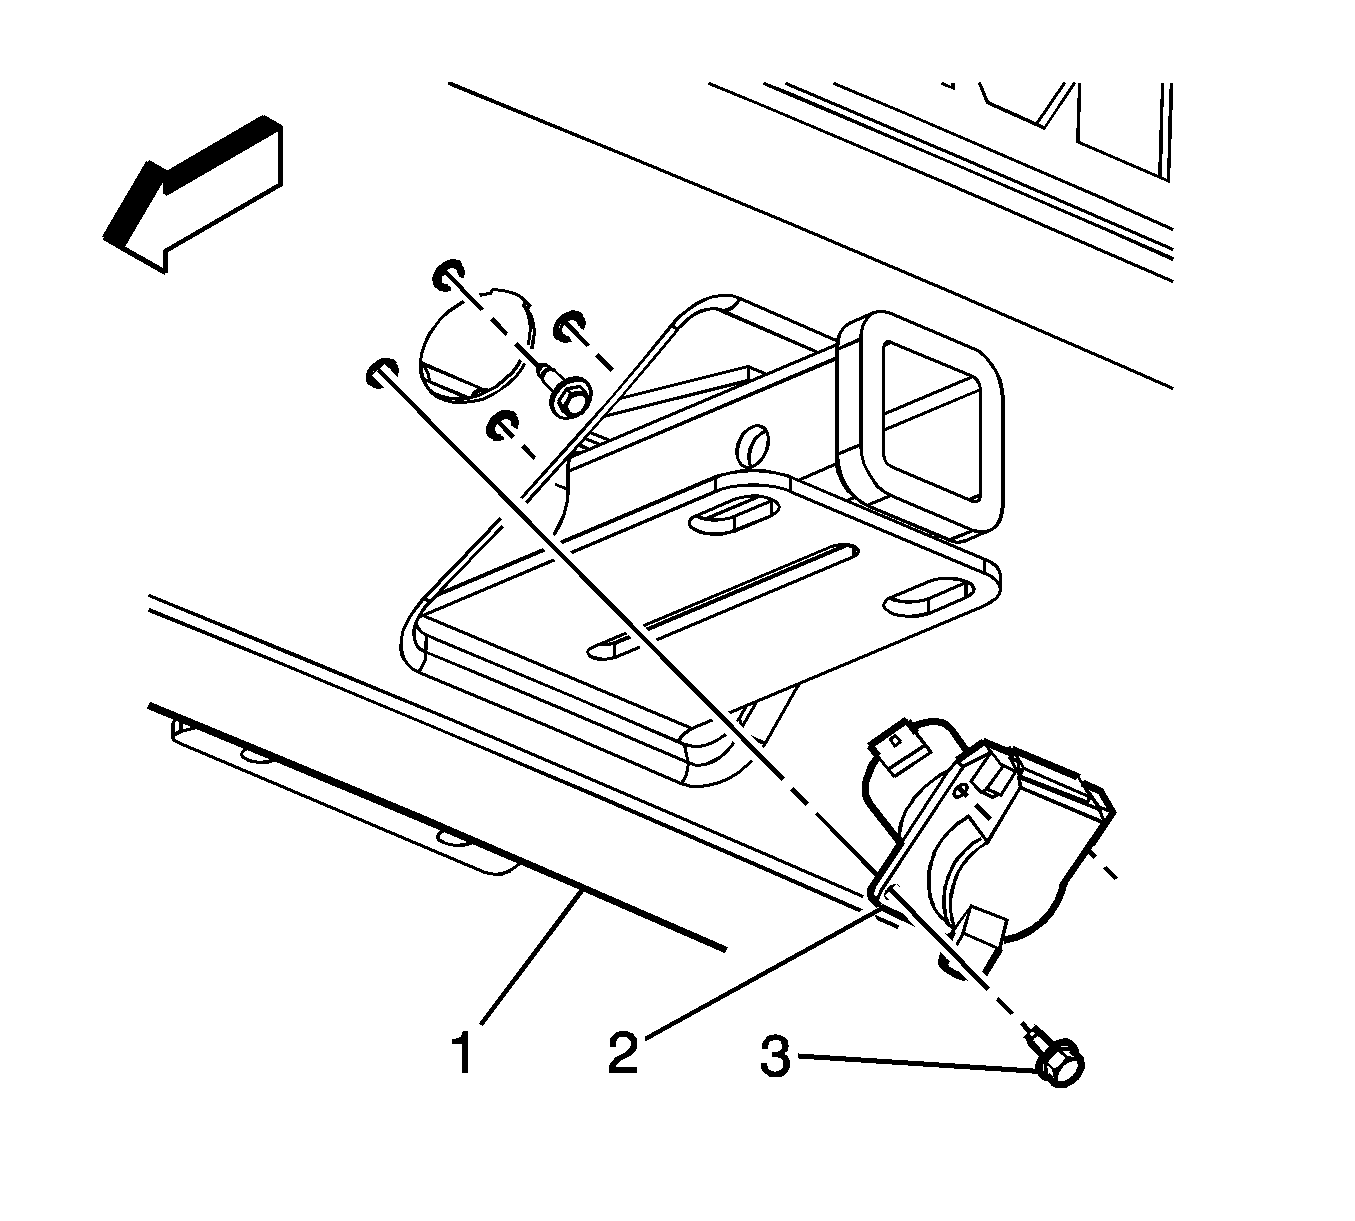
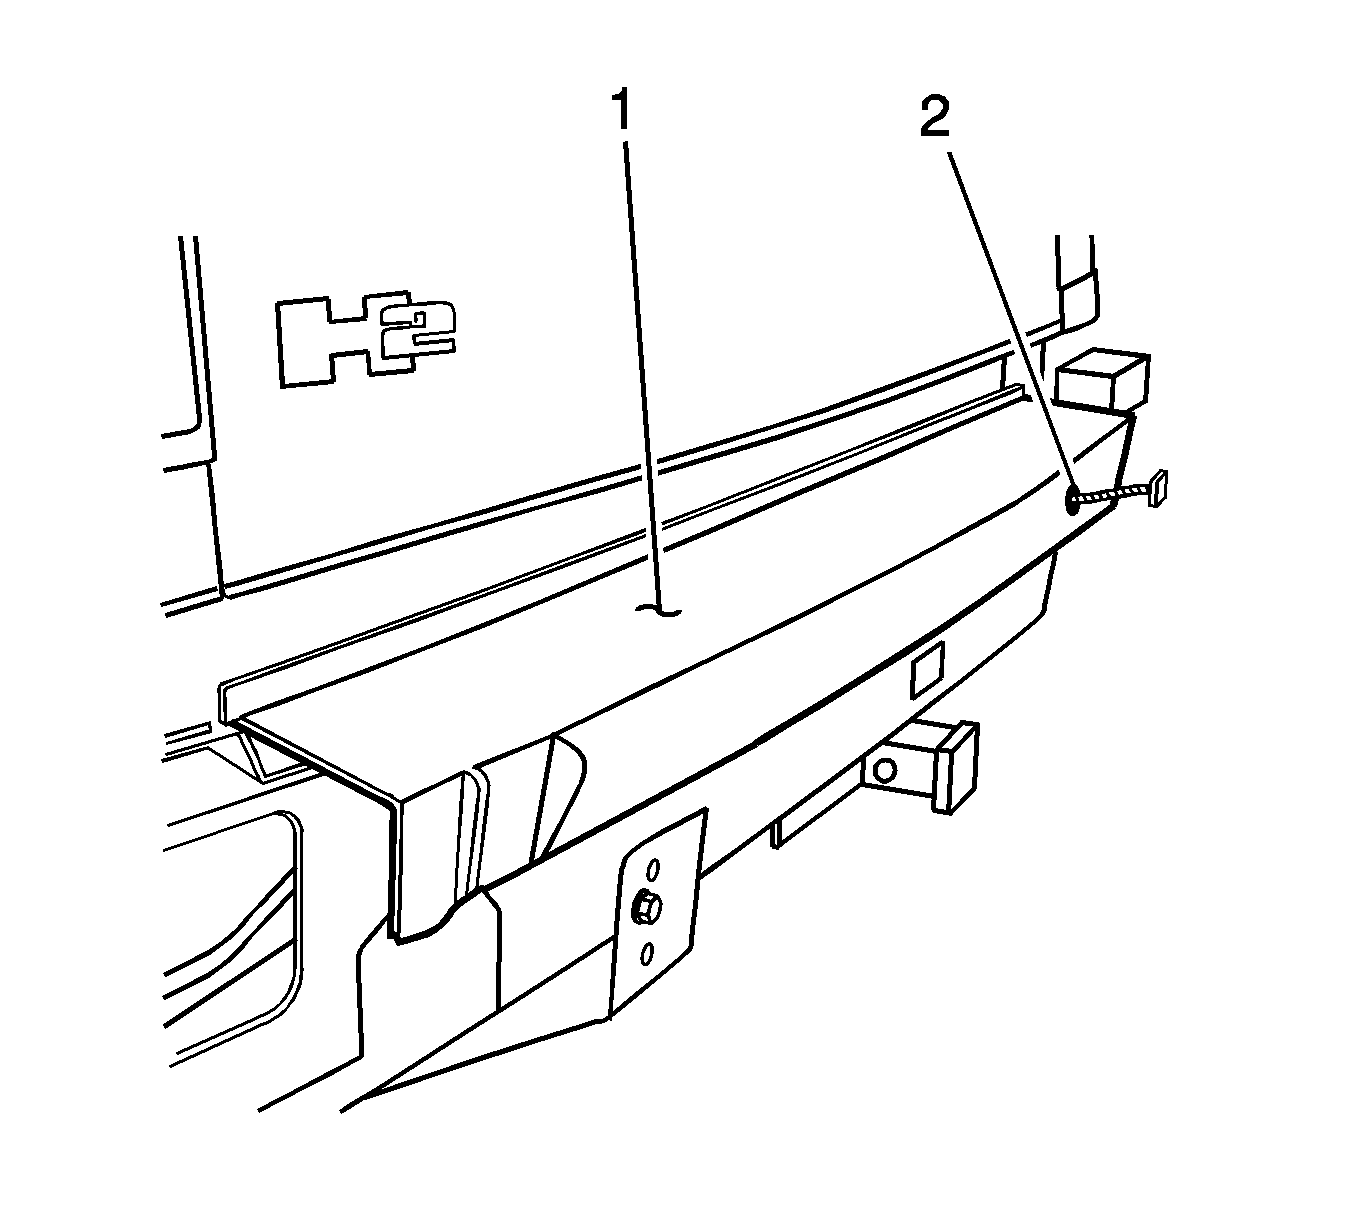
- Disconnect the electrical connector for the rear trailer tow receptacle at the rear bumper (1).
- Remove the receptacle bolts (3) and receptacle (2).
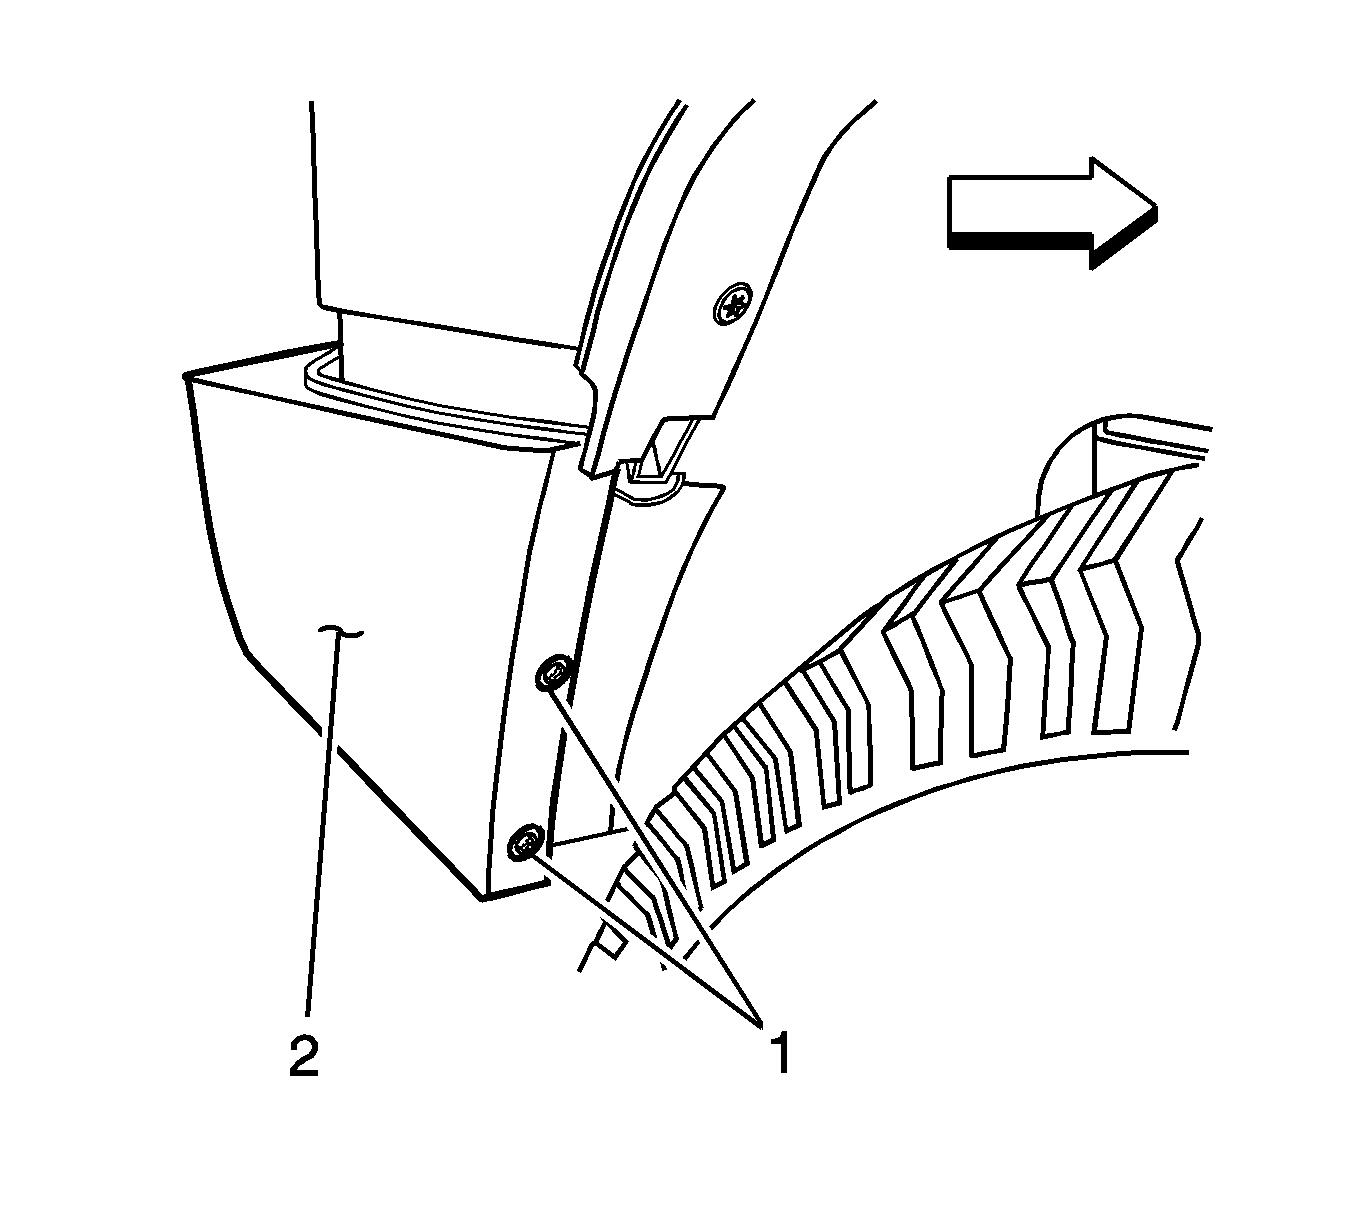
- Remove the push-in retainers (1) securing the bumper end cap (2) to the wheelhouse extensions.
- Disconnect the rear park lamp electrical sockets.
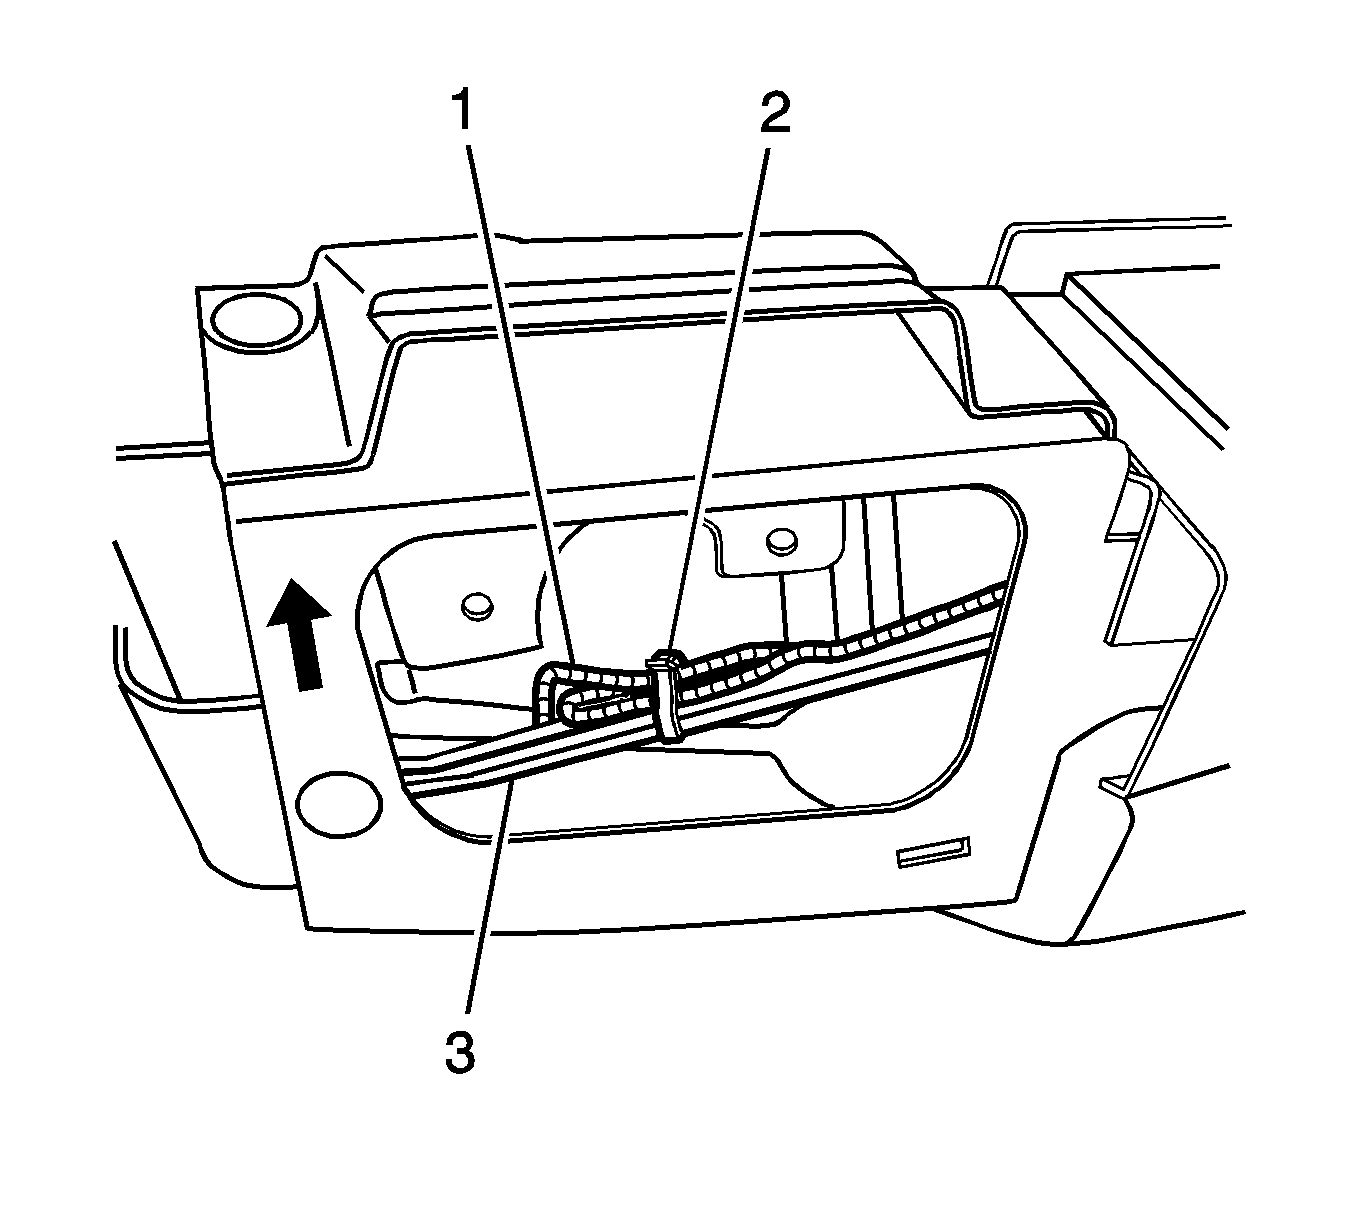
- Cut the tie straps (2) securing the electrical harness loom (1) to the rear bumper brackets (3).
- Remove the rear bumper step pad. Refer to Rear Bumper Step Pad Replacement .
- Remove the rear bumper end cap retainers and covers.
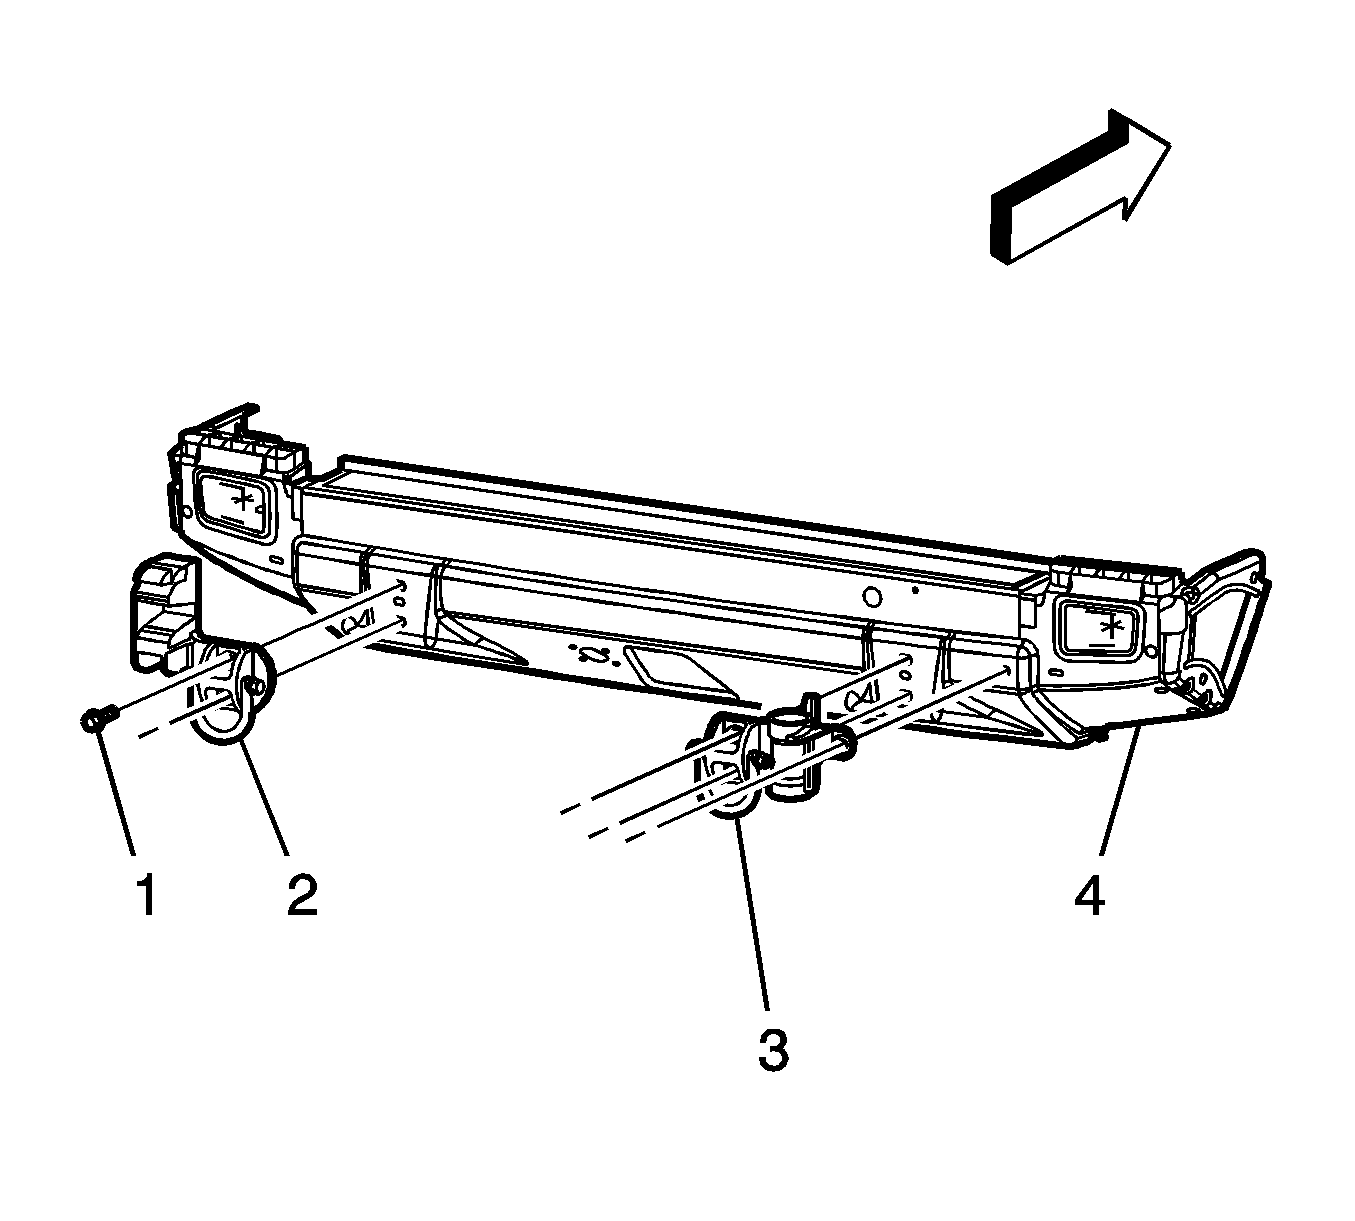
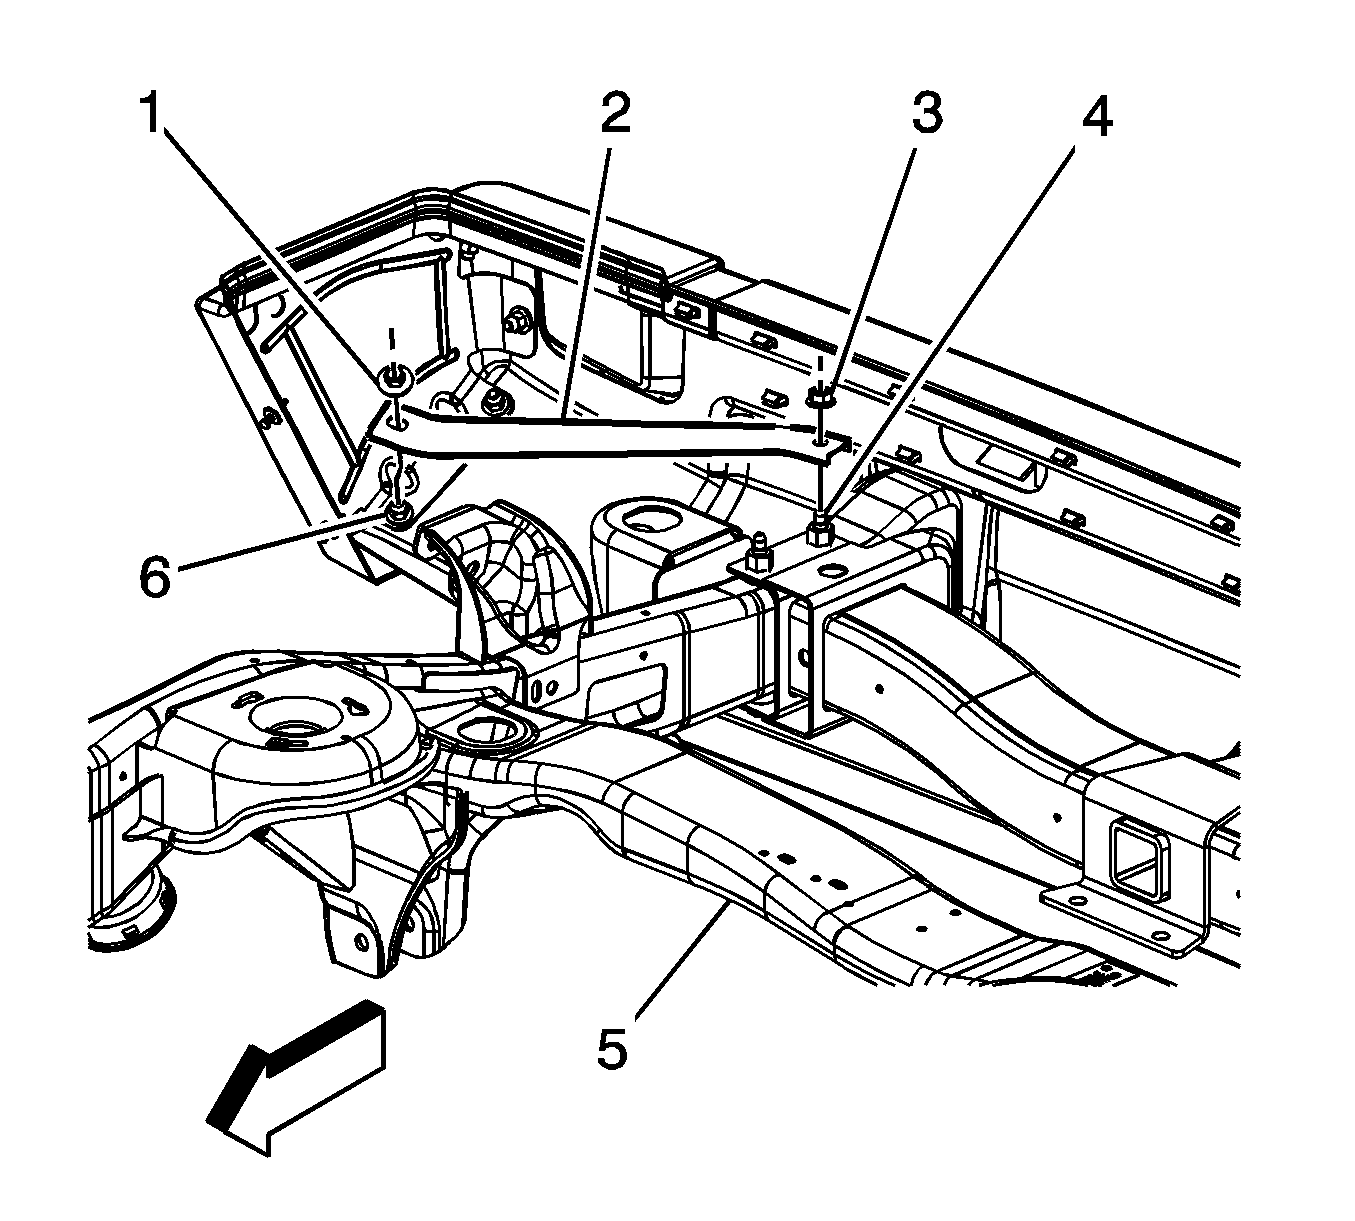
- Remove the nuts (1, 3) securing the reinforcement bar (2) to the bumper end cap and trailer hitch bolt (4).
- Remove the rear bumper bolts behind the removed spare tire carrier mounting plates.
- Remove the bumper.
Installation Procedure
- Position the rear bumper to the chassis frame.
- Install the 2 rear bumper bolts.
- Install the rear tire carrier mounts (2, 3) to the bumper.
- Install the bolts (1).
- Install the reinforcement bar (2) to the chassis hitch bolt and end cap.
- Install the nuts (1, 3) and adjust the bumper height.
- Install the 2 outer bumper end caps (2) and secure the push-pin retainers.
- Connect the rear park lamp electrical sockets.
- Secure the electrical harness loom (1) to the rear bumper bracket (3) with a new tie strap (2).
- Install the push-in retainers in order to secure the bumper end caps.
- Install the trailer tow receptacle (2) to the rear bumper (1).
- Install the bolts (3).
- Secure the rear bumper step cover (1). Refer to Rear Bumper Step Pad Replacement .
- Secure the license plate harness grommet (2) to the bumper cover.
- Connect the trailer tow receptacle electrical connector.
- Install the top rear bumper step pad . Refer to Rear Bumper Step Pad Replacement .
- Install the spare tire carrier. Refer to Spare Tire Carrier Replacement .
- Lower the vehicle. Refer to Lifting and Jacking the Vehicle .
- Install the 2 rear lower wheelhouse liner bolts.

Notice: Refer to Fastener Notice in the Preface section.
Tighten
Tighten the bolts to 32 N·m (24 lb ft) at the spare tire carrier mounts.
Tighten
Tighten the bolts to 95 N·m (70 lb ft).

Tighten
Tighten the nuts to 85 N·m (63 lb ft).


Tighten
Tighten the bolts to 9 N·m (80 lb in).
Tighten
Tighten the bolts to 10 N·m (89 lb in).
Rear Bumper Replacement SUV
Removal Procedure
- Lift the vehicle. Refer to Lifting and Jacking the Vehicle .
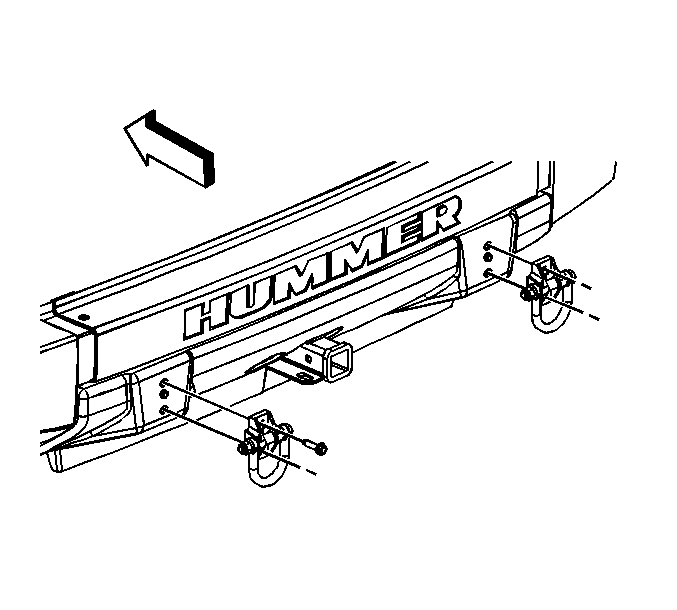
- Remove the rear tow eye/D-rings. Refer to Rear Tow Eye Replacement .
- Disconnect the electrical connector for the rear trailer tow receptacle at the rear bumper (1).
- Remove the receptacle bolts (3) and receptacle (2).
- Remove the push-in retainers (1) securing the bumper end cap (2) to the wheelhouse extensions.
- Remove the rear bumper end cap retainers and covers.
- Remove the nuts (1, 3) securing the reinforcement bar (2) to the bumper end cap and trailer hitch bolt (4).
- Remove the rear bumper bolts behind the removed spare tire carrier mounting plates.
- Remove the bumper.


Installation Procedure
- Position the rear bumper to the chassis frame.
- Install the 2 rear bumper bolts.
- Install the rear tow eye/D-rings. Refer to Rear Tow Eye Replacement .
- Install the reinforcement bar (2) to the chassis hitch bolt and end cap.
- Install the nuts (1, 3) and adjust the bumper height.
- Install the push-in retainers in order to secure the bumper end caps.
- Install the trailer tow receptacle (2) to the rear bumper (1).
- Install the bolts (3).
- Lower the vehicle. Refer to Lifting and Jacking the Vehicle .
Notice: Refer to Fastener Notice in the Preface section.
Tighten
Tighten the bolts to 32 N·m (24 lb ft) at the spare tire carrier mounts.

Tighten
Tighten the nuts to 32 N·m (24 lb ft).

Tighten
Tighten the bolts to 9 N·m (80 lb in).
