For 1990-2009 cars only
Removal Procedures
- Remove the rear wiper arm. Refer to Rear Window Wiper Arm Replacement.
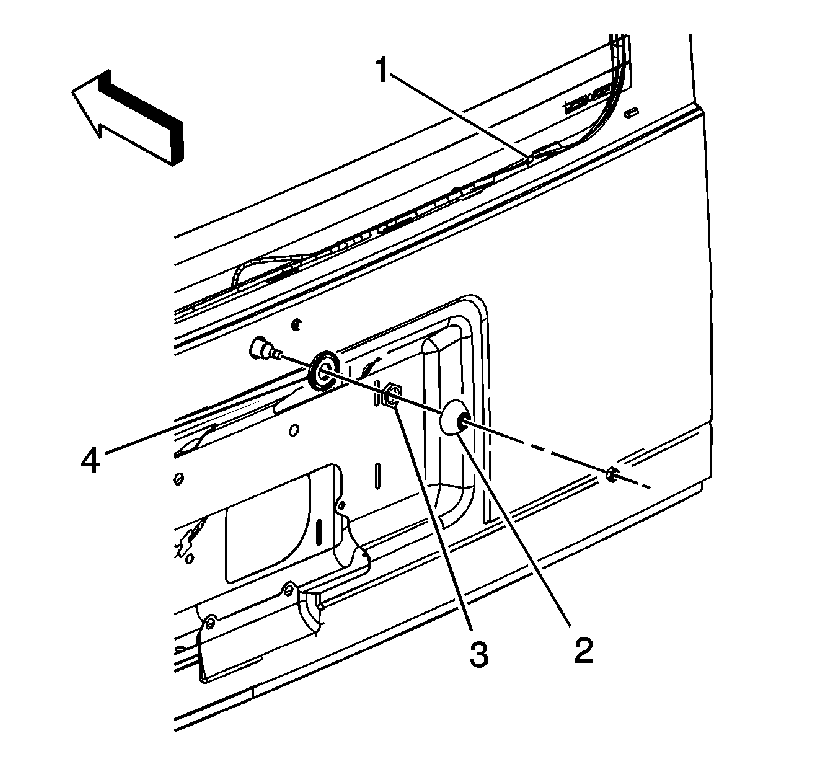
- Remove beauty cover (2) by twisting counterclockwise.
- Remove the rear wiper arm nut (3) and the weatherseal (4).
- Open the liftgate.
- Remove the liftgate trim panel. Refer to Liftgate Trim Panel Replacement.
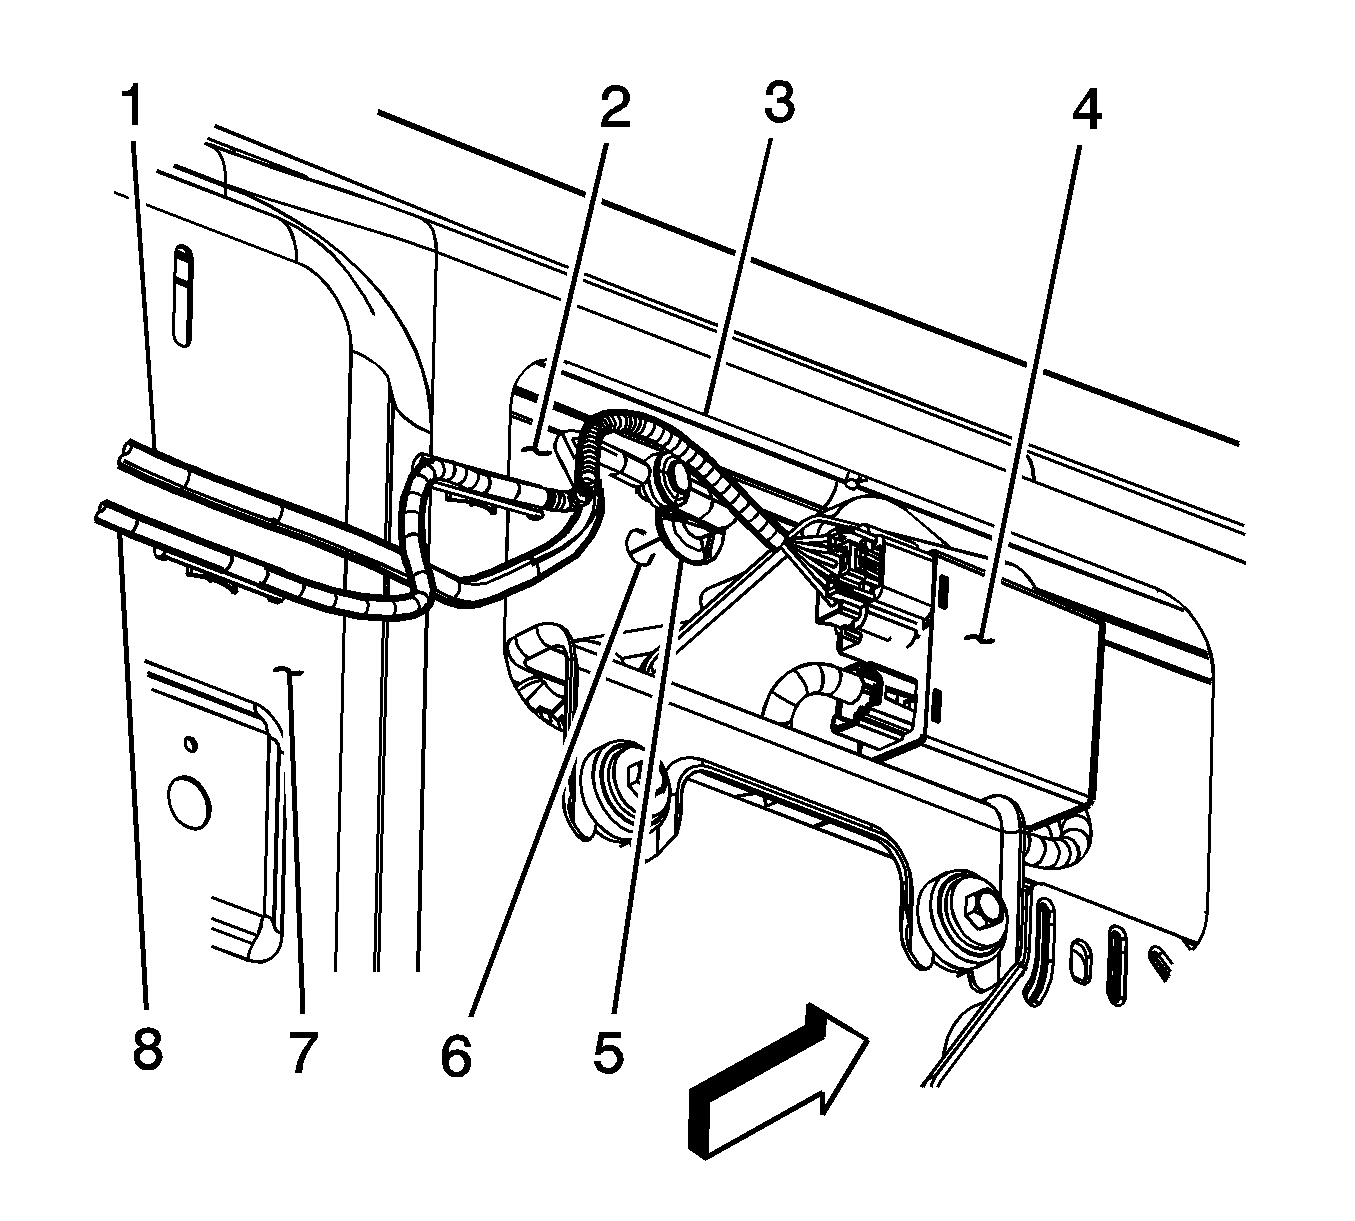
- Disconnect the rear wiper motor electrical connectors from the liftgate (4).
- Remove the rear wiper control module.
- Remove the fasteners (1) retaining the wiper motor to the liftgate (2).
- Remove the rear wiper motor from the liftgate.
Note: Cycle the wiper one time to ensure it is in the parked position.


Installation Procedure
- Position the rear wiper motor (4) into place in the liftgate (2).
- Install the fasteners retaining the wiper motor (4), but do not tighten.
- Install the weatherseal (4) and the rear wiper arm nut (3).
- Tighten the rear wiper motor fasteners.
- Connect rear wiper motor electrical connectors.
- Install the rear wiper motor control module.
- Install the liftgate trim panel. Refer to Liftgate Trim Panel Replacement.
- Install the beauty cover (1).
- Install the rear wiper arm. Refer to Rear Window Wiper Arm Replacement.

Caution: Refer to Fastener Caution in the Preface section.

Tighten
Tighten the rear wiper arm nut to 6 N·m (4 lb ft).
Tighten
Tighten the rear wiper motor fasteners to 9 N·m (7 lb ft).
