For 1990-2009 cars only
Rear License Plate Pocket Replacement SUT
Removal Procedure
- Open the rear spare tire carrier.
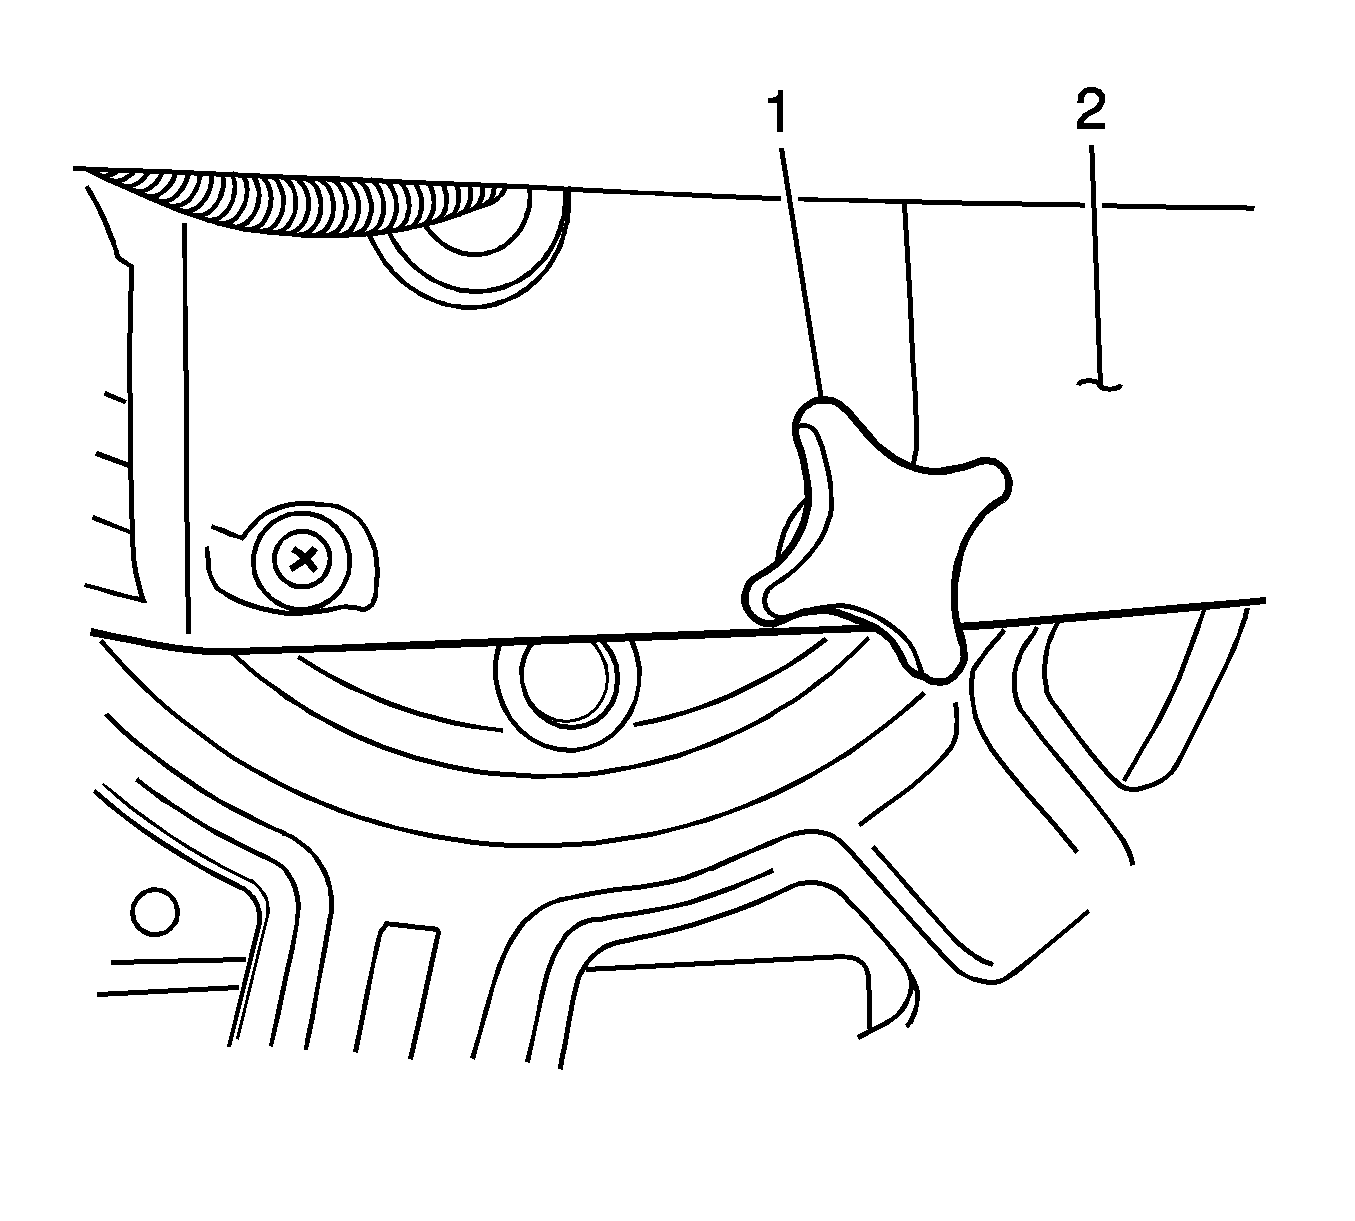
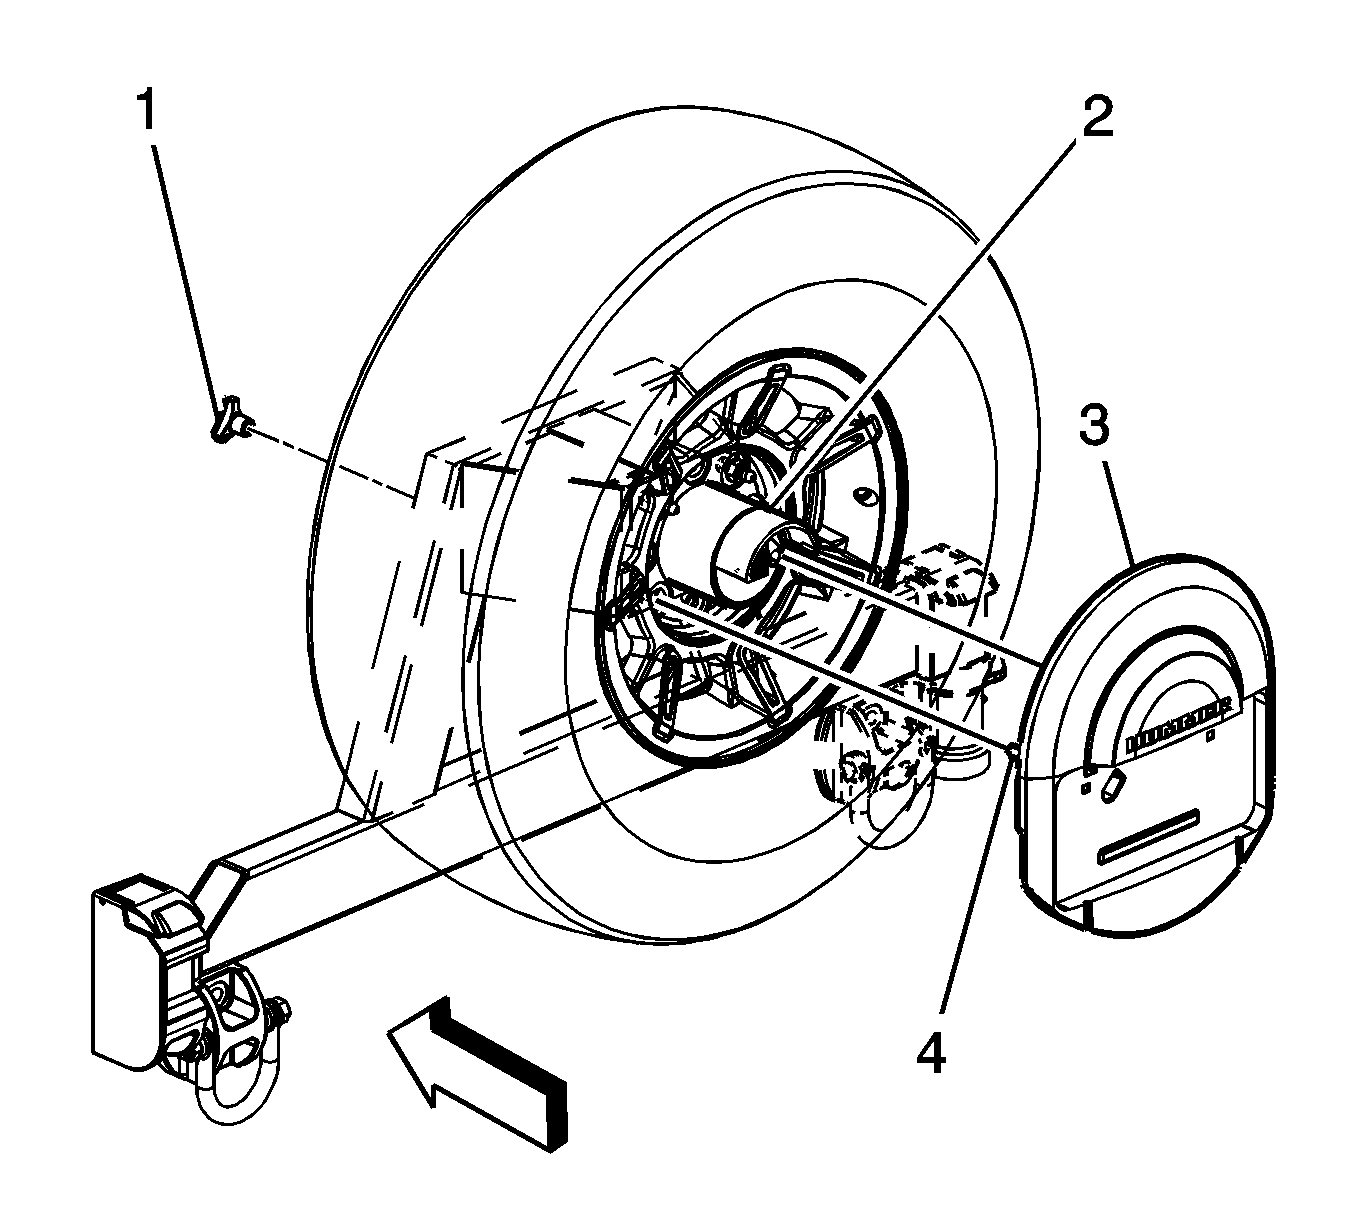
- Remove the hand nut (1) securing the license plate pocket to the spare tire carrier frame (2).
- Remove the license plate pocket (3) from the spare tire carrier frame (2).
Installation Procedure
- Install the license plate pocket (3) to the spare tire carrier frame (2).
- Secure the nut (1) to the license plate pocket bolts. Hand-tighten the nut.
- Latch and secure the spare tire carrier.


Rear License Plate Pocket Replacement SUV
Removal Procedure
- Open the liftgate.
- Remove the liftgate trim panel. Refer to Liftgate Trim Panel Replacement.
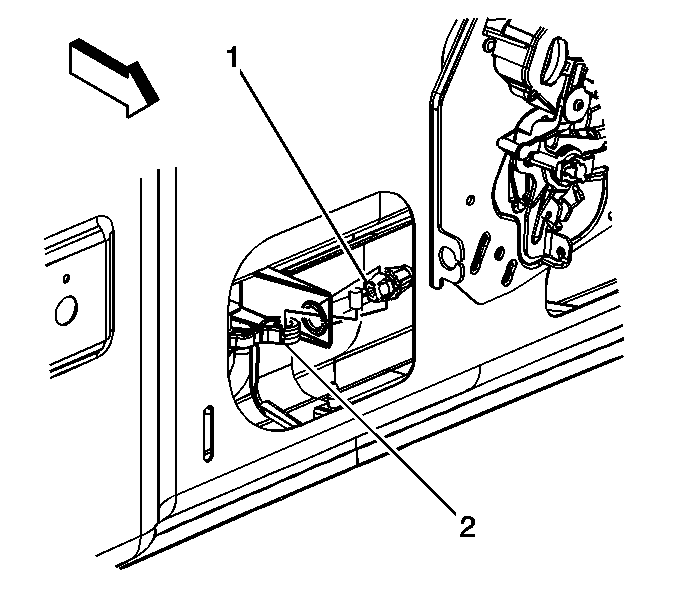
- Remove the latch cable handle connection by releasing the retainer (1) and removing the cable end from the handle arm.
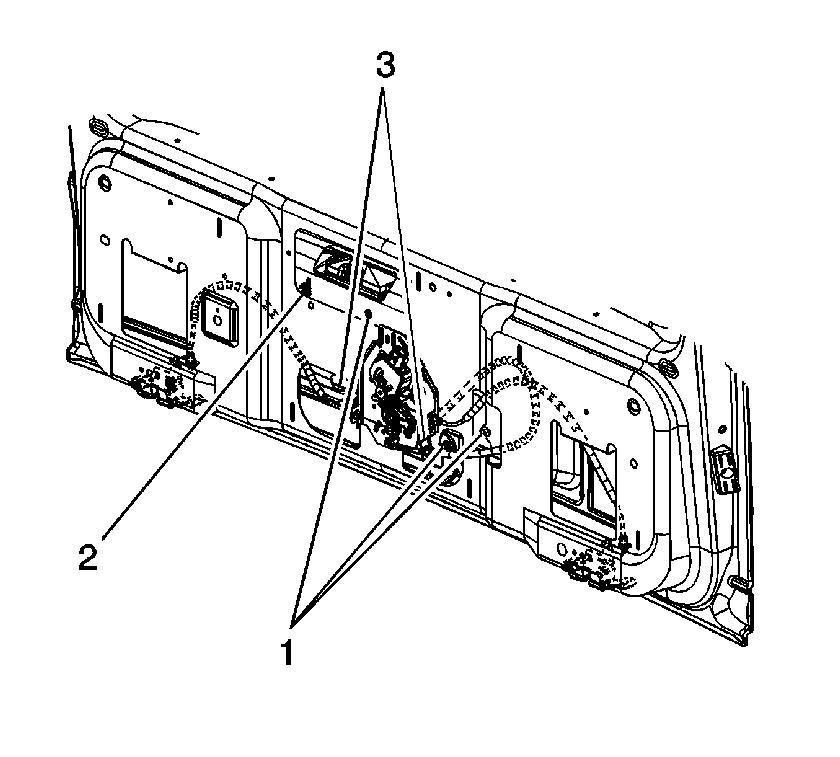
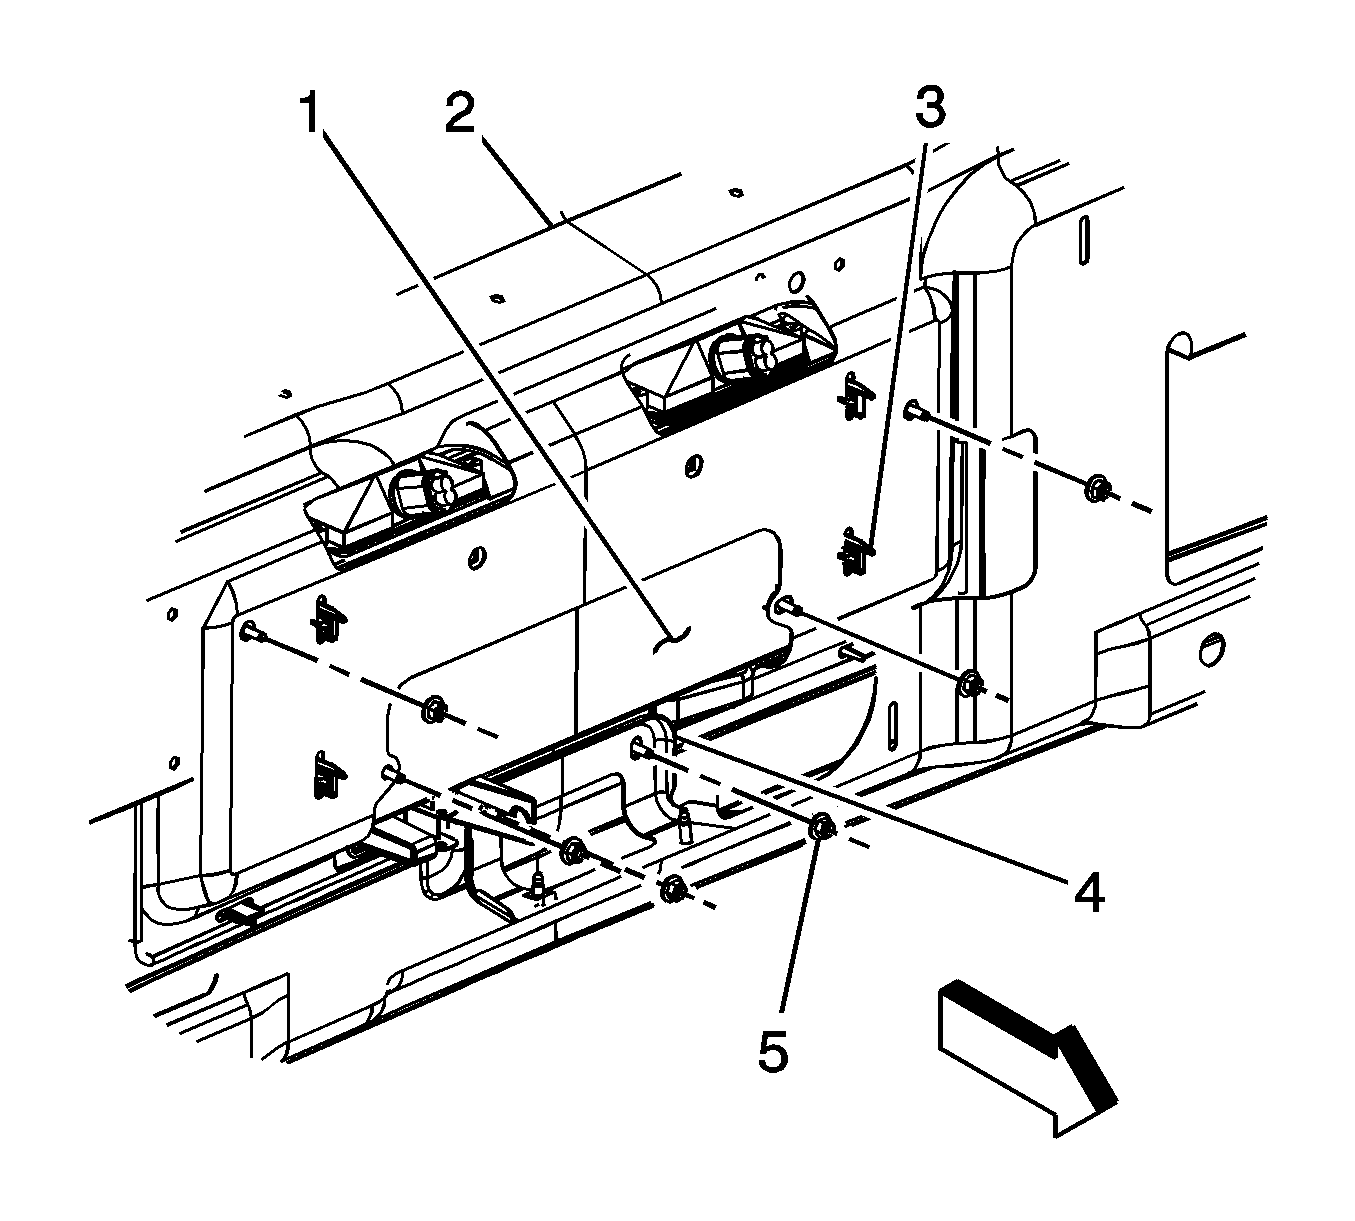
- Disconnect the 2 license plate pocket electrical connectors (3).
- Remove the 6 nuts (5) retaining the plate pocket to the liftgate.
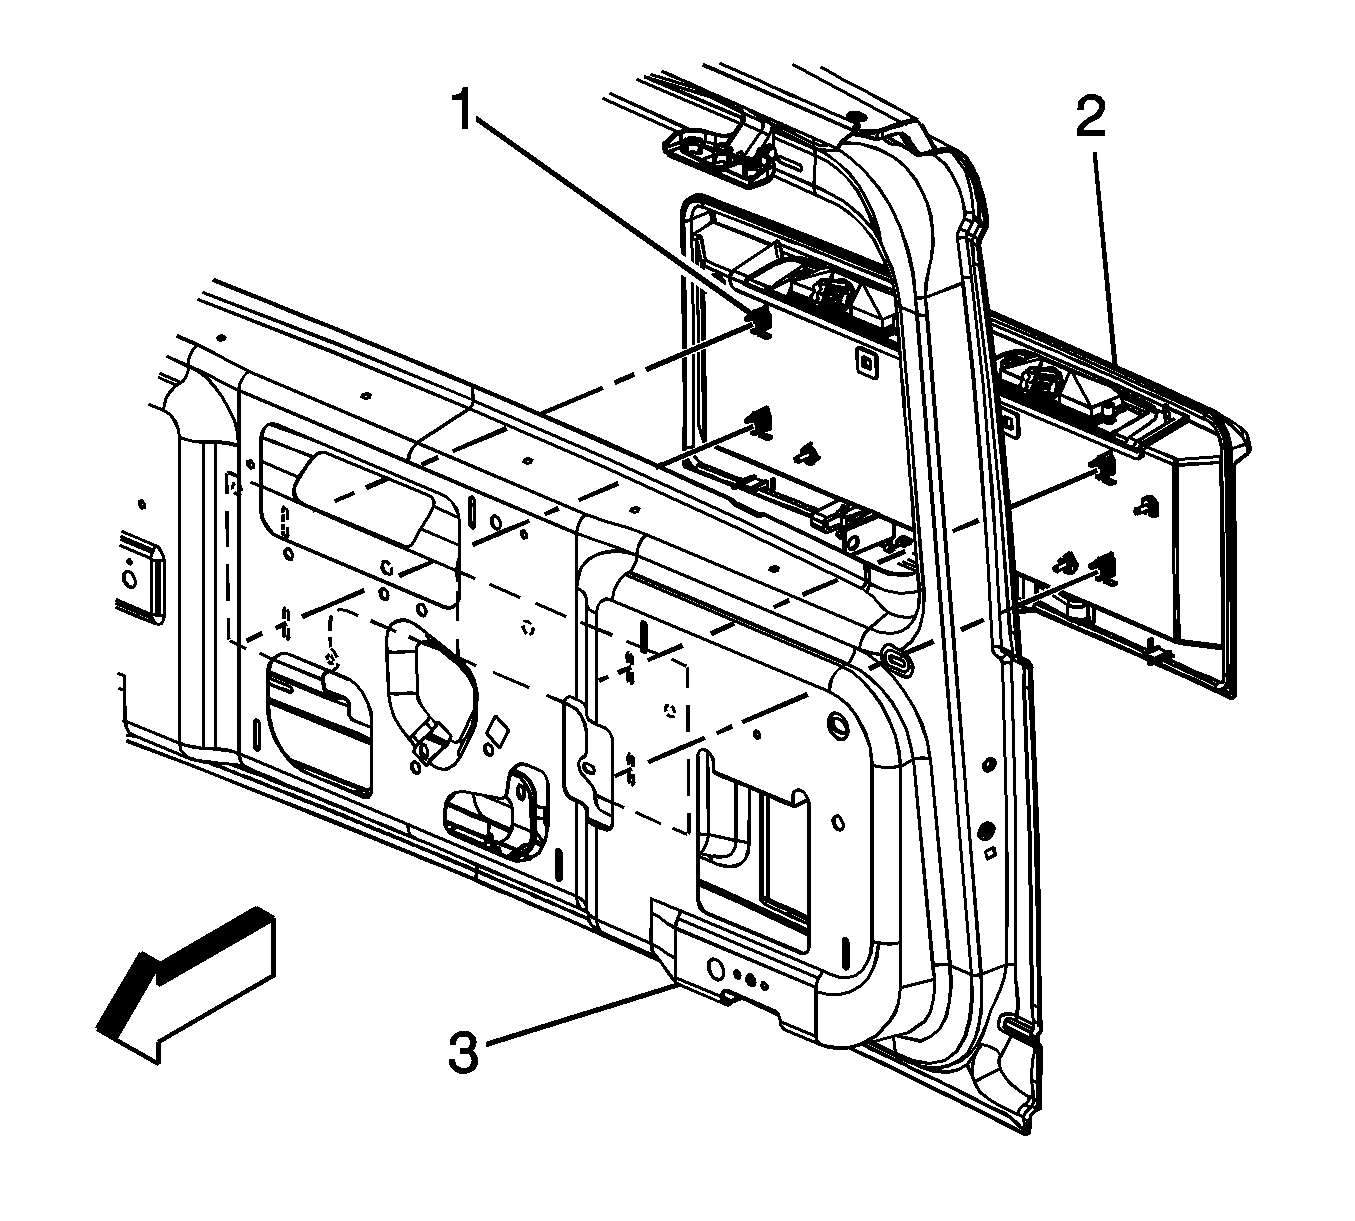
- Release the 4 clips (3) retaining the license plate pocket to the liftgate (2).
- Remove the license plate pocket (2) from the liftgate (3).
Installation Procedure
- Place the license plate pocket (2) in position on the liftgate (3), ensuring all of the retaining clips are fully seated.
- Install the 6 nuts (5) retaining the license plate pocket to the liftgate.
- Connect the 2 license plate electrical connectors.
- Attach the latch control cable handle connection by installing the cable end into the handle arm (2) and securing the retainer (1).
- Install the liftgate trim panel. Refer to Liftgate Trim Panel Replacement.

Caution: Refer to Fastener Caution in the Preface section.

Tighten
Tighten the nuts to 4.5 N·m (40 lb in).

