For 1990-2009 cars only
Removal Procedure
- Remove the oil level indicator and tube. Refer to Oil Level Indicator and Tube Replacement.
- Remove the oil pan skid plate. Refer to Oil Pan Skid Plate Replacement.
- Drain the engine oil. Refer to Engine Oil and Oil Filter Replacement.
- Remove the crossmember. Refer to Crossmember Replacement.
- Remove the differential carrier assembly bushing to frame bolts ONLY.
- Pull the differential carrier assembly downward.
- Secure the pinion yoke, in order to prevent the differential carrier from rotating.
- Remove the service slot plug.
- Remove the nuts securing the fuel hose/pipe bracket to the transmission, and position aside.
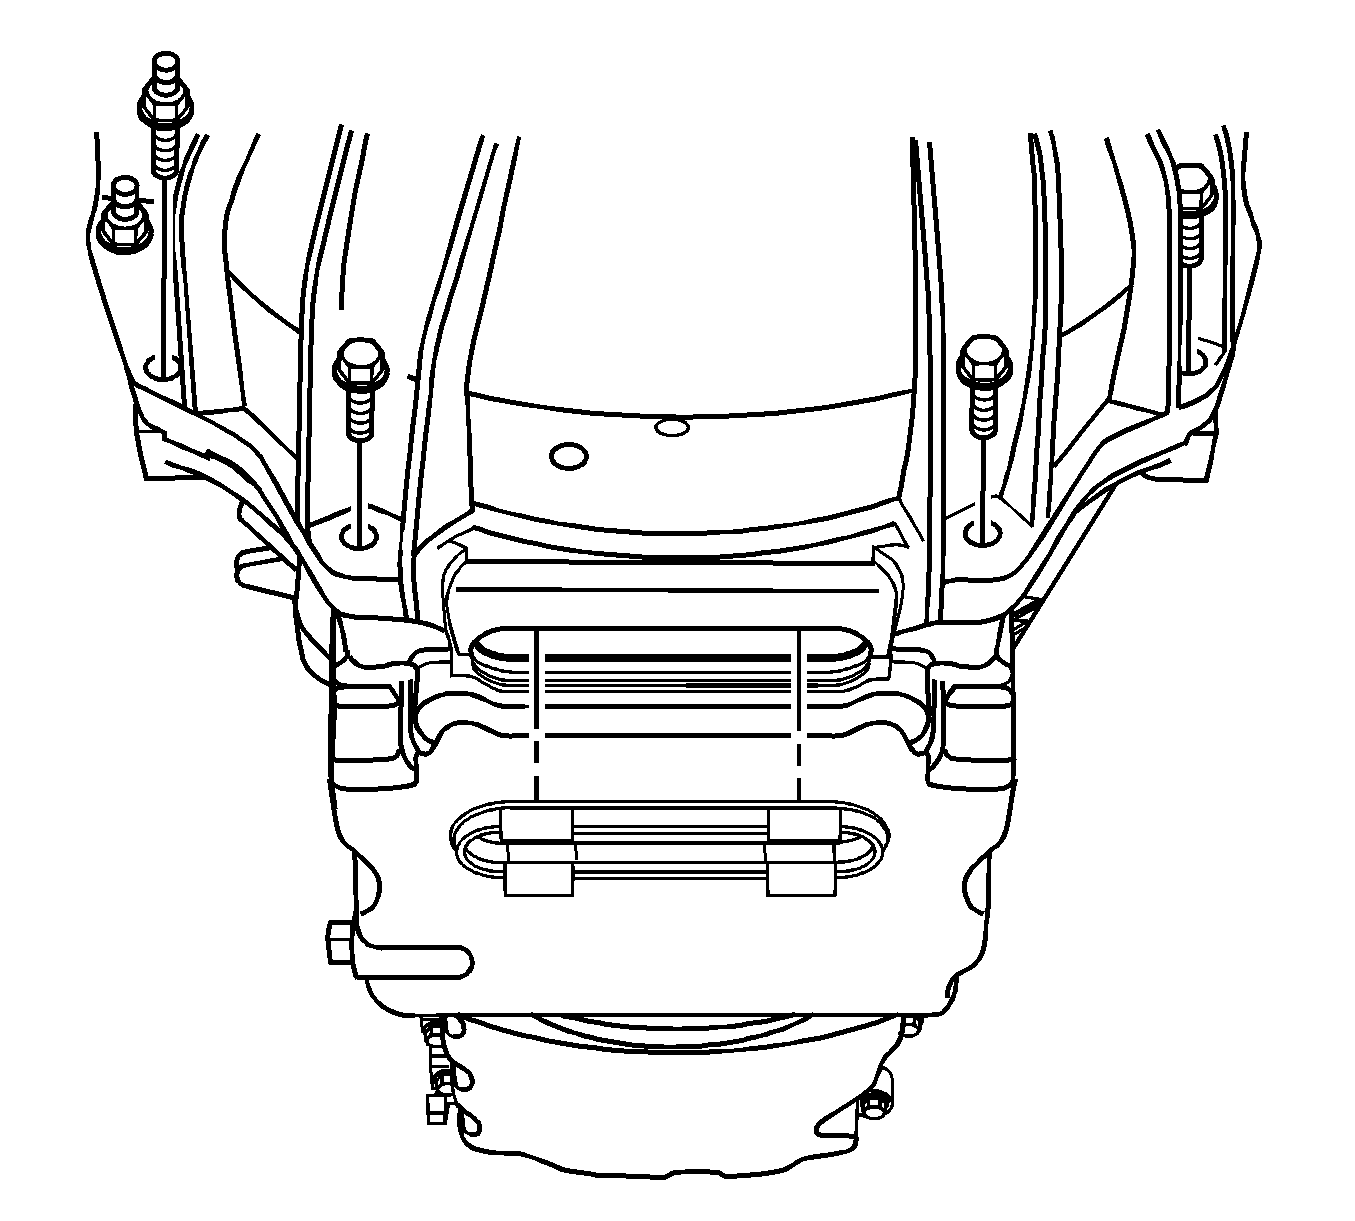
- Remove 4 lower transmission mounting bolts that are attached to the oil pan.
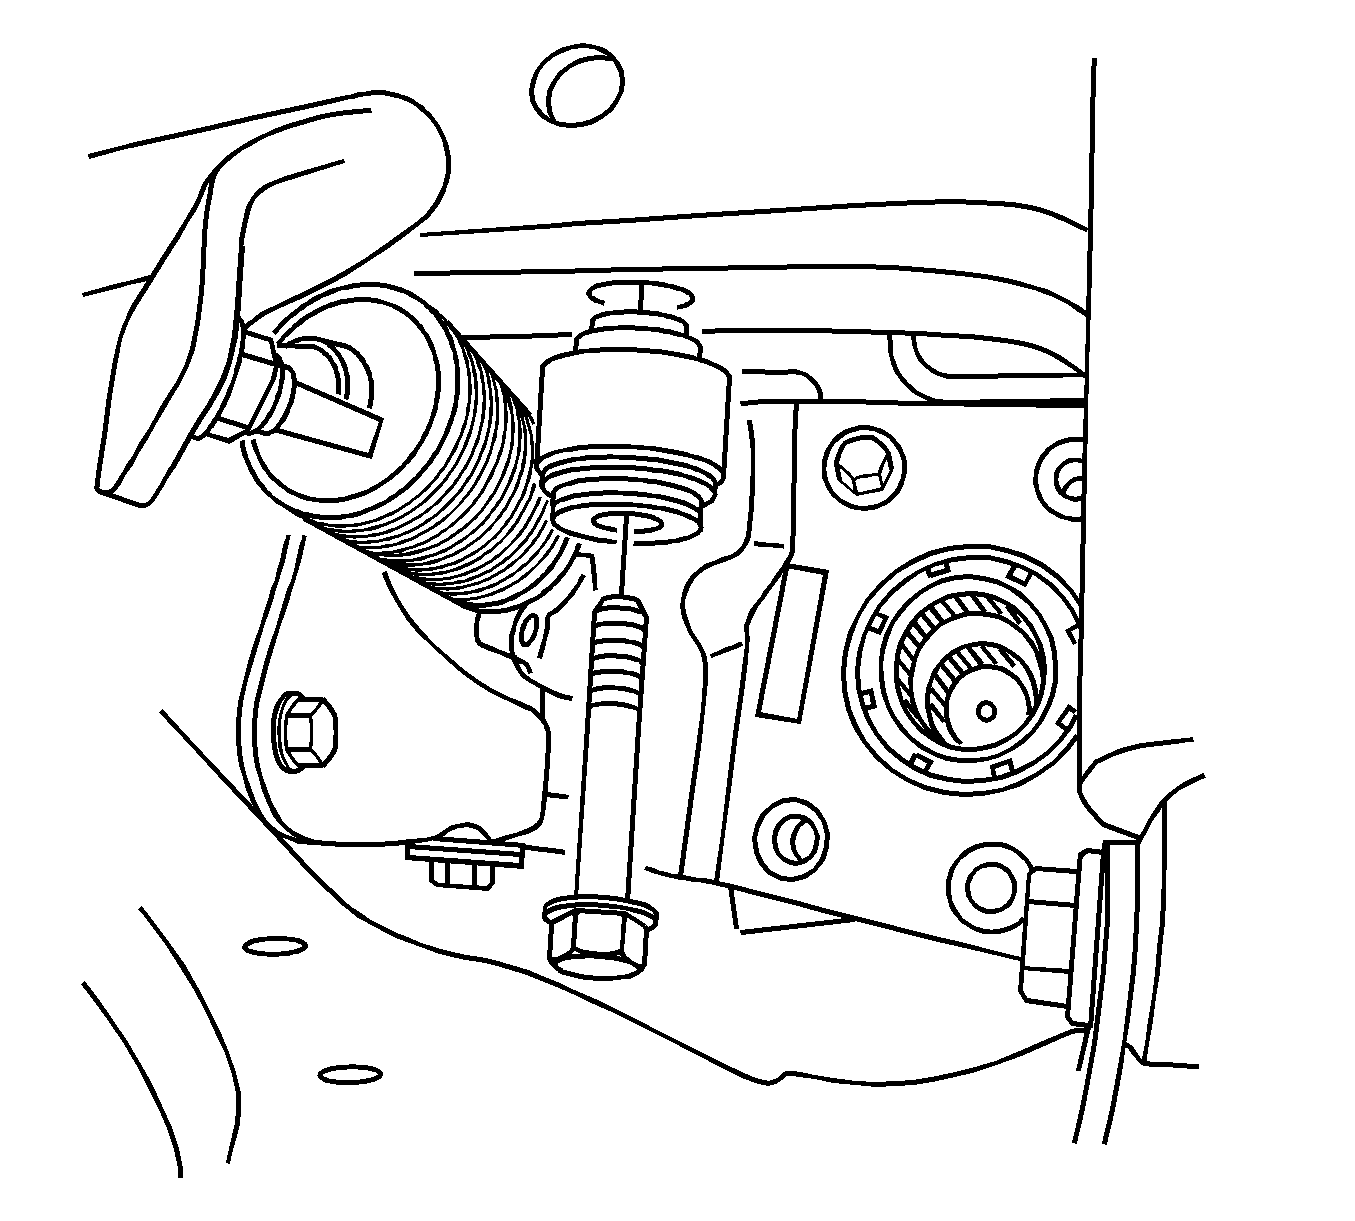
- Remove the power steering gear. Refer to Steering Gear Replacement.
- Pull the power steering gear downward in order to gain access to the oil pan.
- Disconnect the engine wiring harness retainers from the oil pan.
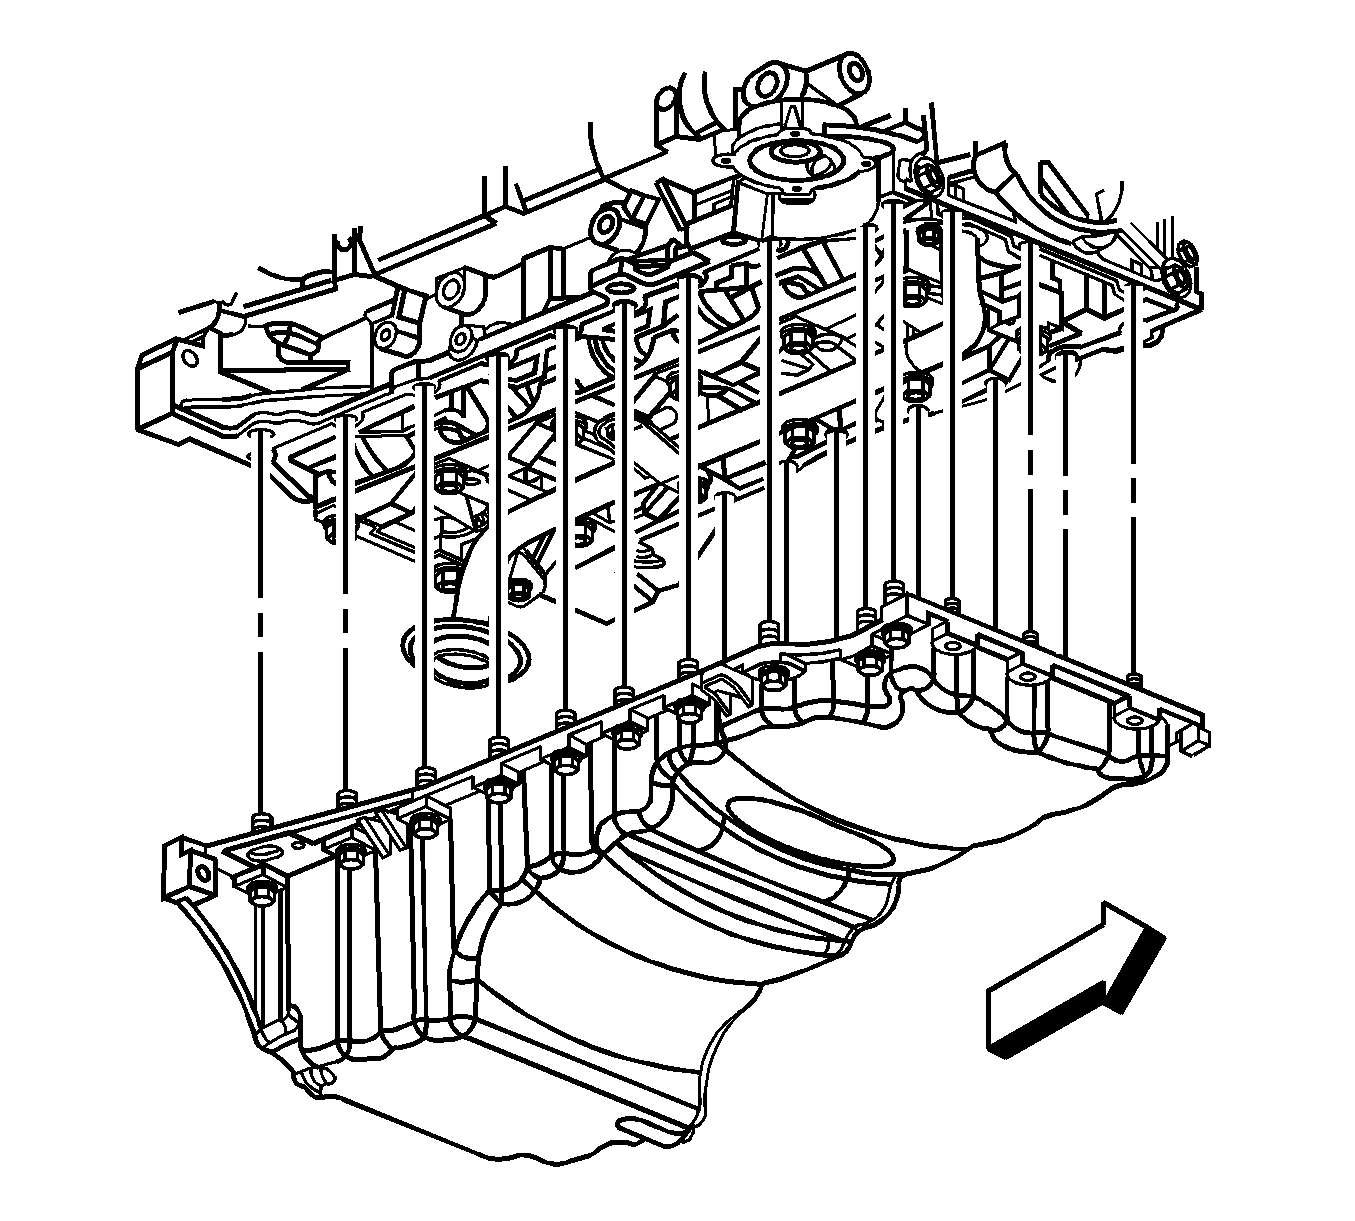
- Remove the oil pan bolts.
- Install 2 bolts in the threaded holes at the rear of the oil pan to act as jack screws and tighten evenly to release the oil pan from the engine block.
- Remove the oil pan.
- Remove the 2 bolts from the jack screw holes.
- Clean and inspect the oil pan. Refer to Oil Pan Cleaning and Inspection.
- Clean and inspect the engine block sealing surface.


Installation Procedure
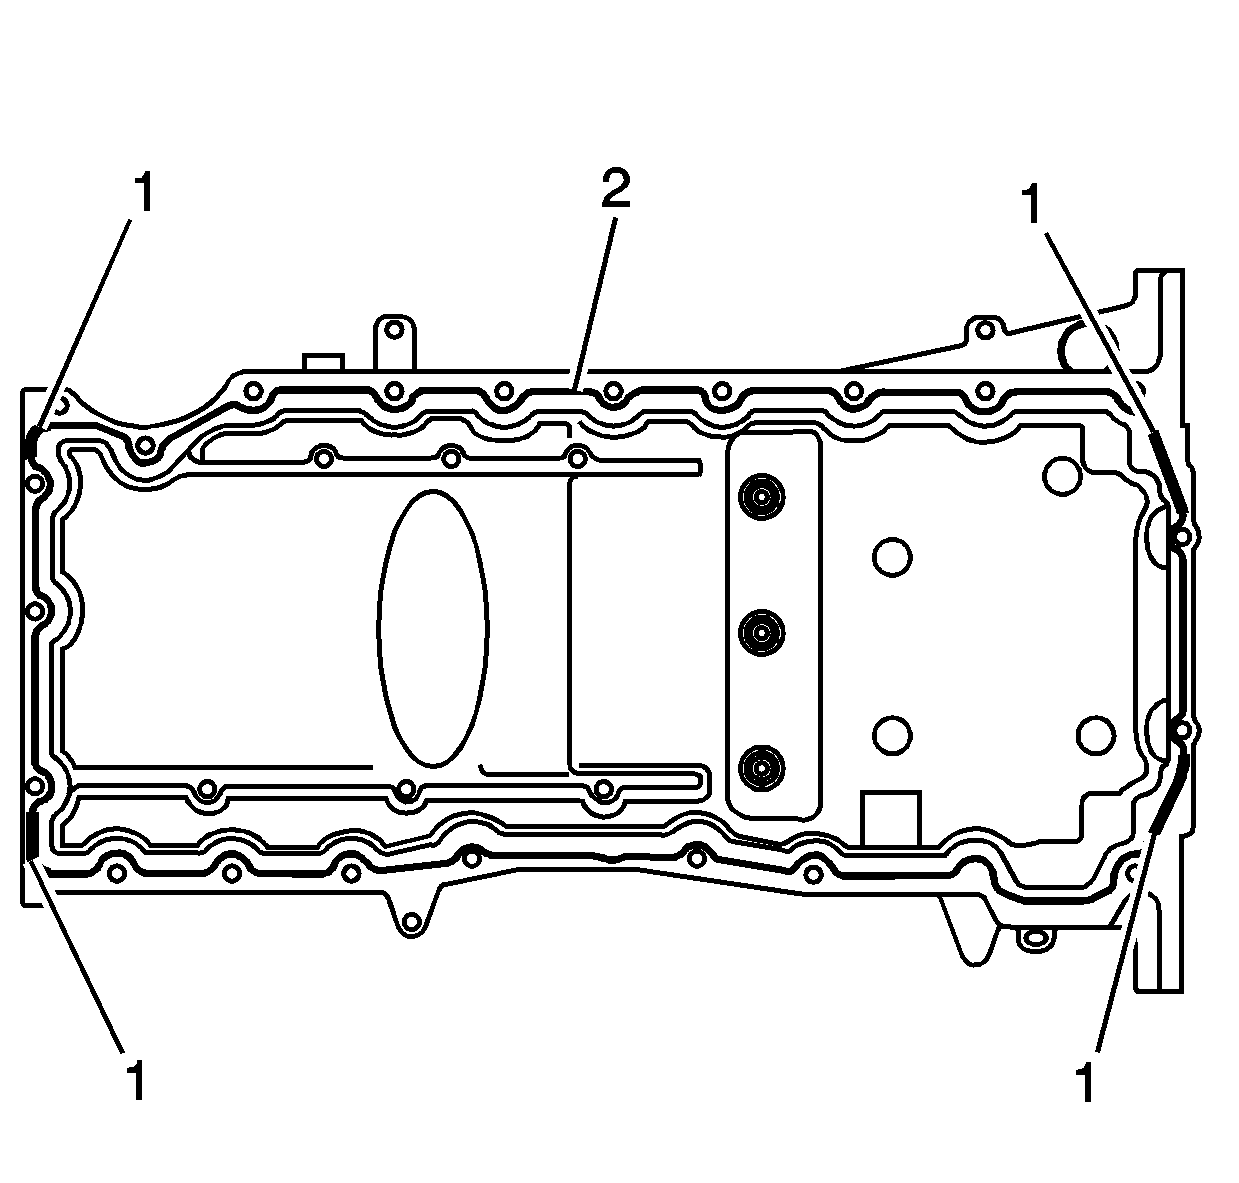
- Apply a 5.5 mm (0.22 in) bead of sealer to the oil pan in the areas marked (1). Refer to Adhesives, Fluids, Lubricants, and Sealers.
- Apply a 3 mm (0.12 in) bead of sealer to the oil pan in the area marked (2). Refer to Adhesives, Fluids, Lubricants, and Sealers.
- Position the oil pan to the engine block.
- Ensure the oil pan is positioned fully rearward against the transmission mounting surface.
- Install the oil pan bolts.
- Tighten the oil pan bolts.
- Connect the engine wiring harness retainers to the oil pan.
- Position the power steering gear upward to the frame assembly.
- Install the power steering gear. Refer to Steering Gear Replacement.
- Install the 4 lower transmission mounting bolts.
- Install the nuts securing the fuel hose/pipe bracket to the transmission.
- Install the service slot plug.
- Position the differential carrier assembly to the frame.
- Install the differential carrier assembly bushing to frame bolts.
- Install the crossmember. Refer to Crossmember Replacement.
- Install the oil pan skid plate. Refer to Oil Pan Skid Plate Replacement.
- Install the oil level indicator and tube. Refer to Oil Level Indicator and Tube Replacement.
- Fill the engine oil. Refer to Engine Oil and Oil Filter Replacement.

Note: The oil pan must be installed within 10 minutes from when the sealer was applied.

Note: Use care not to allow the sealer to contact the oil pump pipe and screen assembly.
Caution: Refer to Fastener Caution in the Preface section.
Tighten
| • | Tighten the (side) bolts to 25 N·m (18 lb ft). |
| • | Tighten the (end) bolts to 10 N·m (89 lb in). |

Tighten
Tighten the bolts to 50 N·m (37 lb ft).
Tighten
Tighten the nuts to 20 N·m (15 lb ft).

Tighten
Tighten the bolts to 152 N·m (112 lb ft).
