Special Tools
| • | EN 46121 Connecting Rod Guide Pin Set |
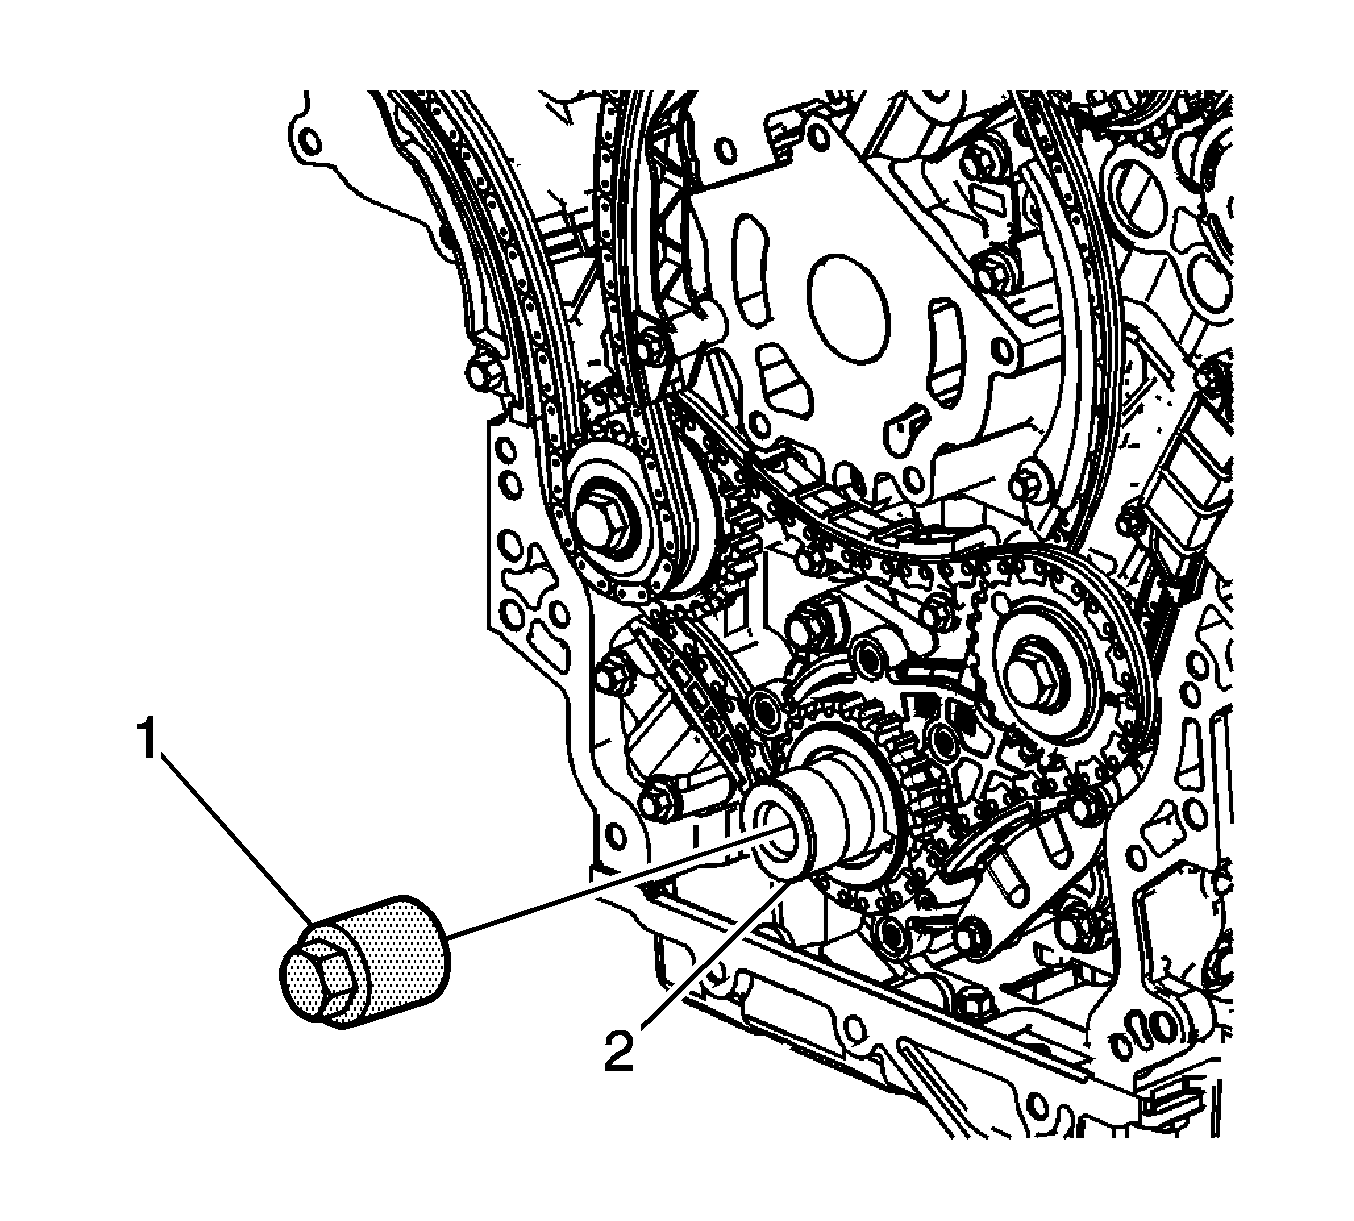
| • | EN 46111 Crankshaft Rotation Socket |
| • | KM-470-B Angular Torque Gage |
Removal Procedure
- Remove the engine assembly. Refer to Engine Replacement .
- Remove both cylinder head assemblies. Refer to Cylinder Head Replacement - Left Side and Cylinder Head Replacement - Right Side .
- Remove the oil pan assembly. Refer to Oil Pan Replacement .
- Mark the top of the piston being removed to identify its specific bore.
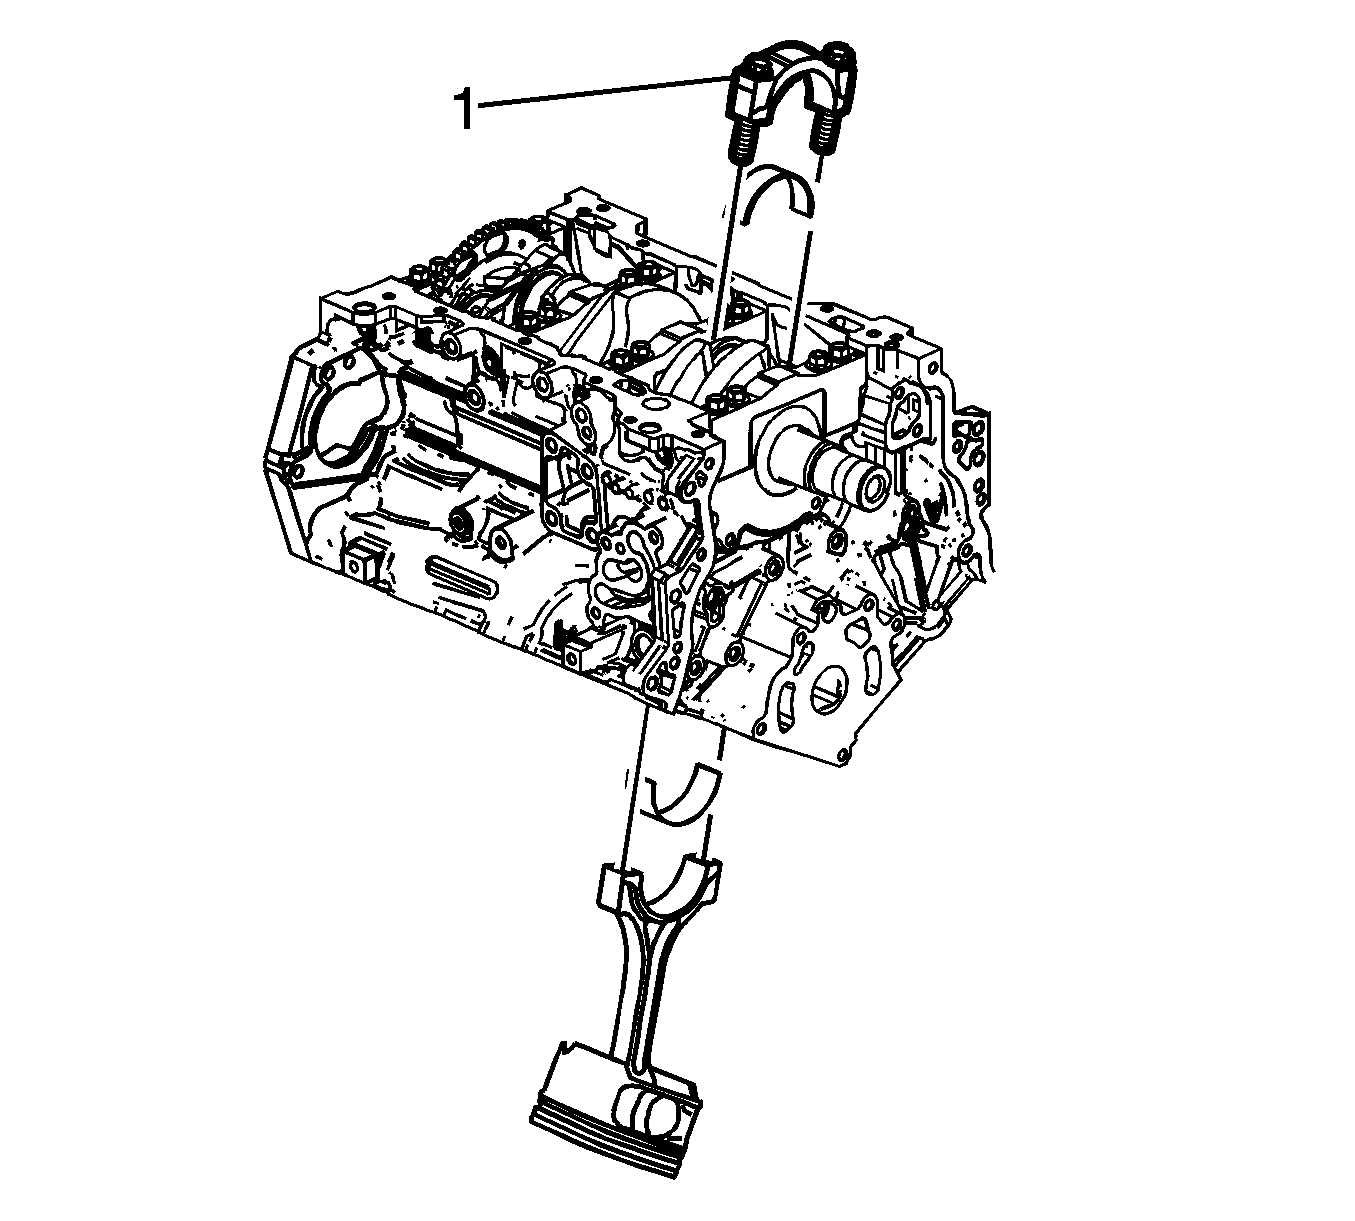
- Install EN 46111 (1) onto the crankshaft (2).
- Rotate the crankshaft until the piston being removed is at the bottom of its stroke; bottom dead center (BDC).
- Before removing the connecting rods, check the connecting rod side clearance using the following procedure:
- Mark the cylinder number on the connecting rod and the connecting rod cap with a paint stick or permanent marker.
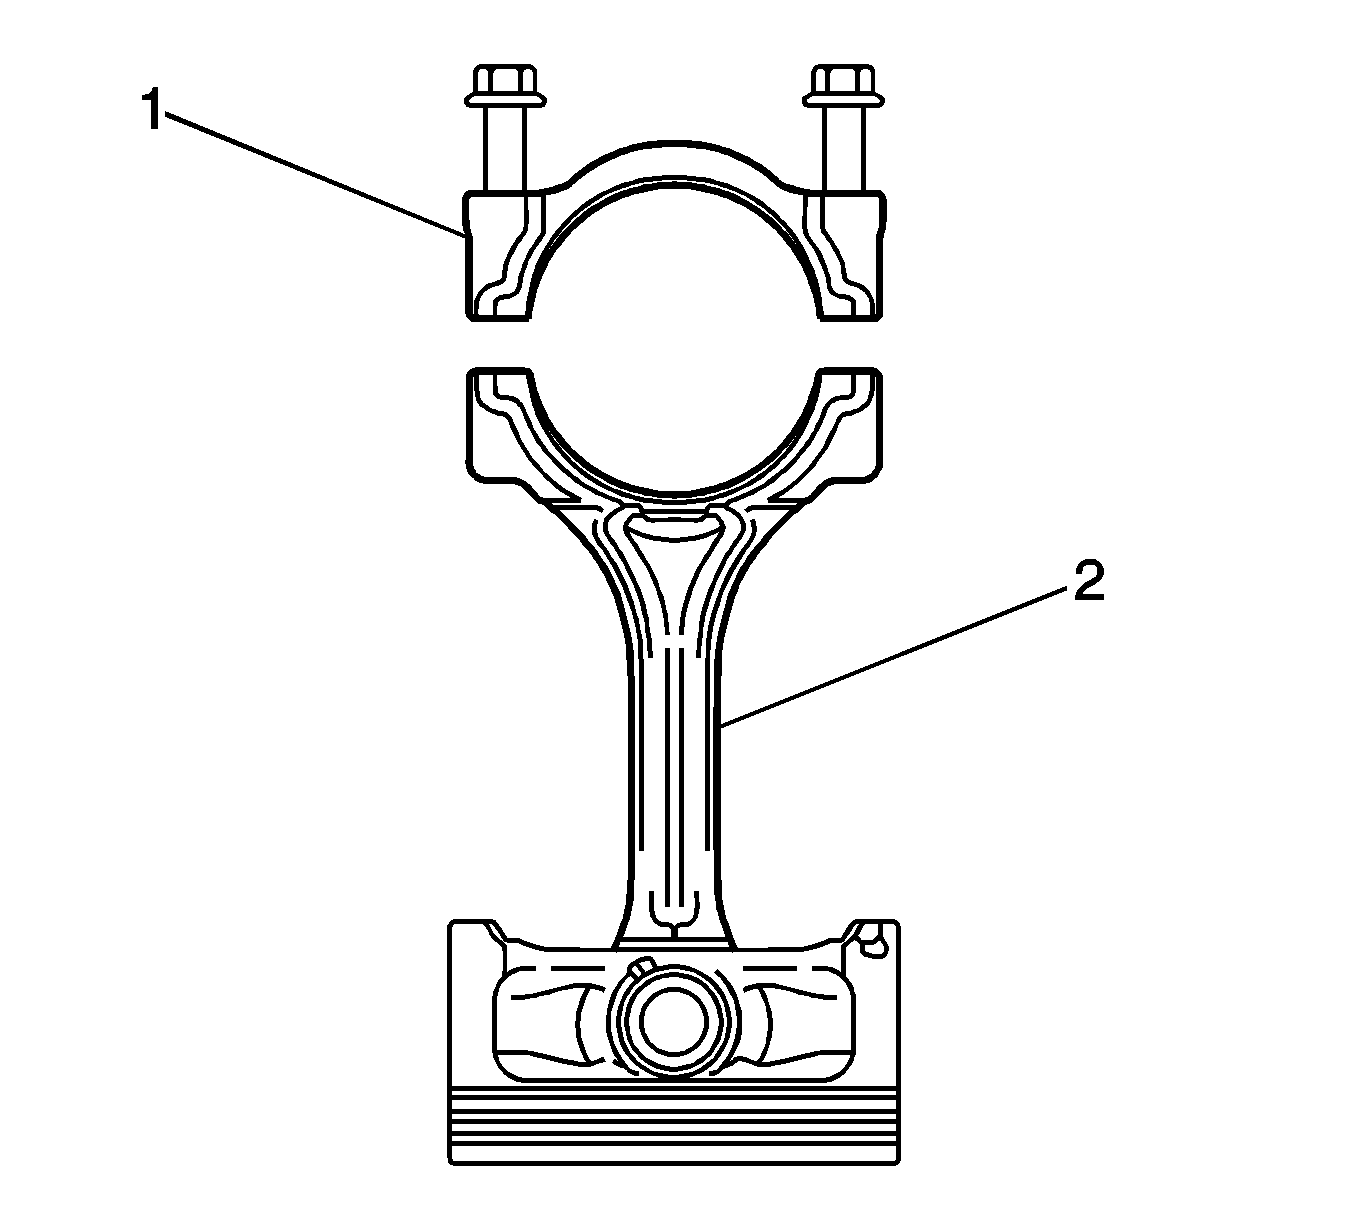
- Remove the connecting rod bolts (1), loosening progressively from side to side.
- Remove the connecting rod cap (2).
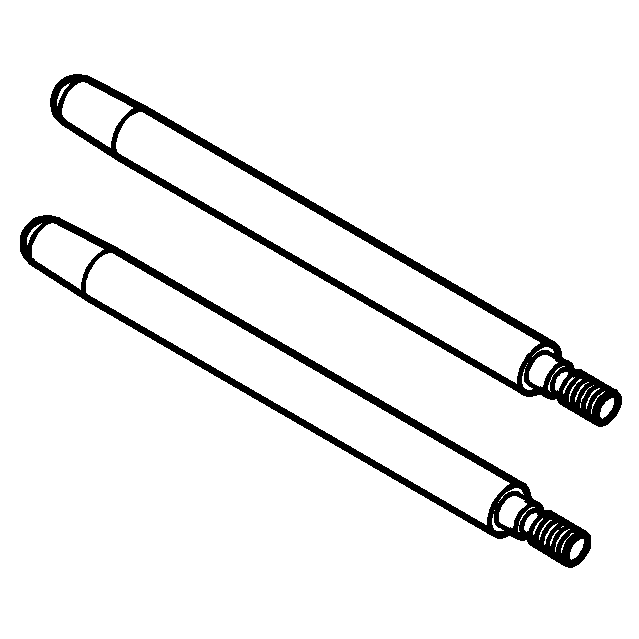
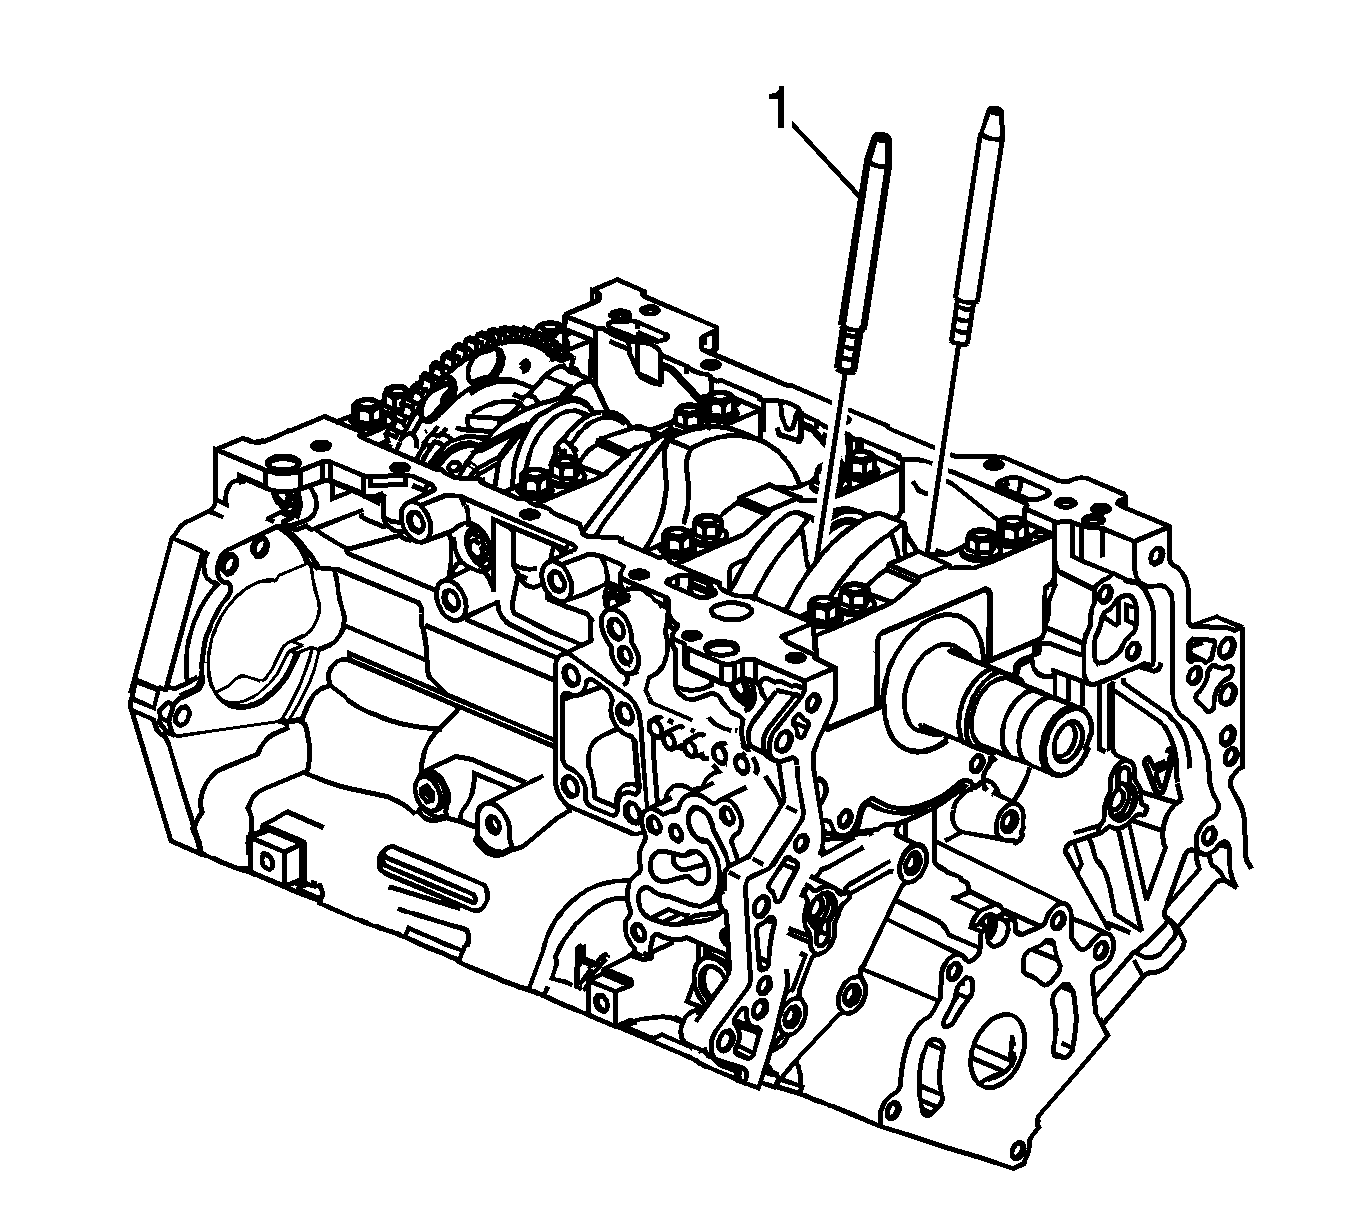
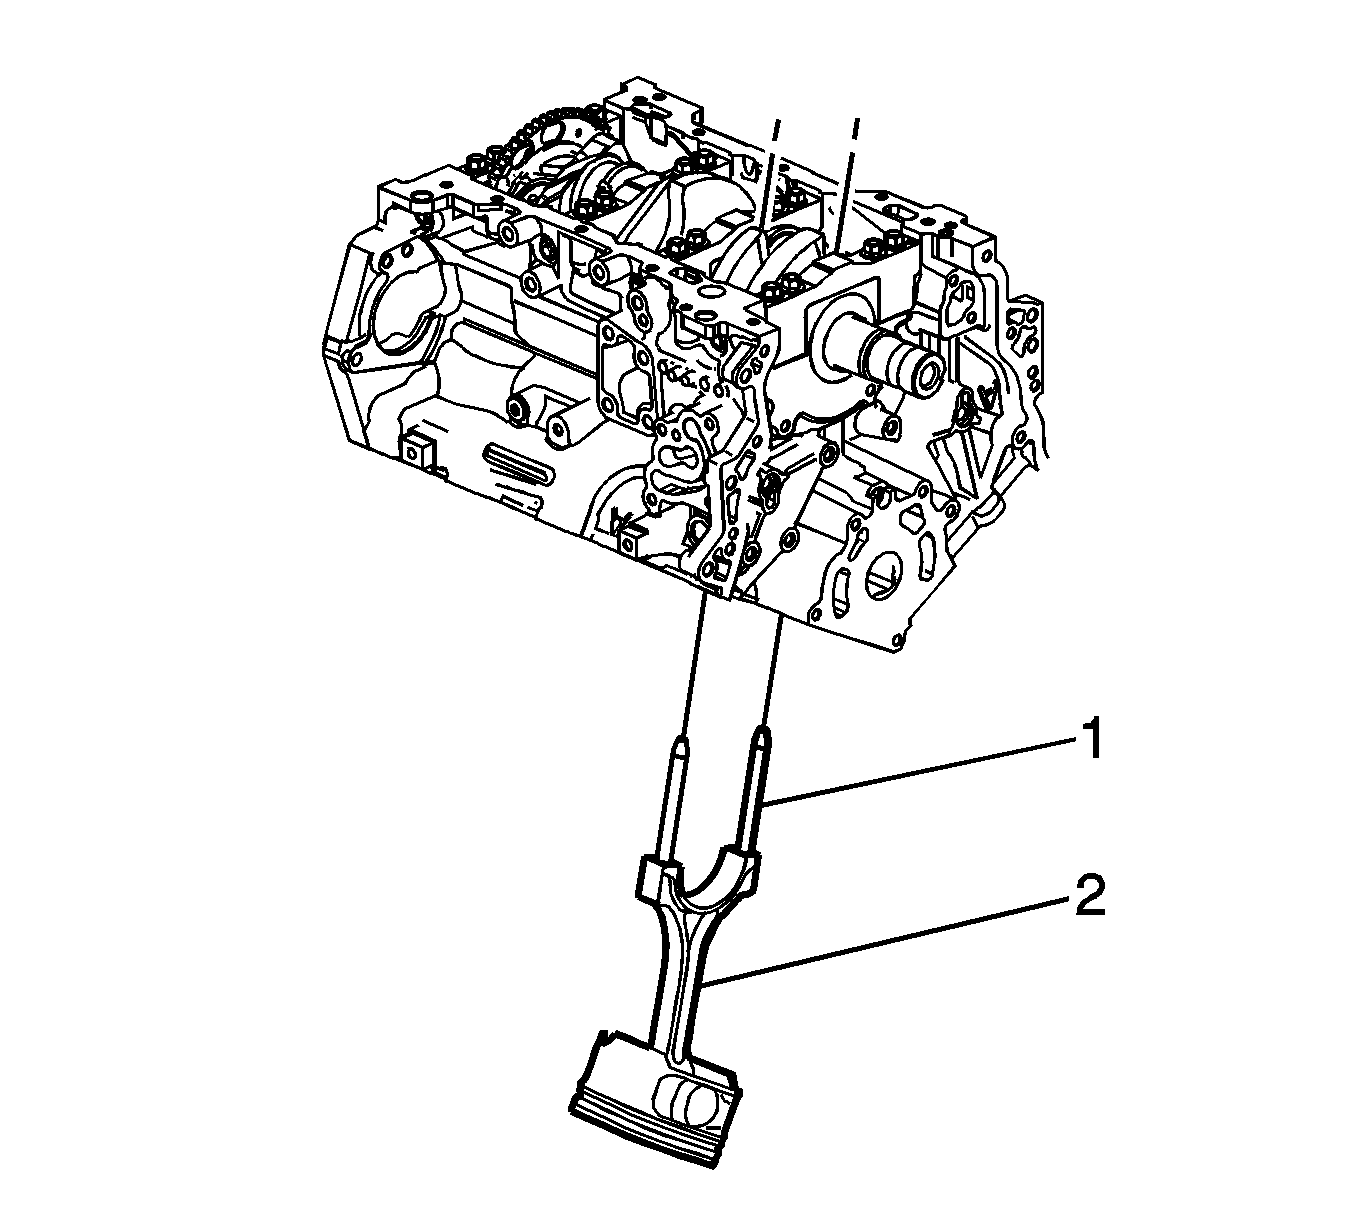
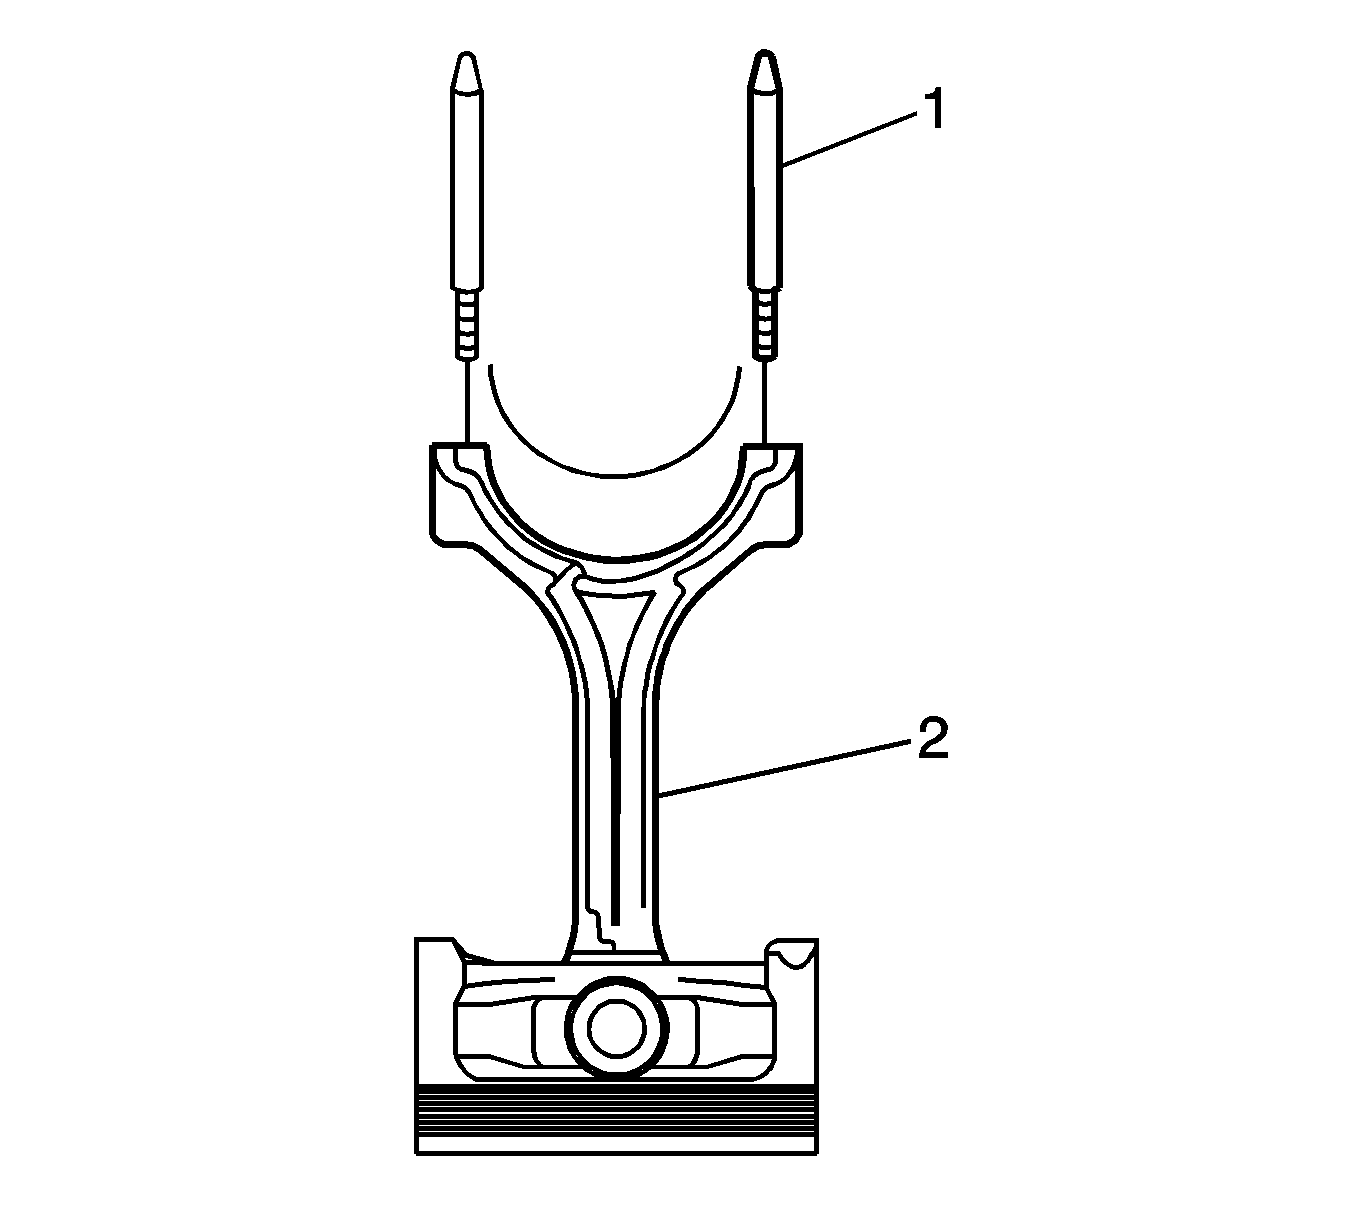
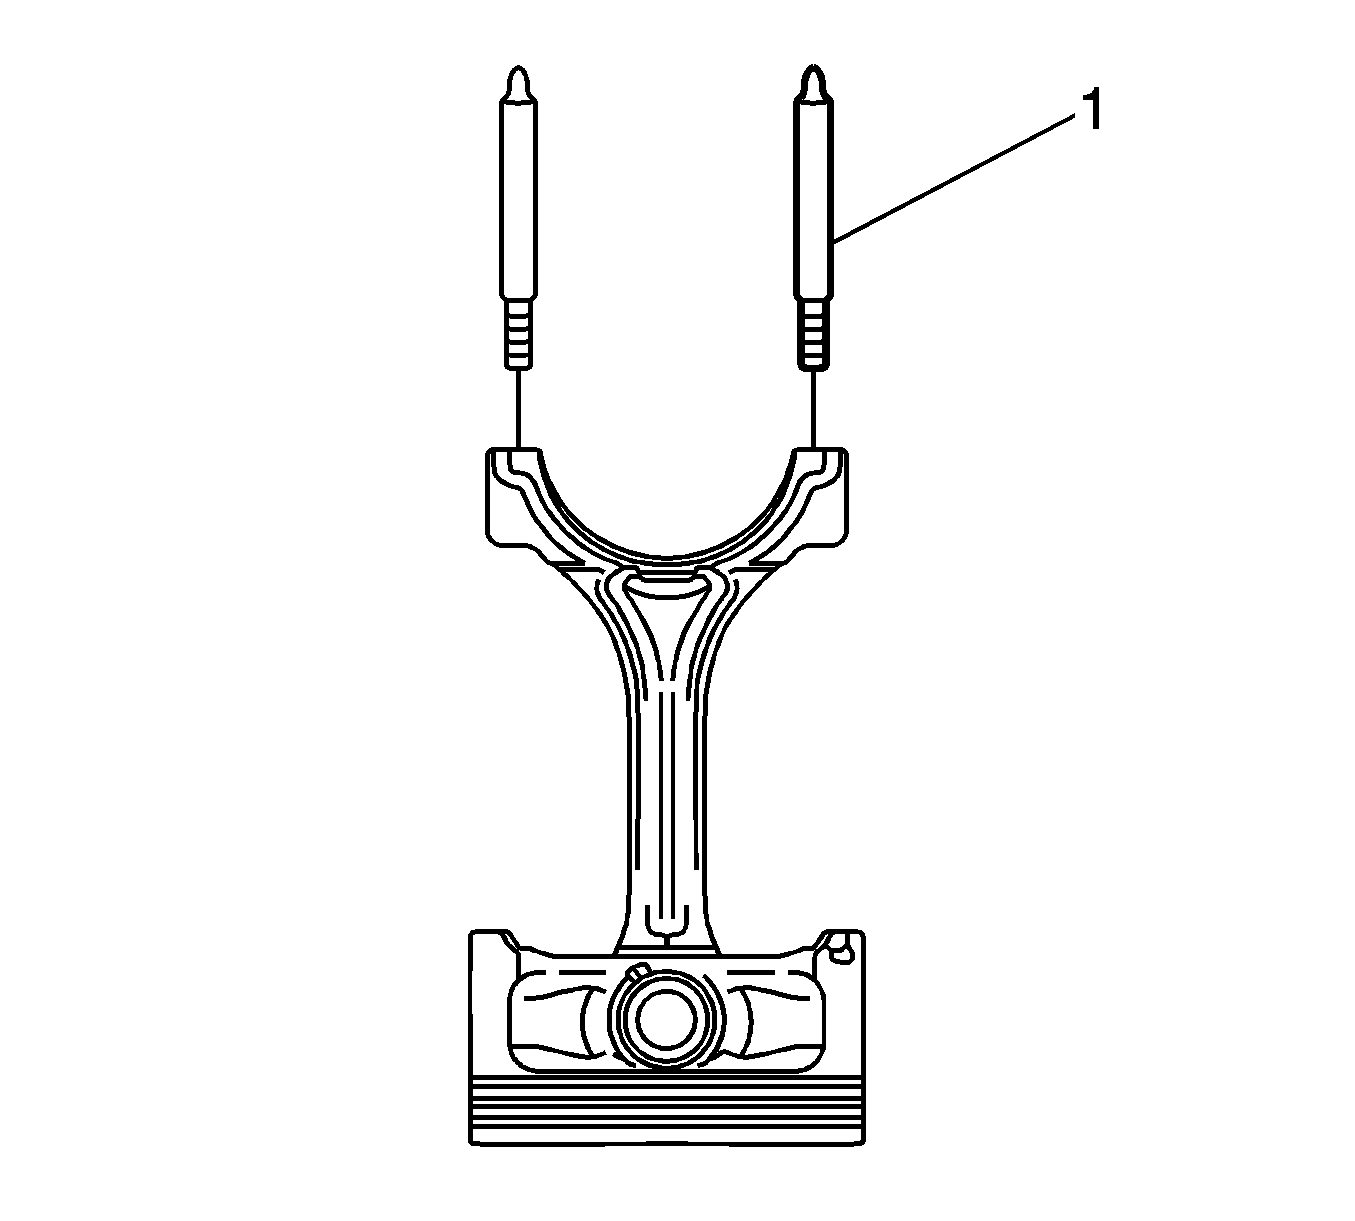
- Install connecting rod guide pin set, EN 46121 (1) to the connecting rod bolt holes.
- Using connecting rod guide pin set, EN 46121 (1), push the connecting rod and piston assembly (2) through the top of the cylinder.
- Remove the connecting rod guide pin set, EN 46121 (1) from the connecting rod bolt holes.
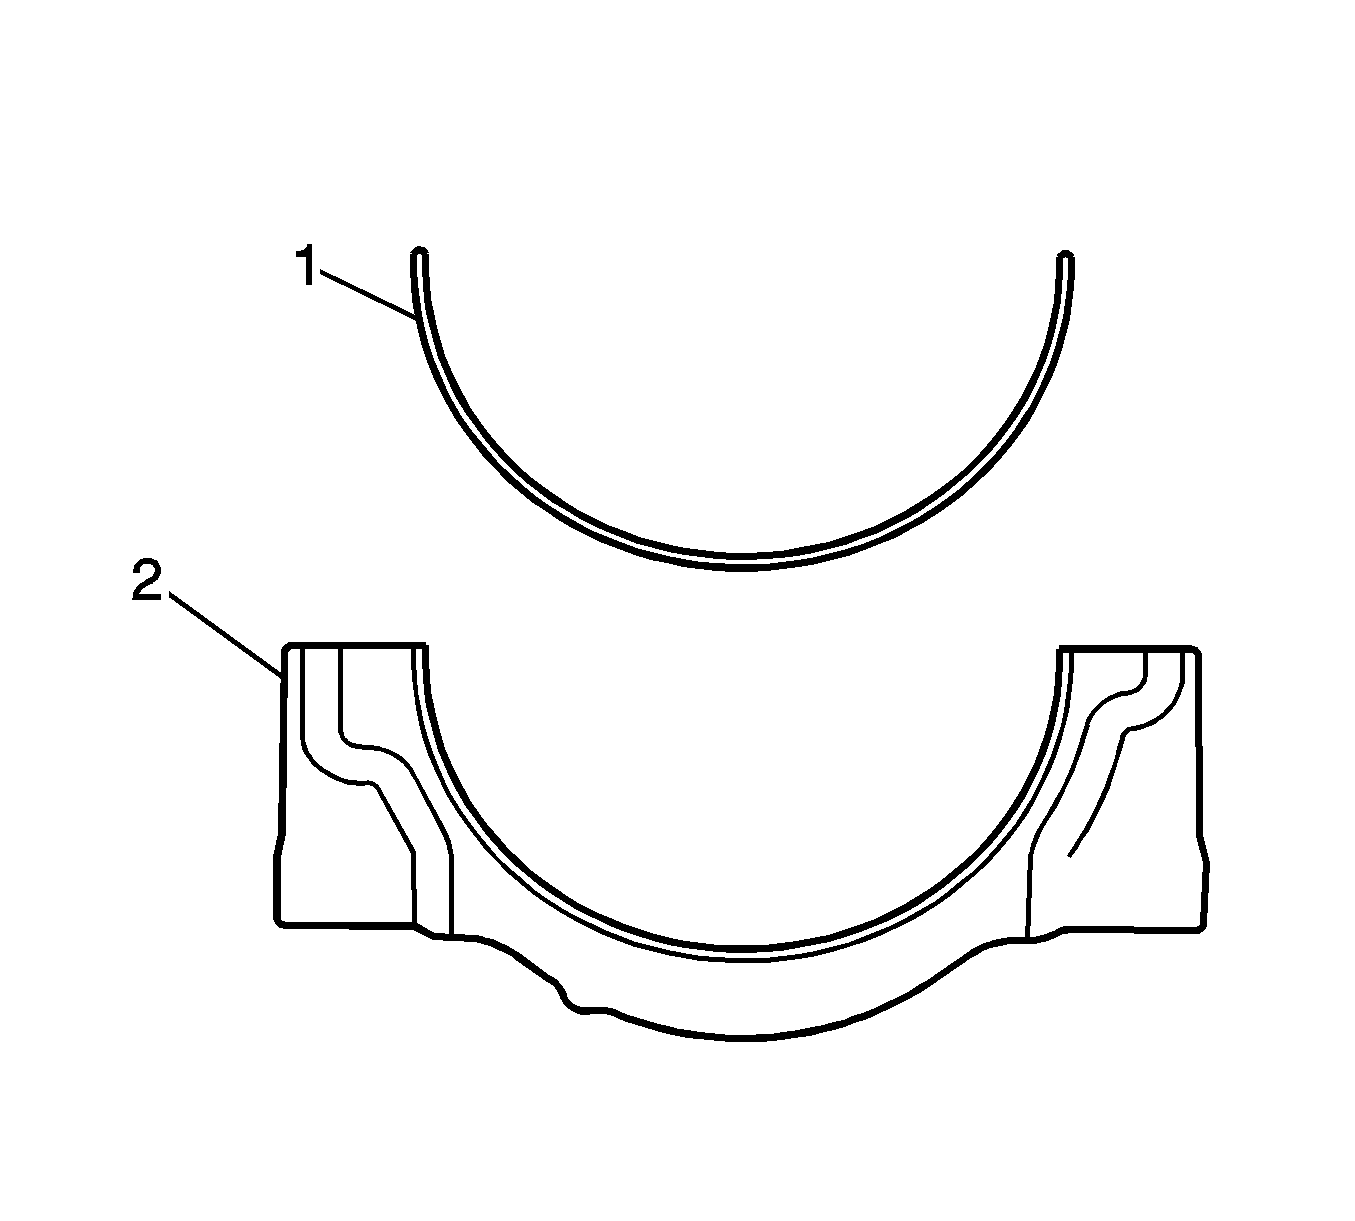
- Remove the upper connecting rod bearing from the connecting rod (2).
- Remove the lower connecting rod bearing (1) from the connecting rod cap (2).
- Reattach the connecting rod cap (1) to the connecting rod (2) to prevent damage to their mating surfaces.
- Repeat steps 4 to 16 for the remaining piston and connecting rod assemblies.
Important: If the connecting rod bearings have been used in a running engine, they must be replaced with new connecting rod bearings for reassembly.
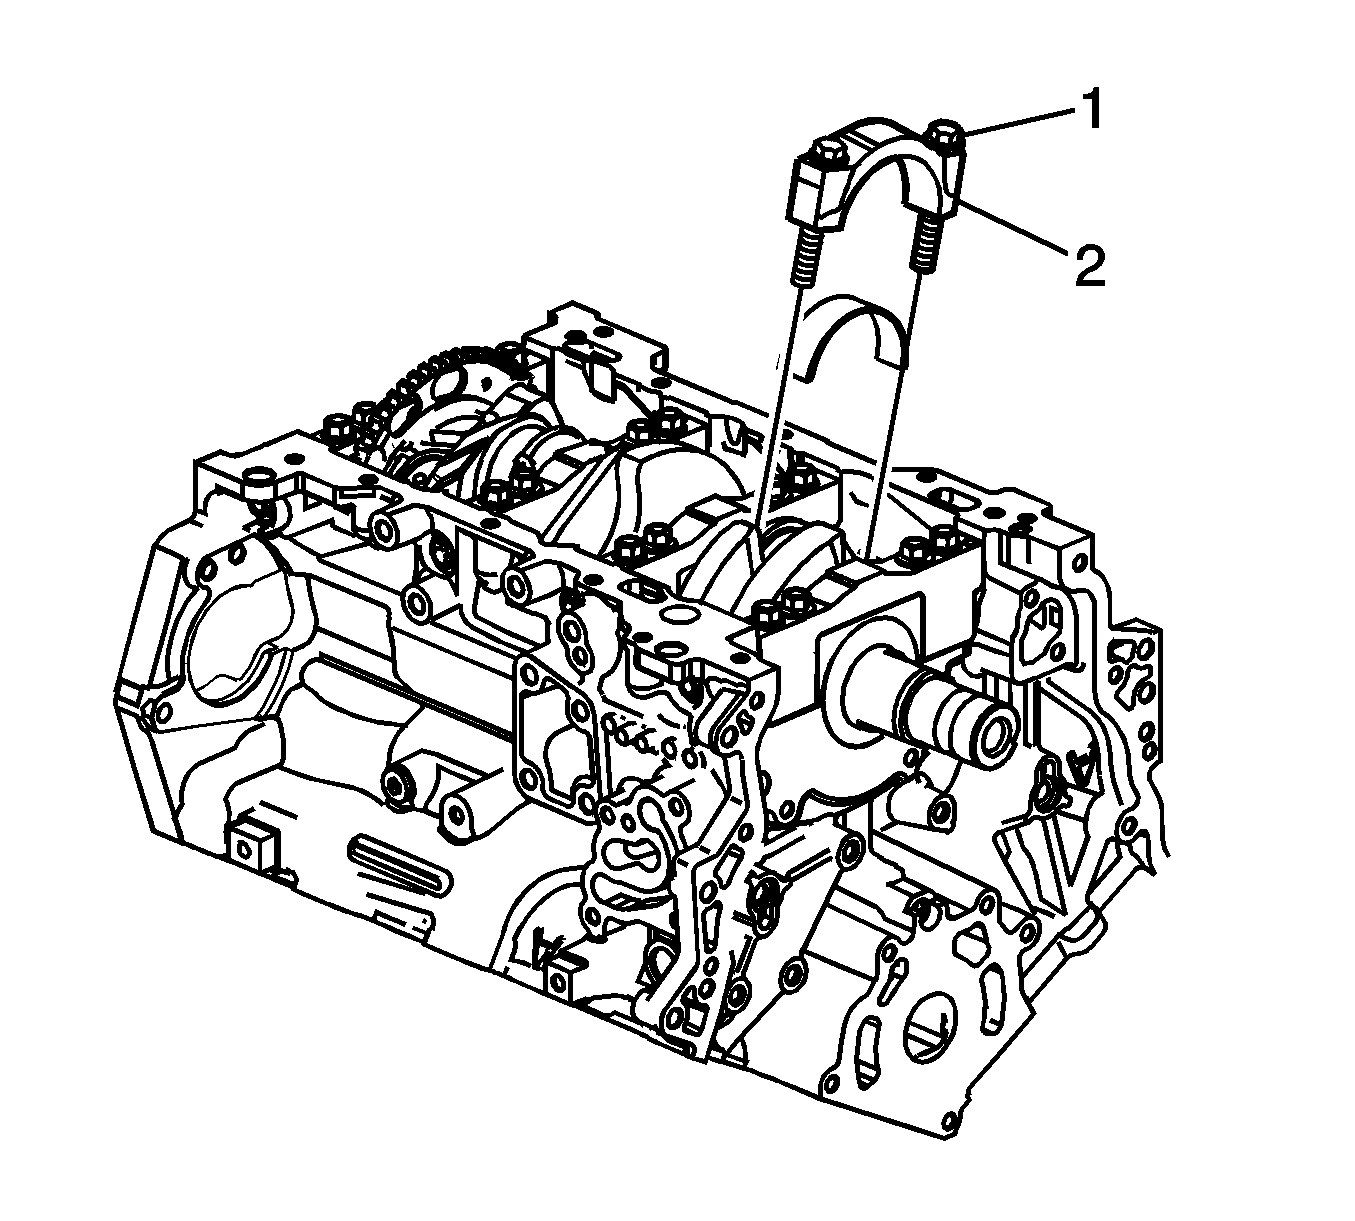
| • | Tap the connecting rod to one end of the crankshaft journal with a dead blow or wooden hammer. |
| • | Using feeler gages, measure the clearance between the crankshaft counterweight and the connecting rod. |
| • | The connecting rod side clearance should not exceed specifications. |
| • | If the endplay exceeds the specified limits, measure the width of the crankpin end of the connecting rod. |
| • | If the connecting rod width is significantly smaller than specified and severe wear is present on the side of the connecting rod, replace the connecting rod. |
Important: Do not use a stamp, punch or any other method that may distort or stress the connecting rod and cap.
Important: Powdered metal connecting rods have rod bolts which yield when tighten to the specified torque. If the bolts are loosened or removed they must be replaced. Rod bolts that are not replaced will not torque to the correct clamp load.
Important: The connecting rod caps must remain with the original connecting rod.
Important: Do not damage the crankshaft journal, cylinder wall and piston cooling jets when removing the connecting rod and piston assembly.
Important: When dismantled, ensure the connecting rod, connecting rod cap, piston and bearings are organized in their original position and location. This will also aid engine mechanical diagnosis.
Important: The cap and rod are a matched set and must be kept together.
Installation Procedure
- Liberally lubricate the cylinder walls, piston rings and piston skirts with engine oil.
- Select the correctly numbered piston/connecting rod assembly for the cylinder. A dot (1) showing correct piston orientation is located on the top of the piston.
- Install EN 46121 (1) into the connecting rod bolt holes.
- Compress the piston rings using a commercially available ring compressor.
- Using both hands from the top and bottom of the cylinder, slowly guide the piston (2) and connecting rod assembly into the cylinder. Do not allow the connecting rod to contact the cylinder wall.
- When the ring compressor contacts the deck surface, gently tap the piston into the cylinder using the handle end of a dead-blow hammer. Guide the connecting rod onto the crankshaft bearing journal using EN 46121 (1) while gently tapping the piston into the cylinder with a soft-blow hammer.
- Remove EN 46121 (1) from the connecting rod bolt holes.
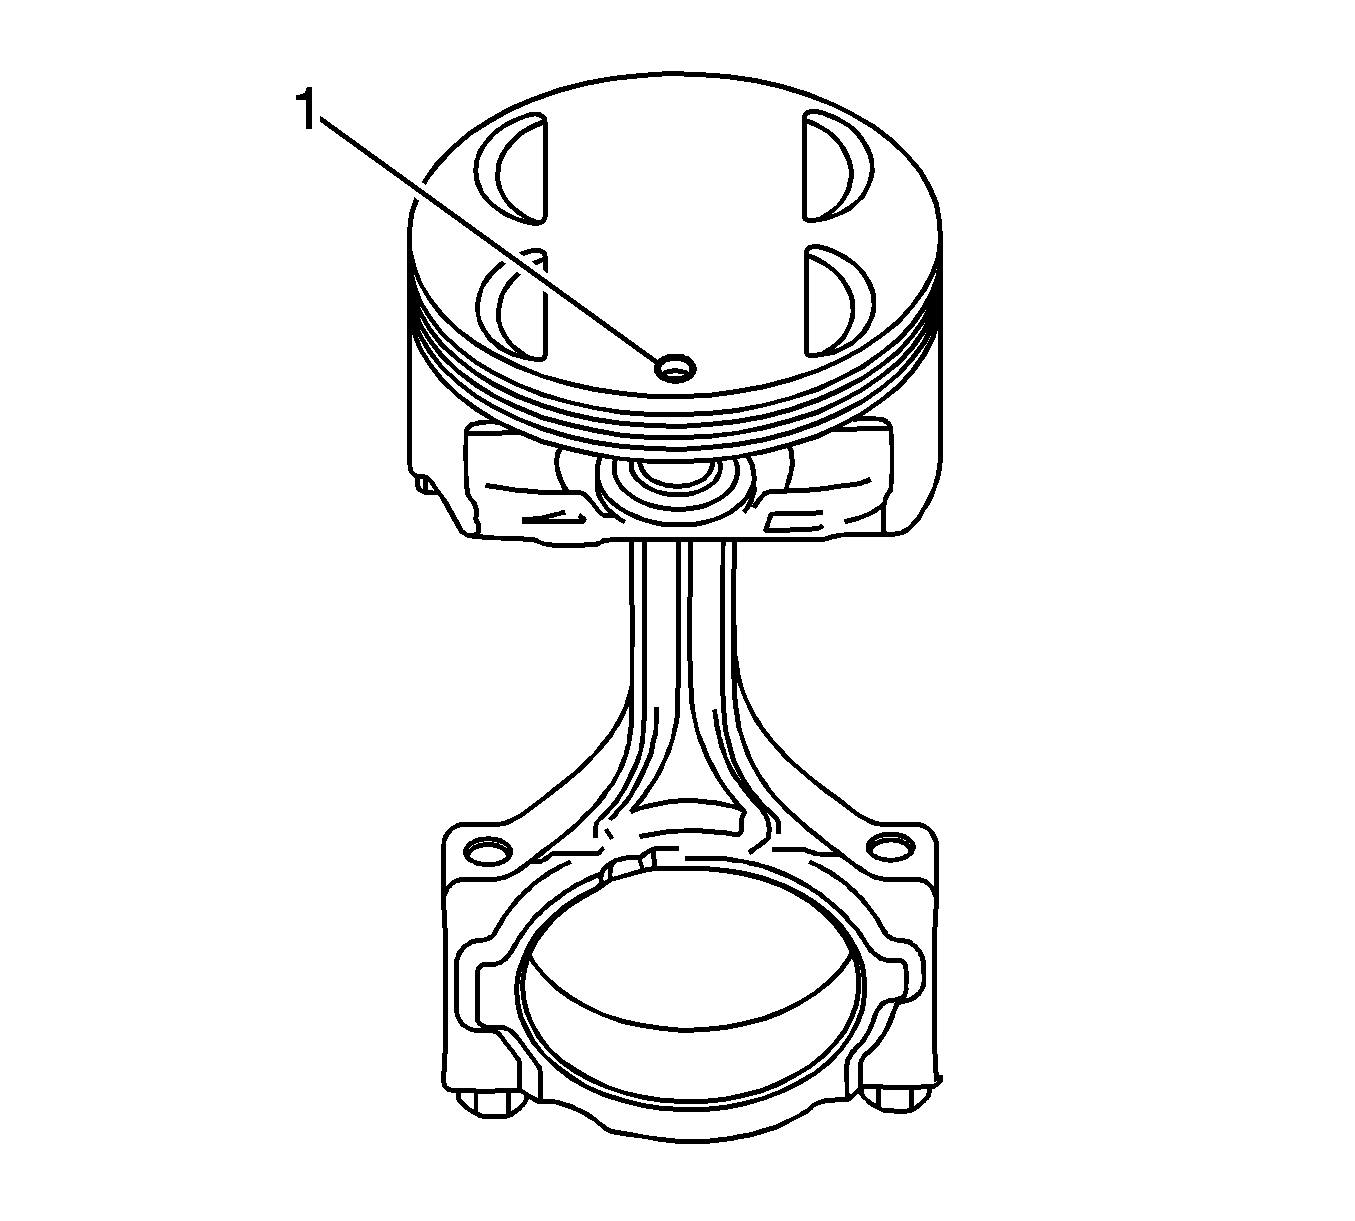
Important: The piston is directional and must be installed in the engine block in the correct direction. The locating arrow on the top of each piston must be pointing toward the front of the engine.
Important: Extreme care must be used when installing the piston and connecting rod to ensure the rod does not scrape or nick the cylinder bore, oil jets, or crankshaft surfaces.
Connecting Rod Bearing Clearance Measurement
- Place a length of fresh, room temperature plastic gaging material all the way across the connecting rod bearing journal.
- Install the connecting rod bearing into the connecting rod cap.
- Install the connecting rod end cap (1) on its original connecting rod and ensure the bearing lock tangs are aligned on the same side of the rod.
- Install the connecting rod cap bolts into the connecting rod cap.
- Allow the assembly to sit for at least 2 minutes.
- Remove the connecting rod cap bolts and discard.
- Remove the connecting rod cap.
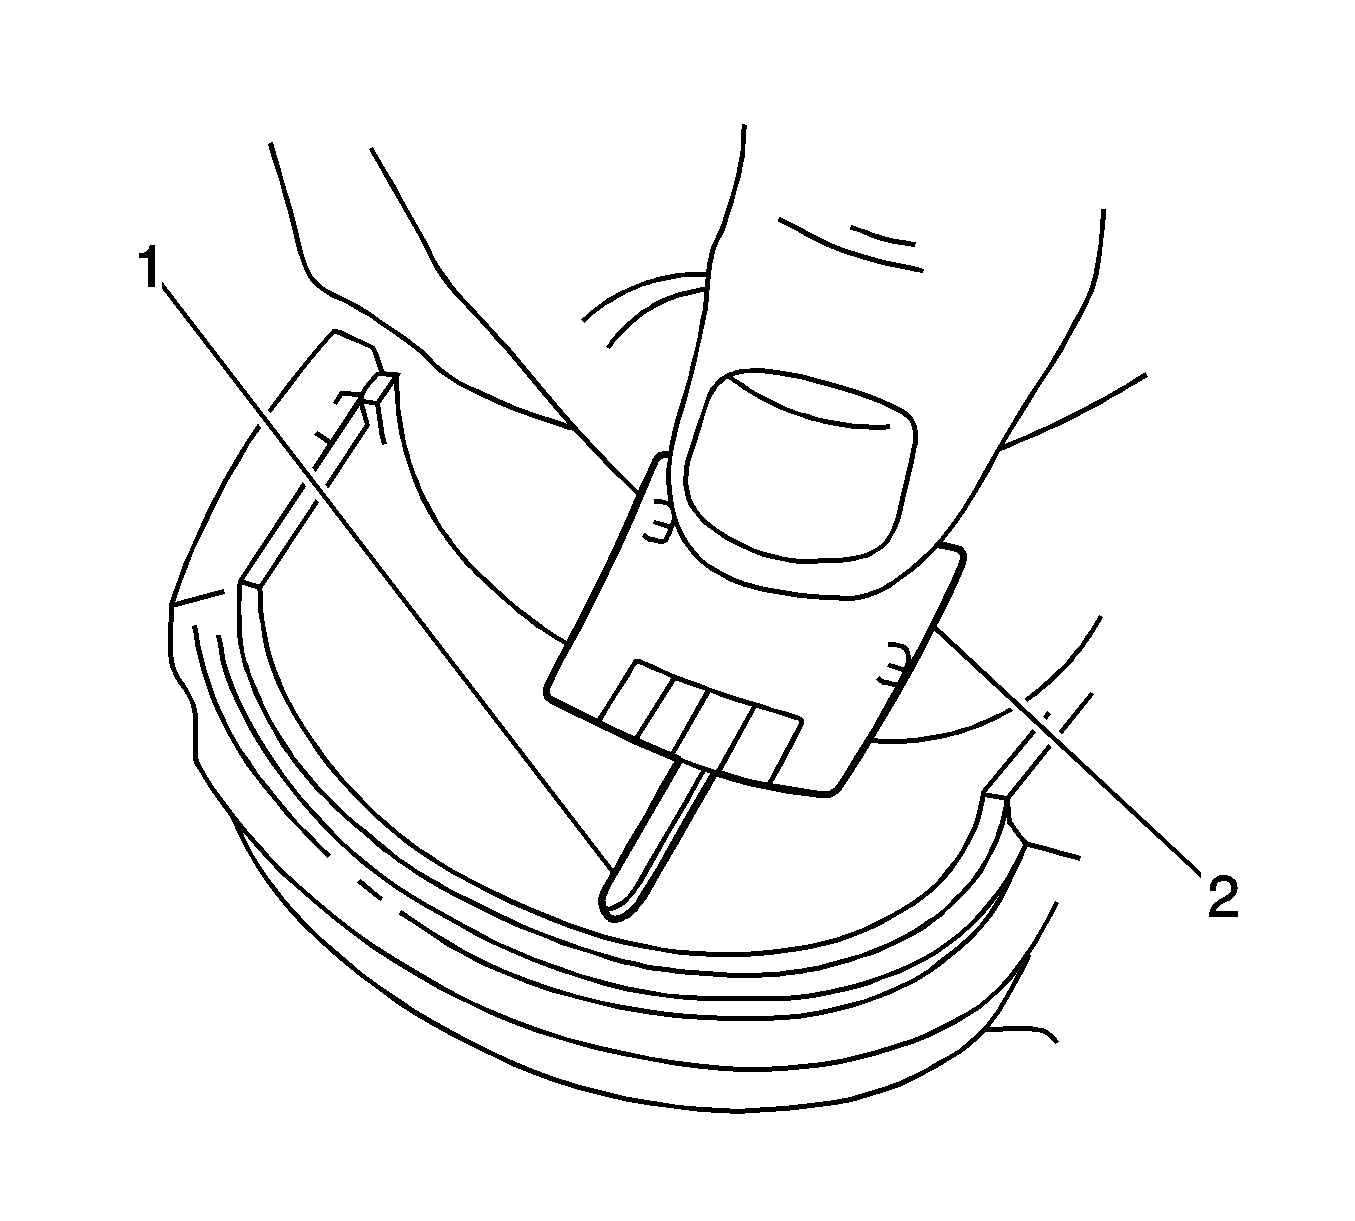
- Determine the connecting rod bearing clearance by comparing the width of the flattened plastic gauging (1) material at its widest point with the graduation on the gauging material container (2).
- Compare the measurements with the specifications.
- If the new bearings do not provide the correct crankshaft to connecting rod bearing clearance, inspect the following:
- Clean the plastic gaging material from the connecting rod bearing journals using a soft lint-free cloth.
Important: Before final assembly, check the clearance of the new connecting rod bearings.
Important: Reuse the old connecting rod bolts only for measuring the connecting rod bearing clearance.
Tighten
| • | Tighten the connecting rod cap bolts to 30 N·m (22 lb ft) and loosen the bolts completely. |
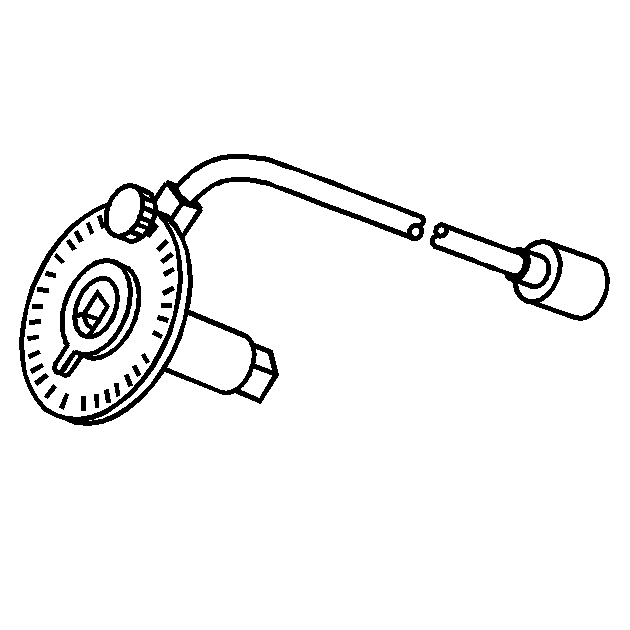
| • | Tighten the connecting rod cap bolts to 25 N·m (18 lb ft) again, and turn the bolt another 110 degrees using KM-470-B . |
| • | Measure the crankshaft connecting rod journals for the correct specified size and ensure the correct new bearings are being installed. If the crankshaft connecting rod journals are incorrectly sized, replace or regrind the crankshaft. Crankshaft machining is permitted and undersized bearings are available. |
| • | Measure the connecting rod bearing bore diameter to ensure correct size. The connecting rod is not machinable and the connecting rod must be replaced if out of specification. |
Connecting Rod Final Assembly Procedure
- Carefully guide the connecting rod away from the crankshaft connecting rod journal slightly to lubricate the crankshaft connecting rod bearing journal.
- Apply a liberal amount of clean engine oil to the crankshaft connecting rod bearing journal.
- Guide the connecting rod to the crankshaft connecting rod journal.
- Install the connecting rod end cap (1) on its original connecting rod and ensure the bearing lock tangs are aligned on the same side of the rod.
- Install new connecting rod bolts into the connecting rod cap.
- Repeat these procedures for the remaining piston/connecting rod assemblies.
- Reinstall the oil pan and oil pump pick up assembly. Refer to Oil Pan Replacement .
- Reinstall the cylinder heads. Refer to Cylinder Head Replacement - Left Side and Cylinder Head Replacement - Right Side .
- Reinstall the engine assembly. Refer to Engine Replacement .
Important:
• Do not lubricate the new connecting rod bolts. The new bolts have a pre-applied graphite lubricant. Applying lubricant to the connecting rod bolts will effect the clamp load when the connecting rod bolts are tightened to the specified torque.
Incorrect clamp load can lead to component failure and extensive engine damage. • Do not lubricate the new connecting rod bolts. The new bolts have a pre-applied graphite lubricant. Applying lubricant to the connecting rod bolts will effect the clamp load when the connecting rod bolts are tightened to the specified torque.
Incorrect clamp load can lead to component failure and extensive engine damage. Do not reuse the old connecting rod bolts.
Tighten
| • | Tighten the connecting rod cap bolts to 30 N·m (22 lb ft) and loosen the bolts completely. |
| • | Tighten the connecting rod cap bolts to 25 N·m (18 lb ft) again, and turn the bolt another 110 degrees using KM-470-B . |
Important: During and after installation, ensure each piston is positioned correctly in the correct cylinder. The locating arrow on the top of each piston must be pointing toward the front of the engine.
