For 1990-2009 cars only
Starter Replacement 2.0L Diesel
Removal Procedure
- Disconnect the battery negative cable.
- Remove the engine undercover. Refer to Engine Shield Replacement.
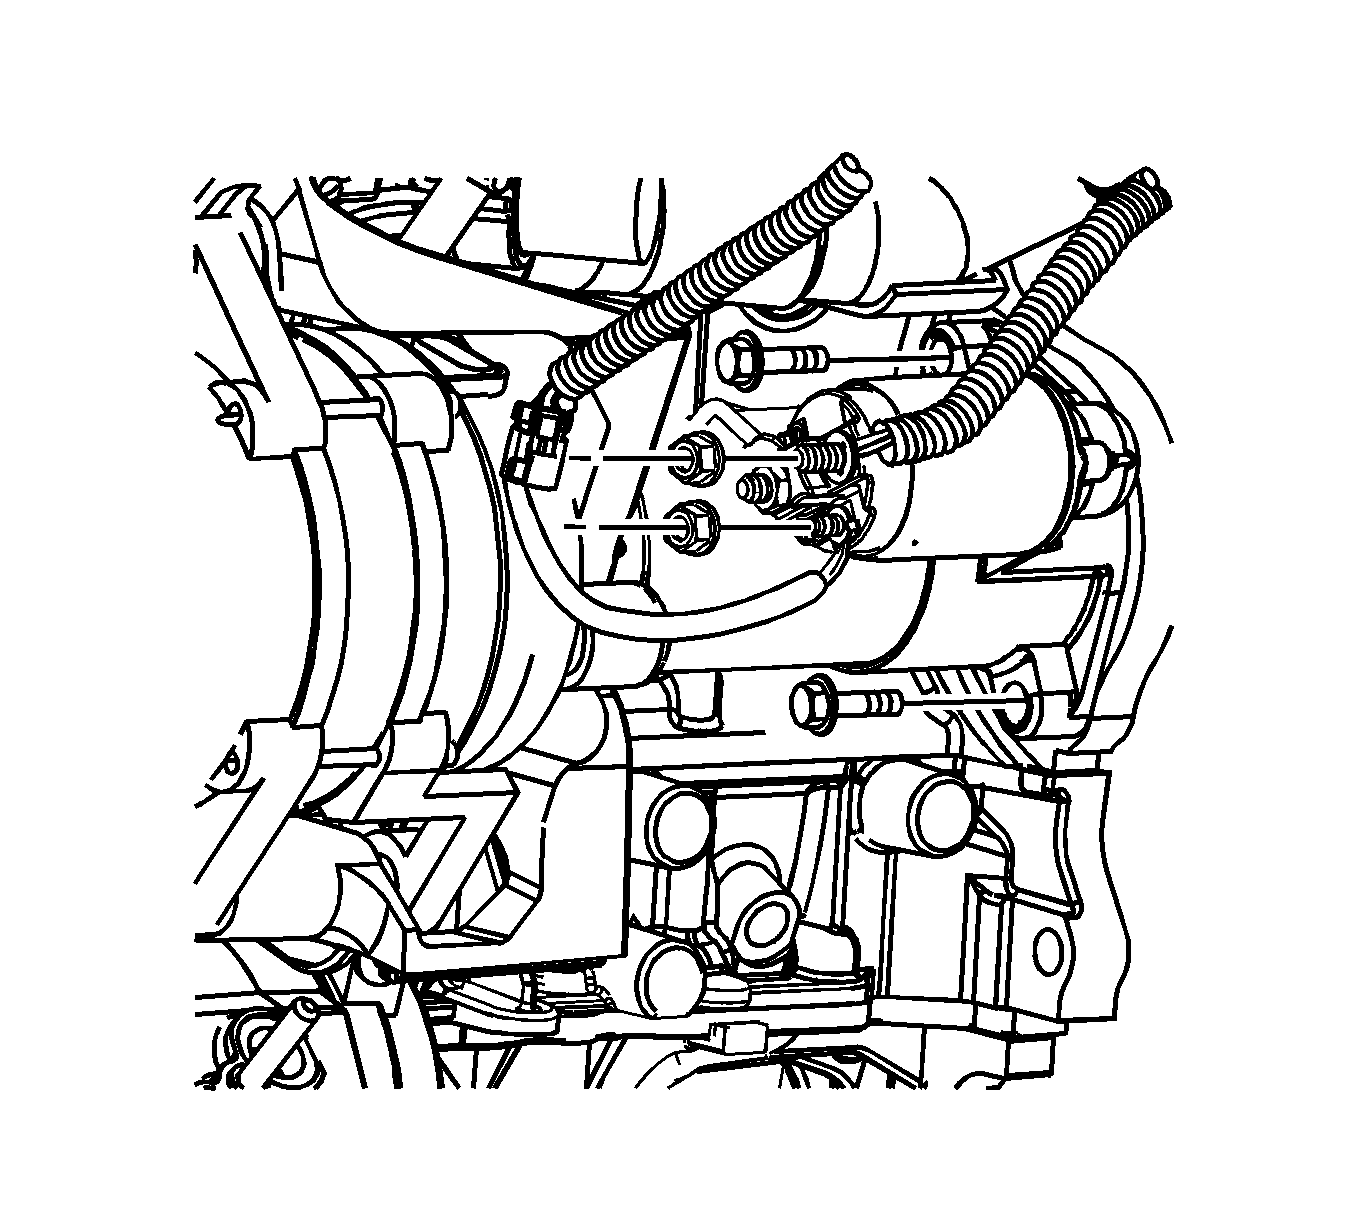
- Remove the nuts which secure the battery lead wire and the generator lead wire from the starter solenoid terminals.
- Remove the starter-to-engine block mounting bolts.
- Remove the starter assembly.
Warning: Refer to Battery Disconnect Warning in the Preface section.
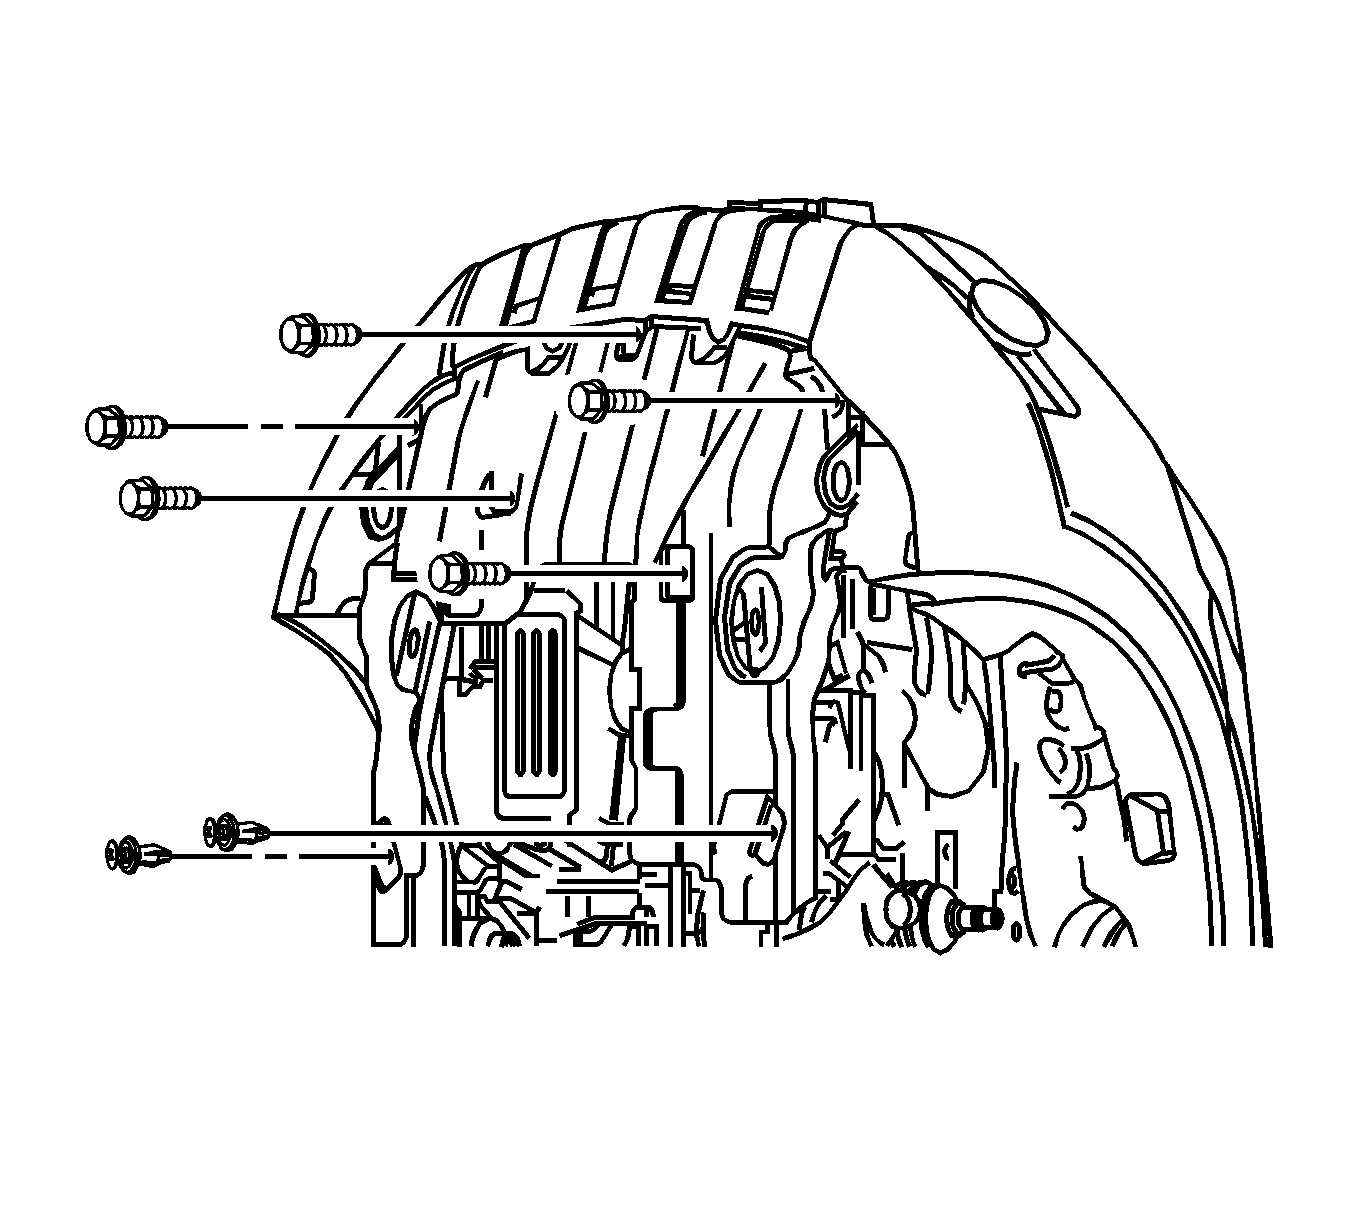
Installation Procedure
- Install the starter mounting bolts and tighten to 45 N·m (33.2 lb ft).
- Install the starter solenoid nut and tighten the lead wire nut to 15 N·m (11 lb ft).
- Install the engine undercover. Refer to Engine Shield Replacement.
- Connect the negative battery cable.
Caution: Refer to Fastener Caution in the Preface section.


Starter Replacement 2.4L
Removal Procedure
- Disconnect the negative battery cable.
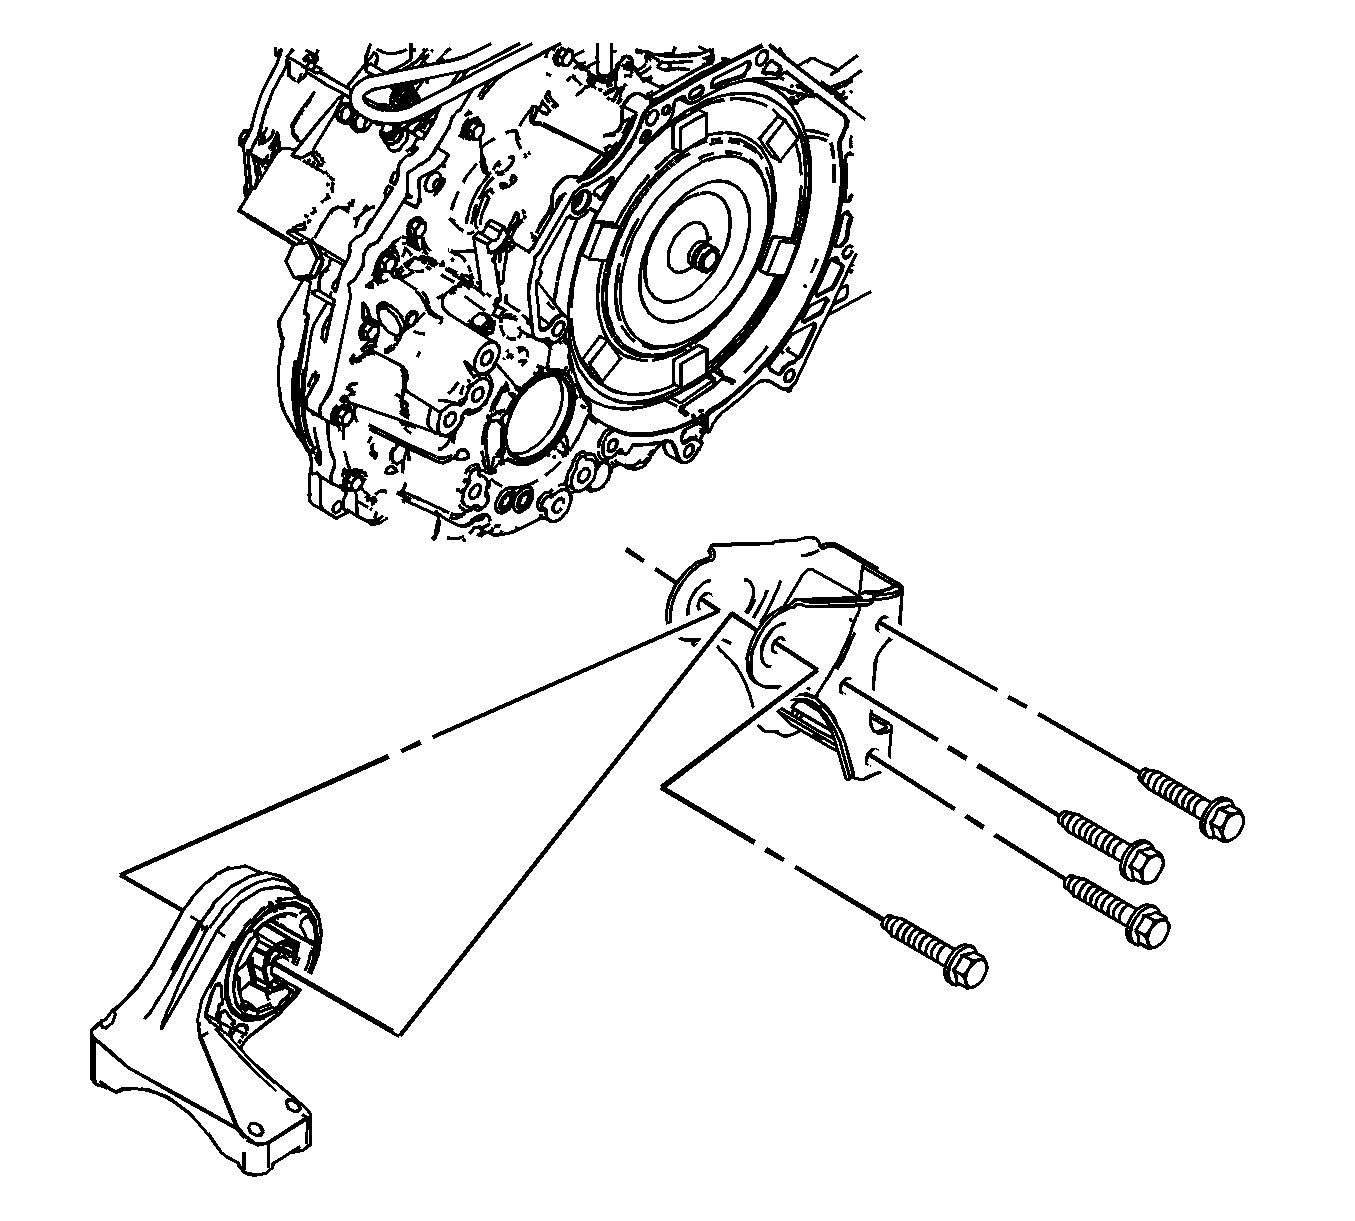
- Remove the transaxle rear mount bracket. Refer to Engine Rear Mount Replacement.
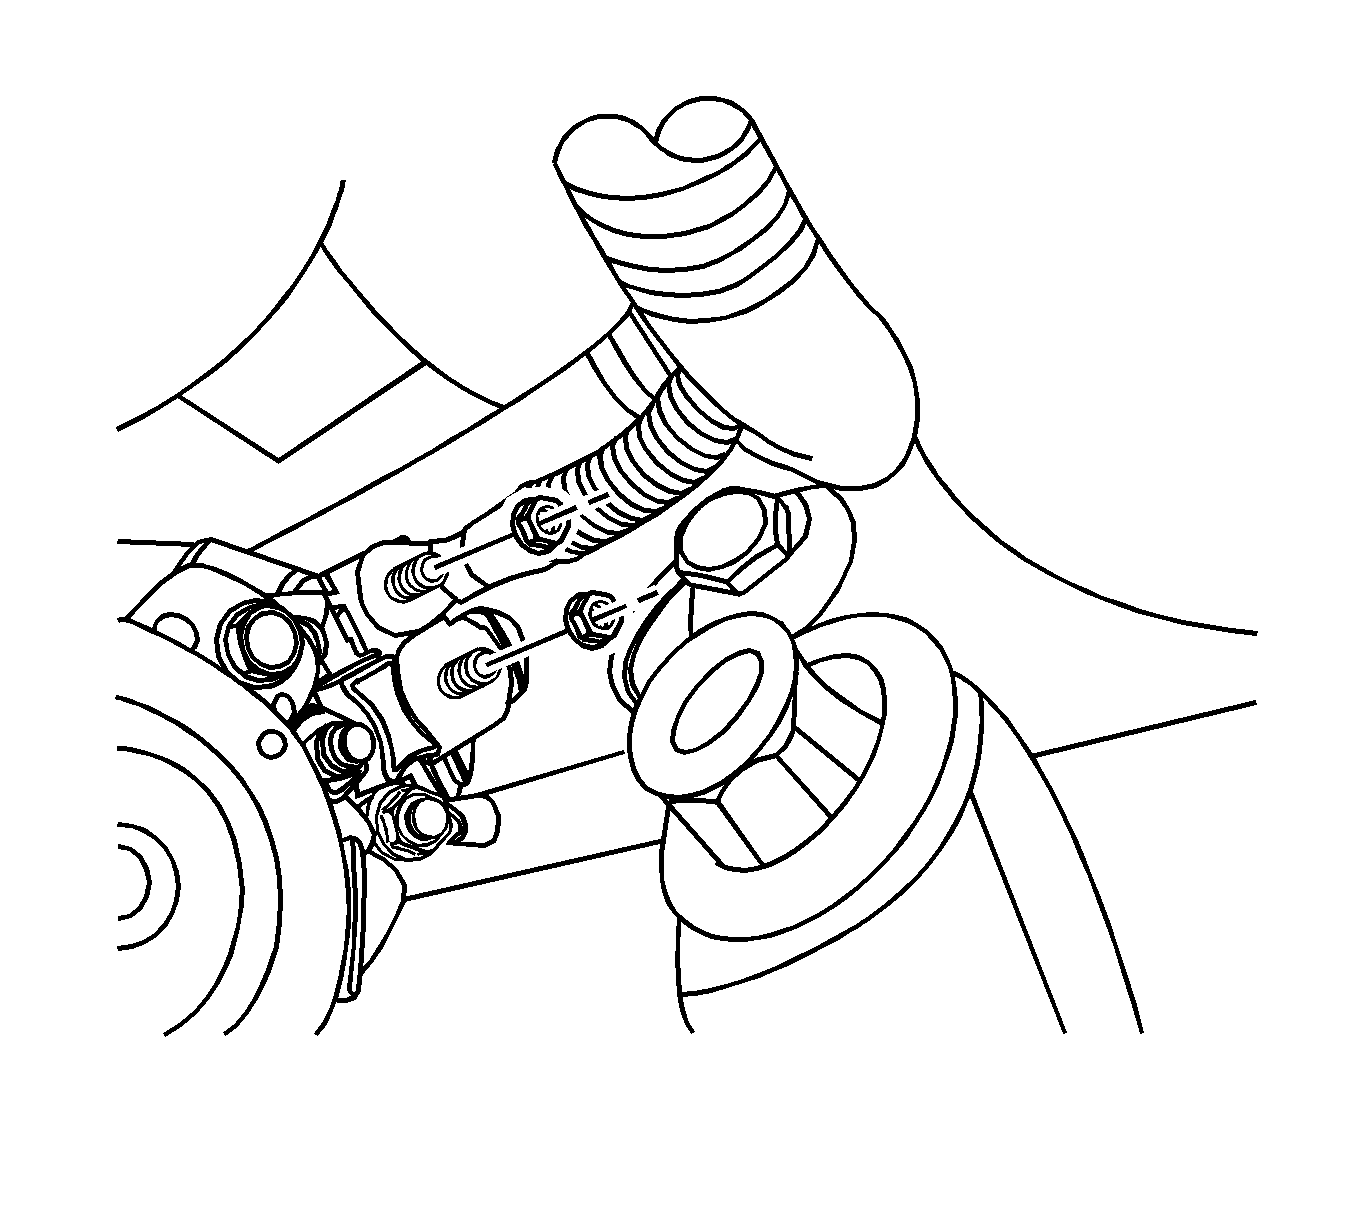
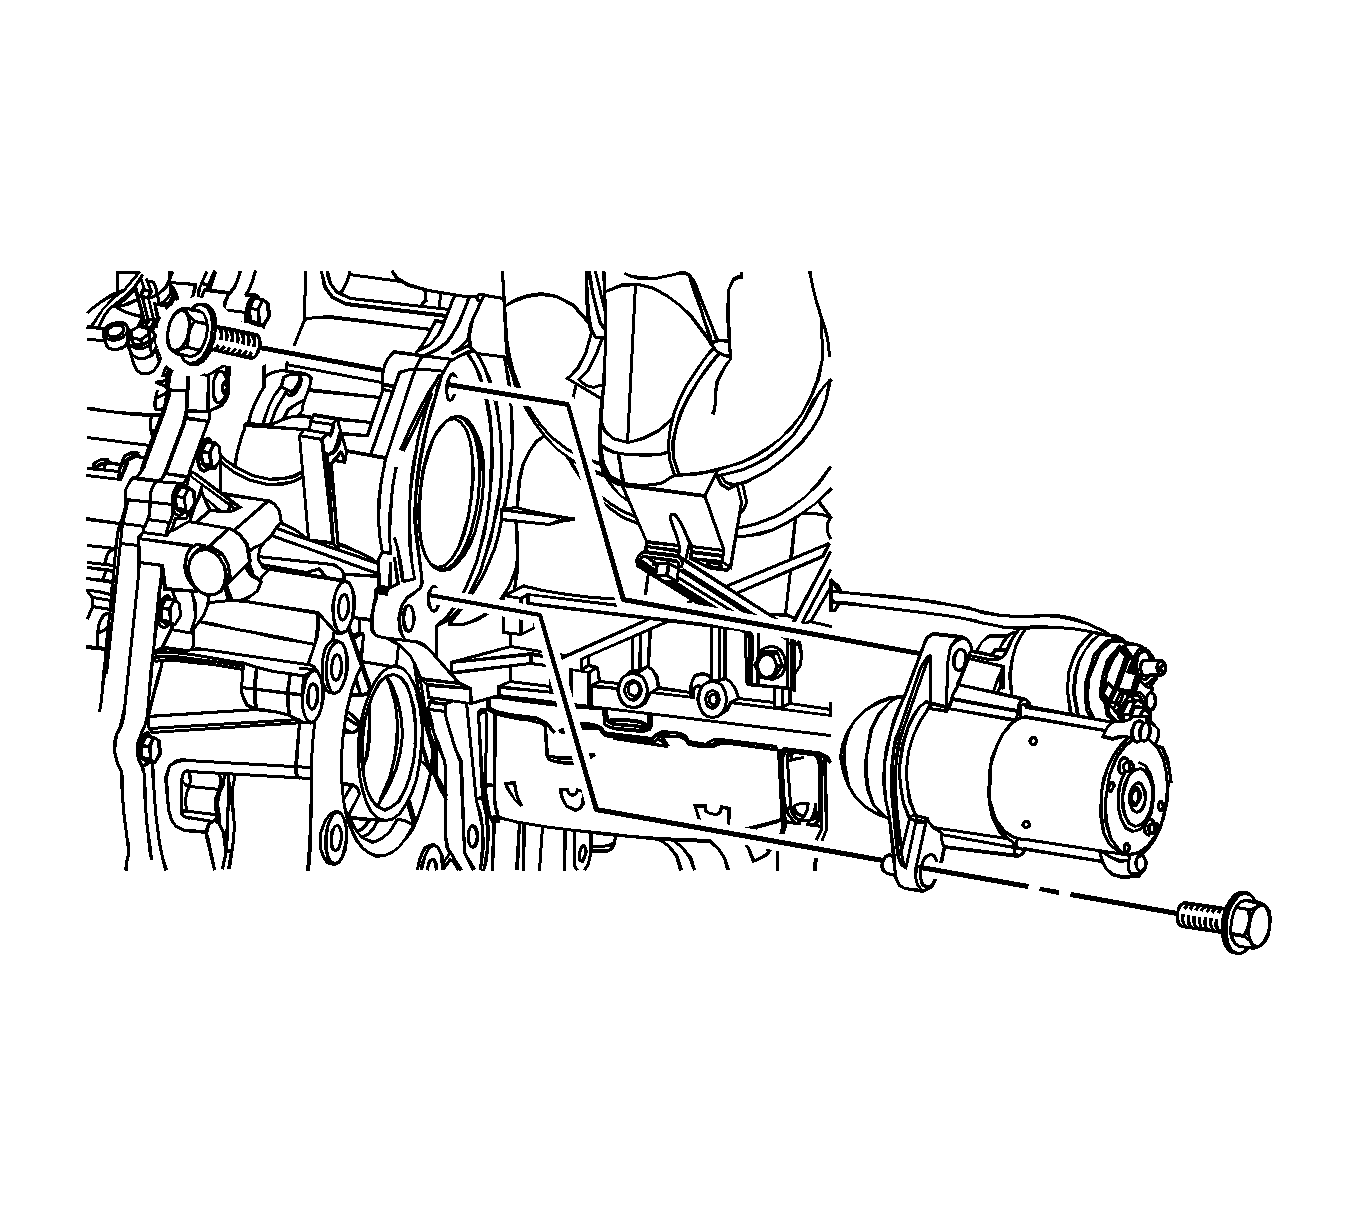
- Remove the nuts which secure the battery lead wire and the generator lead wire from the starter solenoid terminals.
- Remove the starter-to-engine block mounting bolt and the starter-to-transmission mounting bolt.
- Remove the starter assembly.
Warning: Refer to Battery Disconnect Warning in the Preface section.
Installation Procedure
- Install the starter mounting bolts and tighten.
- Install the ignition solenoid nut and the generator lead wire nut to the starter solenoid terminals and tighten.
- Install the transaxle rear mount bracket and tighten. Refer to Engine Rear Mount Replacement.
Caution: Refer to Fastener Caution in the Preface section.

| • | The starter-to-engine block mounting bolt to 75 N·m (55 lb ft). |
| • | The transmission-to-starter mounting bolt to 75 N·m (55 lb ft). |

| • | Tighten the starter solenoid terminal-to-battery lead wire nut to 15 N·m (11 lb ft). |
| • | Tighten the starter solenoid terminal-to-generator lead wire nut to 15 N·m (11 lb ft). |

| • | The transaxle rear mount bracket retaining bolts to 90 N·m (66 lb ft). |
| • | The transaxle rear mount-to-bracket through bolt and nut to 90 N·m (66 lb ft). |
Starter Replacement 3.2L
Removal procedure
- Disconnect the negative battery cable.
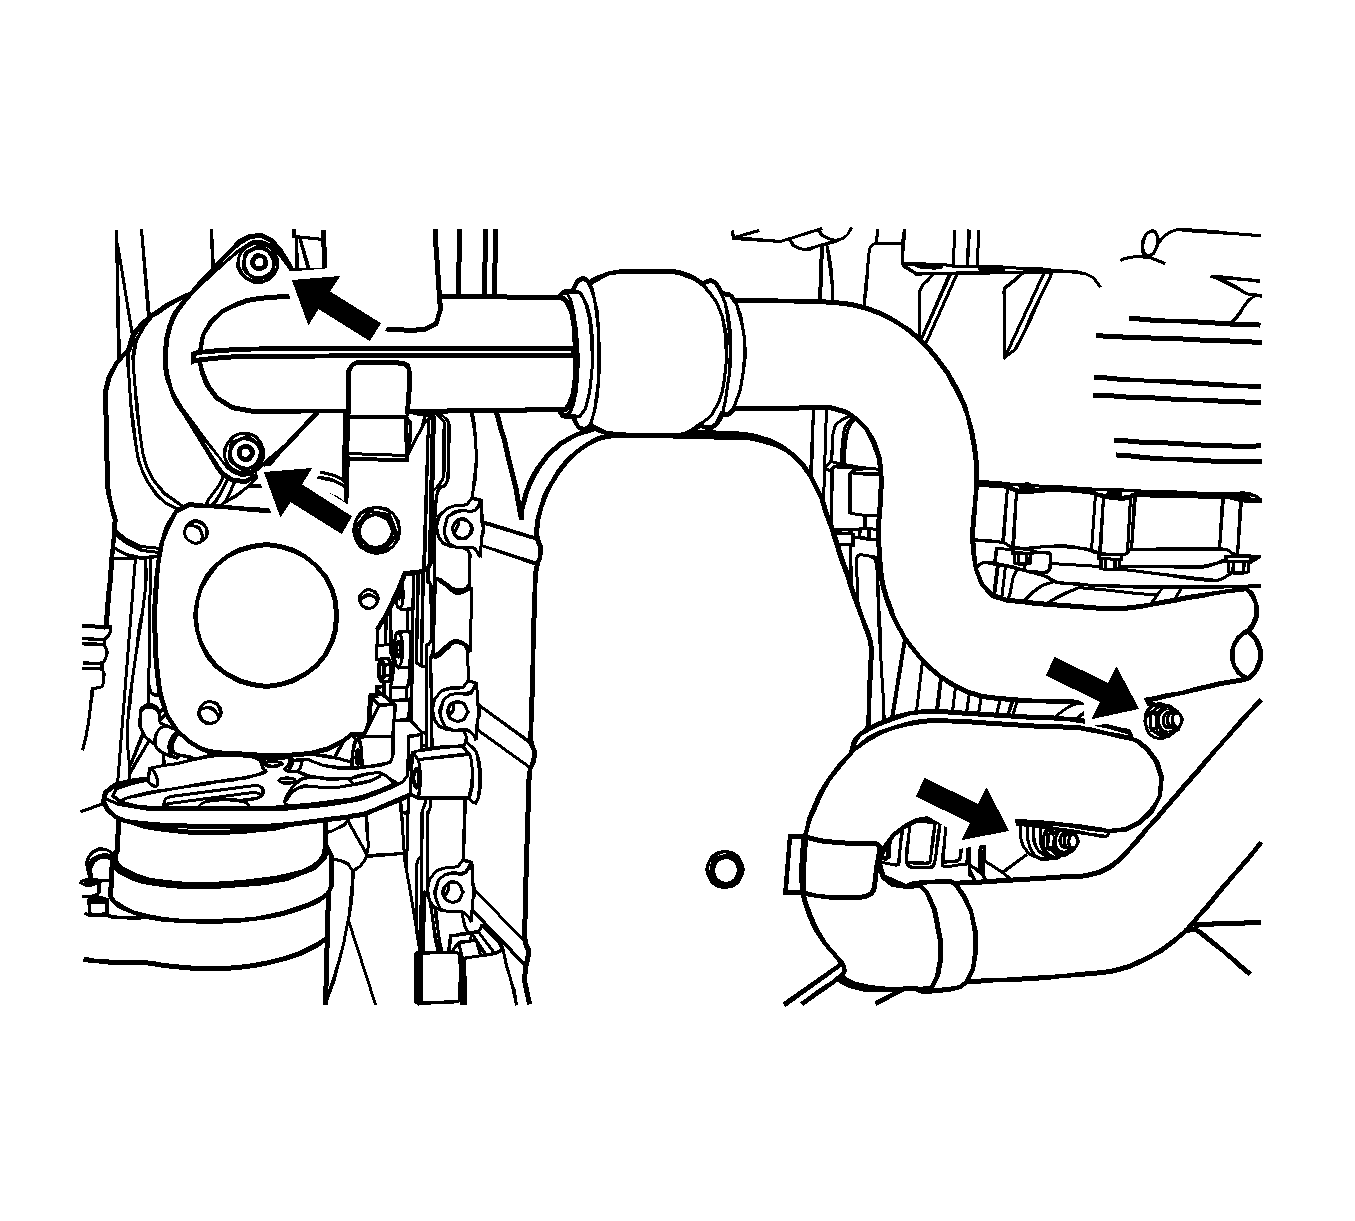
- Remove the exhaust front pipe. Refer to Front Pipe Replacement.
- Remove the bank 2 pup converter. Refer to Auxiliary Catalytic Converter Replacement.
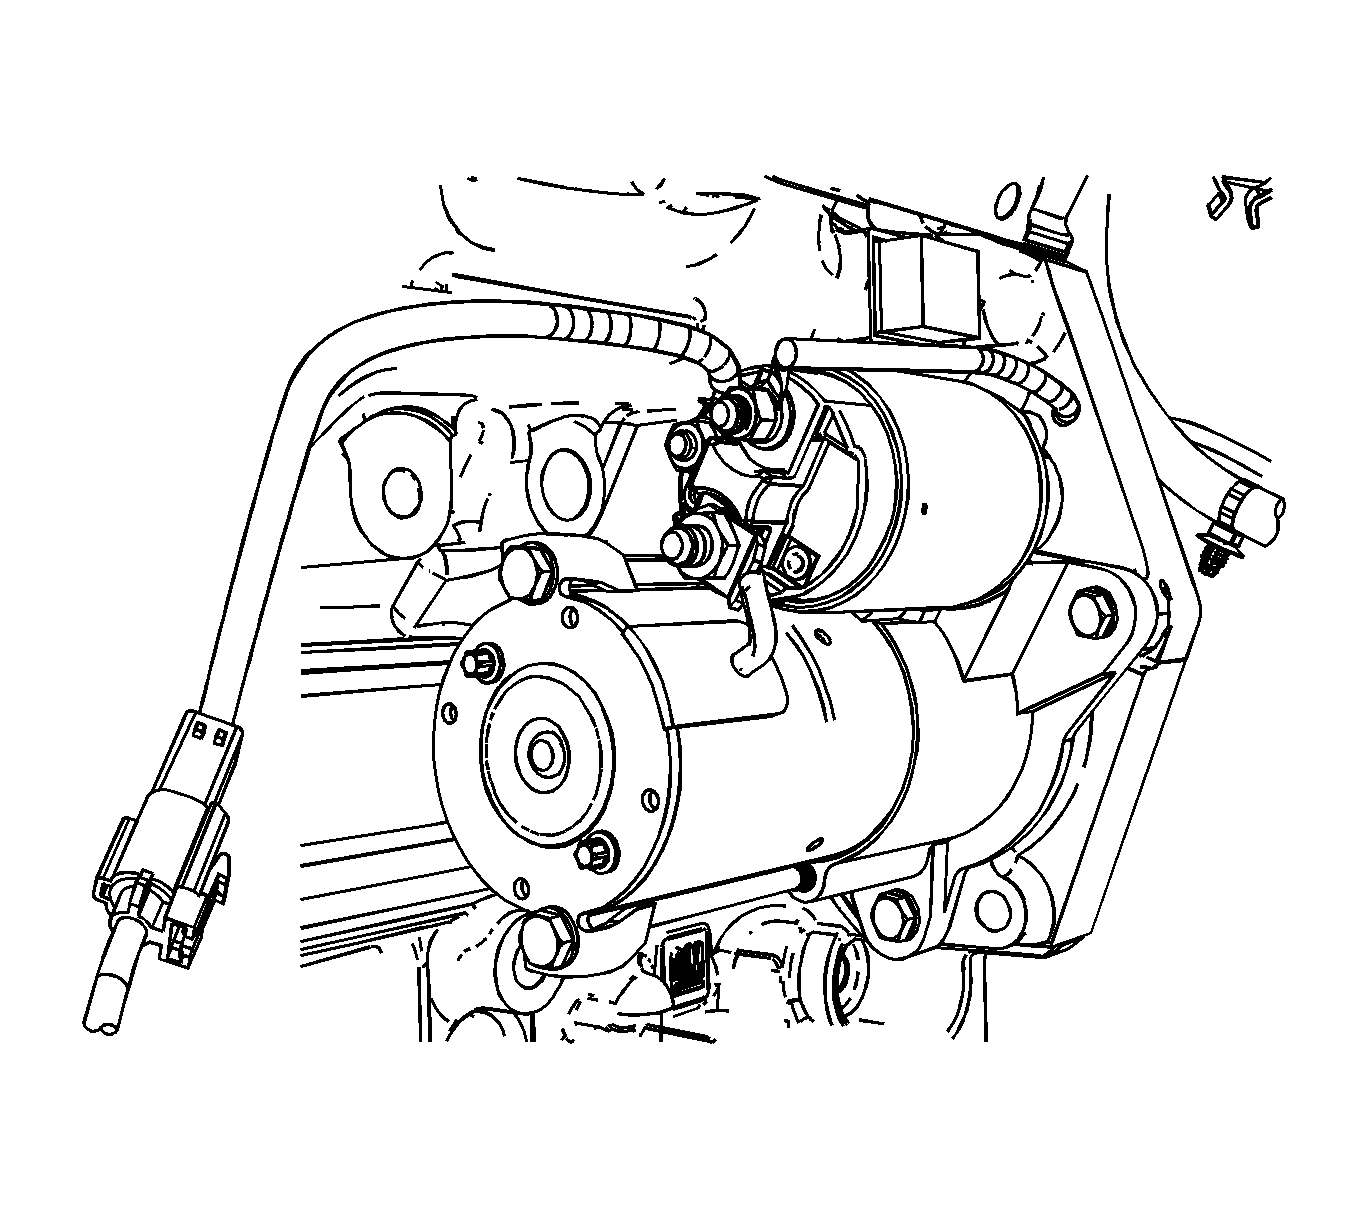
- Remove the nut which secures the battery lead wire from the starter solenoid.
- Disconnect the starter-to-engine main harness lead wire connector.
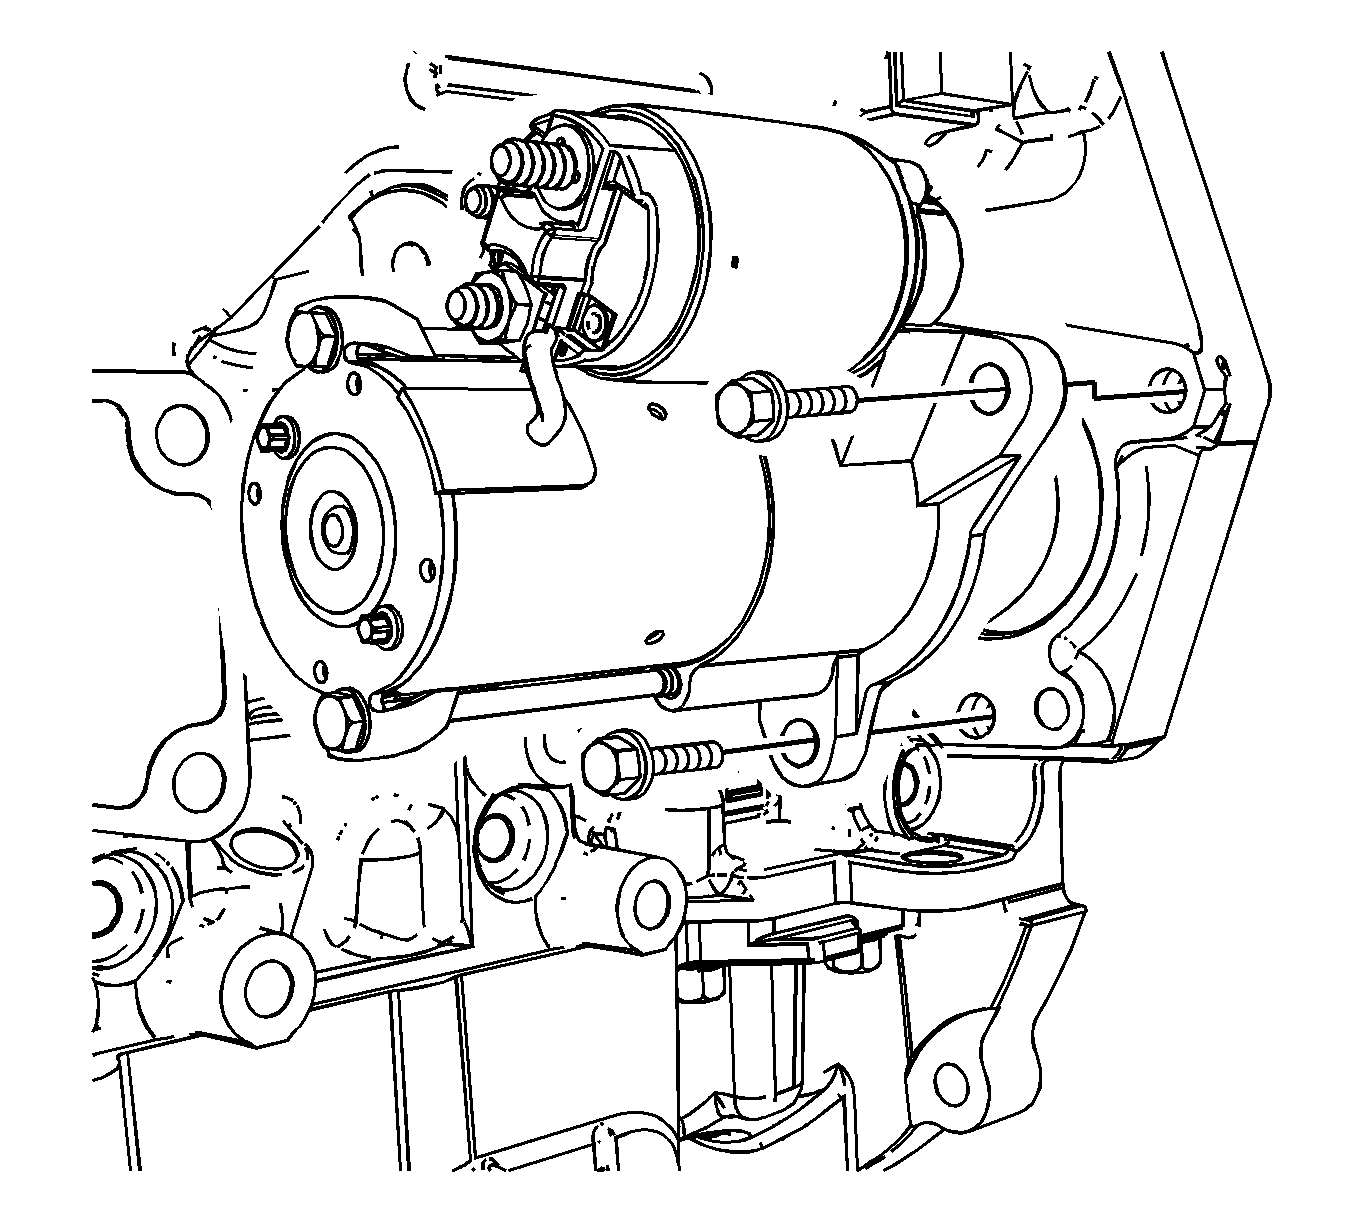
- Remove the starter mounting bolts.
- Remove the starter assembly.
- Remove the starter solenoid-to-engine main harness lead wire retaining nut, if necessary.
Warning: Refer to Battery Disconnect Warning in the Preface section.
Installation procedure
- Install the starter solenoid-to-engine main harness lead wire retaining nut and tighten to 10 N·m (89 lb in), if necessary.
- Install the starter assembly and tighten mounting bolts to 45 N·m (33 lb in).
- Install the starter solenoid-to-battery lead wire retaining nut to the solenoid and tighten lead wire retaining nut to 15 N·m (11 lb in).
- Connect the engine main harness lead wire connector.
- Install the bank 2 pup converter and the exhaust front pipe. Refer to Auxiliary Catalytic Converter Replacement.
- Install the front exhaust pipe. Refer to Front Pipe Replacement.
- Connect the negative battery cable.
Caution: Refer to Fastener Caution in the Preface section.


