For 1990-2009 cars only
Instrument Panel Assembly Replacement C100/Long Body
Removal Procedure
- Disconnect the negative battery cable. Refer to Battery Negative Cable Disconnection and Connection.
- Remove the front, rear floor console. Refer to Console Replacement.
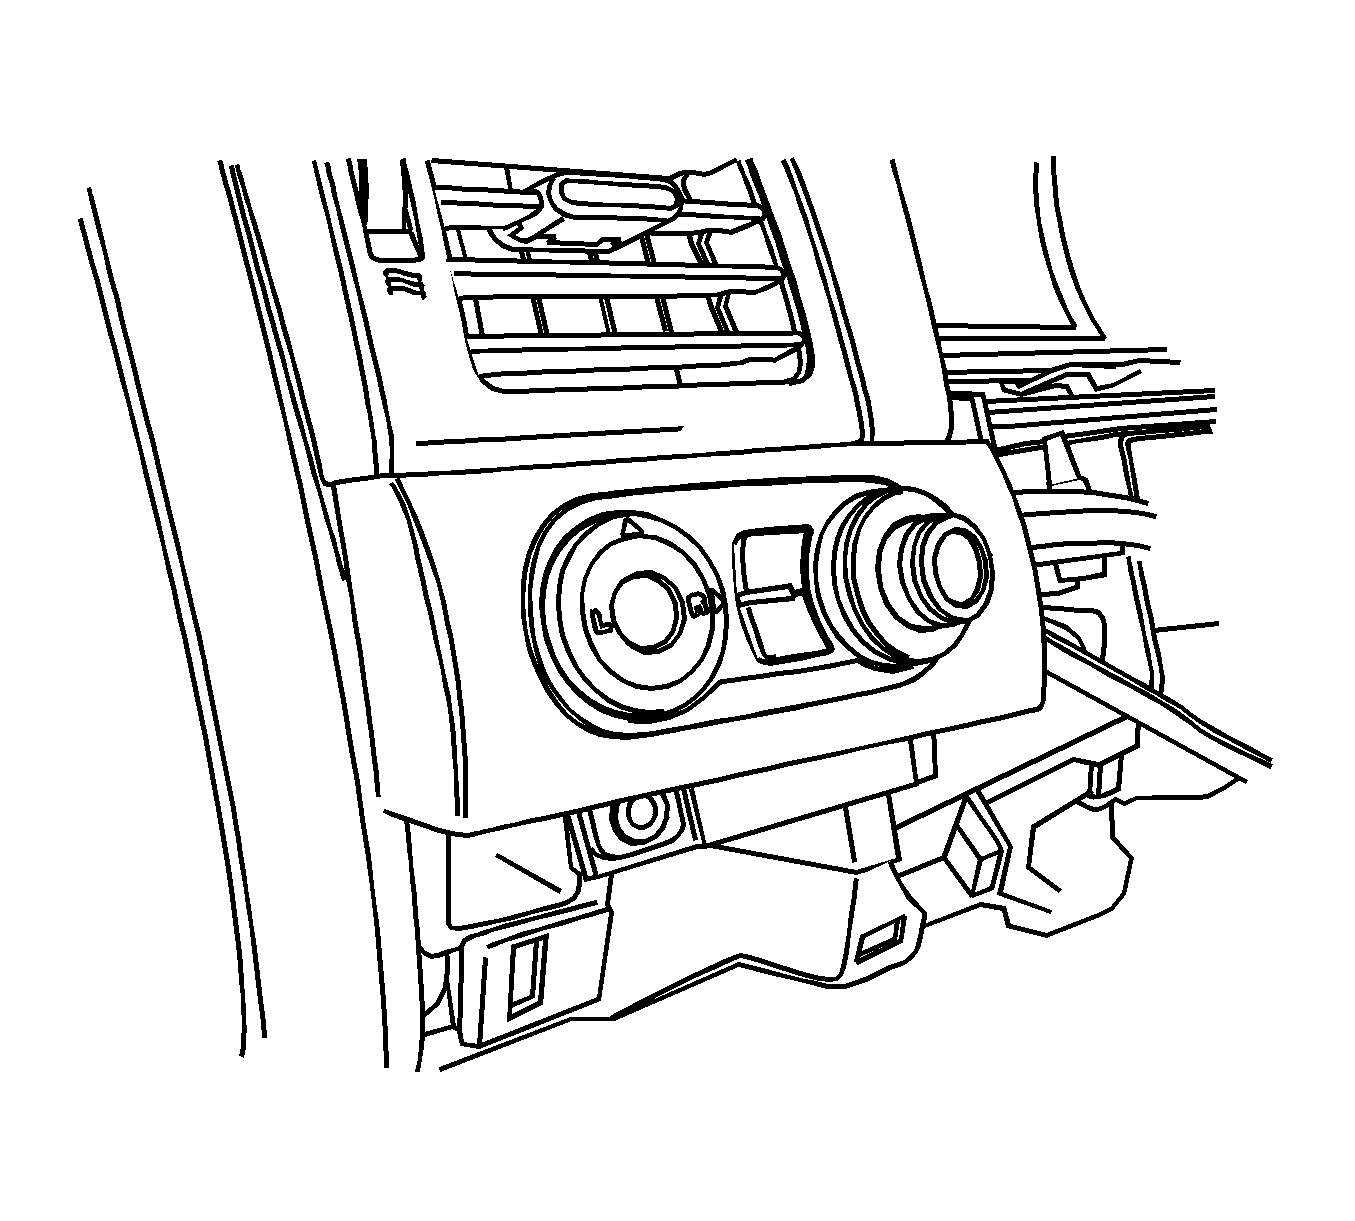
- Remove the headlamp leveling switch assembly. Refer to Headlamp Leveling Switch Replacement.
- Remove the left instrument panel (I/P) vent. Refer to Instrument Panel Outer Air Outlet Replacement - Left Side.
- Remove the steering wheel. Refer to Steering Wheel Replacement.
- Remove the headlamp/turn signal switch. Refer to Turn Signal Multifunction Switch Replacement.
- Remove the wiper switch. Refer to Windshield Wiper and Washer Switch Replacement.
- Remove the instrument cluster. Refer to Instrument Cluster Replacement.
- Remove the I/P lower compartment. Refer to Instrument Panel Lower Compartment Replacement.
- Remove the radio. Refer to Radio Replacement.
- Remove the ambient light sensor. Refer to Ambient Light Sensor Replacement.
- Remove the automatic temperature controls assembly. Refer to Heater and Air Conditioning Control Replacement.
- Remove the body control module. Refer to Body Control Module Replacement.
- Remove the instrument storage compartment. Refer to Instrument Panel Storage Compartment Replacement.
- Remove the right I/P vent. Refer to Instrument Panel Outer Air Outlet Replacement - Right Side.
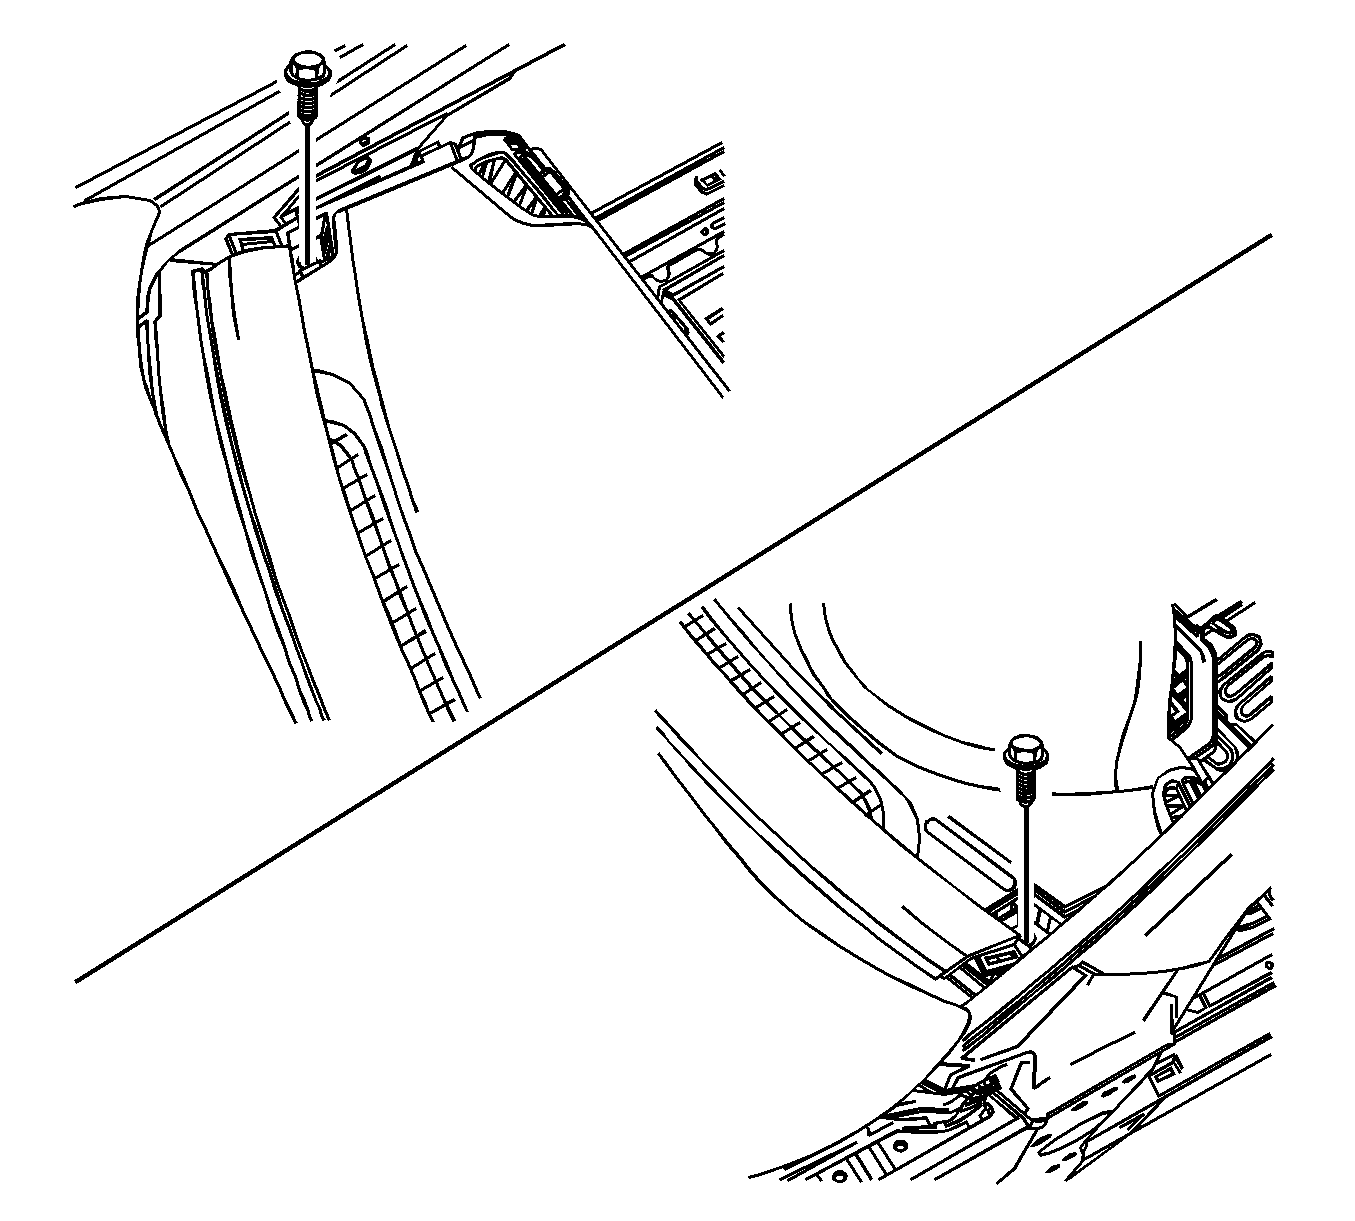
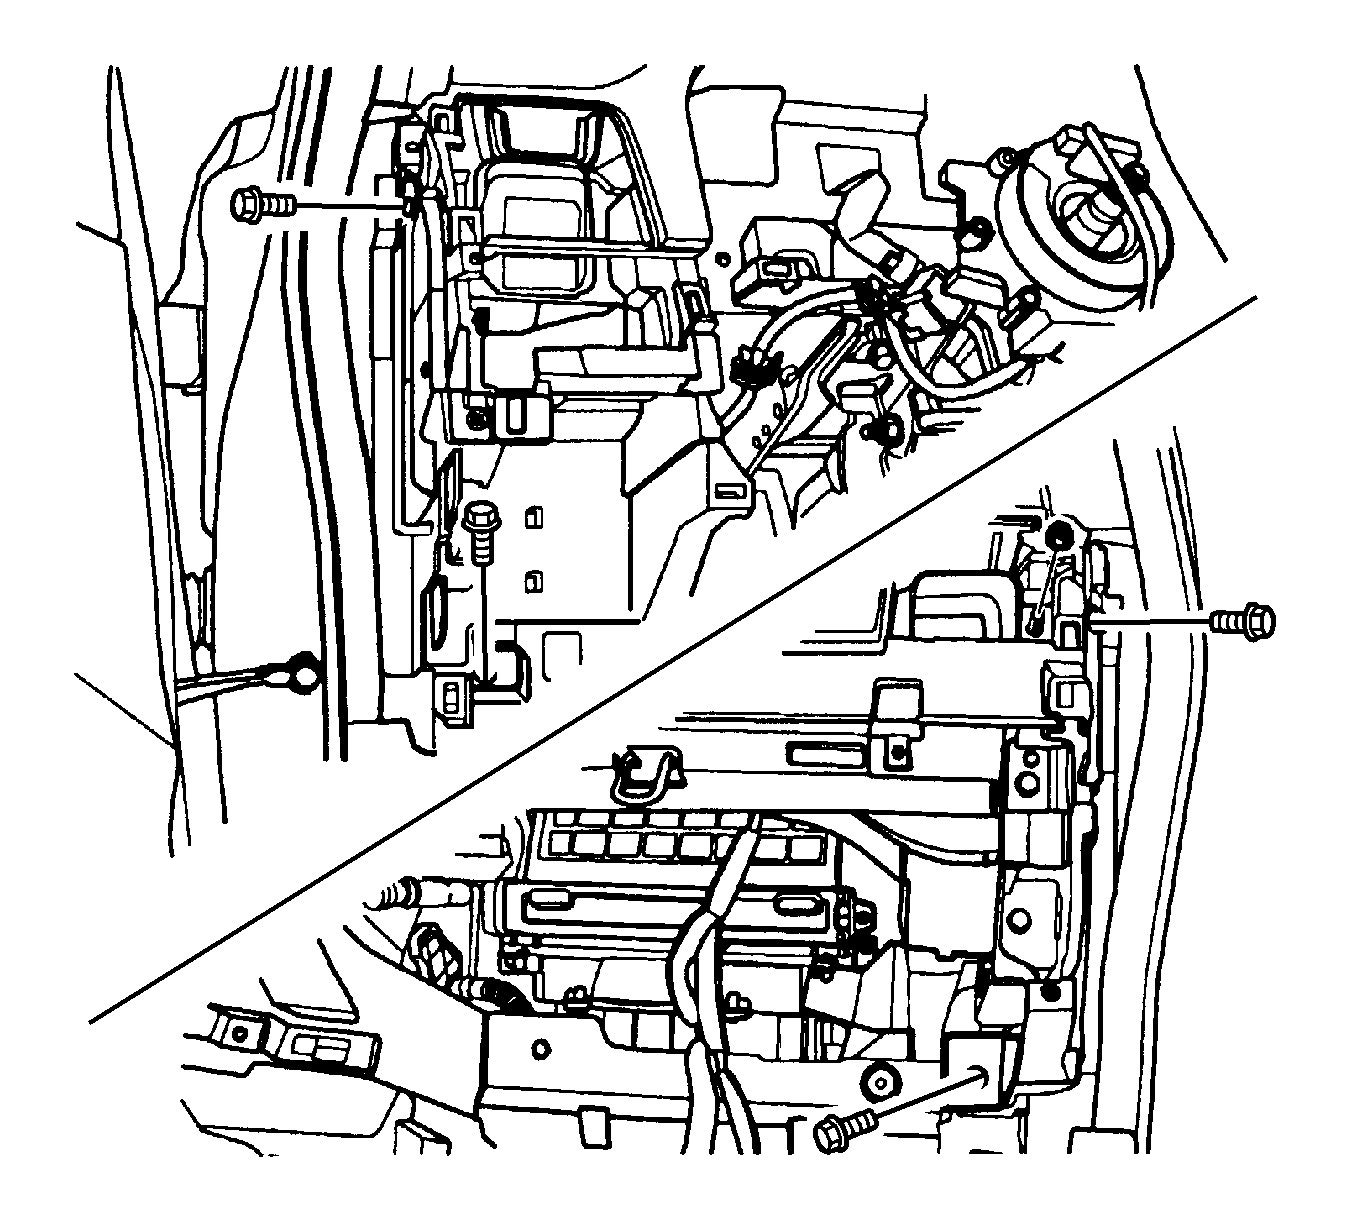
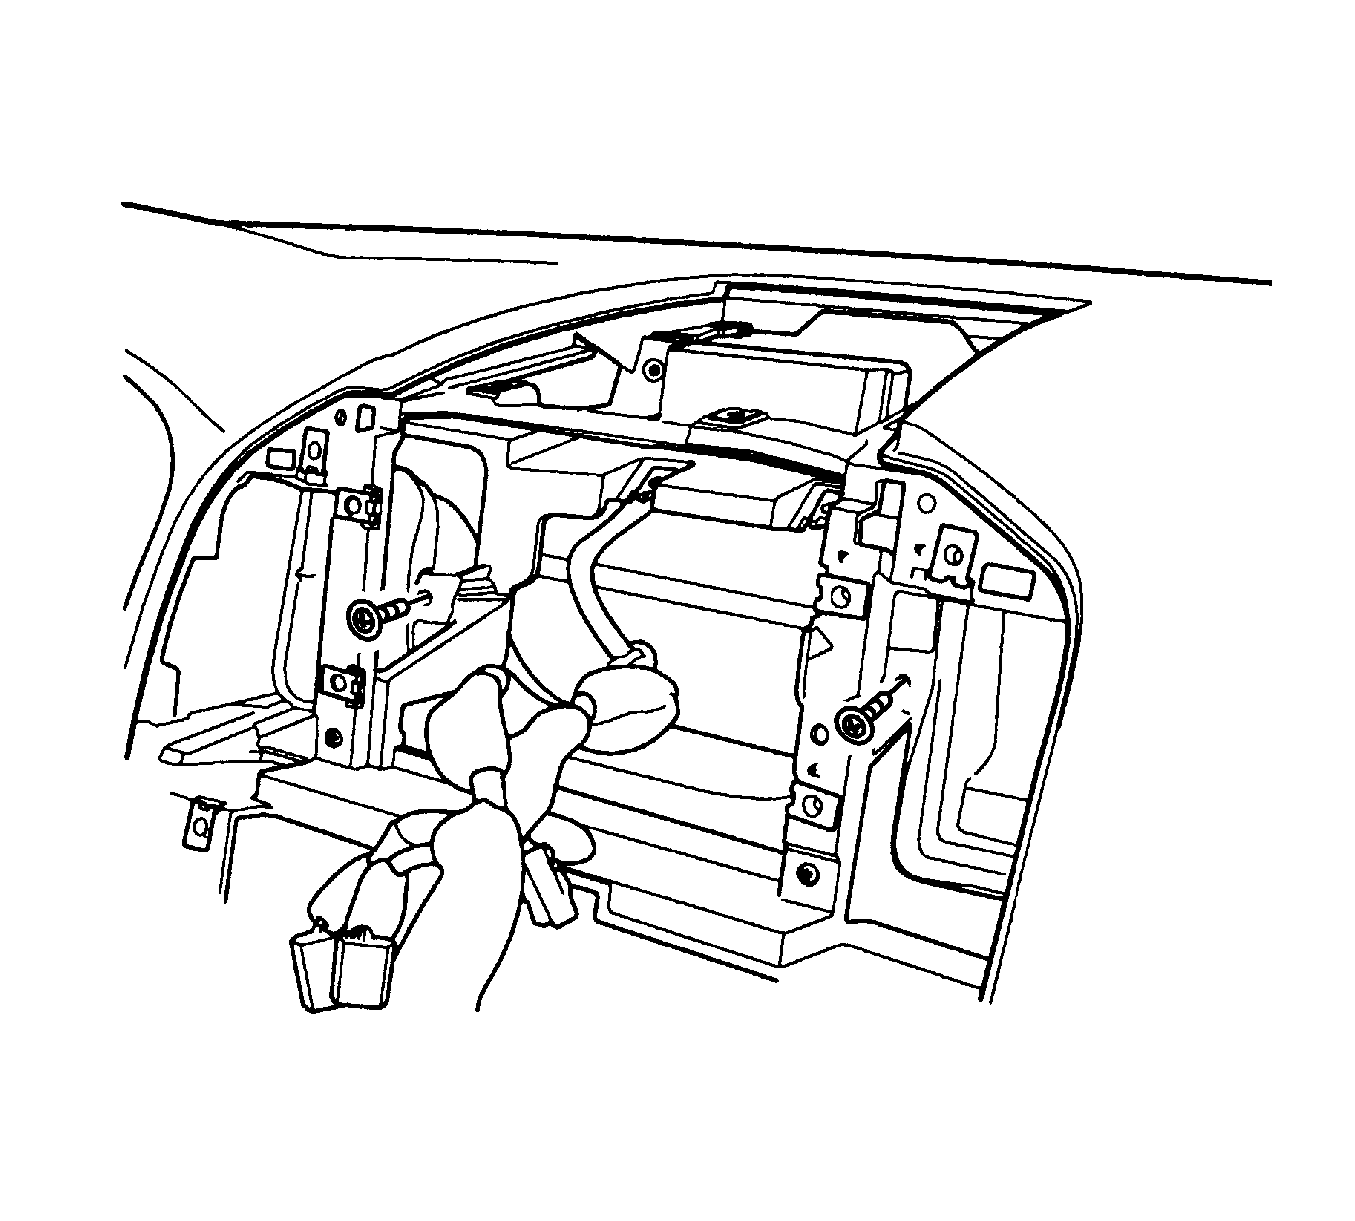
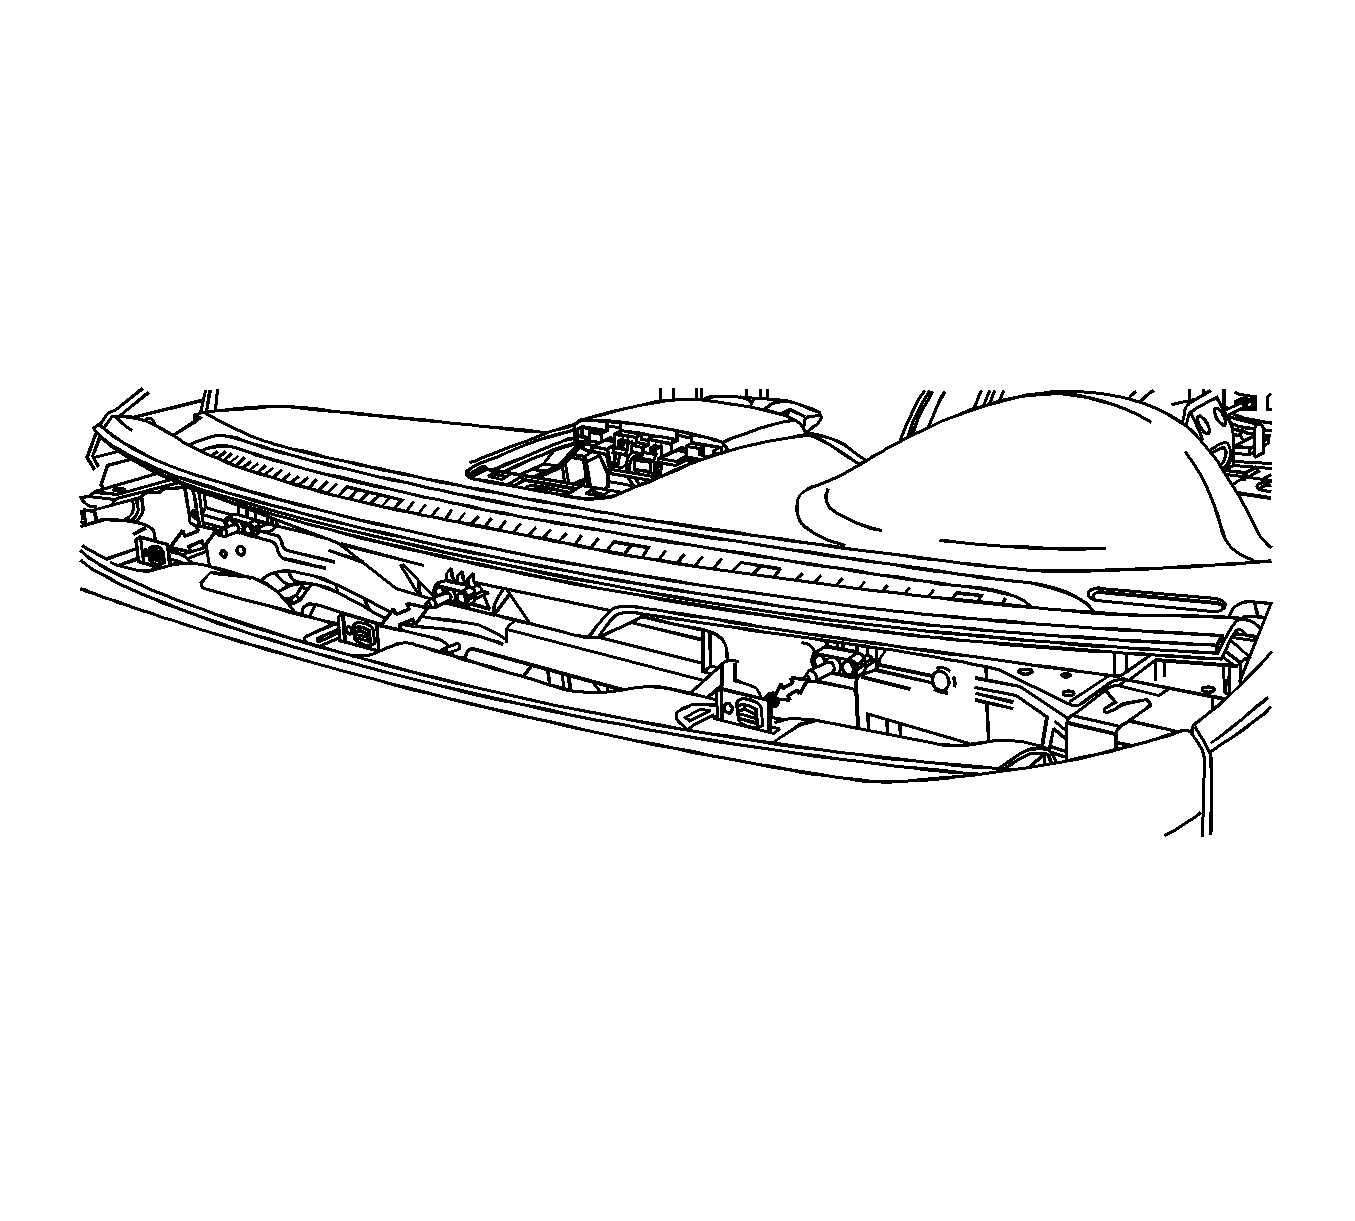
- Remove the bolt caps and the securing bolts in both sides of the I/P below the windshield.
- Remove the securing bolts and nut on the left and right sides of the I/P.
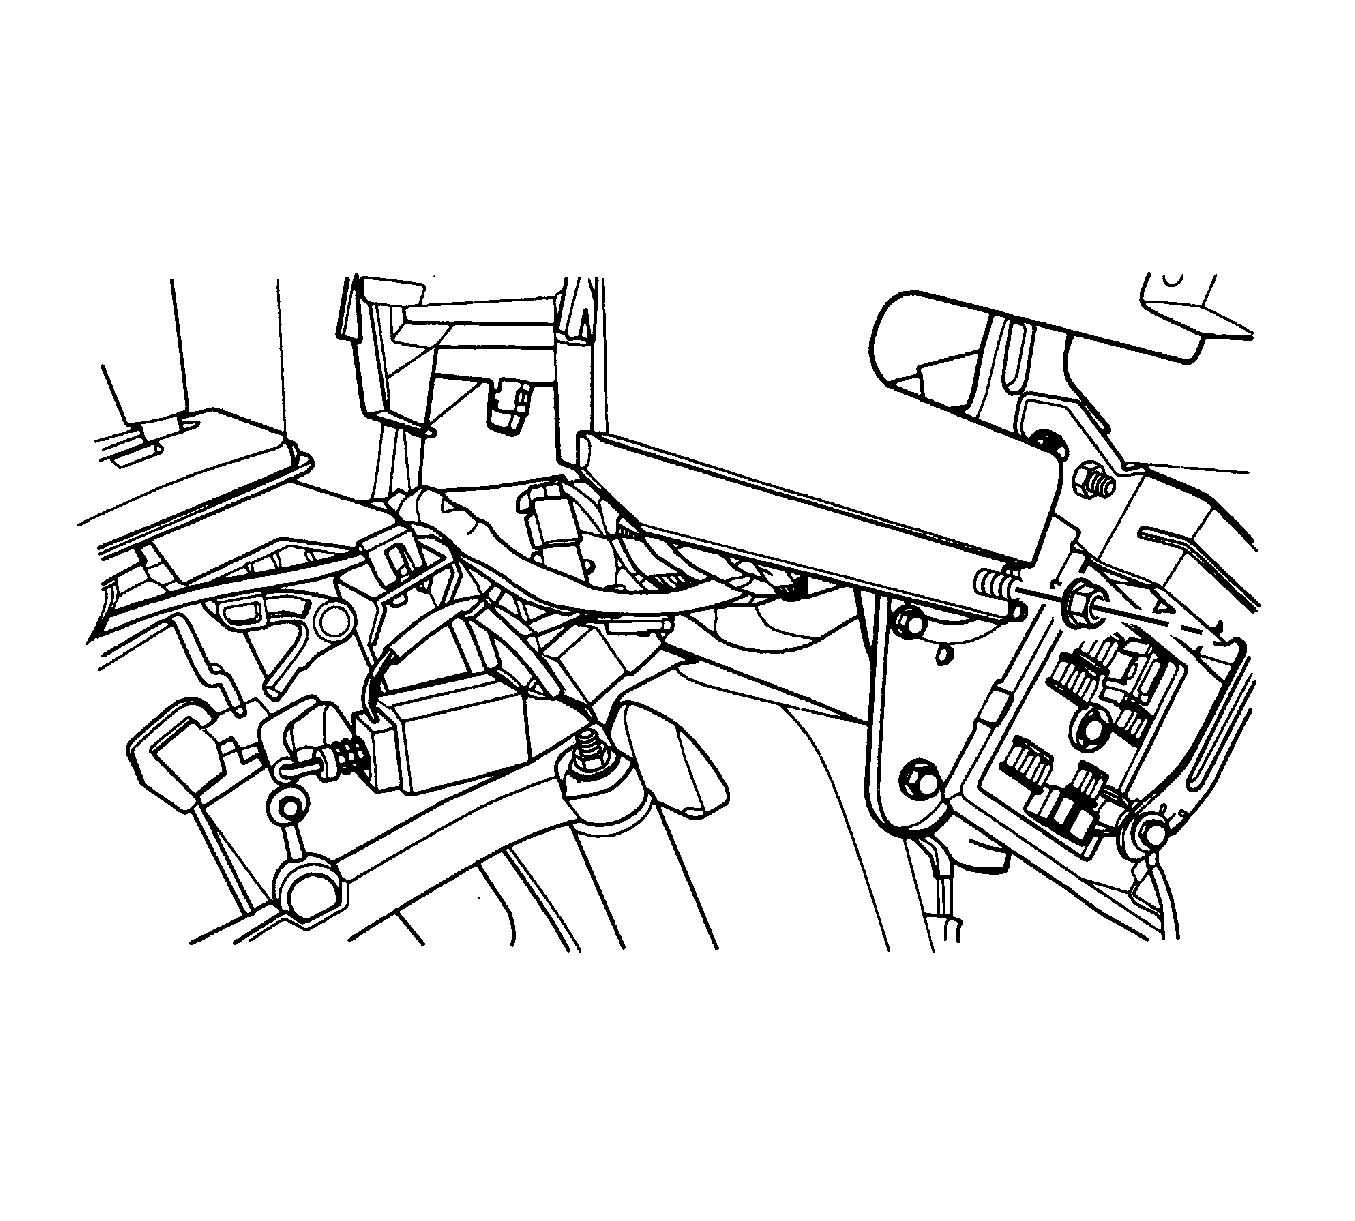
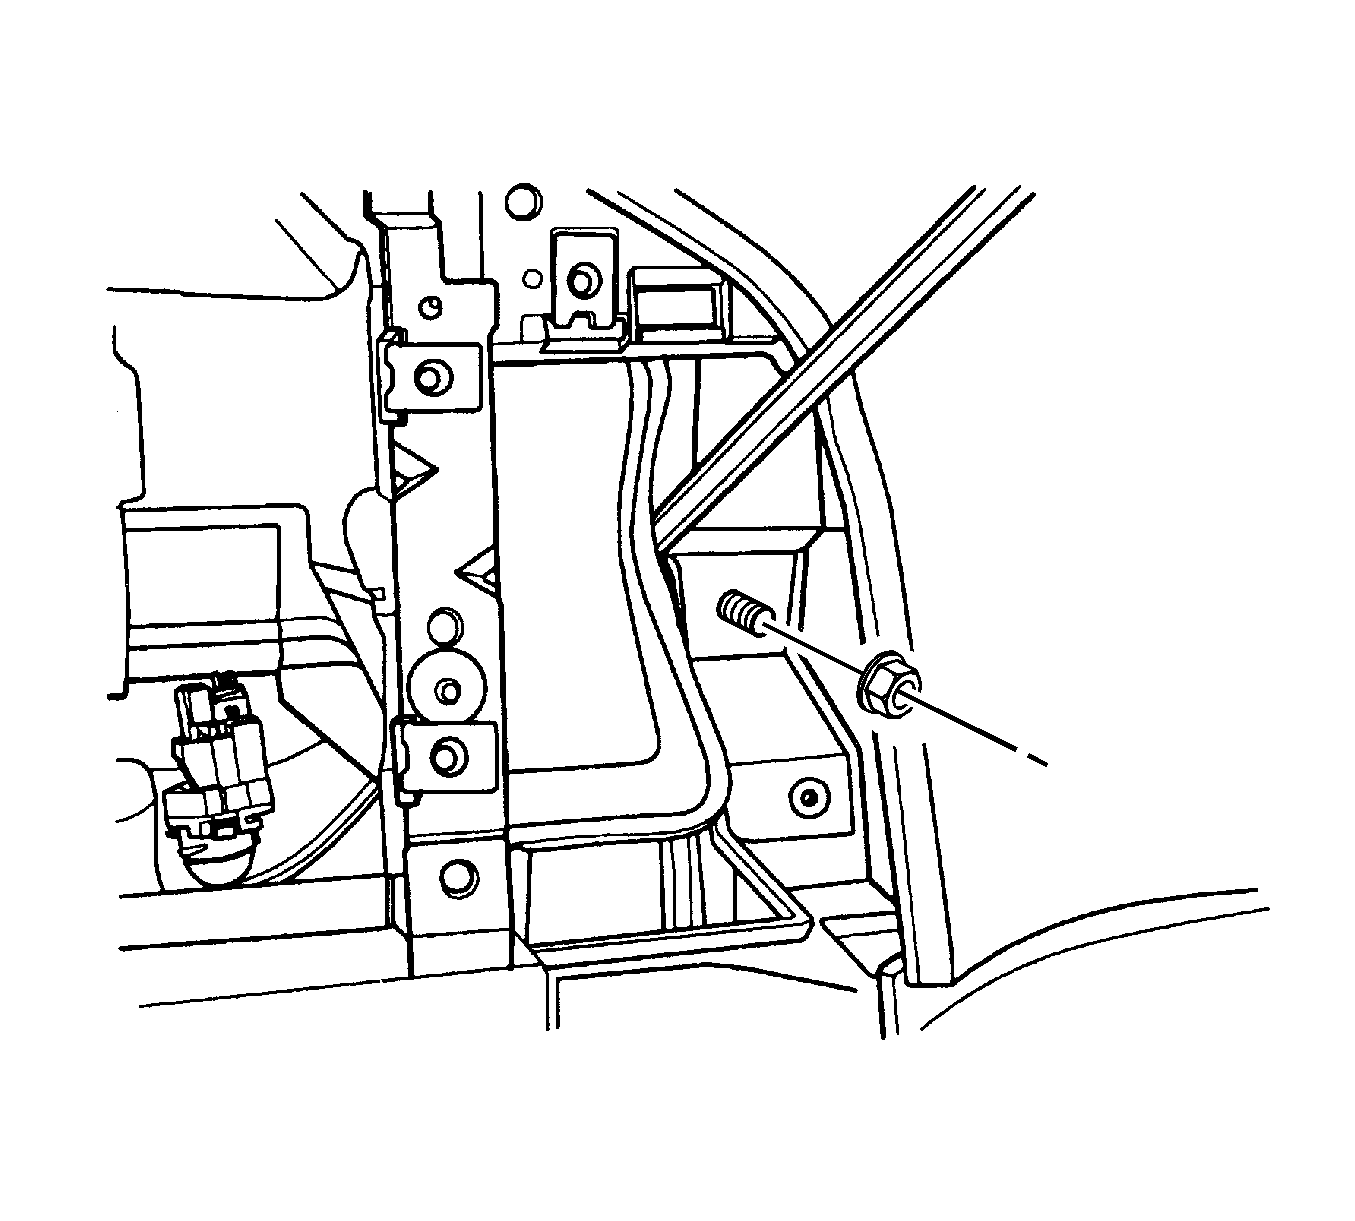
- Remove the securing nut on the right side of the front console.
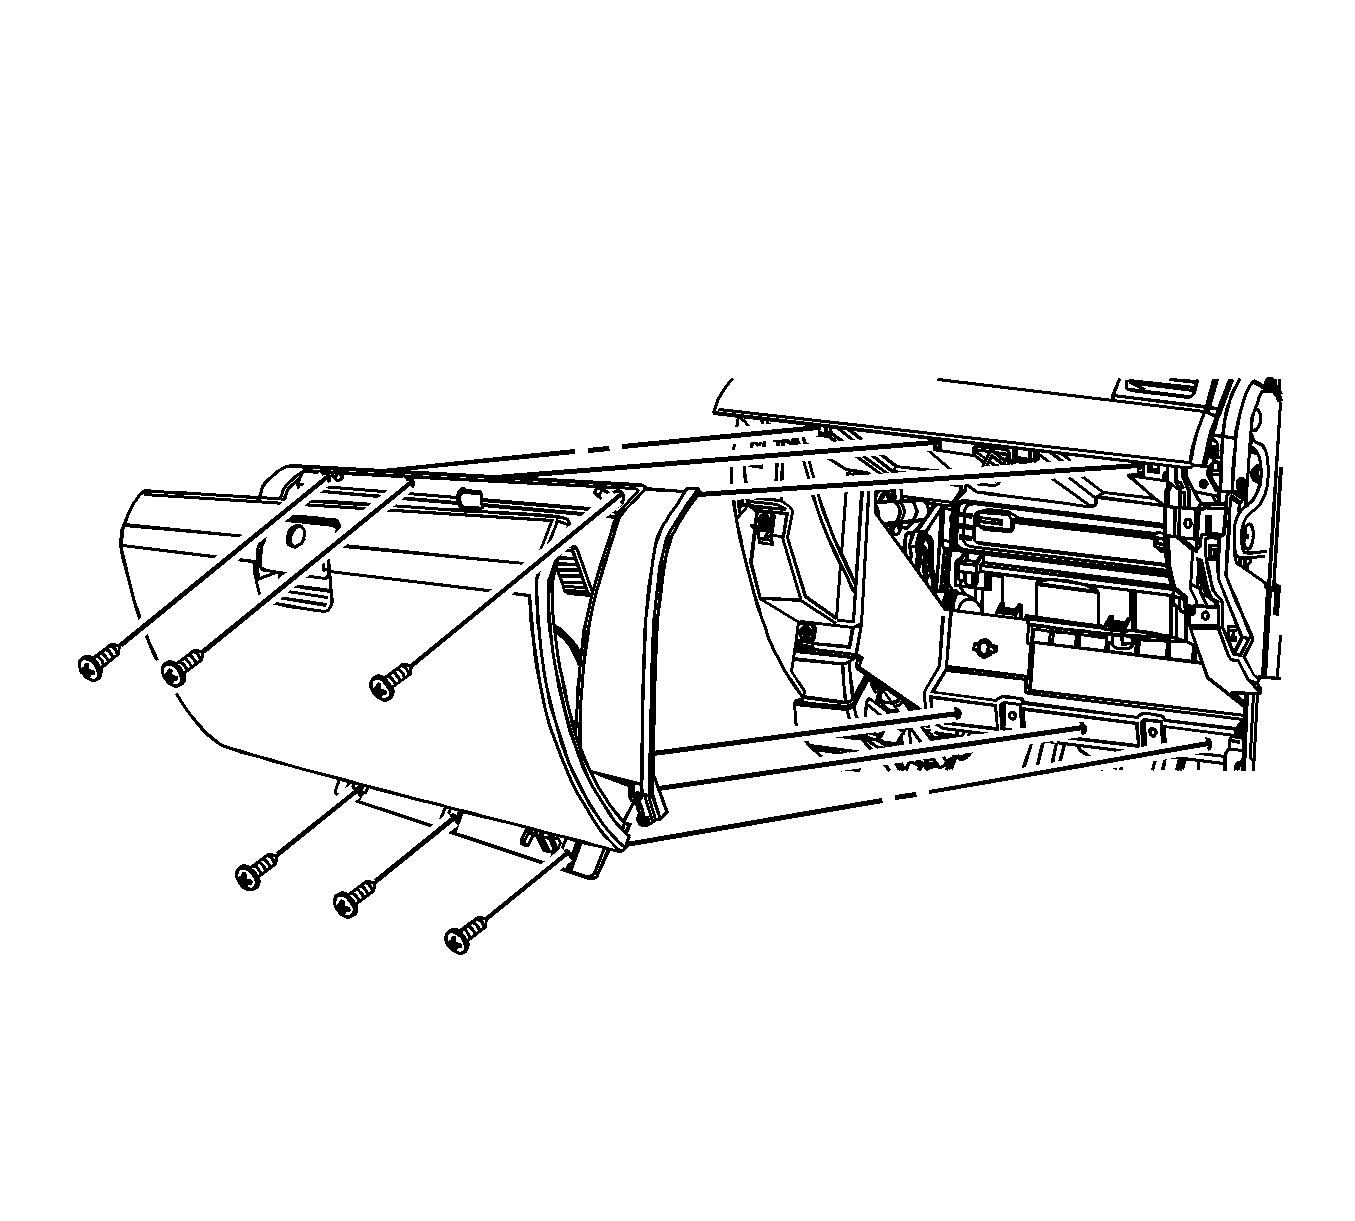
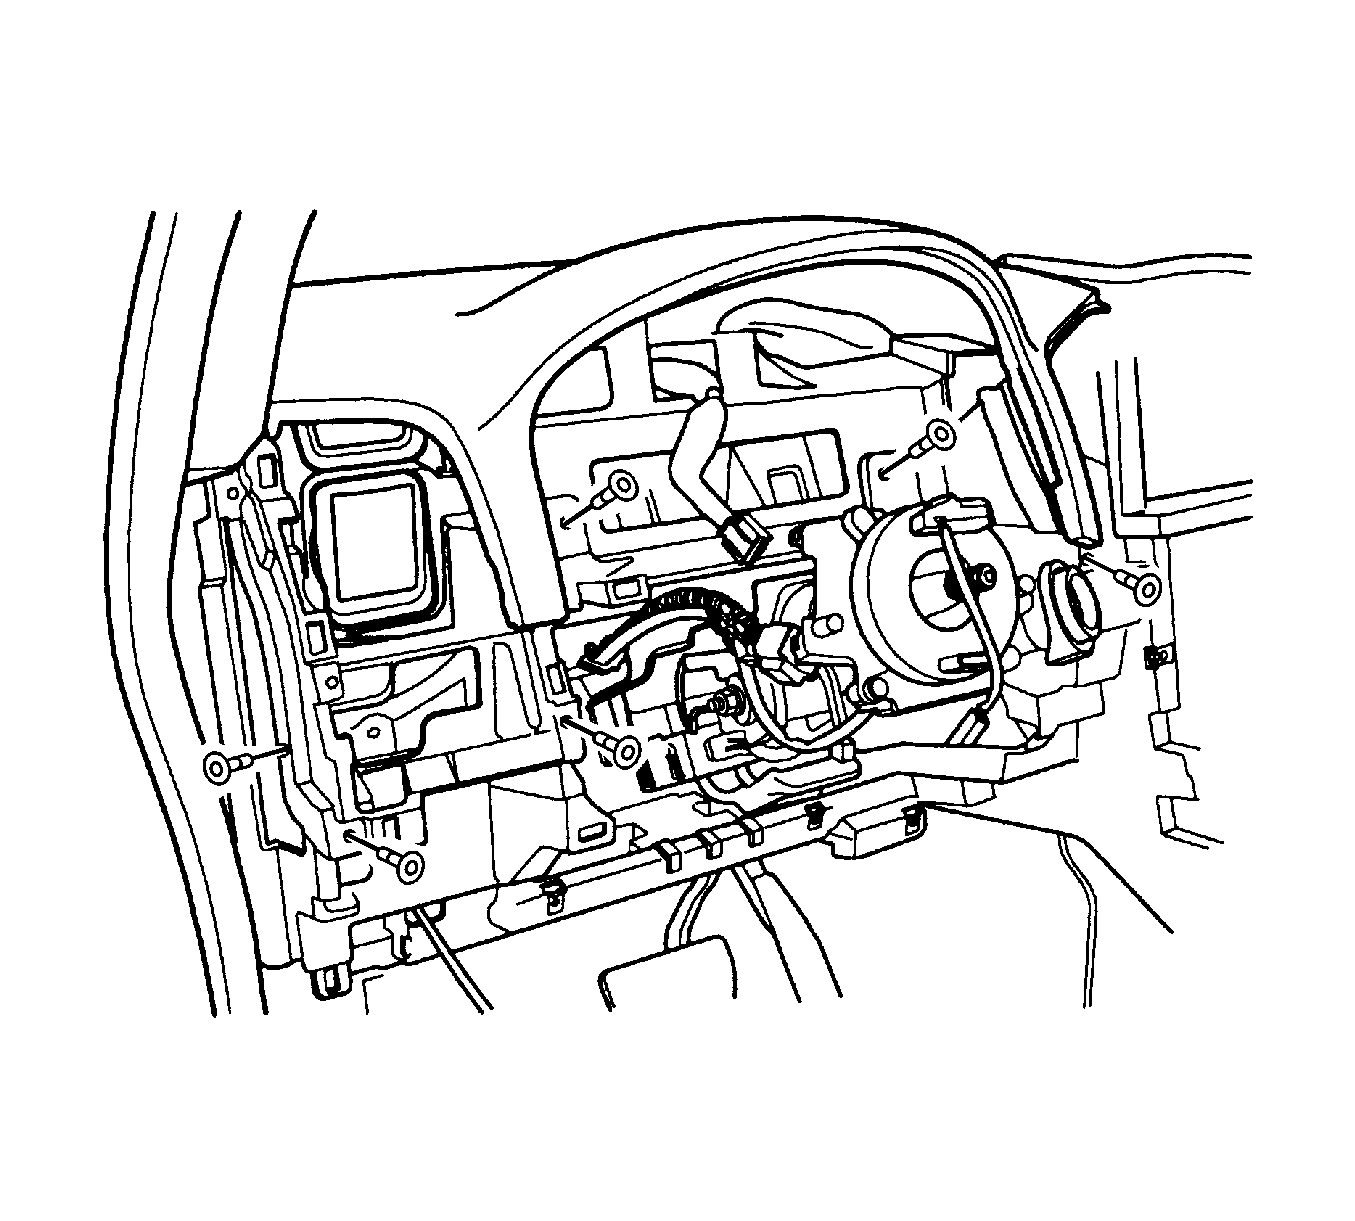
- In order to get access into the bolts behind the I/P cluster, loosen the lower I/P from the upper I/P by removing the securing screws.
- Pull the lower I/P and remove the securing bolts behind the I/P cluster.
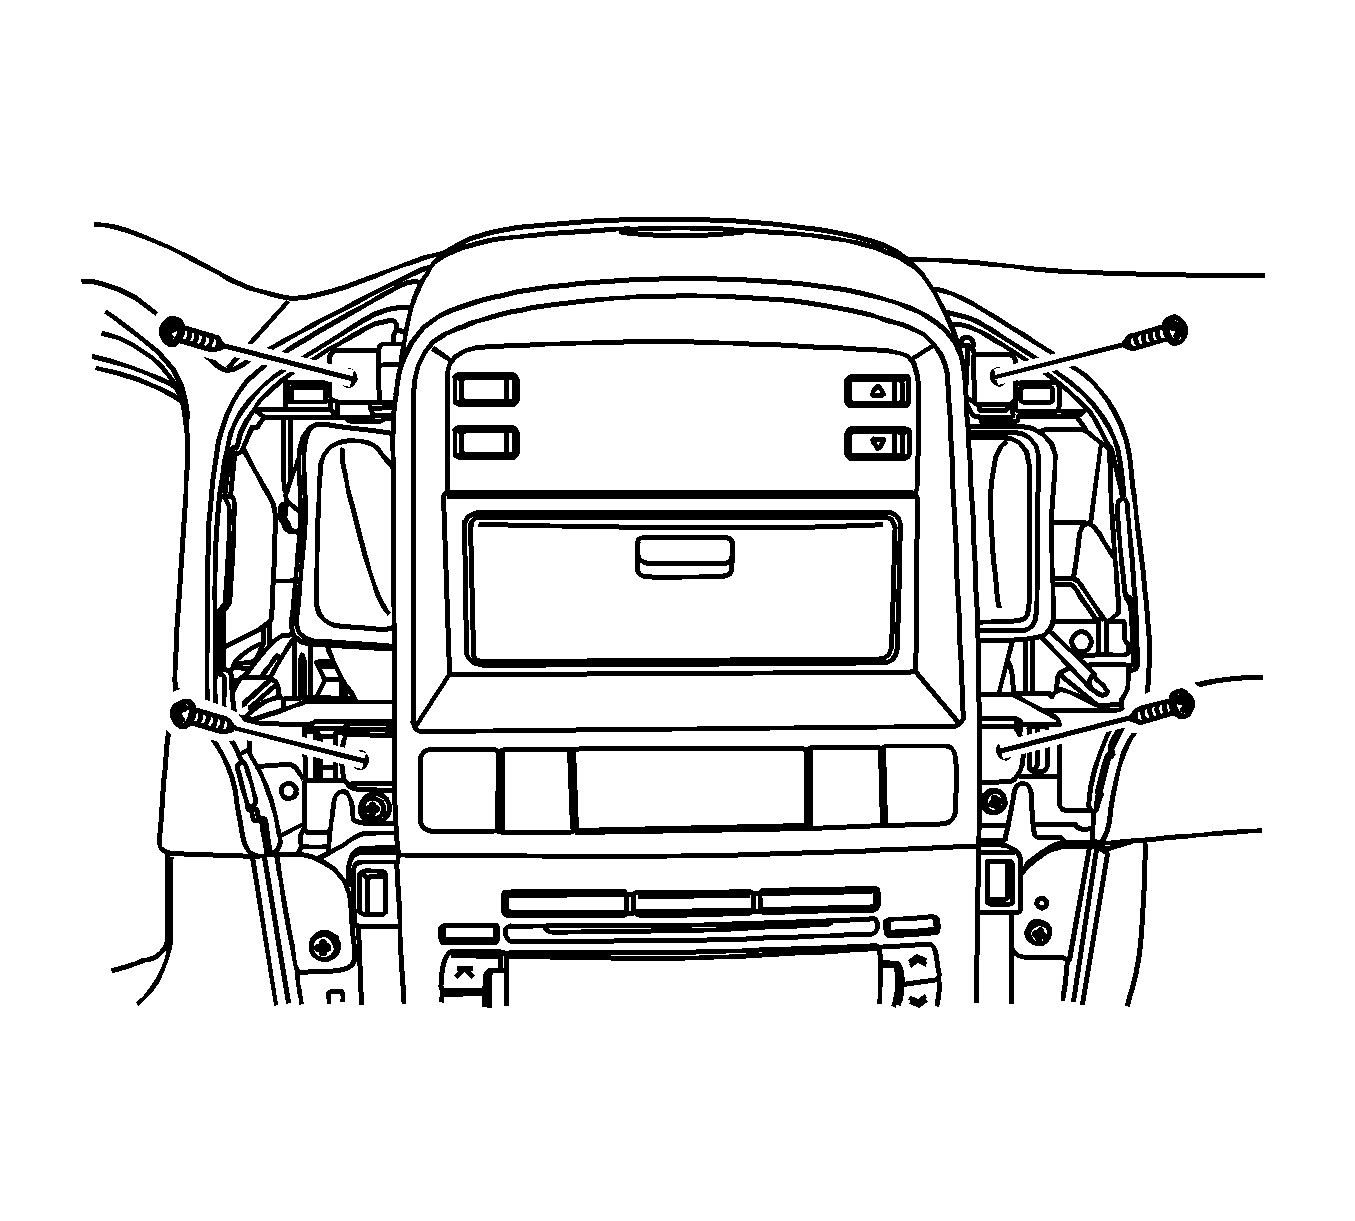
- Remove the screws securing the I/P center vents.
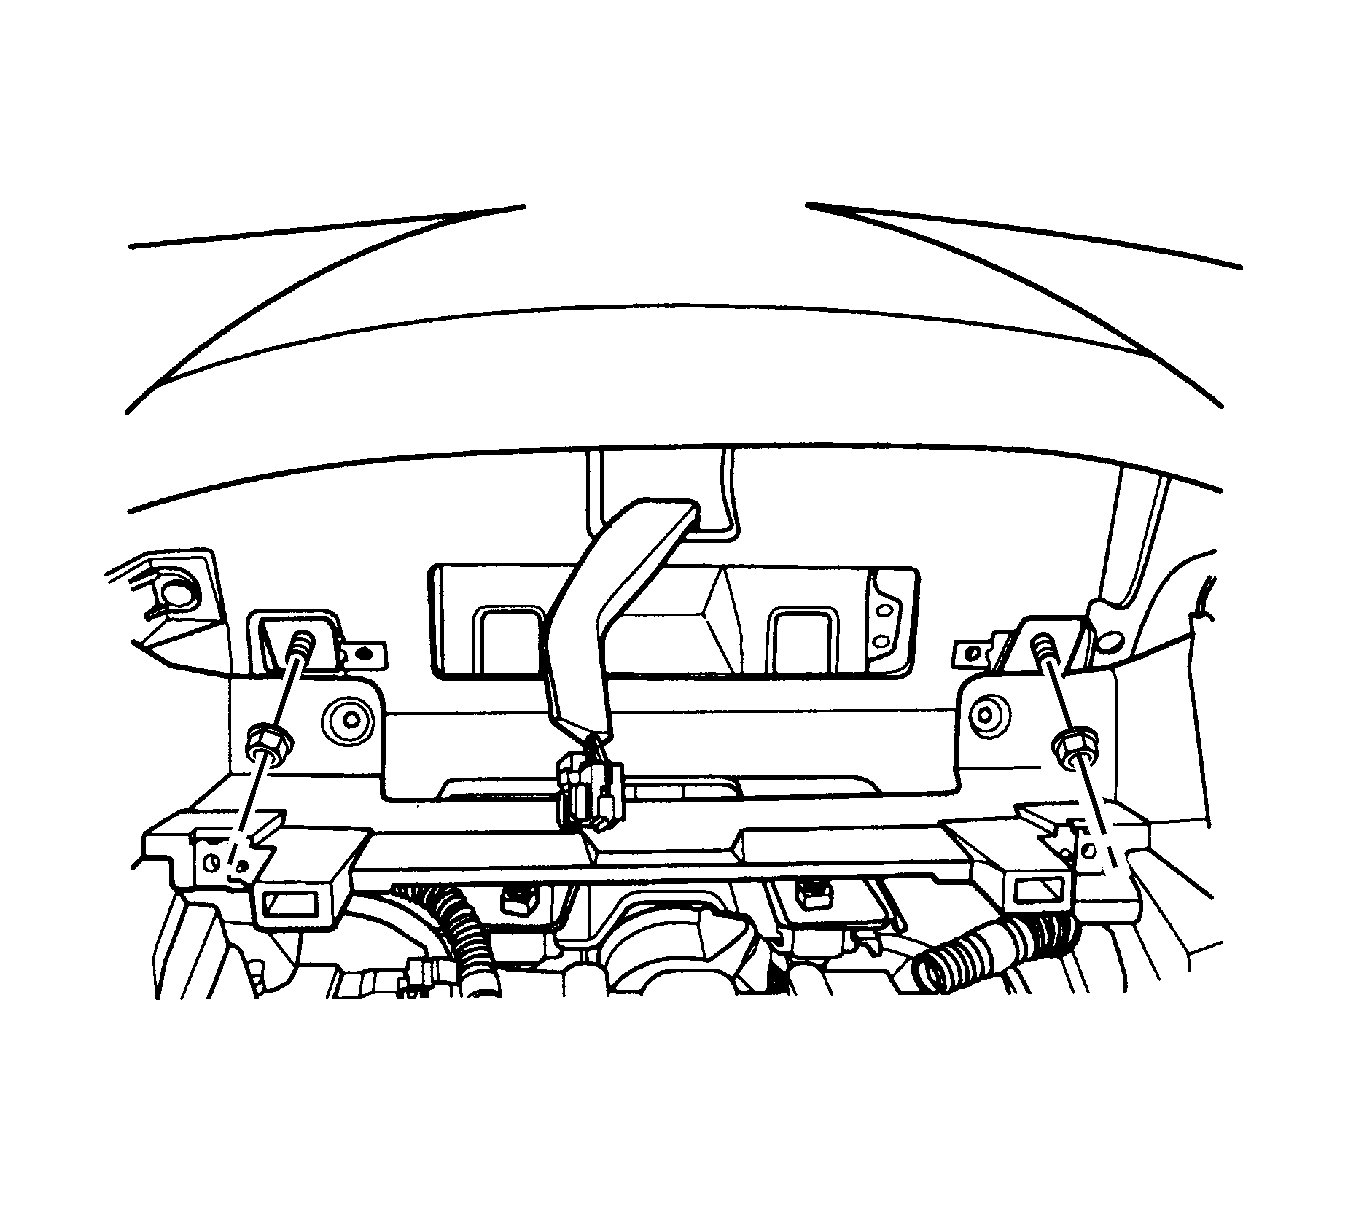
- Remove the securing nut behind the right I/P center vent.
- Disconnect the guide pins from the dash panel by pulling the I/P assembly.
- Remove the I/P from the vehicle.
Warning: Refer to Battery Disconnect Warning in the Preface section.
Installation Procedure
- Position the I/P in the vehicle, making sure the guide pins are fastened.
- Install the securing nut behind the right I/P center vent and tighten to 23 N·m (17 lb ft).
- Install the I/P center vent screws and tighten to 23 N·m (17 lb ft).
- Pull back on the lower I/P and install the securing nuts behind the I/P cluster. Tighten the I/P nuts to 23 N·m (17 lb ft).
- Install the screws connecting the upper I/P with the lower I/P and tighten to 23 N·m (17 lb ft).
- Install the securing nut on the right side of the front console and tighten to 23 N·m (17 lb ft).
- Install the securing bolts and nut on the left and right sides of the I/P and tighten to 23 N·m (17 lb ft).
- Install the securing bolts in both sides of the I/P below the windshield and tighten to 23 N·m (17 lb ft).
- Install the bolt caps.
- Install the bolts securing the passenger air bag on the tie bar and tighten to 10 N·m (7 lb ft).
- Install the right I/P vent. Refer to Instrument Panel Outer Air Outlet Replacement - Right Side.
- Install the I/P storage compartment. Refer to Instrument Panel Storage Compartment Replacement.
- Install the body control module. Refer to Body Control Module Replacement.
- Install the ambient light sensor. Refer to Ambient Light Sensor Replacement.
- Install the automatic temperature controls assembly. Refer to Heater and Air Conditioning Control Replacement.
- Install the radio. Refer to Radio Replacement.
- Install the I/P lower compartment. Refer to Instrument Panel Lower Compartment Replacement.
- Install the instrument cluster. Refer to Instrument Cluster Replacement.
- Install the wiper switch. Refer to Windshield Wiper and Washer Switch Replacement.
- Install the headlamp/turn signal switch. Refer to Turn Signal Multifunction Switch Replacement.
- Install the steering wheel. Refer to Steering Wheel Replacement.
- Install the left I/P vent. Refer to Instrument Panel Outer Air Outlet Replacement - Left Side.
- Install the headlamp leveling switch assembly. Refer to Headlamp Leveling Switch Replacement.
- Install the floor console. Refer to Console Replacement.
- Connect the negative battery cable. Refer to Battery Negative Cable Disconnection and Connection.

Caution: Refer to Fastener Caution in the Preface section.




Instrument Panel Assembly Replacement C105/Short Body
Removal Procedure
- Disconnect the negative battery cable. Refer to Battery Negative Cable Disconnection and Connection.
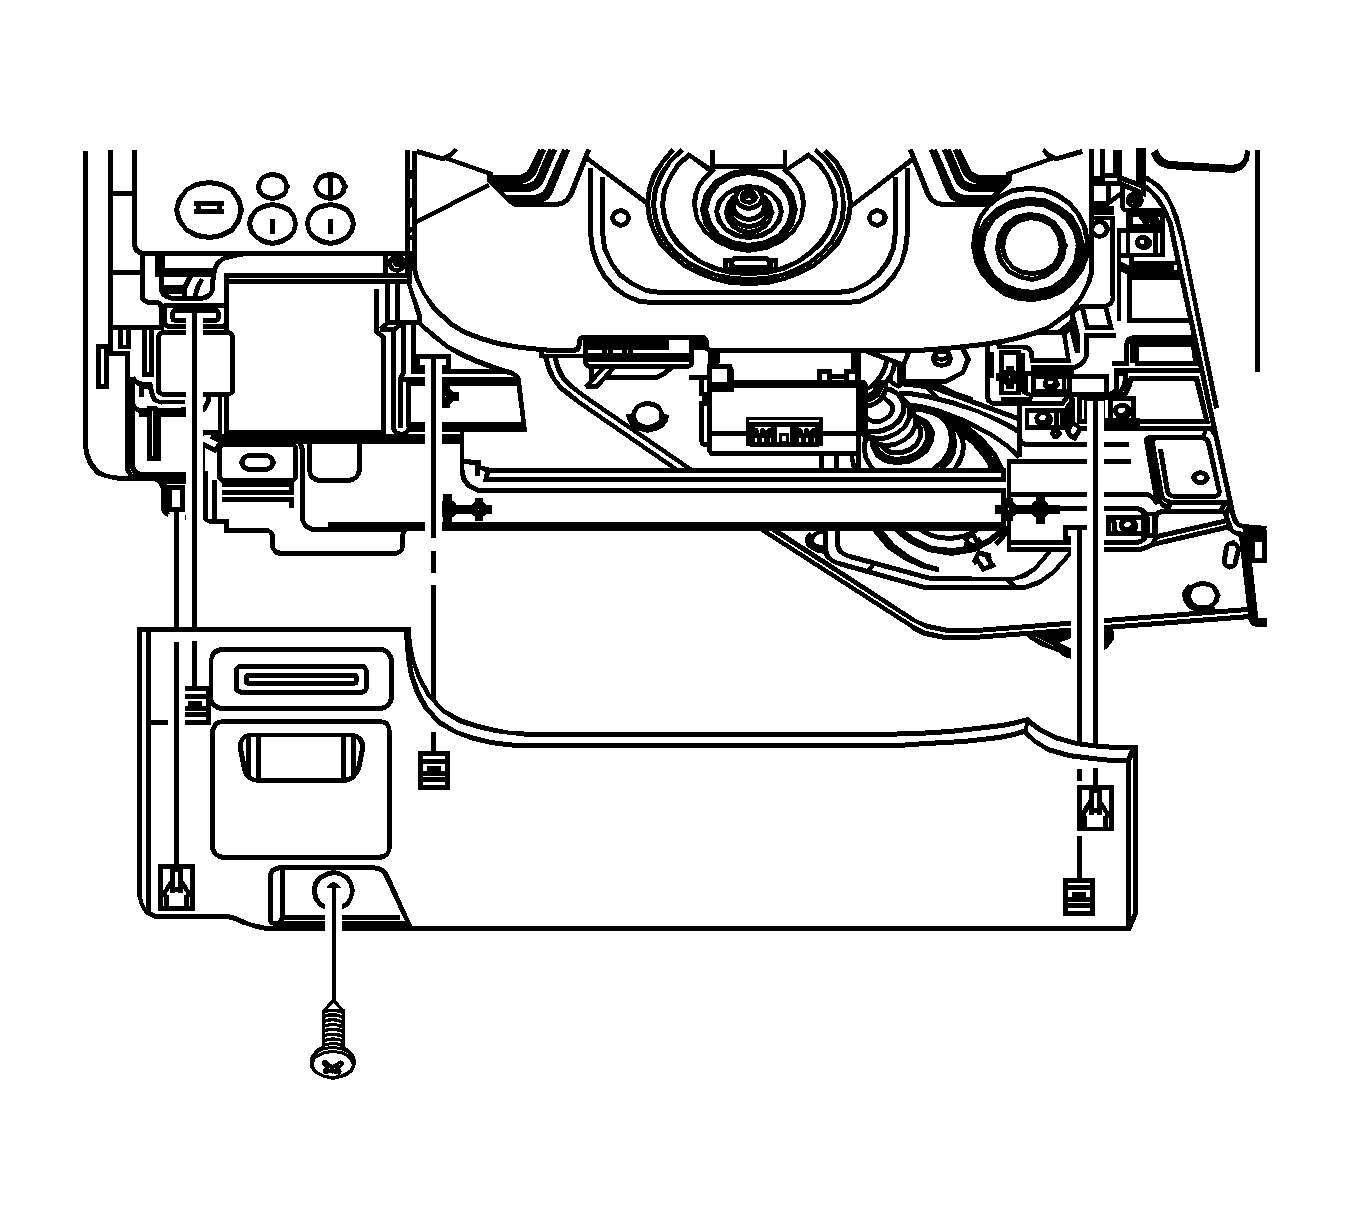
- Remove the instrument panel (I/P) lower left trim. Refer to Instrument Panel Lower Trim Panel Replacement - Left Side.
- Remove the front, rear floor console. Refer to Console Replacement.
- Remove the radio. Refer to Radio Replacement.
- Remove the headlamp leveling switch assembly. Refer to Headlamp Leveling Switch Replacement.
- Remove the instrument cluster trim panel.
- Remove the automatic temperature controls assembly. Refer to Heater and Air Conditioning Control Replacement.
- Remove the instrument cluster. Refer to Instrument Cluster Replacement.
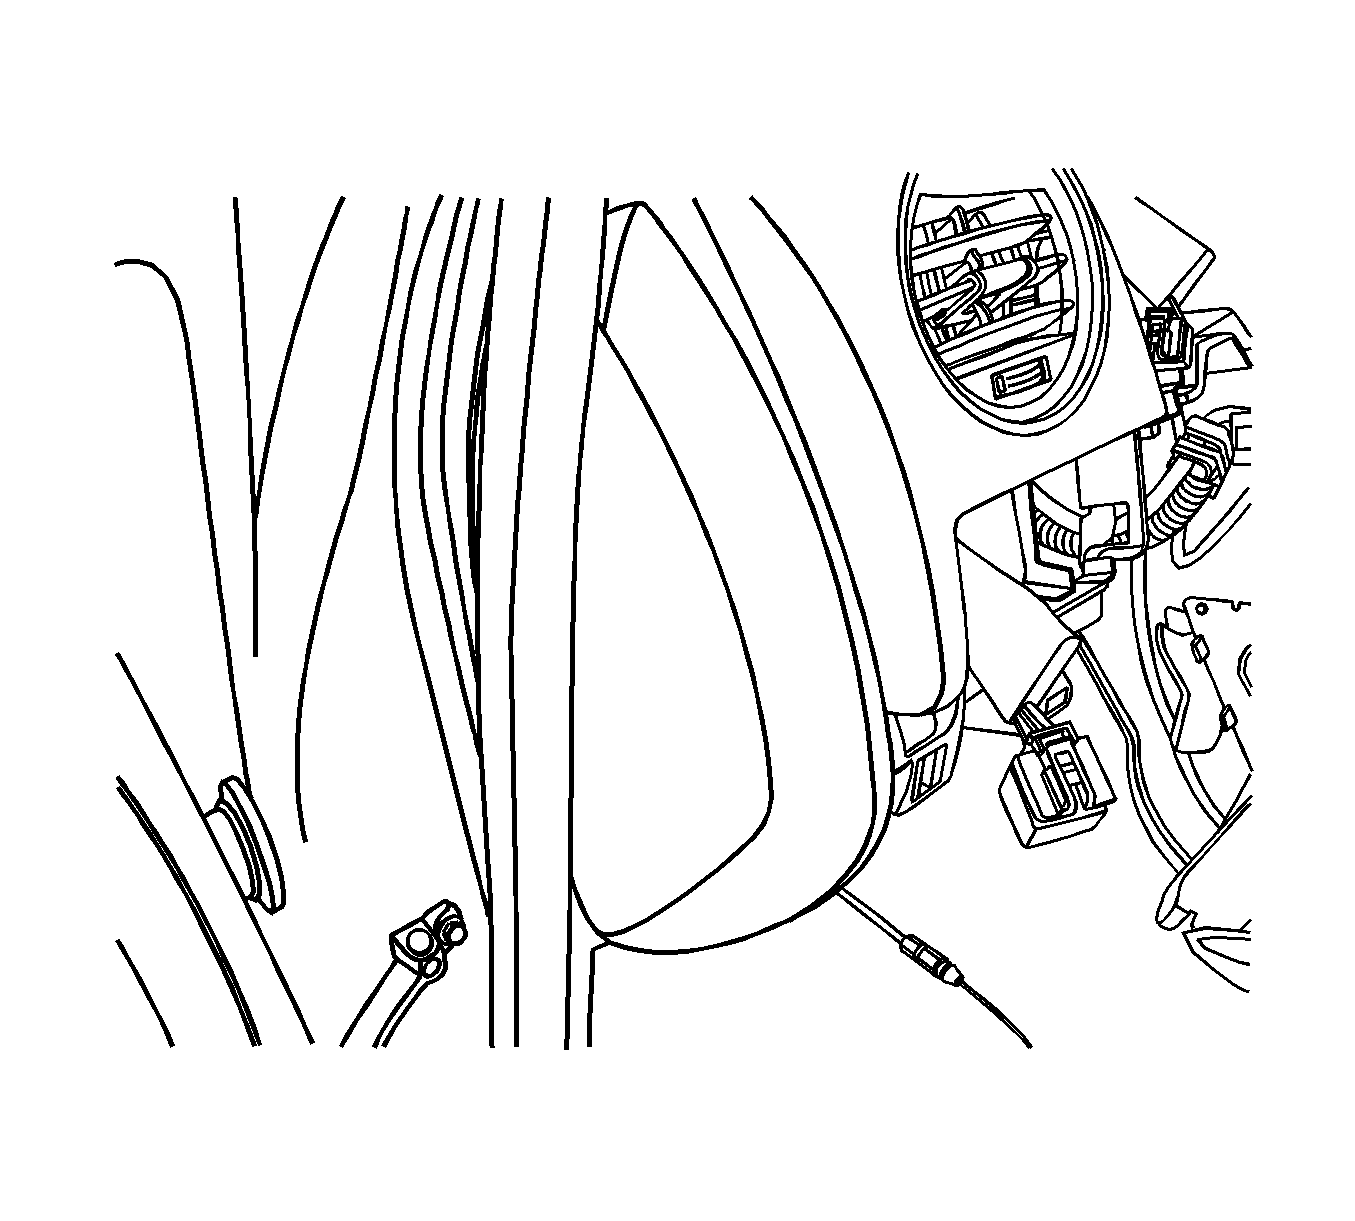
- Remove the kick panels.
- Remove the storage compartment. Refer to Instrument Panel Storage Compartment Replacement.
- Disconnect the instrument compartment electrical connectors.
- Remove the knee bolster. Refer to Knee Bolster Replacement.
- Remove the I/P side covers.
- Remove the body control module. Refer to Body Control Module Replacement.
- Remove the steering wheel. Refer to Steering Wheel Replacement.
- Remove the headlamp switch. Refer to Headlamp Switch Replacement.
- Remove the wiper/washer switch. Refer to Windshield Wiper and Washer Switch Replacement.
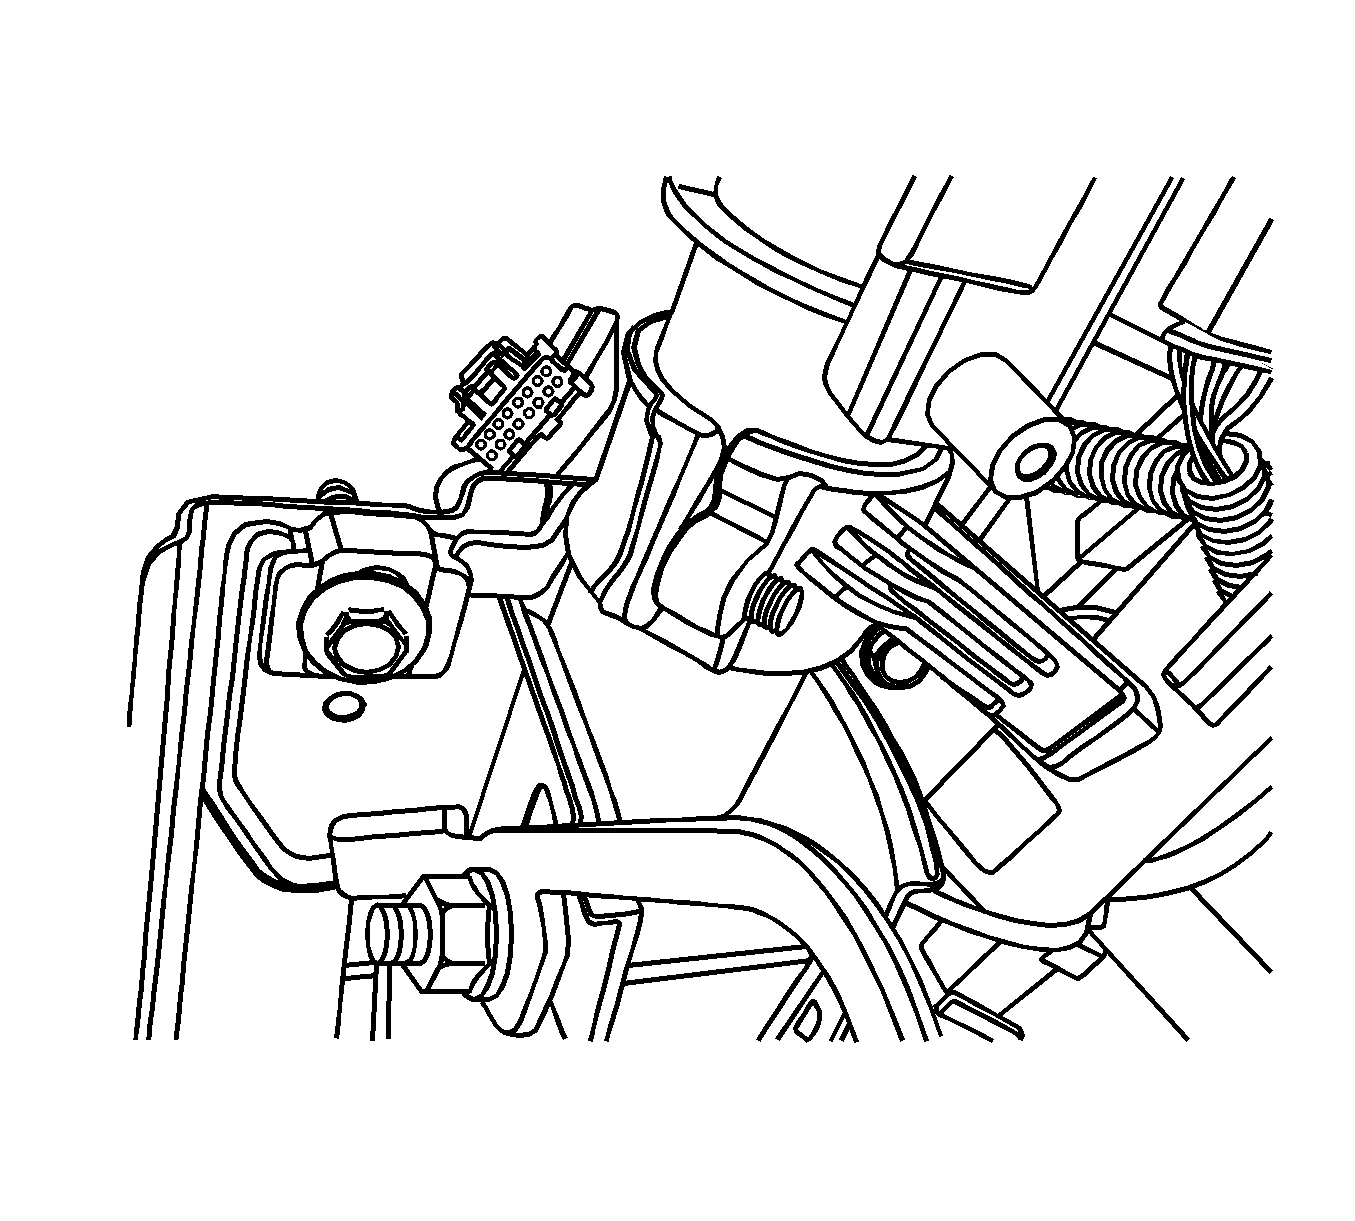
- Remove the nuts and the bolts securing the steering column.
- Disconnect the steering column electrical connector.
- Lower the steering column.
- Remove the A-pillar trim.
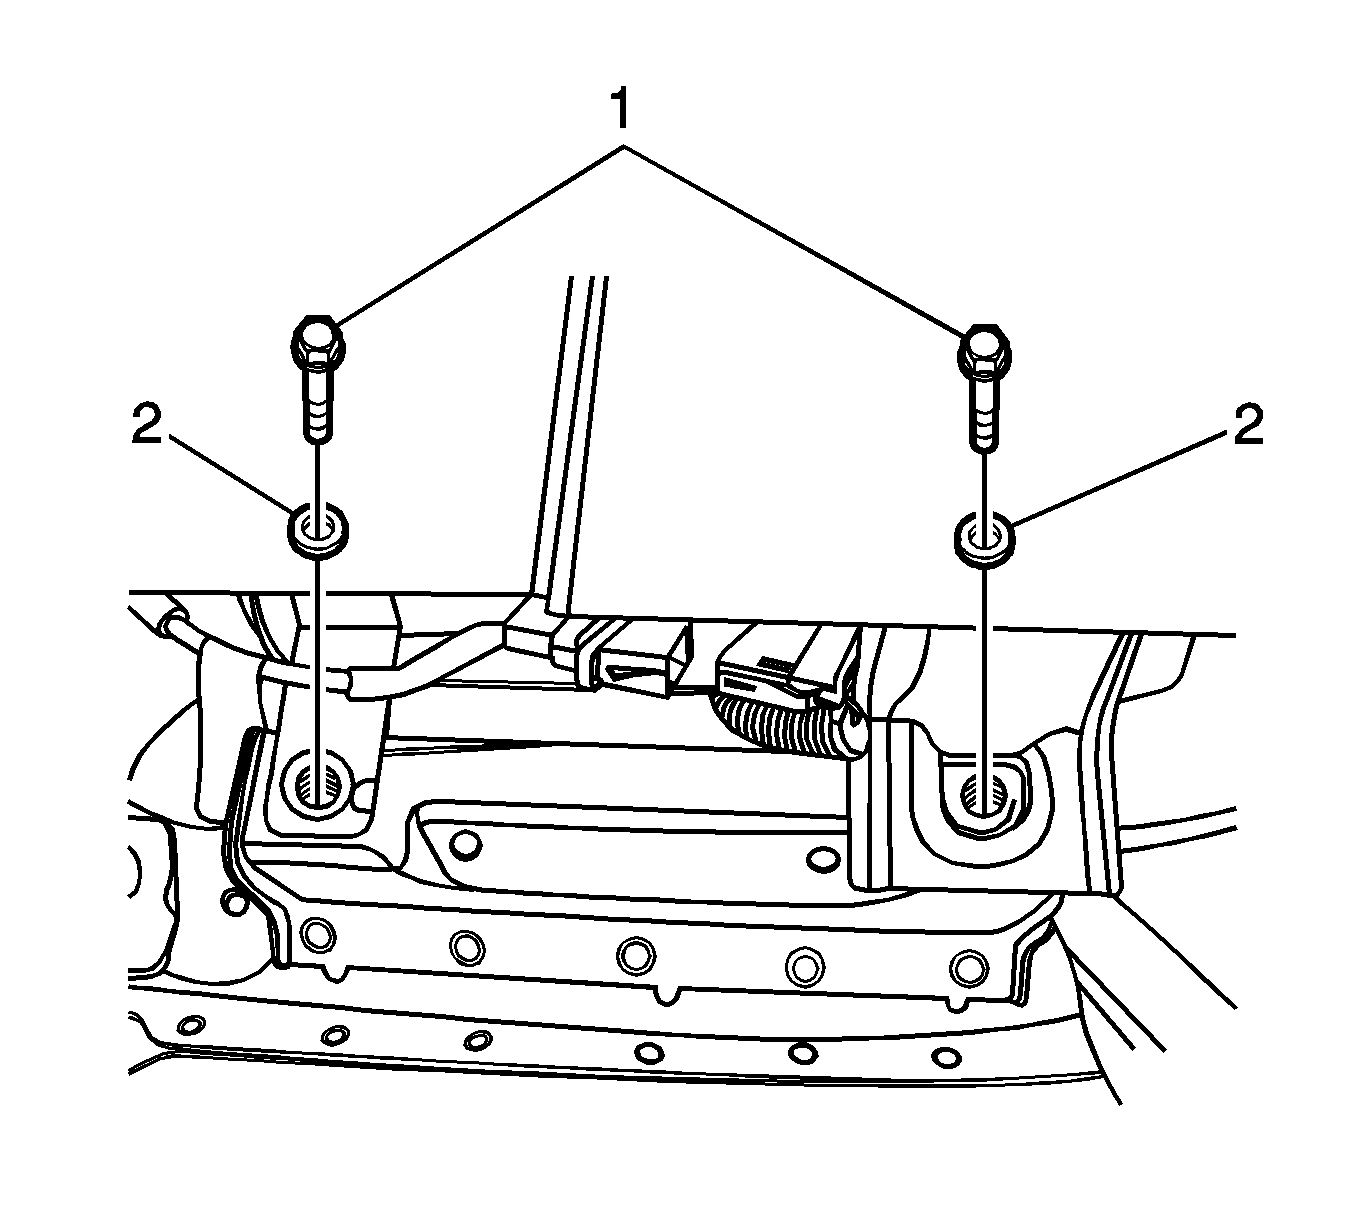
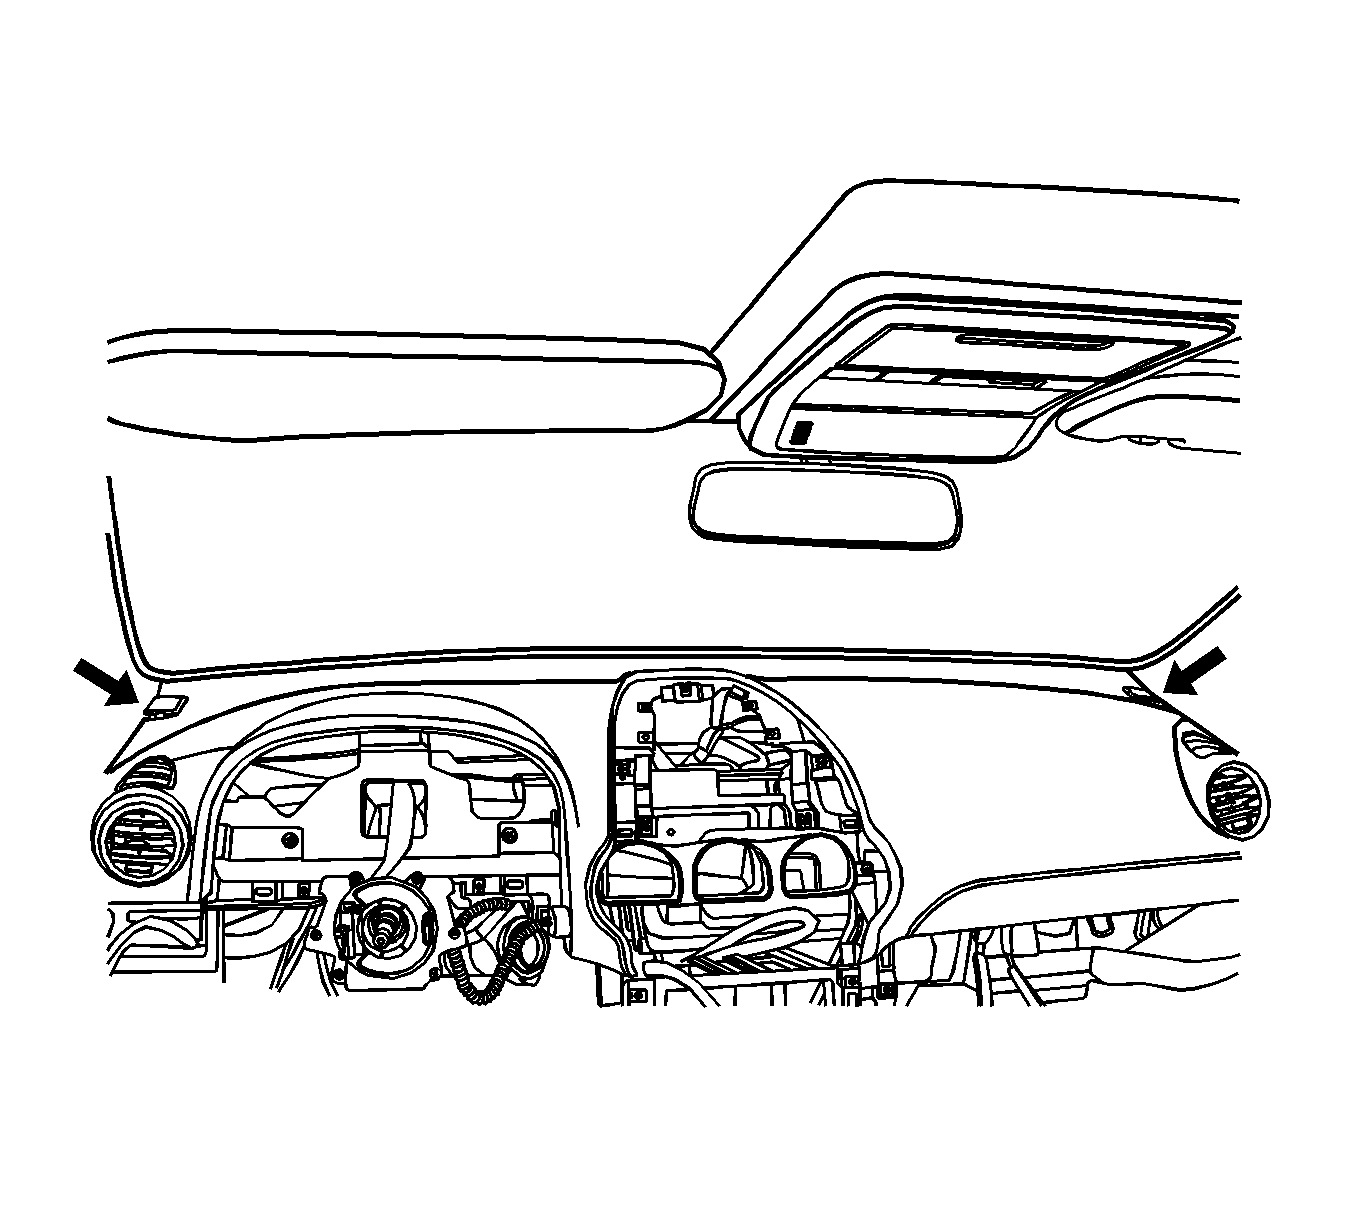
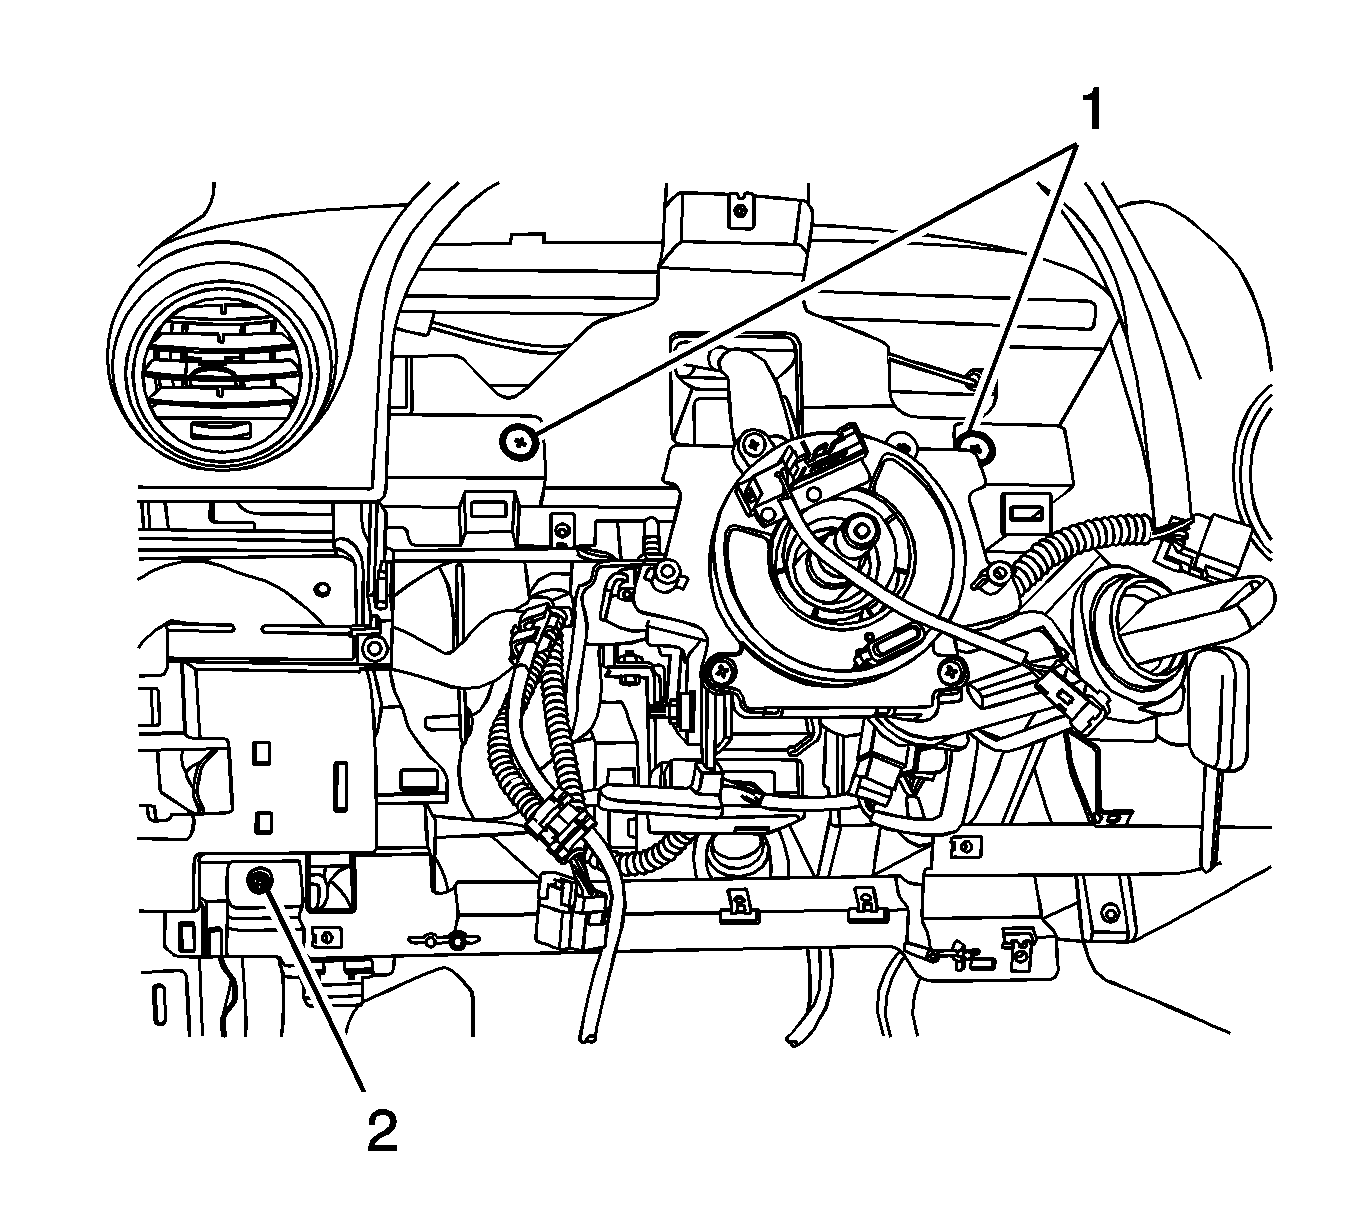
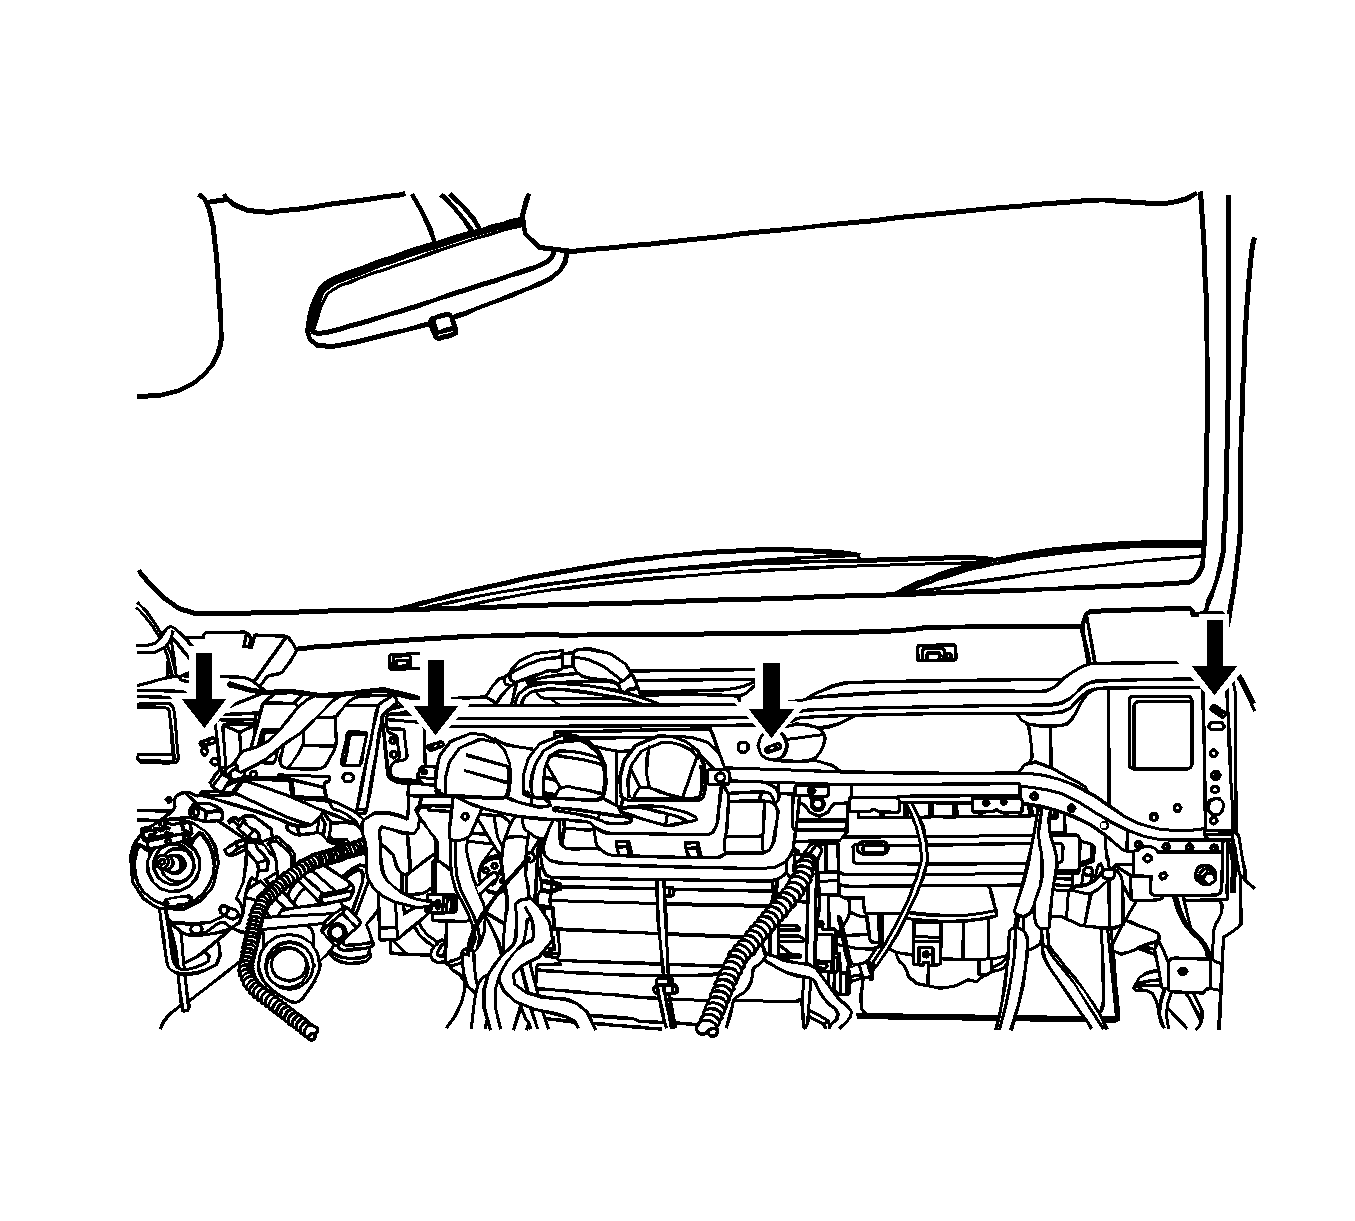
- Remove the I/P bolts below the windshield.
- Remove the screws (1) and the left lower I/P retaining bolt (2).
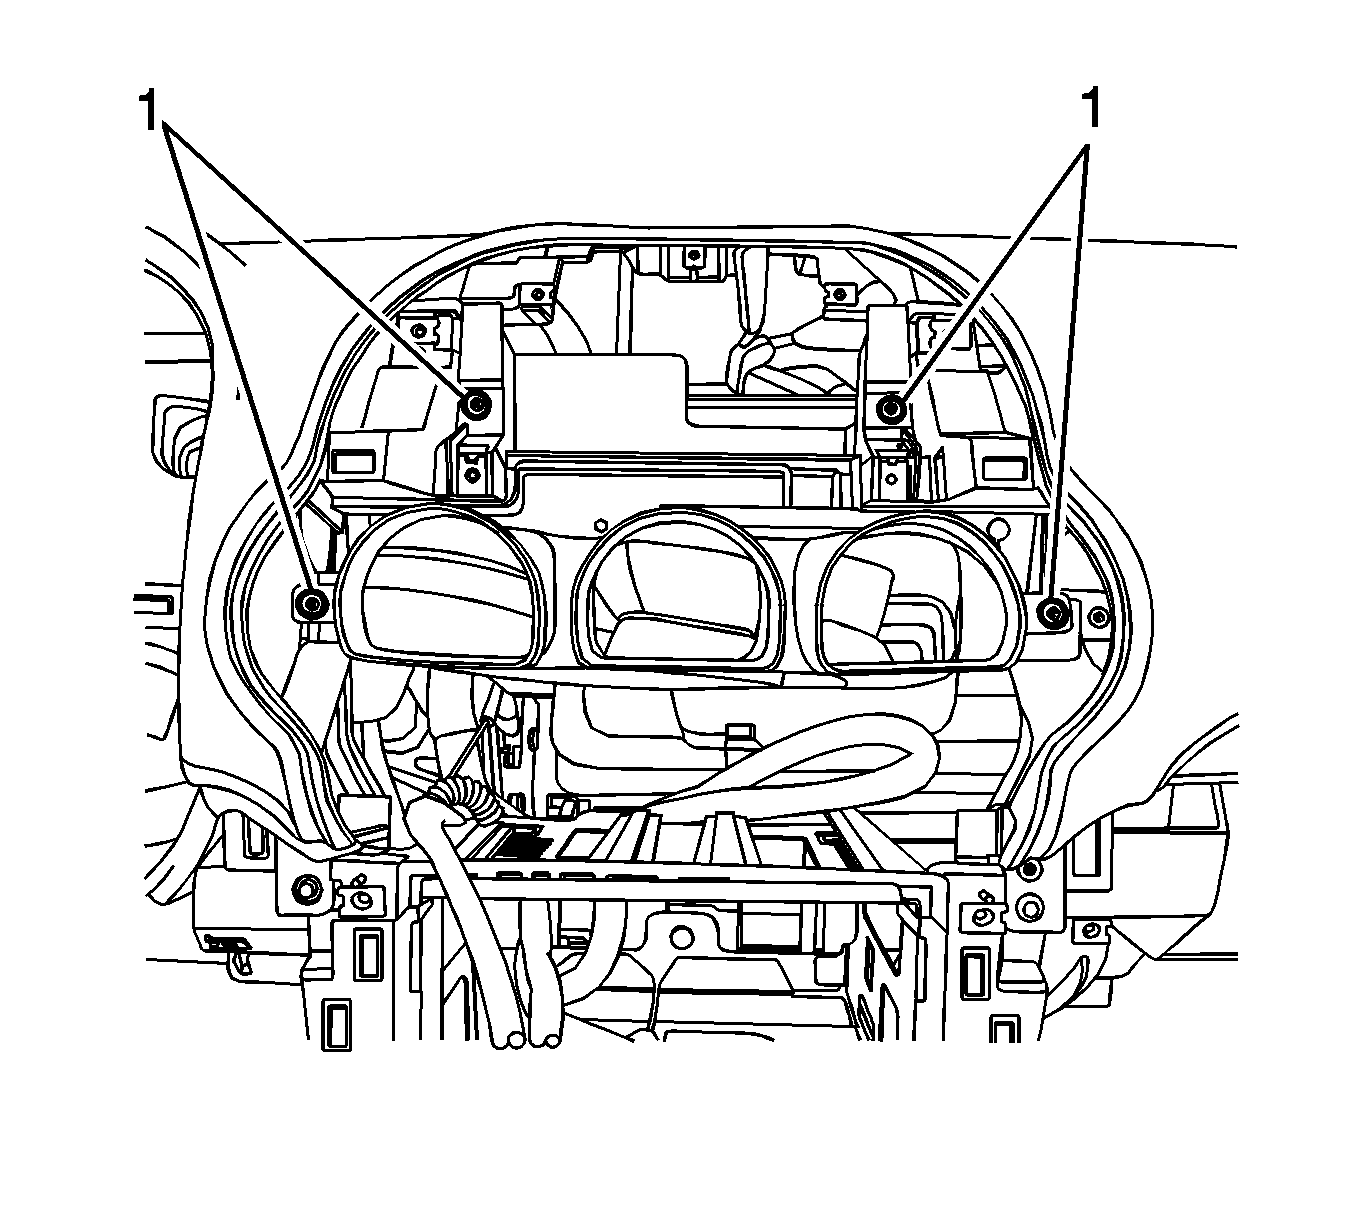
- Remove the screws (1) securing the I/P center.
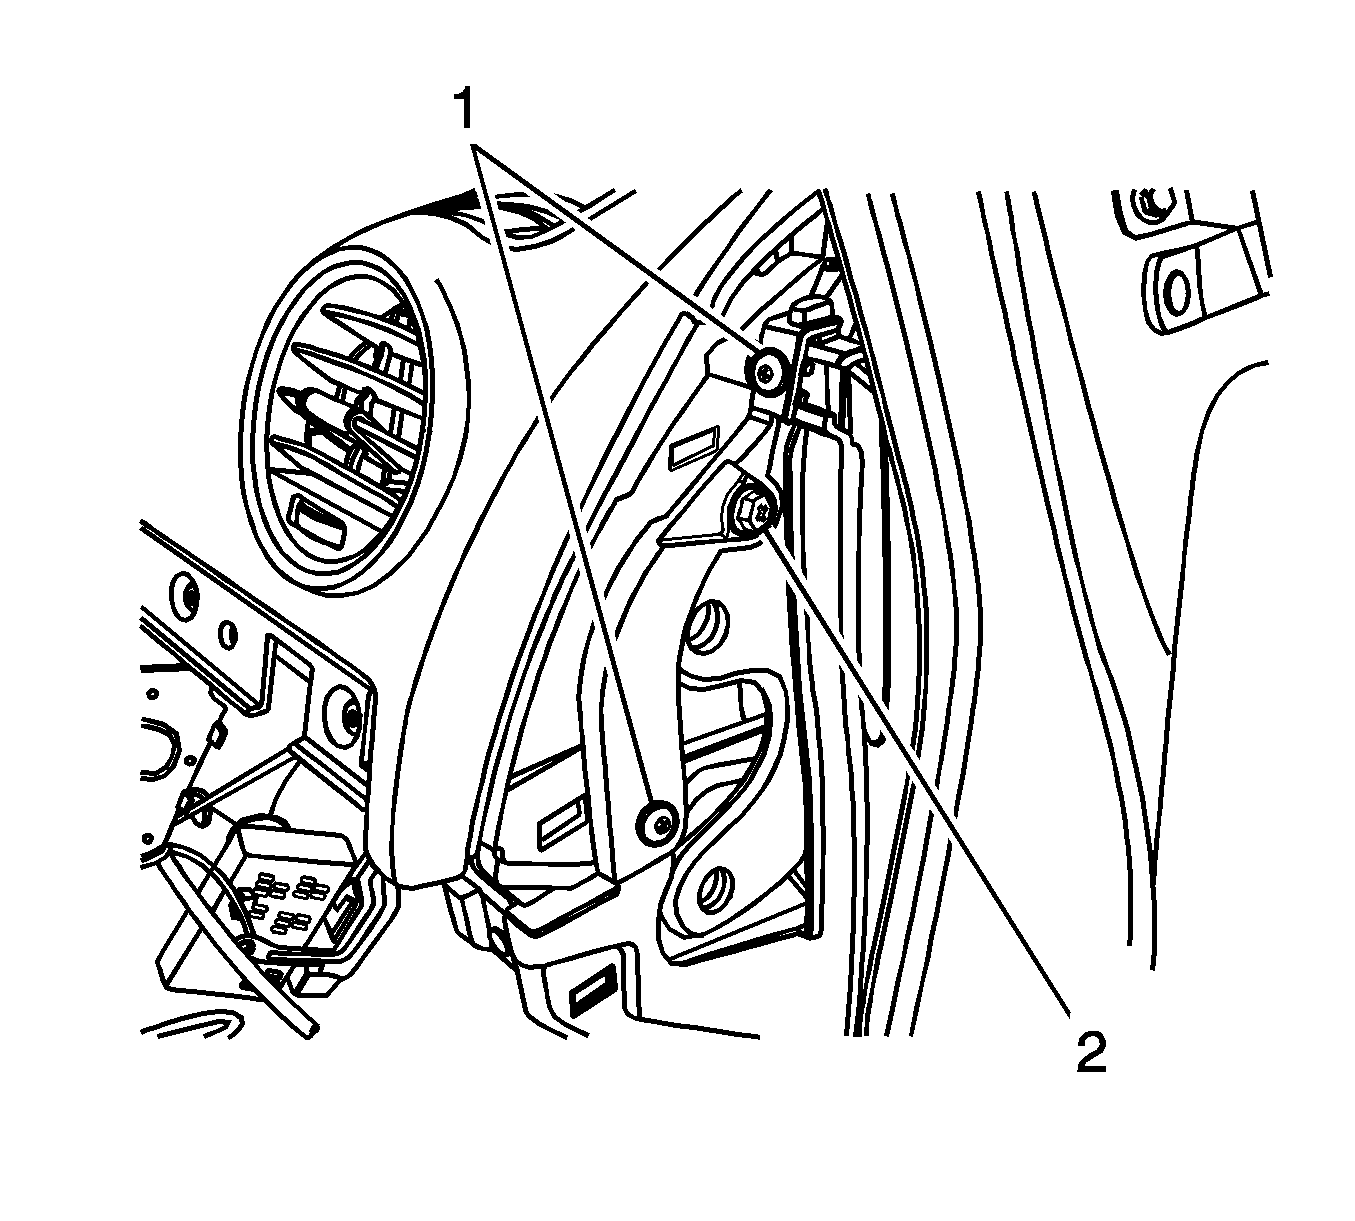
- Remove the I/P left and right side screws (1) and bolt (2).
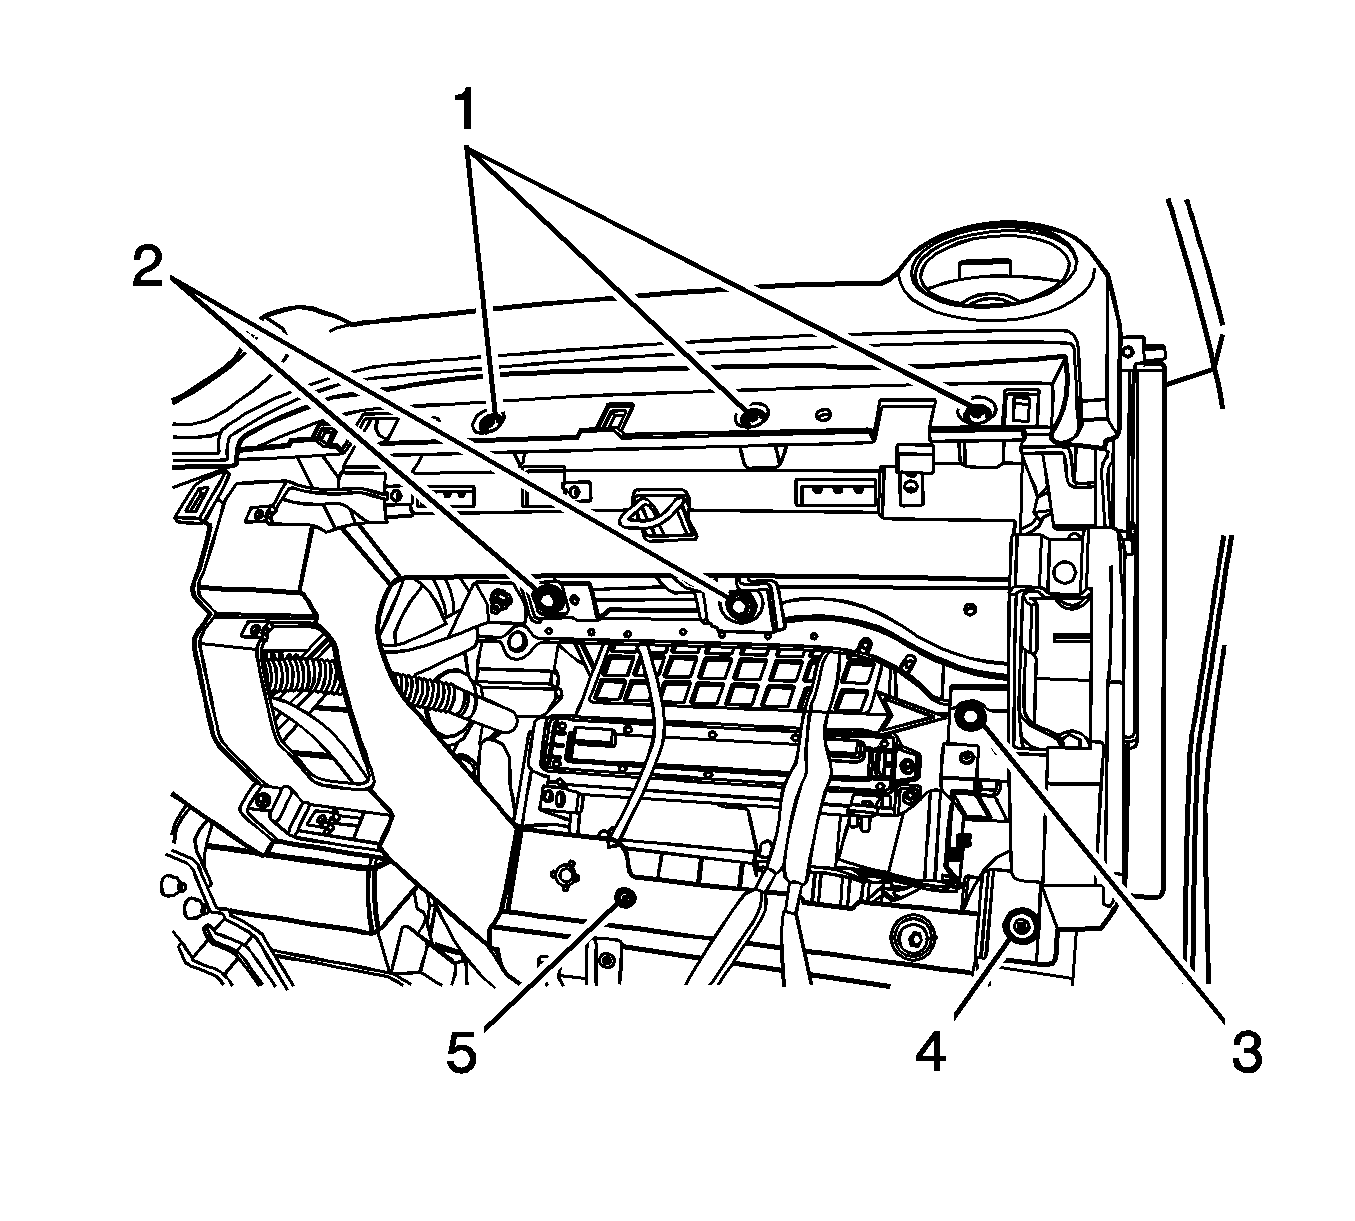
- Remove the screws (1) near the I/P compartment.
- Remove the air bag retaining bolts (2).
- Remove the screw (5) near the blower motor.
- Remove the right lower I/P retaining bolt (4).
- Remove the nut (3) securing the I/P backside.
- Lift up the I/P and remove the I/P to T-bar nuts.
- Disconnect the electrical connectors.
- Remove the I/P from the vehicle.
Warning: Refer to Battery Disconnect Warning in the Preface section.
Note: Left-Hand Drive Shown, Right-Hand Drive Similar.

Installation Procedure
- Position the I/P in the vehicle.
- Connect the I/P electrical connectors.
- Lift up the I/P and install the I/P to T-bar nuts. Tighten the nuts to 10 N·m (89 lb in).
- Install the nut (3) securing the I/P backside and tighten to 10 N·m (89 lb in).
- Install the right lower I/P retaining bolt (4) and tighten to 10 N·m (89 lb in).
- Install the screw (5) near the blower motor and the screws (1) near the I/P compartment. Tighten the screws near the blower motor and the I/P compartment to 2 N·m (18 lb in).
- Install the air bag retaining bolts (2) and tighten to 10 N·m (89 lb in).
- Install the I/P left and right side screws (1) and tighten to 2 N·m (18 lb in).
- Install the I/P bolt (2) and tighten to 10 N·m (89 lb in).
- Install the screws (1) securing the I/P center and tighten to 2 N·m (18 lb in).
- Install the I/P screws (1) and tighten to 10 N·m (89 lb in).
- Install the I/P retaining bolt (2) and tighten to 10 N·m (89 lb in).
- Install the I/P bolts below the windshield and tighten to 23 N·m (17 lb ft).
- Install the A-pillar trim.
- Raise the steering column.
- Connect the steering column electrical connector.
- Install the bolts securing the steering column and tighten to 22 N·m (16 lb ft).
- Install the headlamp switch. Refer to Headlamp Switch Replacement.
- Install the wiper/washer switch. Refer to Windshield Wiper and Washer Switch Replacement.
- Install the steering wheel. Refer to Steering Wheel Replacement.
- Install the body control module. Refer to Body Control Module Replacement.
- Install the I/P side covers.
- Install the knee bolster. Refer to Knee Bolster Replacement.
- Install the I/P lower left trim. Refer to Instrument Panel Lower Trim Panel Replacement - Left Side.
- Connect the instrument compartment electrical connectors.
- Install the storage compartment. Refer to Instrument Panel Storage Compartment Replacement.
- Install the kick panels.
- Install the instrument cluster. Refer to Instrument Cluster Replacement.
- Install the automatic temperature controls assembly. Refer to Heater and Air Conditioning Control Replacement.
- Install the instrument cluster trim panel.
- Install the headlamp leveling switch assembly. Refer to Headlamp Leveling Switch Replacement.
- Install the radio. Refer to Radio Replacement.
- Install the ambient light sensor. Refer to Ambient Light Sensor Replacement.
- Install the floor console. Refer to Console Replacement.
- Connect the negative battery cable. Refer to Battery Negative Cable Disconnection and Connection.

Caution: Refer to Fastener Caution in the Preface section.


