Compressor Magnetic Clutch Disassembly
Tools Required
| • | J 33939 Armature Holder |
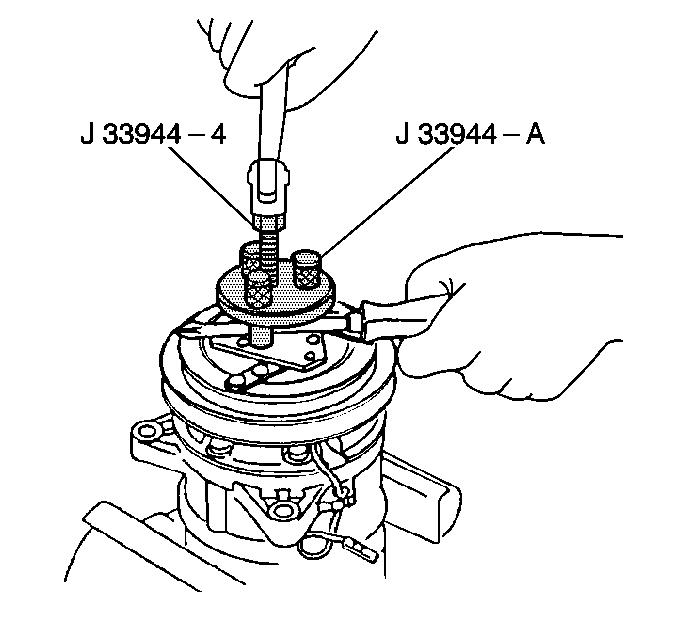
| • | J 33944-A Armature Plate Remover |
| • | J 33944-4 Puller Forcing Screw |
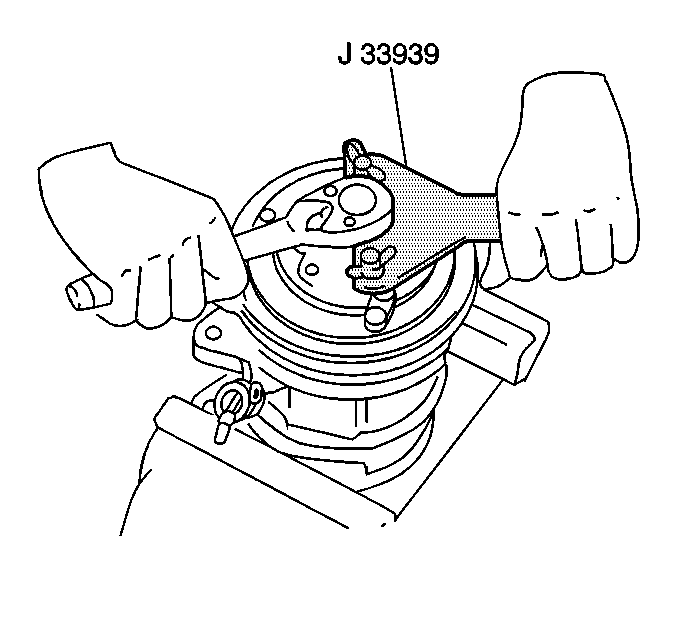
- Remove the armature bolt from the A/C compressor shaft by inserting the two pins of the J 33939 into any two threaded holes of the armature.
- Remove the armature. Replace the driver plate and pulley if the surface shows signs of damage due to excessive heat.
- Remove the shim(s) from the front housing.
Compressor Magnetic Clutch Assembly
Tools Required
| • | J 33939 Armature Holder |
| • | J 33940-A Puller Installer |
| • | J 8092 Driver Handle |
| • | J 4245 External Snap Ring Pliers |
- Install the shim on the A/C compressor shaft.
- Clean the armature with suitable cleaning solvent.
- Install the armature onto the A/C compressor shaft by inserting the two pins of the J 33939 into any two threaded holes of the armature.
- Use the J 37872 in order to hold the plate.
- Install the armature bolt on the A/C compressor shaft.
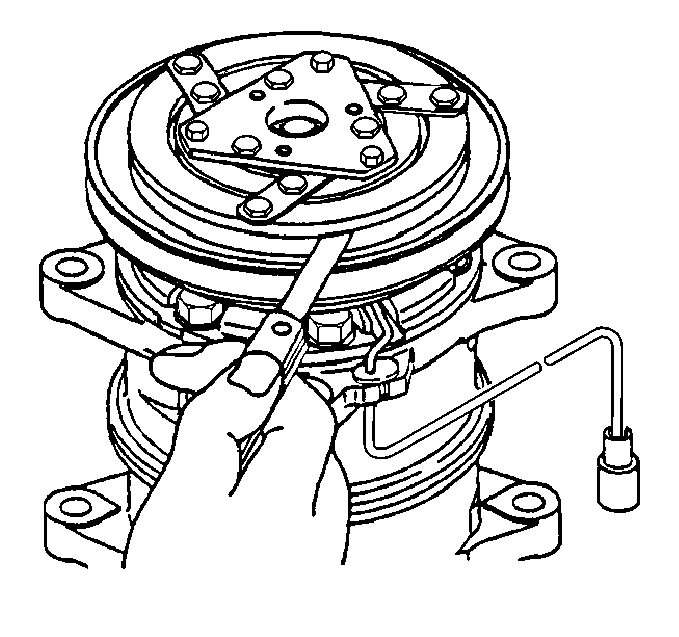
- Inspect the armature clearance. Ensure that the armature clearance is between 0.3 - 0.6 mm (0.01-0.02 in).
Notice: Use the correct fastener in the correct location. Replacement fasteners must be the correct part number for that application. Fasteners requiring replacement or fasteners requiring the use of thread locking compound or sealant are identified in the service procedure. Do not use paints, lubricants, or corrosion inhibitors on fasteners or fastener joint surfaces unless specified. These coatings affect fastener torque and joint clamping force and may damage the fastener. Use the correct tightening sequence and specifications when installing fasteners in order to avoid damage to parts and systems.
Tighten
Tighten the armature bolt to 13 N·m (113 lb in).
Compressor Magnetic Clutch Pulley
Removal Procedure
Tools Required
| • | J 33943-A Pulley Puller Pilot |
| • | J 4245 External Snap Ring Pliers |
| • | J 8433 Compressor Pulley Puller |
- Remove the armature from the A/C compressor. Refer to Compressor Magnetic Clutch .
- Use the J 4245 in order to remove the front housing snap ring.
- Remove the front housing snap ring cover, if equipped.
- Remove the pulley.
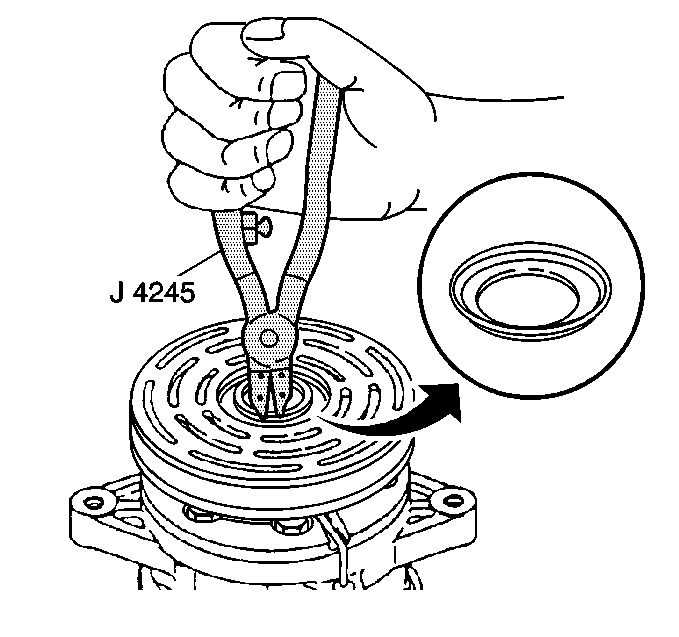
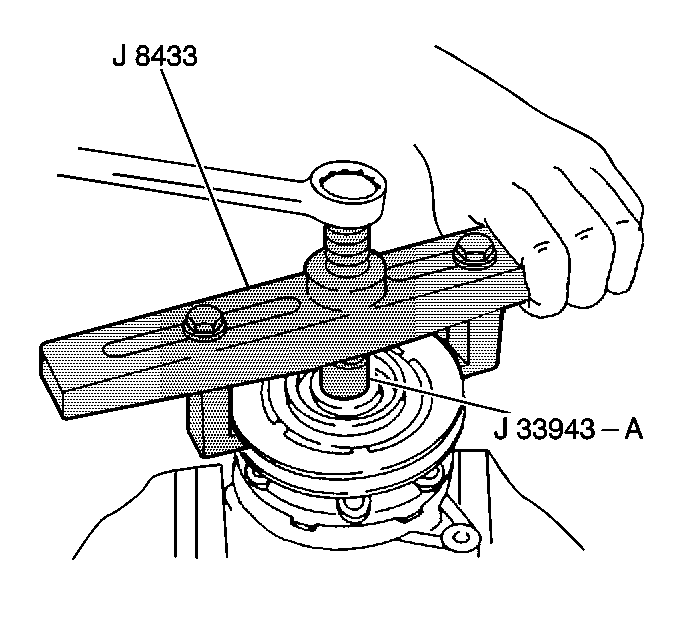
| 4.1. | Align the J 33943-A to the center bolt of the A/C compressor shaft. |
| 4.2. | Turn the puller center bolt to the right until the pulley is free. |
Installation Procedure
Tools Required
| • | J 33939 Armature Holder |
| • | J 33940-A Puller Installer |
| • | J 8092 Driver Handle |
| • | J 4245 External Snap Ring Pliers |
- Install the front housing snap ring cover, if equipped.
- Install the front housing snap ring with the J 4245 External Snap Ring Pliers
- Install the pulley.
- Install the armature on the A/C compressor. Refer to Compressor Magnetic Clutch .
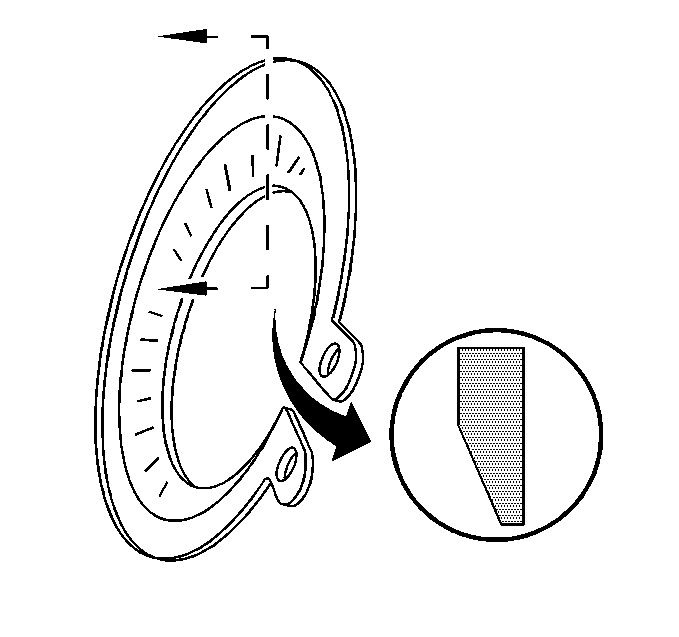

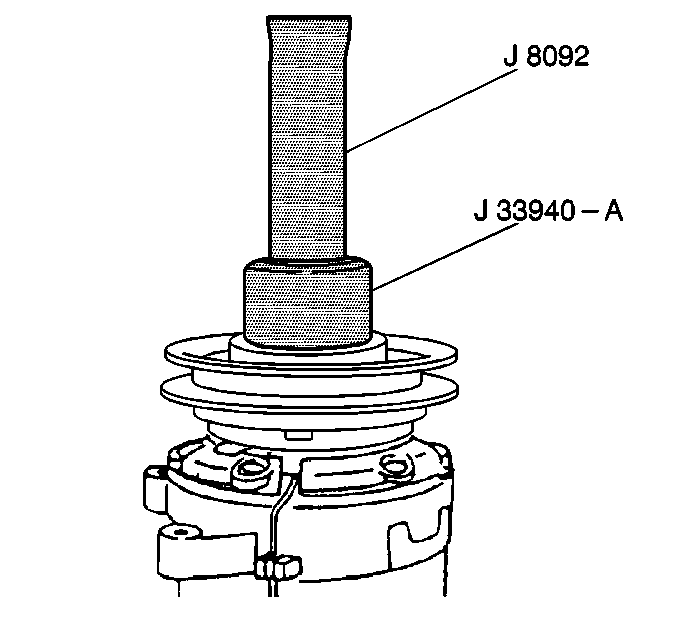
| 3.1. | Place the J 33940-A on the A/C compressor shaft. |
| 3.2. | Place theJ 8092 on the A/C compressor shaft. |
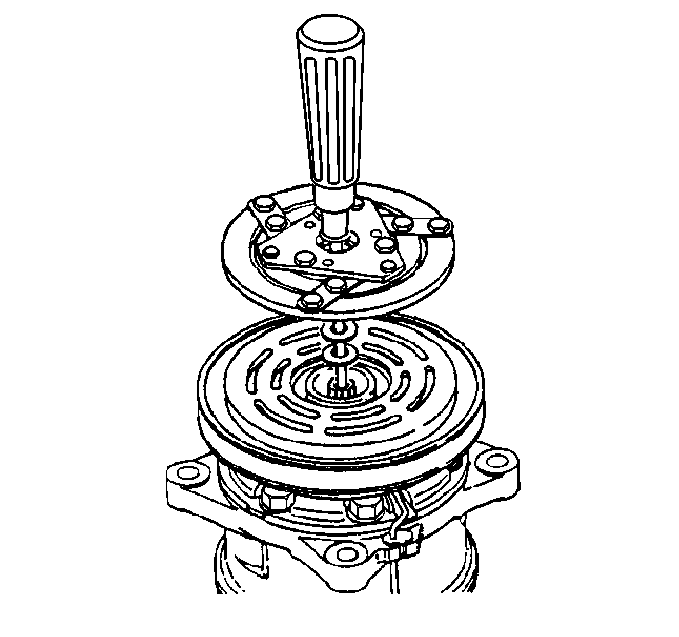
| 3.3. | Tap the end of the J 8092 in order to guide the rotor pulley on the A/C compressor shaft until it bottoms out against the A/C compressor front housing hub. A distinct change of sound will indicate that the pulley has bottomed out. |
Compressor Magnetic Clutch Field Coil
Removal Procedure
- Remove the armature from the A/C compressor. Refer to Compressor Magnetic Clutch .
- Remove the pulley from the A/C compressor. Refer to Compressor Magnetic Clutch .
- Remove the field coil lead wire from the clip on top of the A/C compressor front housing.
- Remove the field coil screw and field coil from the A/C compressor.

Installation Procedure
- Install the field coil on the A/C compressor with the field coil screw.
- Install the field coil lead wire on the clip on top of the A/C compressor front housing.
- Install the pulley on the A/C compressor.
- Install the armature on the A/C compressor. Refer to Compressor Magnetic Clutch .

Notice: Use the correct fastener in the correct location. Replacement fasteners must be the correct part number for that application. Fasteners requiring replacement or fasteners requiring the use of thread locking compound or sealant are identified in the service procedure. Do not use paints, lubricants, or corrosion inhibitors on fasteners or fastener joint surfaces unless specified. These coatings affect fastener torque and joint clamping force and may damage the fastener. Use the correct tightening sequence and specifications when installing fasteners in order to avoid damage to parts and systems.
Tighten
Tighten the field coil screw to 5 N·m(44 lb in).
Compressor Magnetic Clutch A/C Compressor Seal
Removal Procedure
Tools Required
| • | J 4245 External Snap Ring Pliers |
| • | J 33942-B Seal Seat Remover/Installer |
- Remove the armature from the A/C compressor. Refer to Compressor Magnetic Clutch .
- Remove the pulley from the A/C compressor. Refer to Compressor Magnetic Clutch .
- Remove the field coil from the A/C compressor. Refer to Compressor Magnetic Clutch .
- Remove the felt from the compressor shaft. if equipped.
- Use the J 33942-B in order to remove the seal shaft cover (if equipped) from the compressor shaft.
- Engage the hook with the shaft seal cover grove.
- Remove the shaft seal cover off the compressor shaft.
- Use the J 4245 in order to remove the snap ring from the compressor shaft.
- Use the J 33942-B in order to remove the shaft seal from the compressor shaft .
- Engage the hook with the shaft seal grove and slowly remove the shaft seal off the compressor shaft.
- Discard the shaft seal.
Installation Procedure
Tools Required
| • | J 34614 Shaft Seal Protector |
| • | J 4245 External Snap Ring Pliers |
| • | J 33942-B Seal Seat Remover/Installer |
| Important: Keep the new shaft seal free from oil, grease and all contaminates. |
- Clean the shaft seal sealing portions of the compressor housing and the compressor shaft.
- Coat the new shaft seal and the J 34614 Shaft Seal Protector with new compressor oil.
- Position the J 34614 Shaft Seal Protector over the compressor shaft.
- Position the new shaft seal on the compressor shaft.
- Use the J 33942-B in order to install the new shaft seal on the compressor shaft.
- Use the J 33942-B in order to install the shaft seal cover on the compressor shaft.
- Install the field coil.
- Install the pulley on the A/C compressor.
- Install the armature on the A/C compressor. Refer to Compressor Magnetic Clutch .


