For 1990-2009 cars only
Special Tools
- EN-47630 Holder, crankshaft
- EN-46789 Camshaft fixing tool
- CH-49290 Centring fixture Subrame- Engine
- EN-46788 Fixing tool, crankshaft
- KM-977 Holding tool, crankshaft pulley
- EN-46793 Fitting tool, oil pump seal
- EN-49430 Assembly fixture
For equivalent regional tools, refer to Special Tools
Removal Procedure
- Remove the timing belt. Refer to Timing Belt Replacement
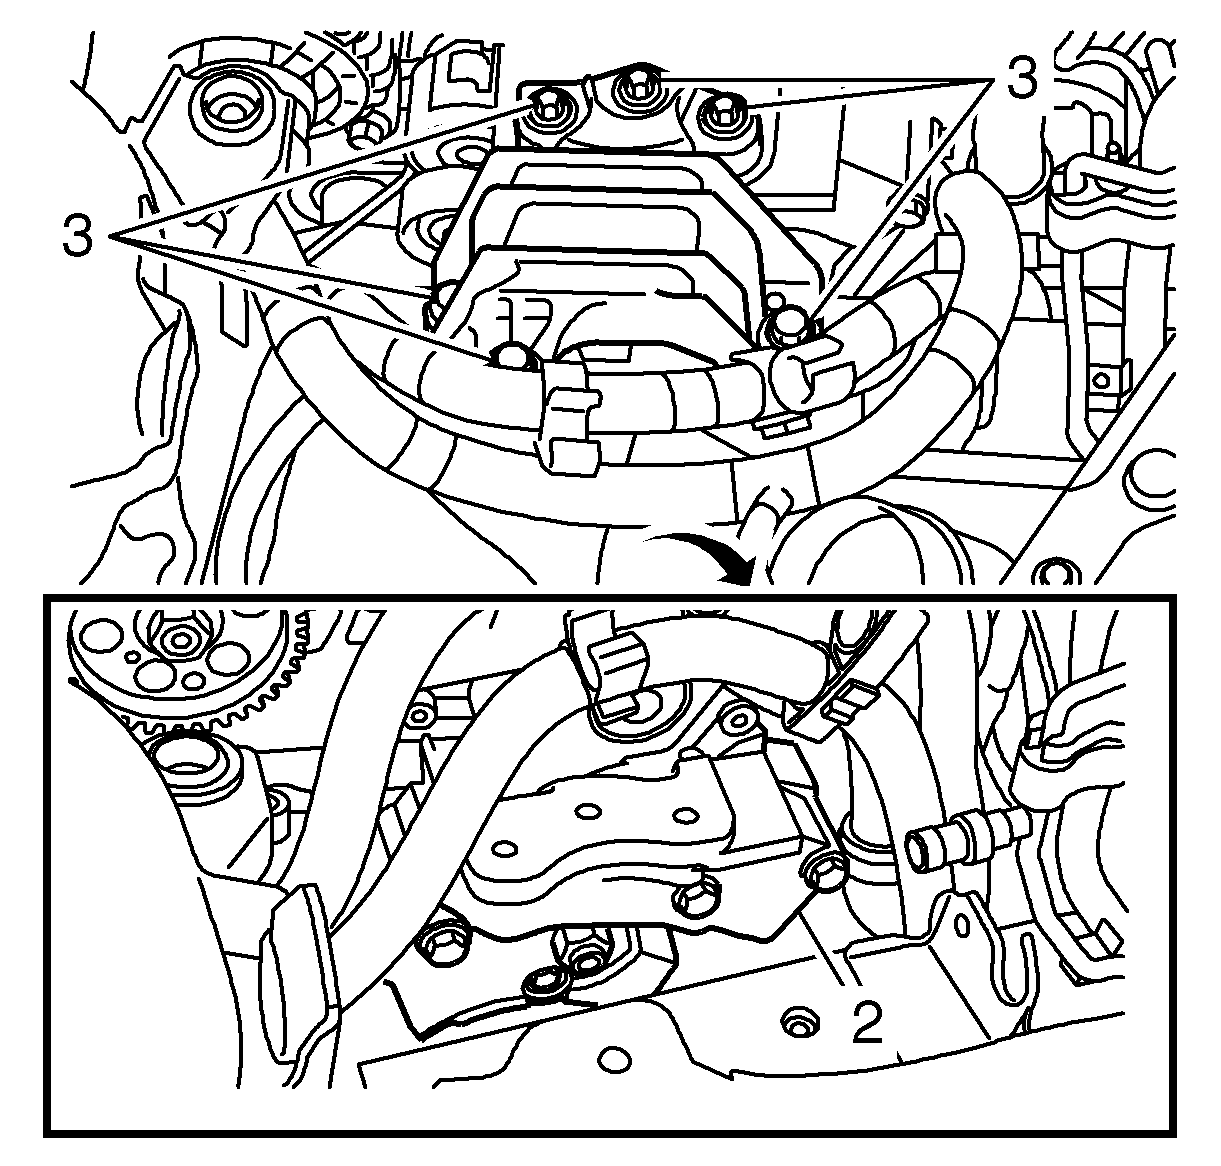
- Fit the right-hand engine mounting (2).
- Fit the right-hand engine pad (3).
- Raise and support the vehicle. Refer to Lifting and Jacking the Vehicle
- Remove the CH-49290 centring fixture .
- Remove the oil sump. Refer to Oil Pan Replacement
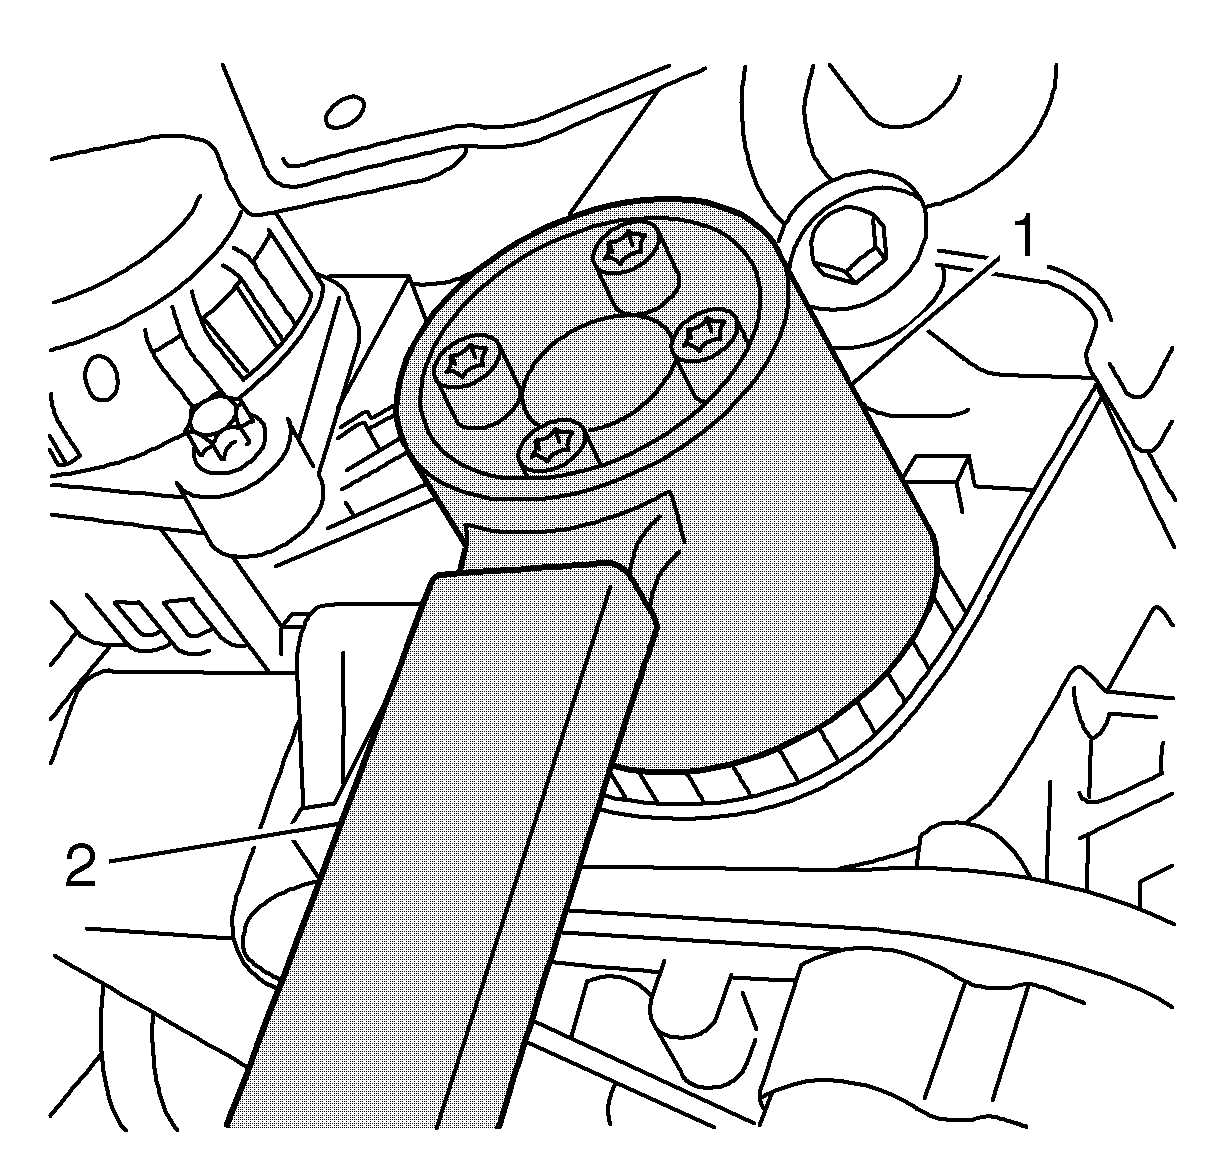
- Remove the belt pulley using EN-47630 holder (1) in combination with KM-977 holding tool (2)
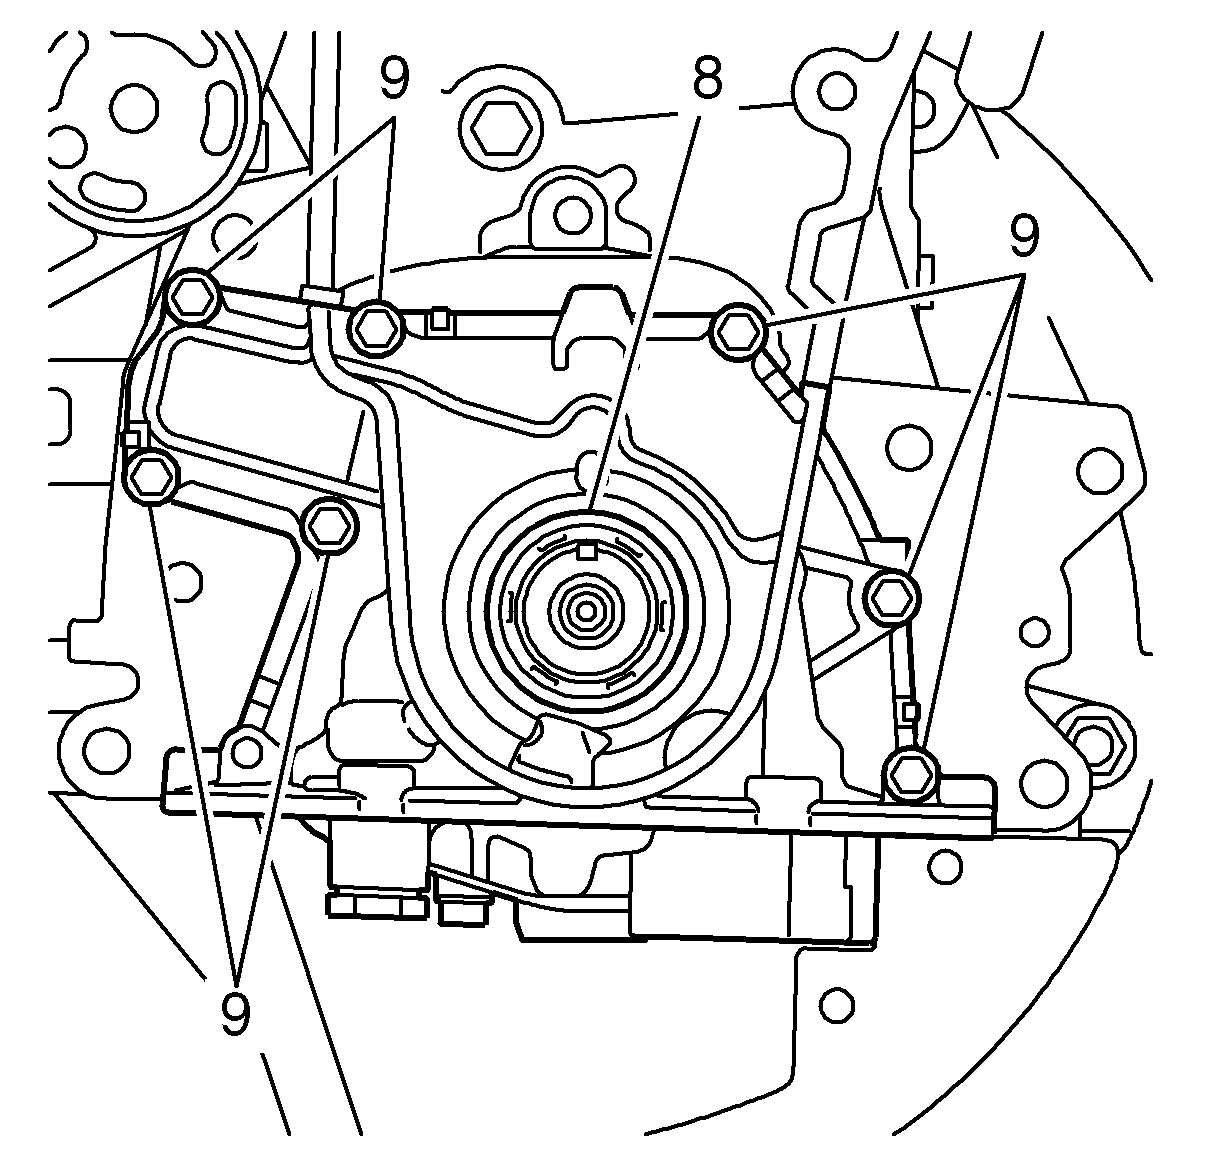
- Remove the oil pump sealing ring (8).
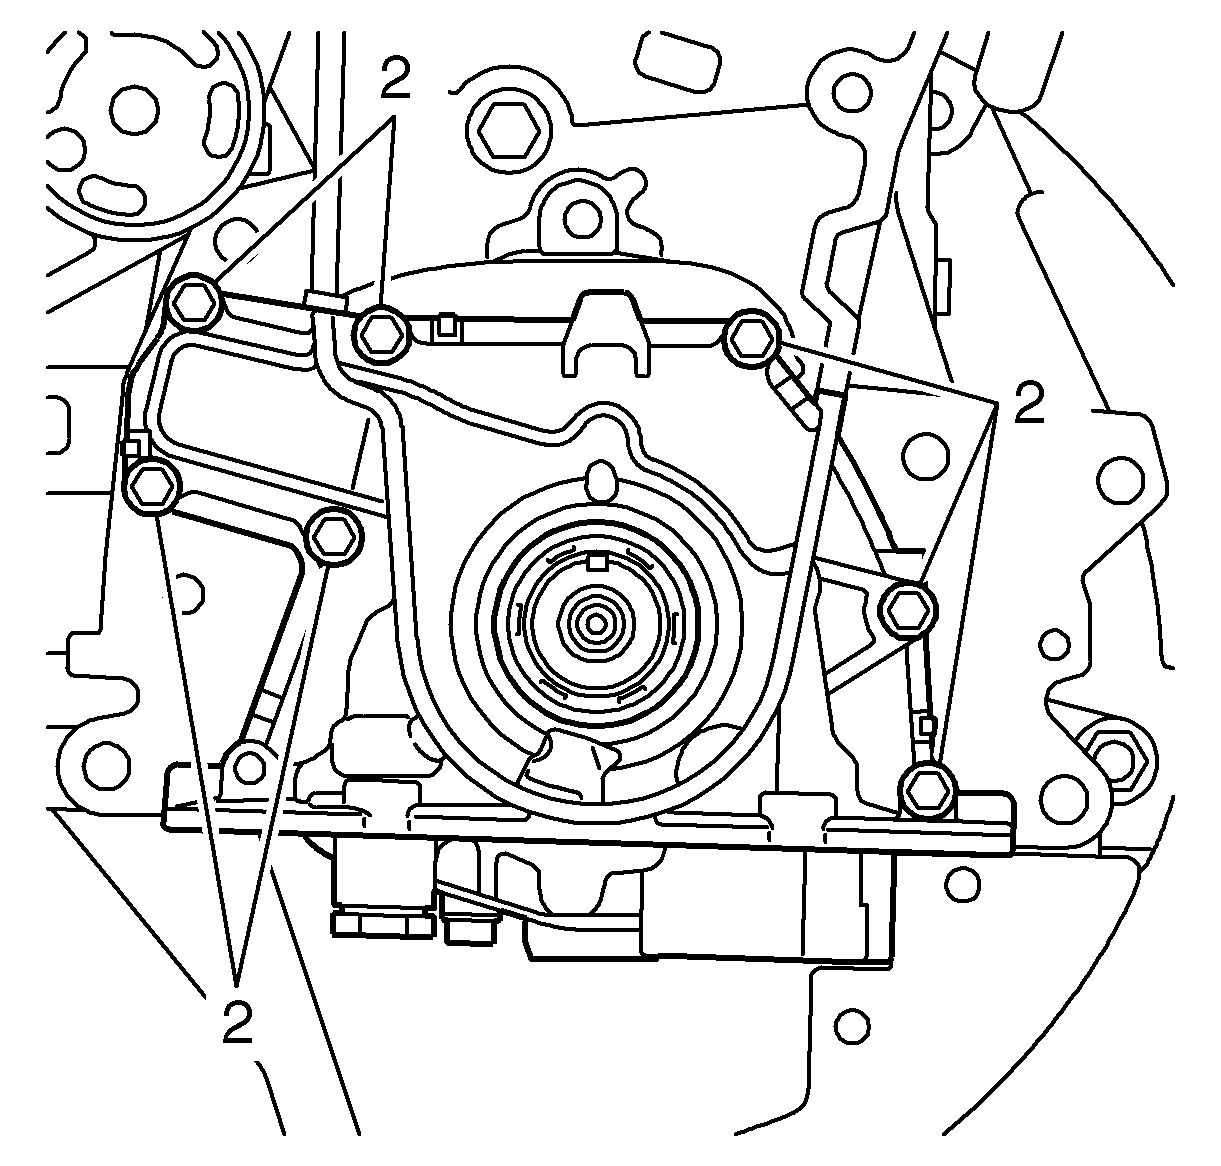
- Remove the oil pump (9). Unscrew the stud from EN-46788 fixing tool .
Note: Different fasteners.
Note: The bolt has a left-hand thread.
Note: Prise loose the sealing ring from the oil pump using a suitable tool without damaging the sealing surfaces.
Installation Procedure
- Clean the threads and sealing surfaces.
- Fit the oil pump (2) with a NEW gasket. Use locking agent on the M6x20 bolts. Screw in the stud for the EN-46788 fixing tool .
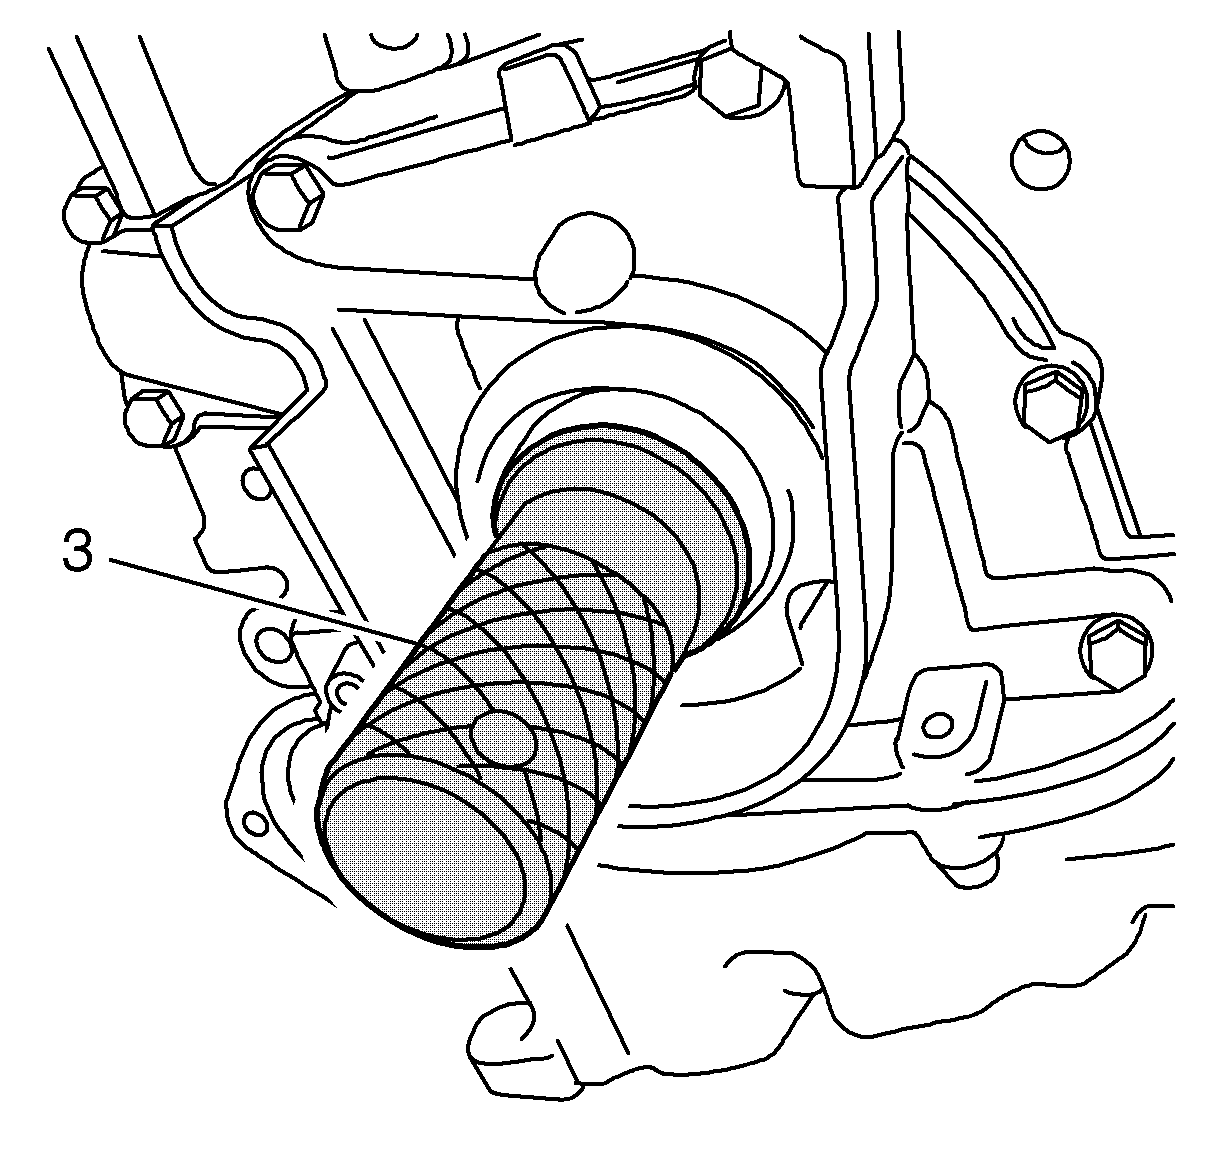
- Fit the oil pump seal using EN-46793 fitting tool (3).
- Fit the belt pulley using EN-47630 holder crankshaft (1) in combination with KM-977 holding tool, crankshaft pulley (2). Tighten bolt to 380 N·m (280 lb ft).
- Remove EN 47630 holder (1) and KM 977 holding tool (2).
- Fit the oil sump. Refer to Oil Pan Replacement
- Raise and support the vehicle. Refer to Lifting and Jacking the Vehicle
- Place CH-49290 centring fixture on the left of the front axle member.
- Put both holders to the right of the front axle member.
- Fit CH-49290 centring fixture .
- Remove the bolt on the compressor bracket and fit EN-49430 assembly fixture .
- Lower the car.
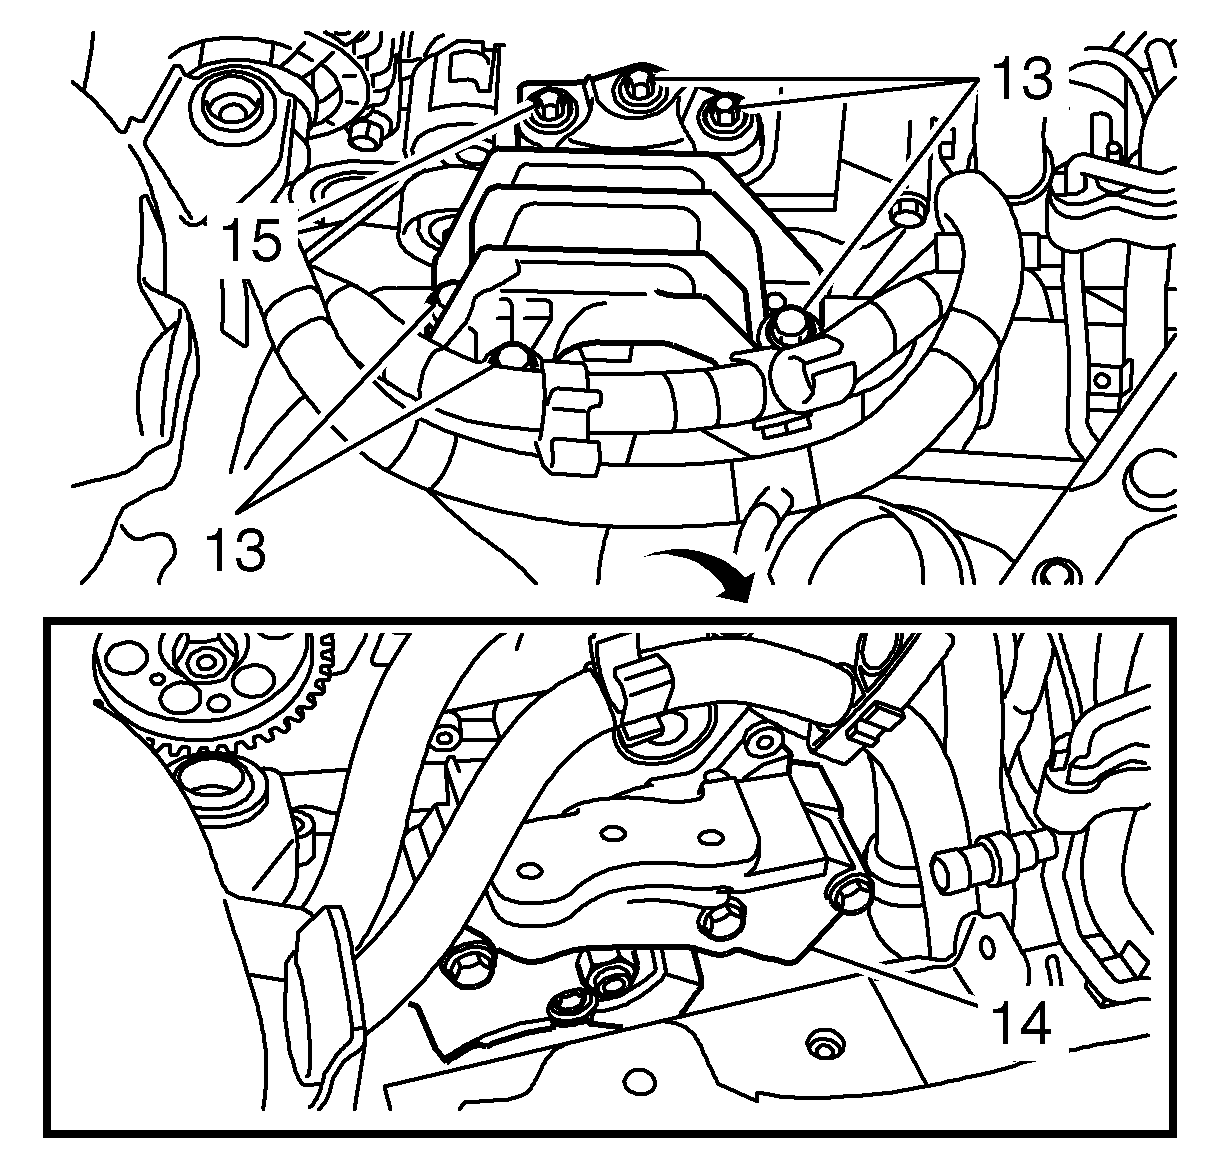
- Remove the right-hand engine pad (13).
- Remove the right-hand engine mounting (14).
- Fit the timing belt. Refer to Timing Belt Replacement
Note: Moisten the gasket sealing lip with a little silicone grease (white).
Note: The bolt has a left-hand thread.

Note: The guide bolt must be positioned in the hole in the front axle member.
Note: The guide bolt must be positioned in the hole in the front axle member.
