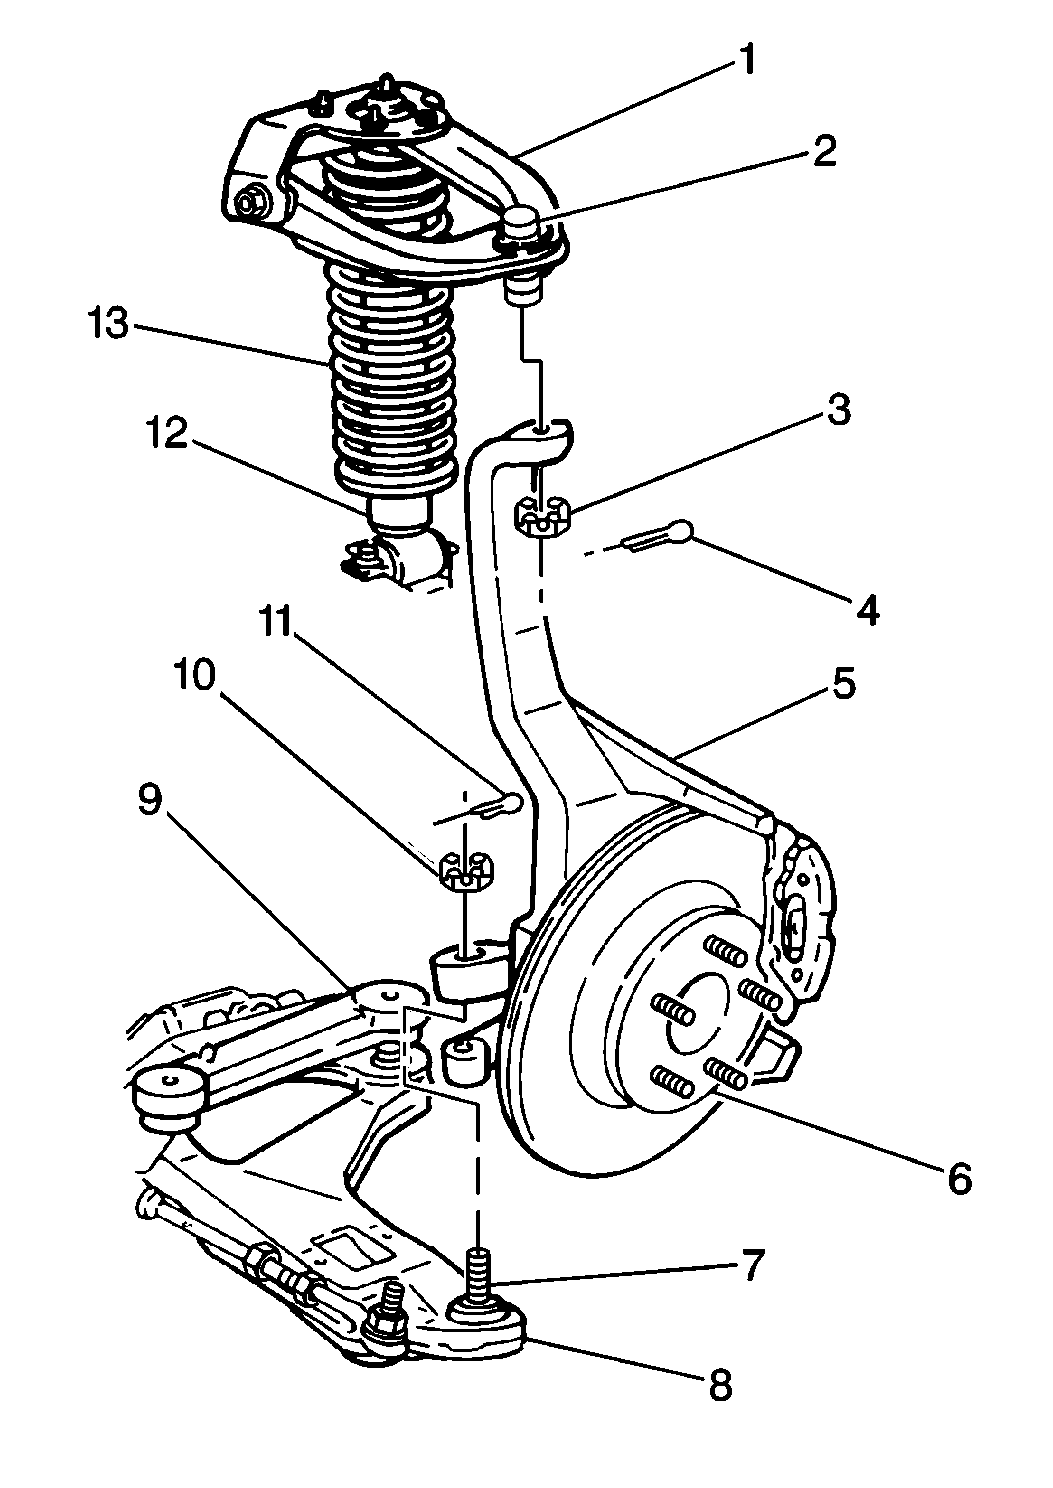
For 1990-2009 cars only
Removal Procedure
- Support the vehicle. Raise the vehicle. Refer to Lifting and Jacking the Vehicle in General Information.
- Remove the special security wheel lock nut, if equipped. Use the special security wheel lock key, which is located in the front floor console.
- Remove the tire and wheel assembly. Refer to Tire and Wheel Removal and Installation in Tires and Wheels.
- Remove the brake caliper. Refer to Brake Caliper Replacement in Disc Brakes. Set the caliper aside.
- Remove the brake rotor. Refer to Brake Rotor Replacement in Disc Brakes.
- Remove the wheel speed sensor electrical connector and move aside. Refer to Wheel Speed Sensor Replacement in Antilock Brake System.
- Remove the front wheel hub from the steering knuckle. Refer to Front Wheel Bearing and Hub Replacement .
- Remove the power steering gear from the steering knuckle. Refer to Steering Gear Replacement in Power Steering System.
- Remove the stabilizer shaft link. Refer to Stabilizer Shaft Link Replacement .
- Remove the front shock absorber bolts. Refer to Shock Absorber Replacement .
- Separate the lower ball stud from the steering knuckle. Refer to Lower Control Arm Ball Joint Replacement .
- Remove the lower control arm from the steering knuckle. Refer to Lower Control Arm Replacement .
- Separate the upper ball stud from the steering knuckle. Refer to Upper Control Arm Ball Joint Replacement and Lower Control Arm Ball Joint Replacement .
- Remove the steering knuckle from the upper control arm. Refer to Upper Control Arm Replacement .
- Remove the steering knuckle (5) and the hubs (6).

Installation Procedure
- Position the steering knuckle (5) and the hubs (6) to the upper control arm (1). Refer to Upper Control Arm Replacement .
- Install the upper ball stud (2) to the steering knuckle. Refer to Upper Control Arm Ball Joint Replacement and Lower Control Arm Ball Joint Replacement .
- Position the steering knuckle (5) to the lower control arm. Refer to Lower Control Arm Replacement .
- Install the lower ball stud (7) to the steering knuckle. Refer to Lower Control Arm Ball Joint Replacement .
- Install the front shock absorber bolts. Refer to Shock Absorber Replacement .
- Install the stabilizer shaft link. Refer to Stabilizer Shaft Link Replacement .
- Install the power steering gear to the steering knuckle. Refer to Steering Gear Replacement in Power Steering System.
- Install the front wheel hub (6) to the steering knuckle. Refer to Front Wheel Bearing and Hub Replacement .
- Reinstall the wheel speed sensor electrical connector. Refer to Wheel Speed Sensor Replacement in Antilock Brake System.
- Reinstall the brake rotor. Refer to Brake Rotor Replacement in Disc Brakes.
- Reinstall the brake caliper. Refer to Brake Caliper Replacement in Disc Brakes.
- Reinstall the tire and wheel. Refer to Tire and Wheel Removal and Installation in Tires and Wheels.
- Install the special security wheel lock nut, if equipped. Use the special security wheel lock key, which is located in the front floor console.
- Lower the vehicle.
- Test the wheel toe-in alignment. Refer to Front Toe Adjustment in Wheel Alignment.

Important: The wheel speed sensor electrical connector must be reconnected to the wheel speed sensor wire bracket and to the wheel speed sensor, or else the wires may be damaged.
