For 1990-2009 cars only
Removal Procedure
- Disable the SIR system. Refer to SIR Disabling and Enabling.
- Move the seat all the way forward towards the front of the vehicle, to gain access to the seat belt.
- Remove the seat belt tensioner trim cover. Refer to Front Seat Belt Front Trim Cover Replacement.
- Remove the front seat outer rear track cover. Refer to Driver or Passenger Seat Outer Adjuster Rear Finish Cover Replacement.
- Remove the front seat outer front track cover. Refer to Driver or Passenger Seat Outer Adjuster Front Finish Cover Replacement.
- Remove the rear seat cushion. Refer to Rear Seat Cushion Replacement.
- Remove the front and rear door sill trim plates. Refer to Door Sill Plate Replacement.
- Remove the lower centre pillar trim plate. Refer to Center Pillar Lower Trim Panel Replacement.
- Remove the upper centre pillar trim panel. Refer to Center Pillar Upper Trim Panel Replacement.
- Remove the front seat belt tensioner. Refer to Driver and Passenger Seat Belt Tensioner Replacement.
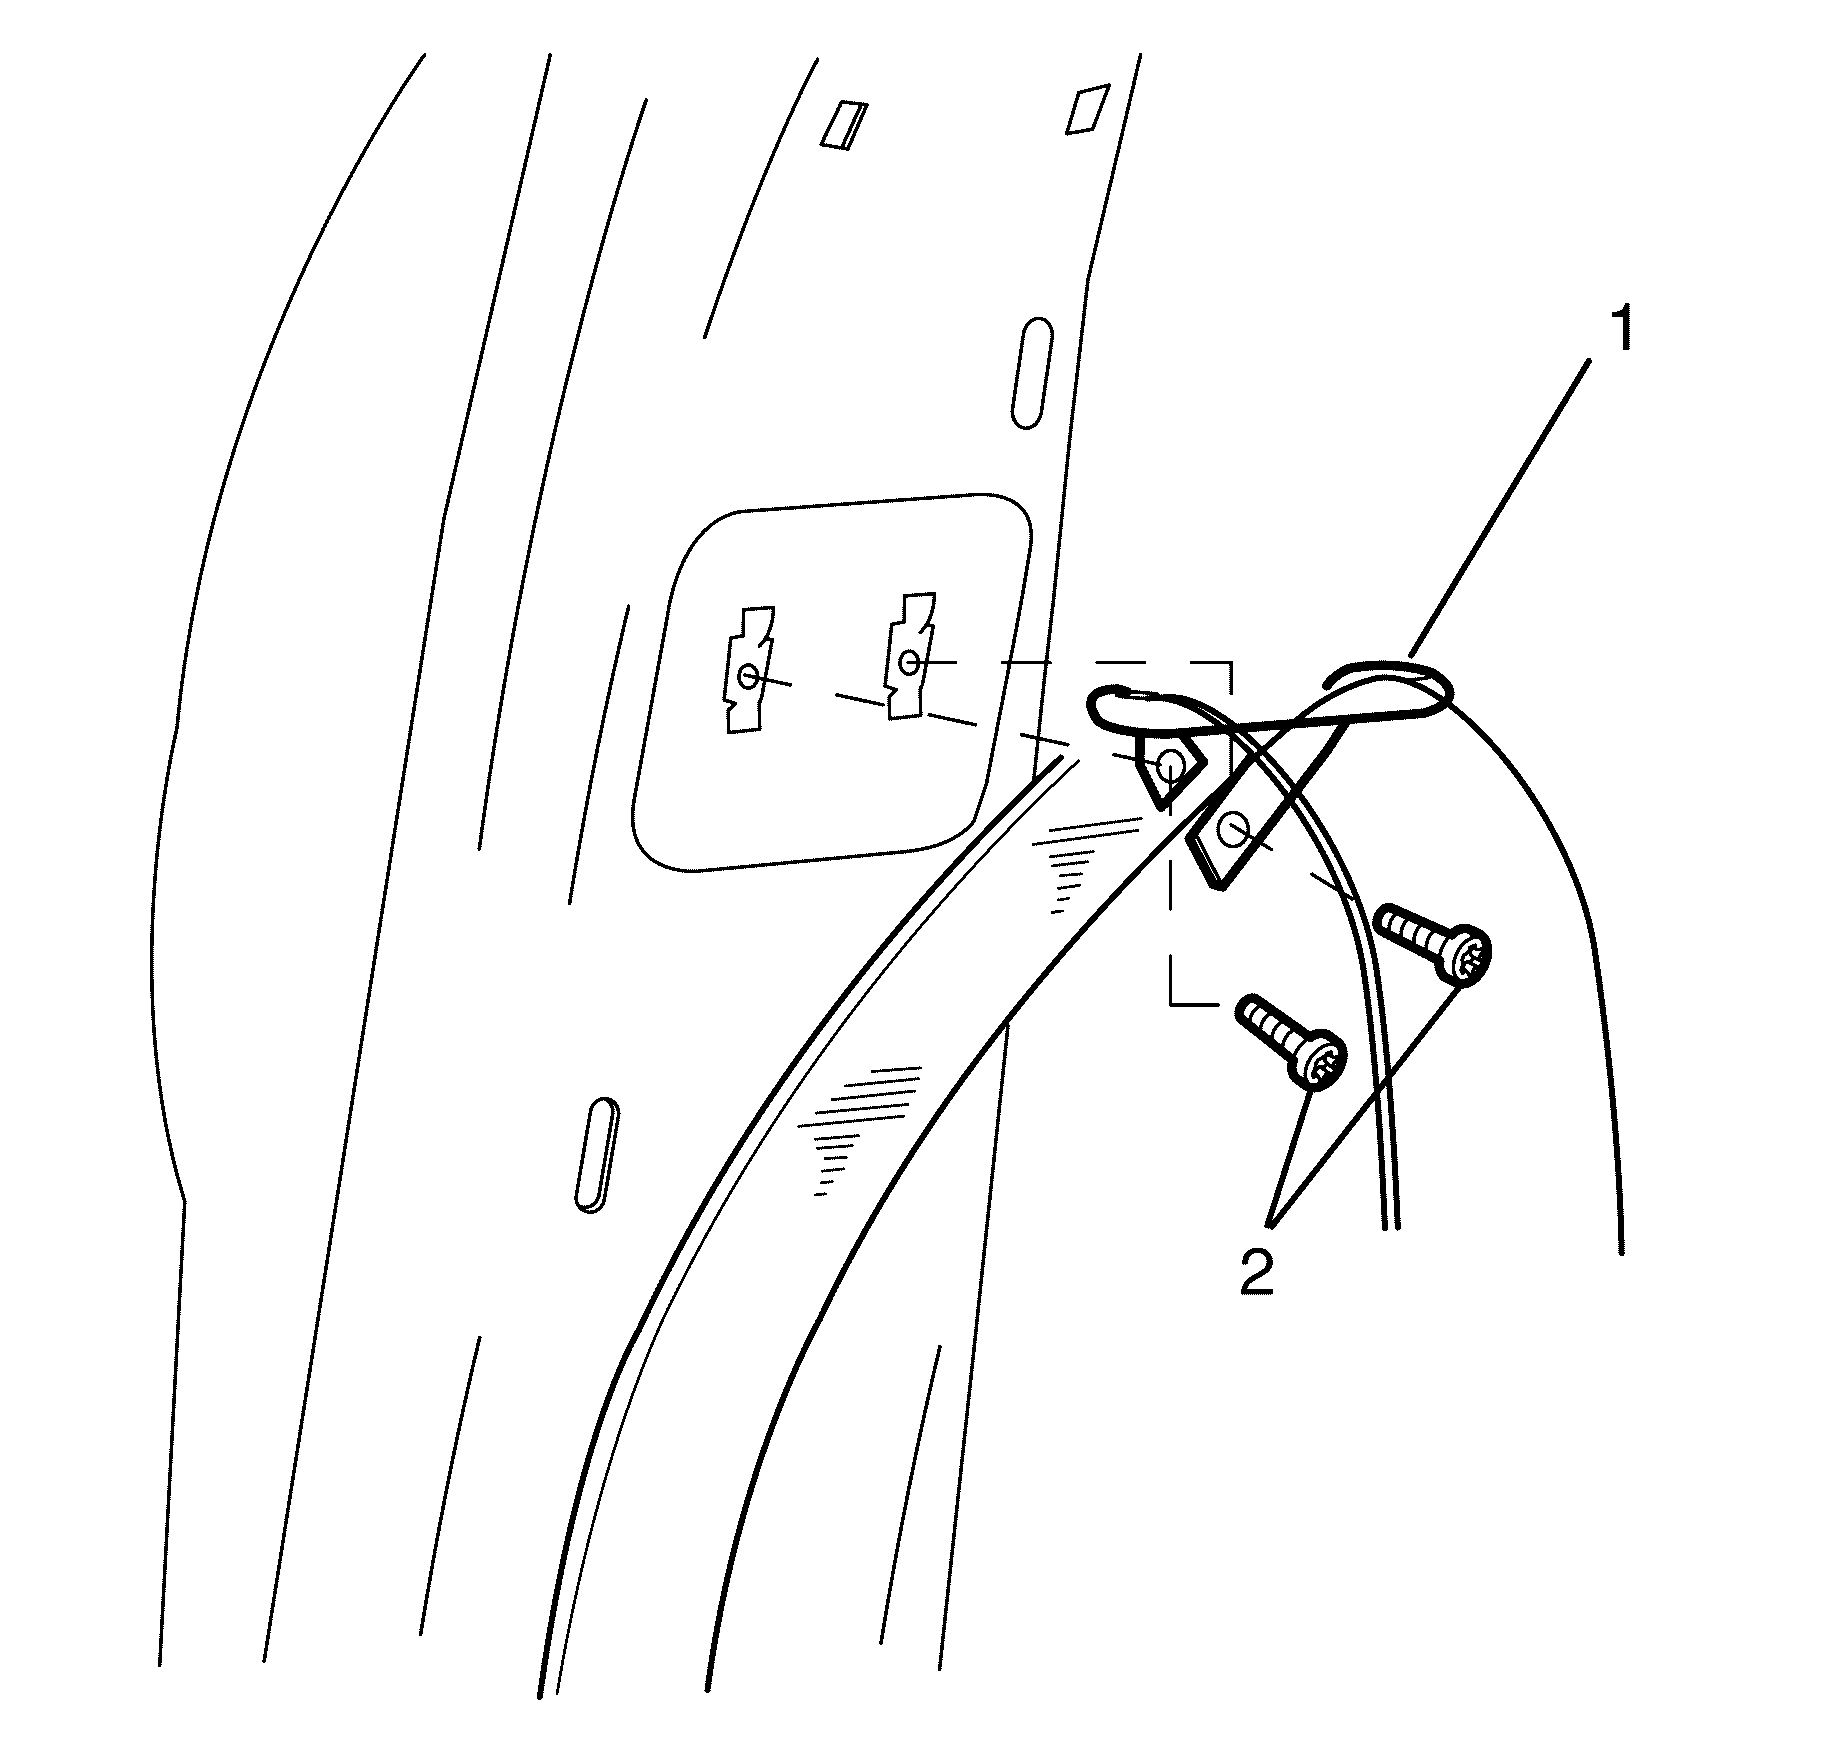
- Remove the intermediate seat belt guide screws (2).
- Remove the intermediate seat belt guide (1).
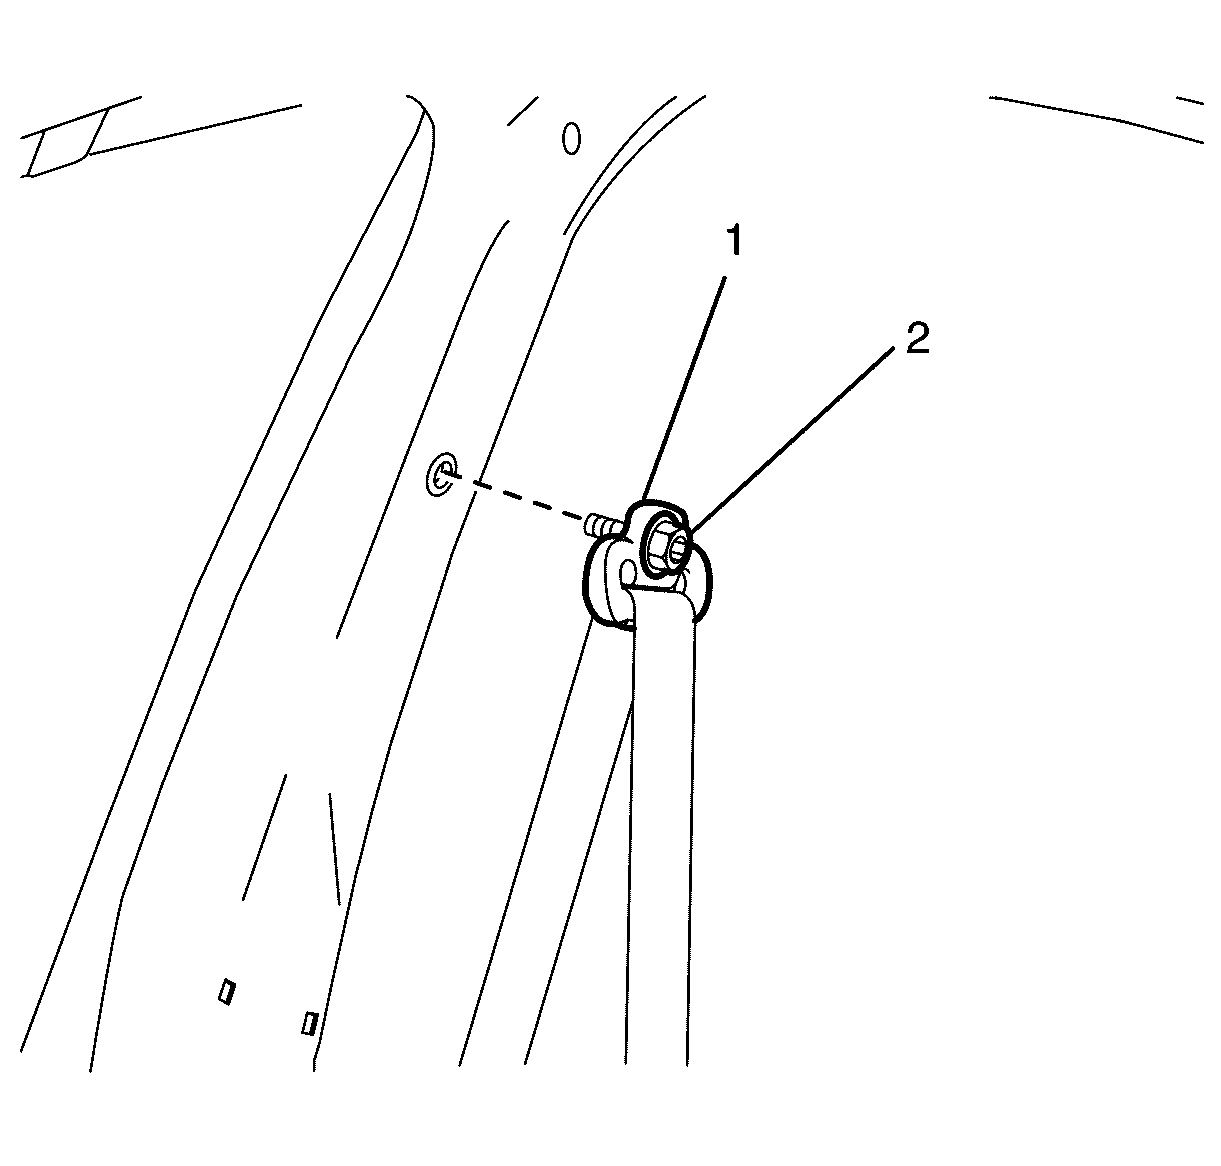
- Remove the front seat belt upper guide bolt assembly (1).
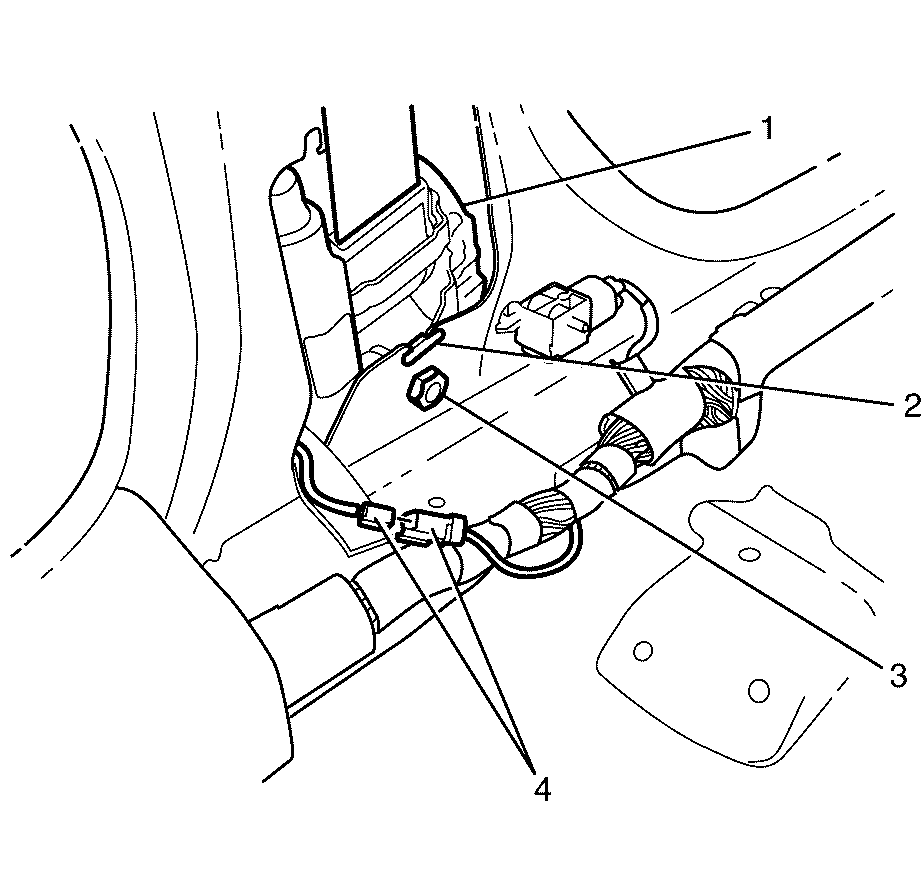
- Disconnect the seat belt retractor pretensioner electrical connector (4).
- Remove the front seat belt retractor bolt (3).
- Lift the retractor (1) in an upwards direction.
- Tilt the retractor on a 30 degree angle making sure that the locking tab (2) is clear.
- Remove the dust cover from the centre pillar (if required).
Caution: Refer to SIR Caution in the Preface section.
Caution: Refer to SIR Inflator Module Handling and Storage Caution in the Preface section.


Installation Procedure
- Install the front seat belt dust cover to the vehicle (if removed).
- Install the front seat belt retractor (1) to the vehicle.
- Install the retractor to pillar retaining bolt (4).
- Connect the seat belt retractor pretensioner electrical connector (4).
- Install the front seat belt upper guide assembly (1).
- Install the intermediate seat belt guide (1) to the vehicle. Secure the guide with the screws (2).
- Install the front seat belt tensioner. Refer to Driver and Passenger Seat Belt Tensioner Replacement.
- Install the upper centre pillar trim panel. Refer to Center Pillar Upper Trim Panel Replacement.
- Install the lower centre panel trim panel. Refer to Center Pillar Lower Trim Panel Replacement.
- Install the front and rear door sill trim plates. Refer to Door Sill Plate Replacement.
- Install the rear seat cushion. Refer to Rear Seat Cushion Replacement.
- Install the front seat outer front track cover. Refer to Driver or Passenger Seat Outer Adjuster Front Finish Cover Replacement.
- Install the front seat outer rear track cover. Refer to Driver or Passenger Seat Outer Adjuster Rear Finish Cover Replacement.
- Install the front seat belt tensioner trim cover. Refer to Front Seat Belt Front Trim Cover Replacement.
- Move the front seat back to original position.
- Enable the SIR system. Refer to SIR Disabling and Enabling.
- If re-programming is required. Refer to Control Module References.

IMPORTANT: Make sure that the locking tab (2) is seated correctly.
Notice: Refer to Fastener Notice in the Preface section.
Tighten
Tighten the bolt to 43 N·m (32 lb ft).

Tighten
Tighten the front seat belt upper guide bolt (2)
to 43 N·m (32 lb ft).

Tighten
Tighten the intermediate seat belt guide screws (2)
to 3 N·m (27 lb in).
