Removal Procedure
- Raise and support the vehicle. Refer to Lifting and Jacking the Vehicle.
- Remove the propeller shaft from the vehicle. Refer to Propeller Shaft Replacement.
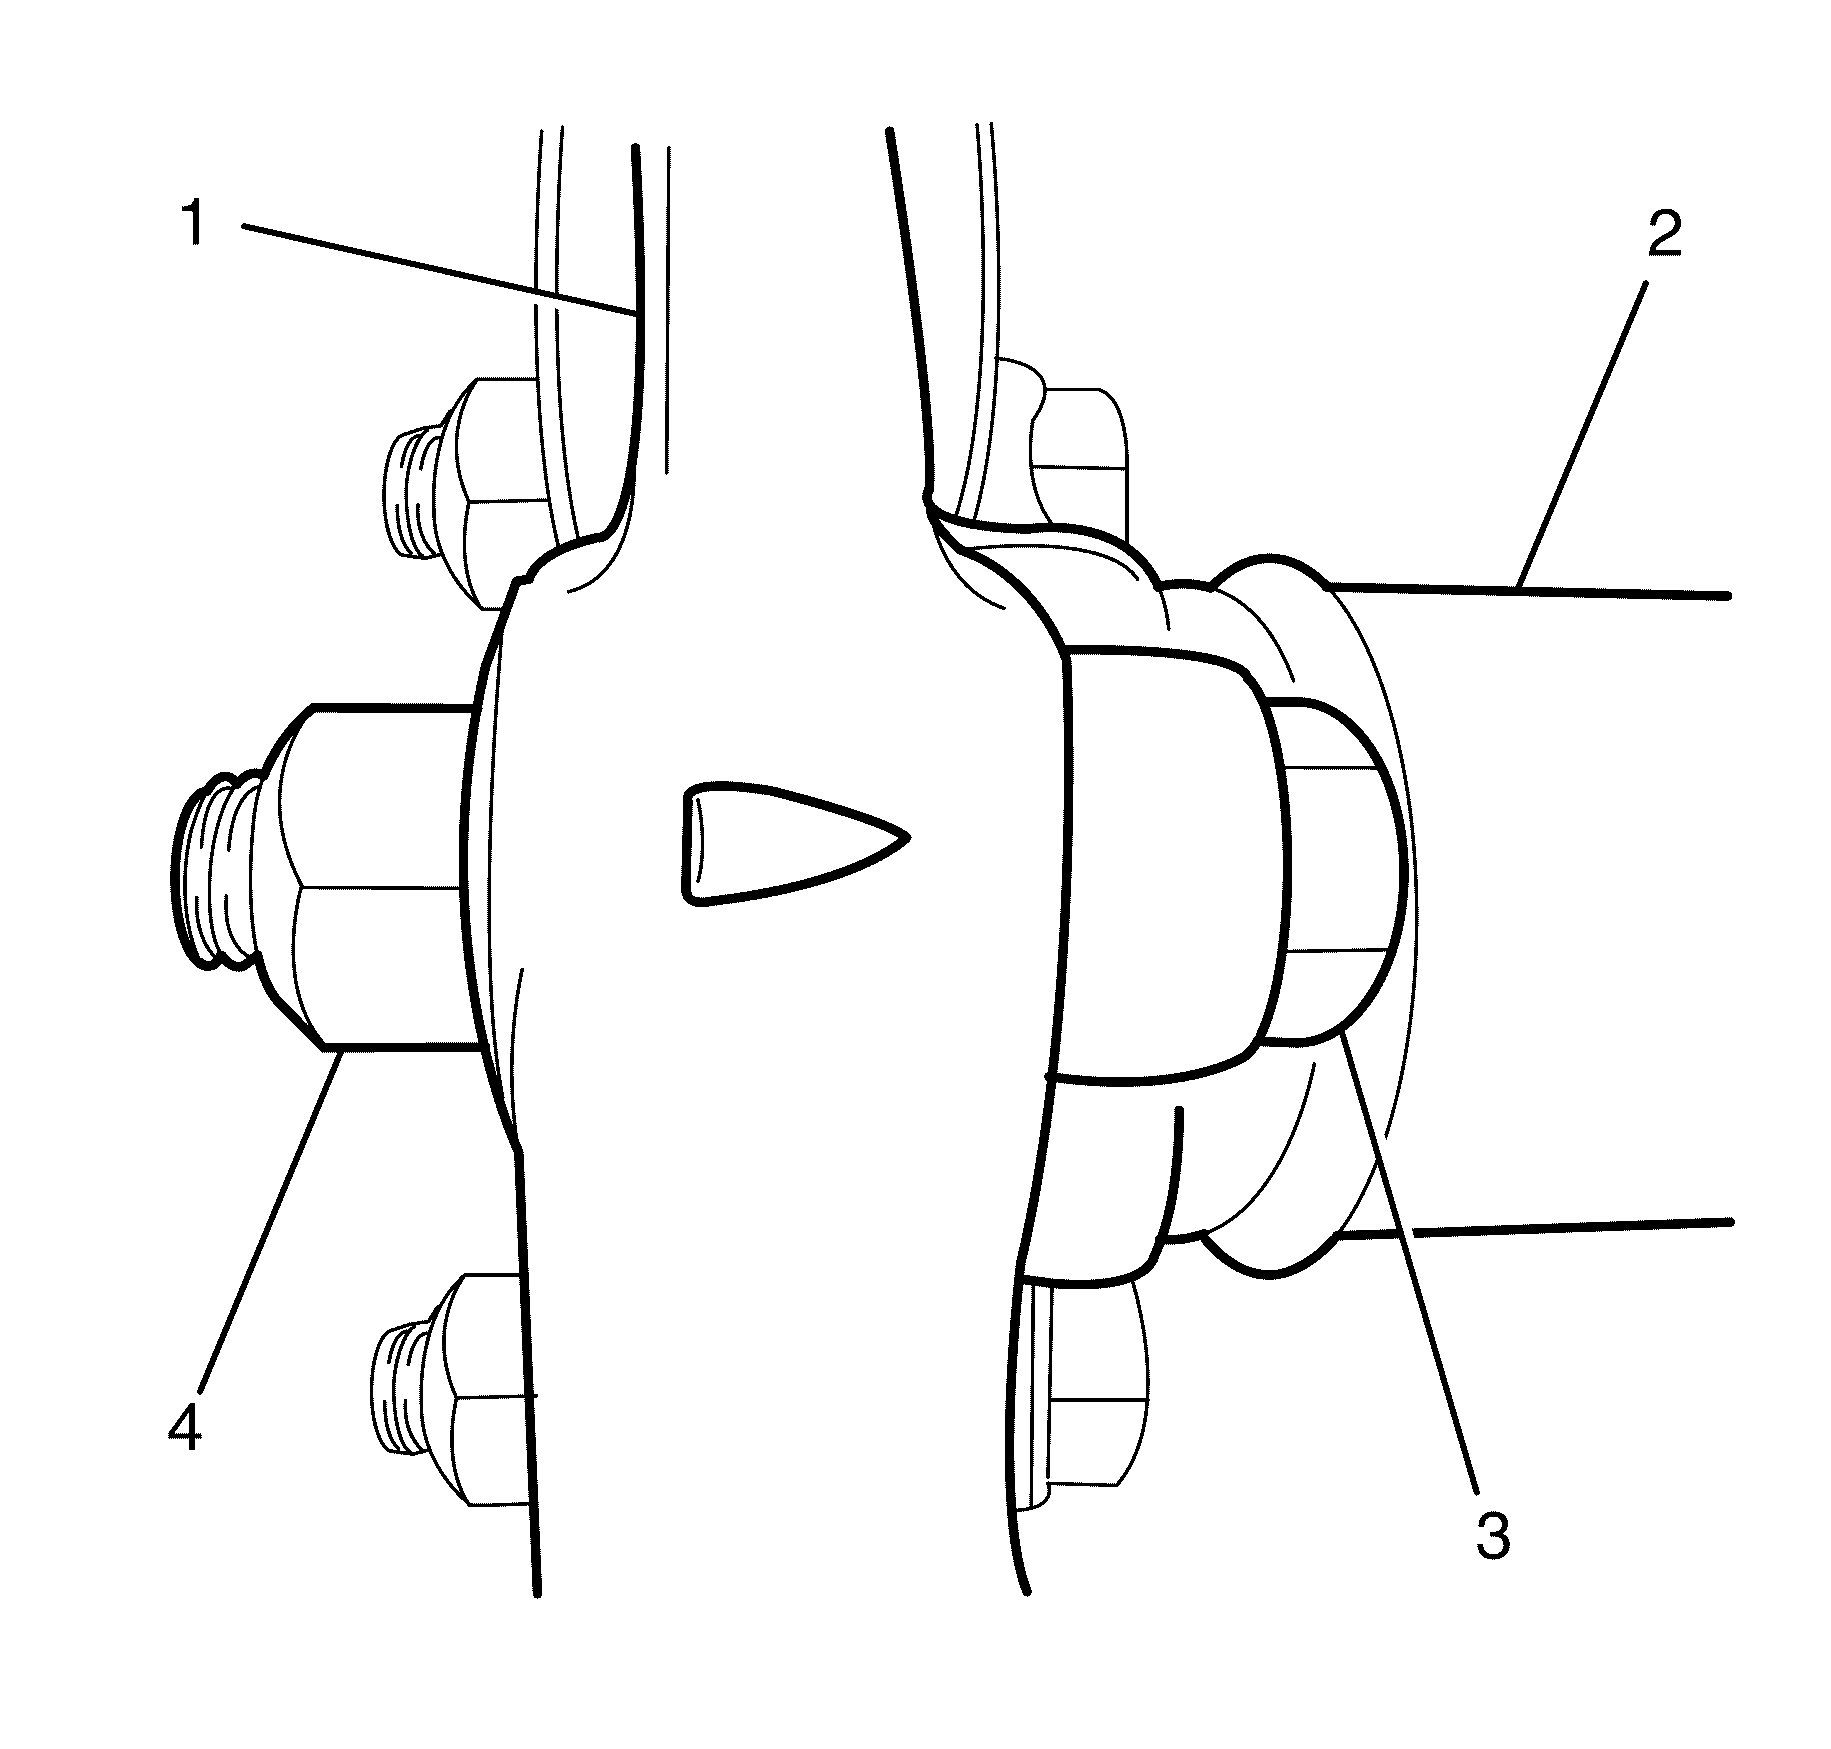
- Remove the rubber coupling to propeller shaft retaining bolts (3) and torque prevailing nuts (4).
- Remove the rubber coupling (1) from the propeller shaft (2).
Warning: Refer to Safety Glasses Warning in the Preface section.
Danger: To avoid any vehicle damage, serious personal injury or death when major components are removed from the vehicle and the vehicle is supported by a hoist, support the vehicle with jack stands at the opposite end from which the components are being removed and strap the vehicle to the hoist.

Note: Torque prevailing nuts with are single use parts and must be discarded after removal.
Discard the nuts.
Installation Procedure
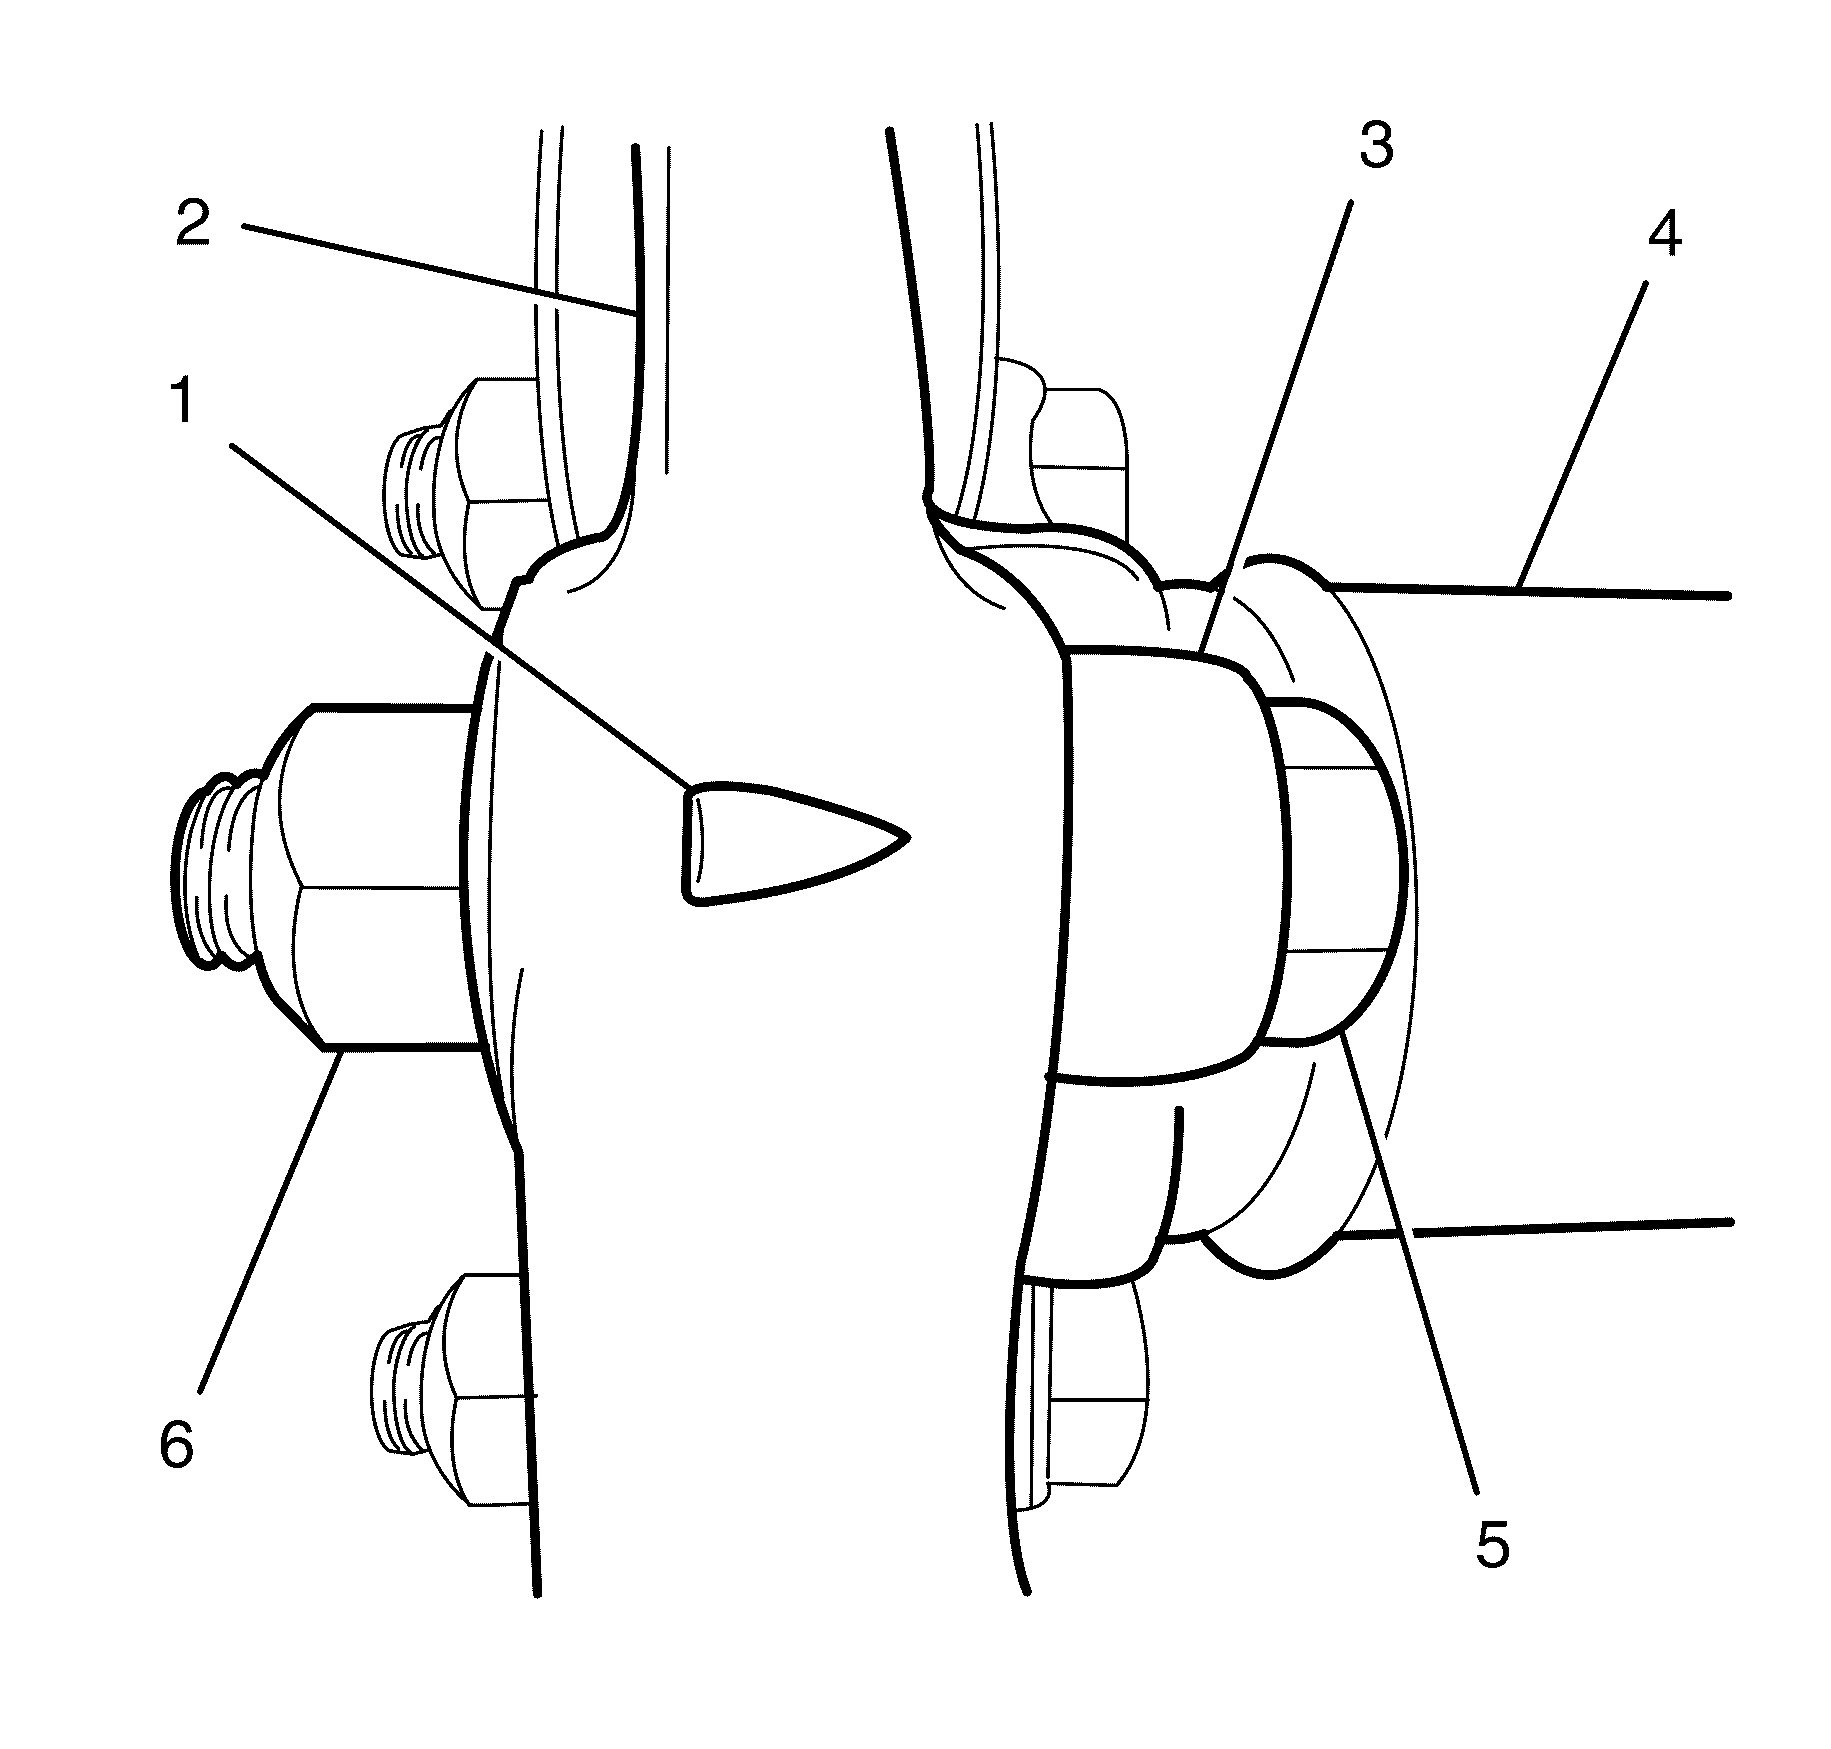
- Install the rubber coupling (2) to the propeller shaft (4).
- Install the rubber coupling to propeller shaft retaining bolts (5) and NEW torque prevailing nuts (6) and tighten to 20 N·m +55° (15 lb ft +55°).
- Install the propeller shaft to the vehicle. Refer to Propeller Shaft Replacement.
- Remove the safety stands.
- Lower the vehicle to the ground.

Note: The triangular mark (1) on the rubber coupling (2) must face towards the propeller shaft flange lug (3).
Caution: Refer to Fastener Caution in the Preface section.
Removal Procedure - Front Slip Joint
- Raise and support the vehicle. Refer to Lifting and Jacking the Vehicle.
- Remove the propeller shaft from the vehicle. Refer to Propeller Shaft Replacement.
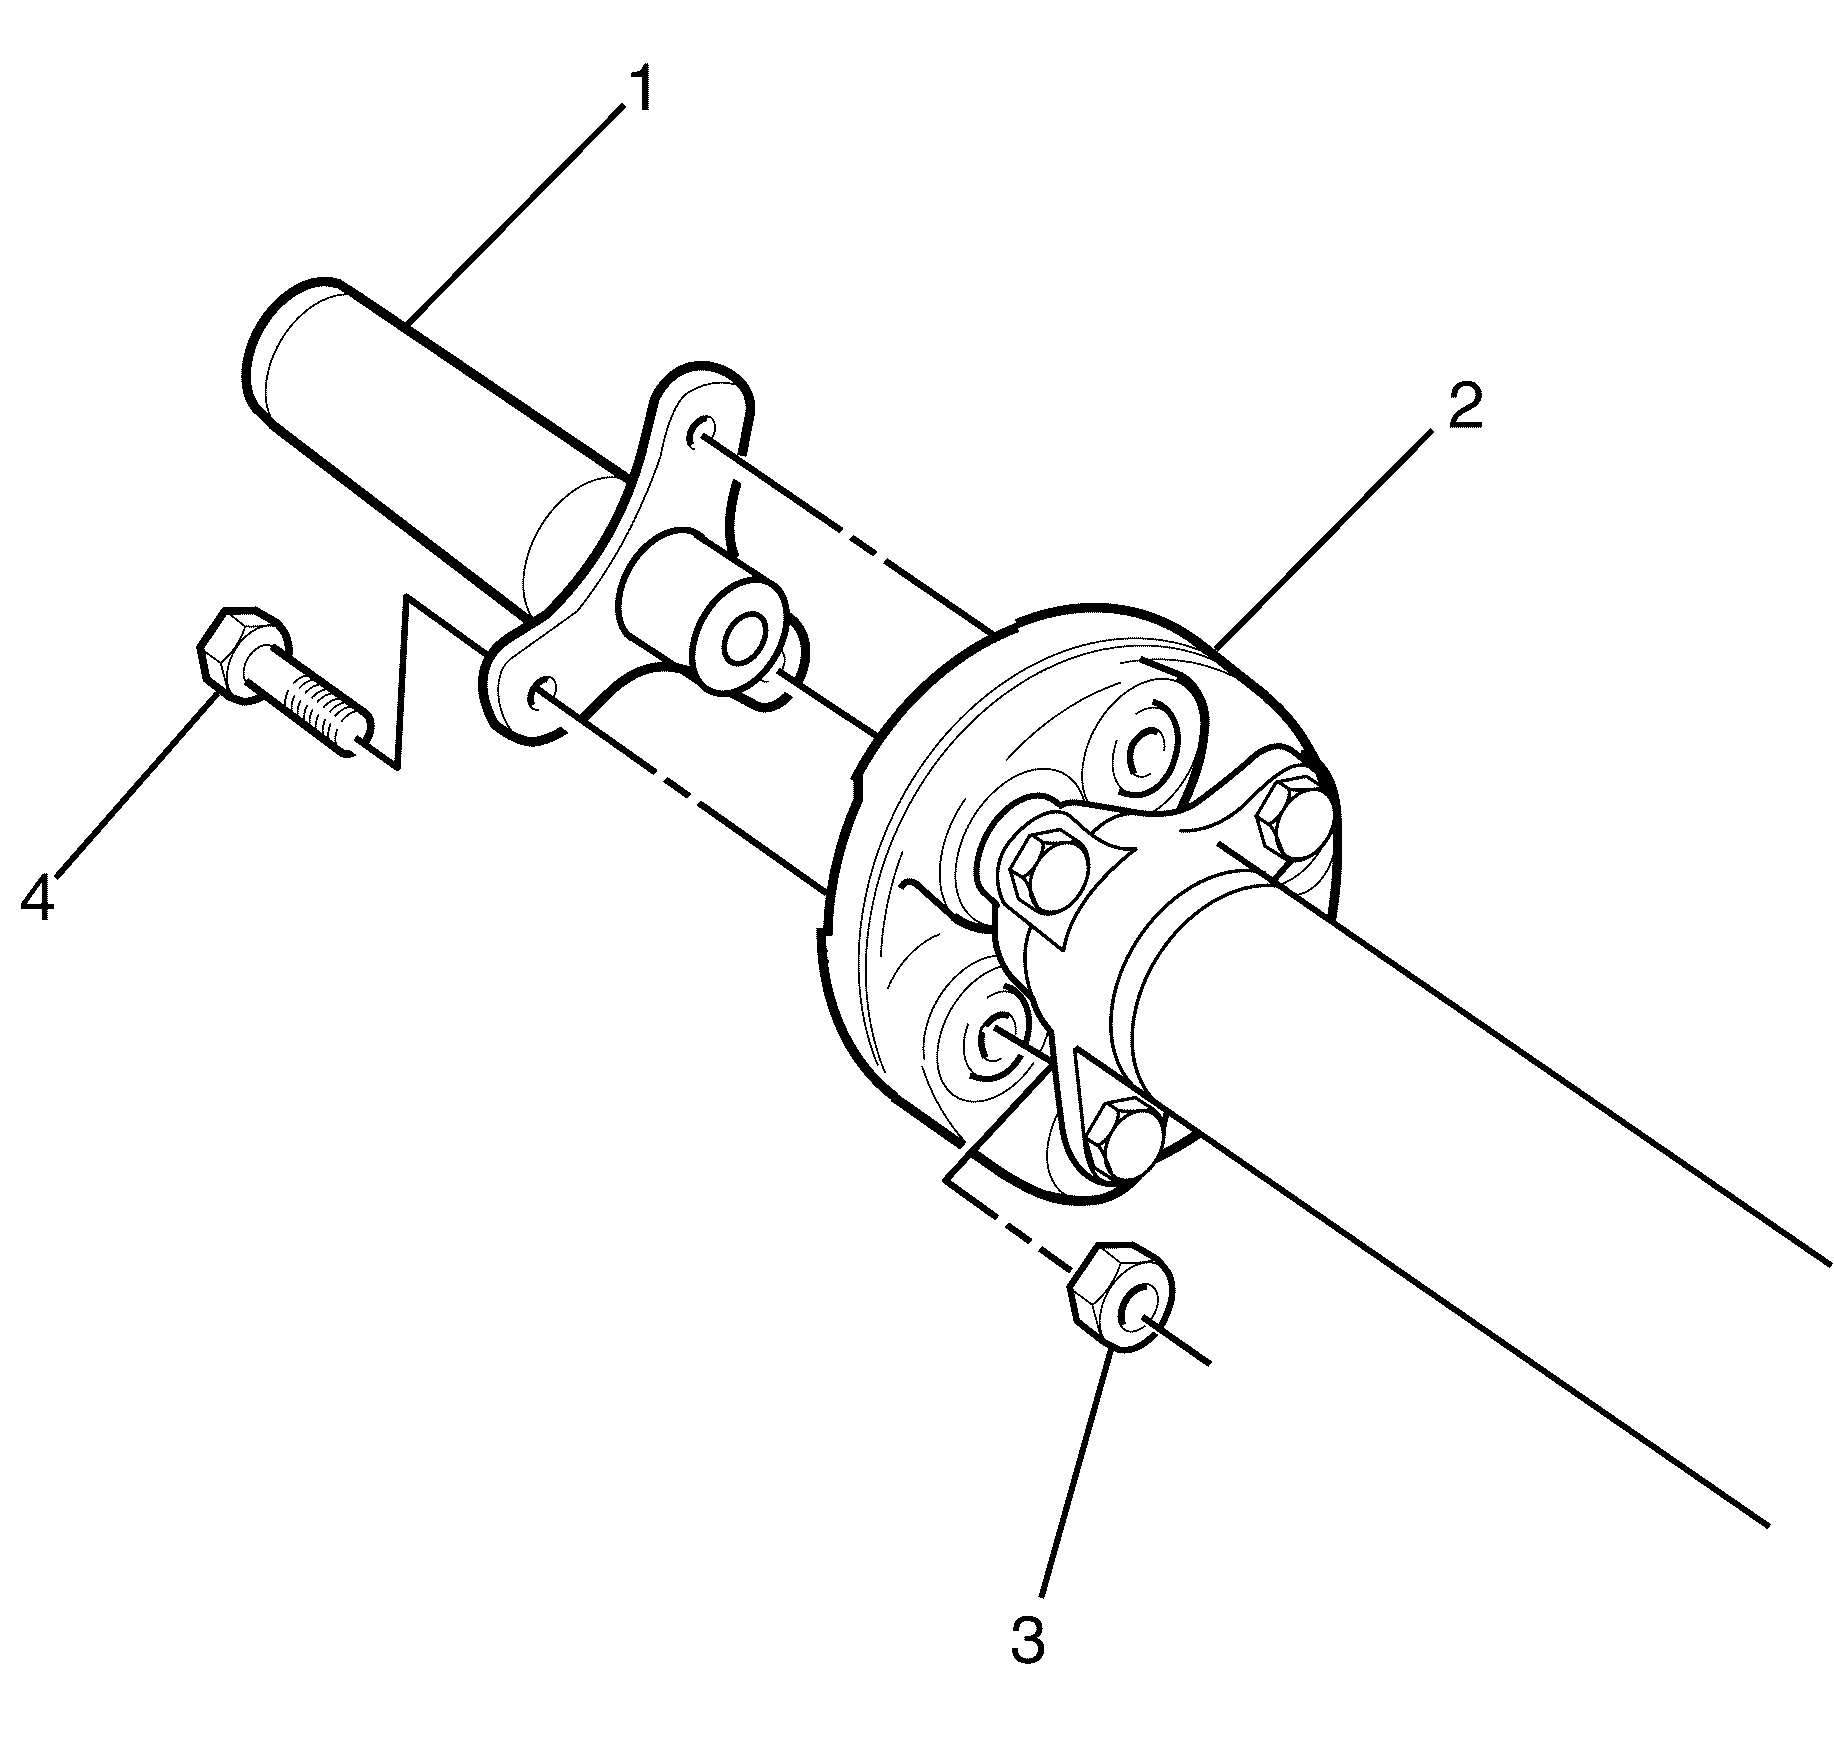
- Remove the rubber coupling to propeller shaft yoke retaining bolts (4) and torque prevailing nuts (3).
- Remove the propeller shaft yoke (1) from the rubber coupling (2).
- Remove the rubber coupling to propeller shaft retaining bolts (3) and torque prevailing nuts (4).
- Remove the rubber coupling (1) from the propeller shaft (2).
Warning: Refer to Safety Glasses Warning in the Preface section.
Danger: To avoid any vehicle damage, serious personal injury or death when major components are removed from the vehicle and the vehicle is supported by a hoist, support the vehicle with jack stands at the opposite end from which the components are being removed and strap the vehicle to the hoist.

Note: Torque prevailing nuts with are single use parts and must be discarded after removal.
Discard the nuts.

Note: Torque prevailing nuts with are single use parts and must be discarded after removal.
Discard the nuts.
Installation Procedure - Front Slip Joint
- Install the rubber coupling (2) to the propeller shaft (4).
- Install the rubber coupling to propeller shaft retaining bolts (5) and NEW torque prevailing nuts (6) and tighten to 20 N·m +55° (15 lb ft +55°).
- Install the propeller shaft yoke (1) to the rubber coupling (2).
- Install the propeller shaft yoke to rubber coupling retaining bolts (4) and NEW torque prevailing nuts (3) and tighten to 20 N·m +55° (15 lb ft +55°).
- Install the propeller shaft to the vehicle. Refer to Propeller Shaft Replacement.
- Remove the safety stands.
- Lower the vehicle to the ground.

Note: The triangular mark (1) on the propeller shaft rubber coupling (2) must align with the propeller shaft flange lug (3).
Caution: Refer to Fastener Caution in the Preface section.

