For 1990-2009 cars only
Removal Procedure
- Remove the door sill plate. Refer to Door Sill Plate Replacement .
- Position the seat to the most forward position.
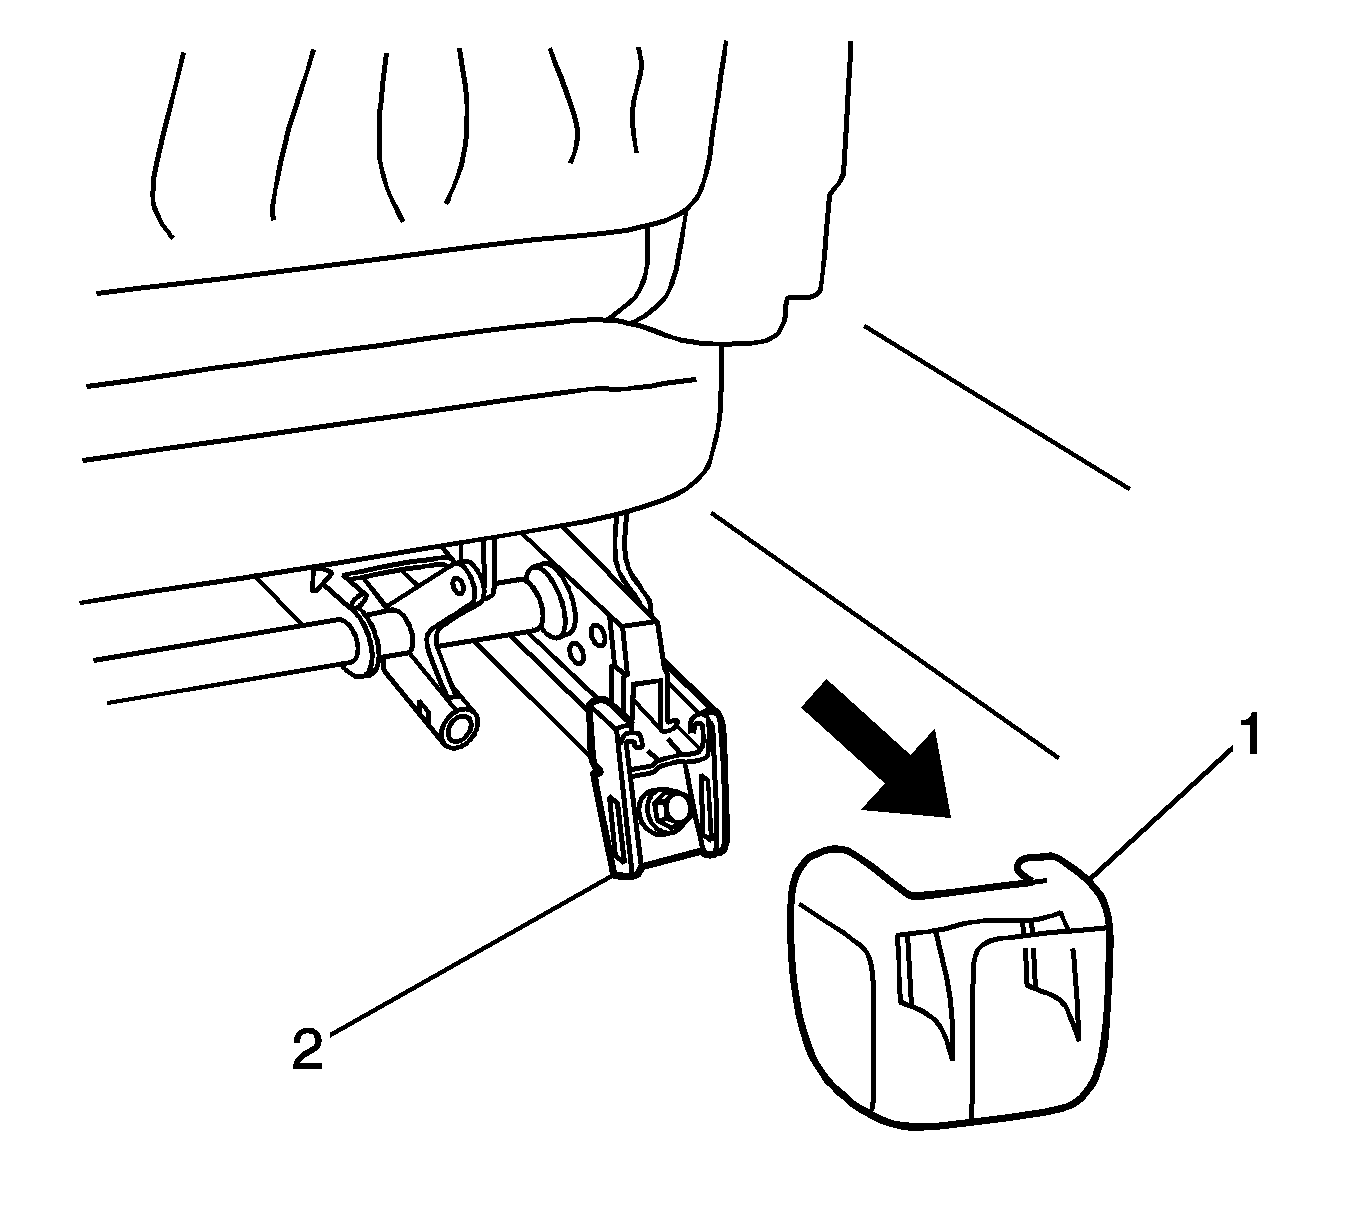
- Unclip the front seat inner rear cover (1) from the seat track (2).
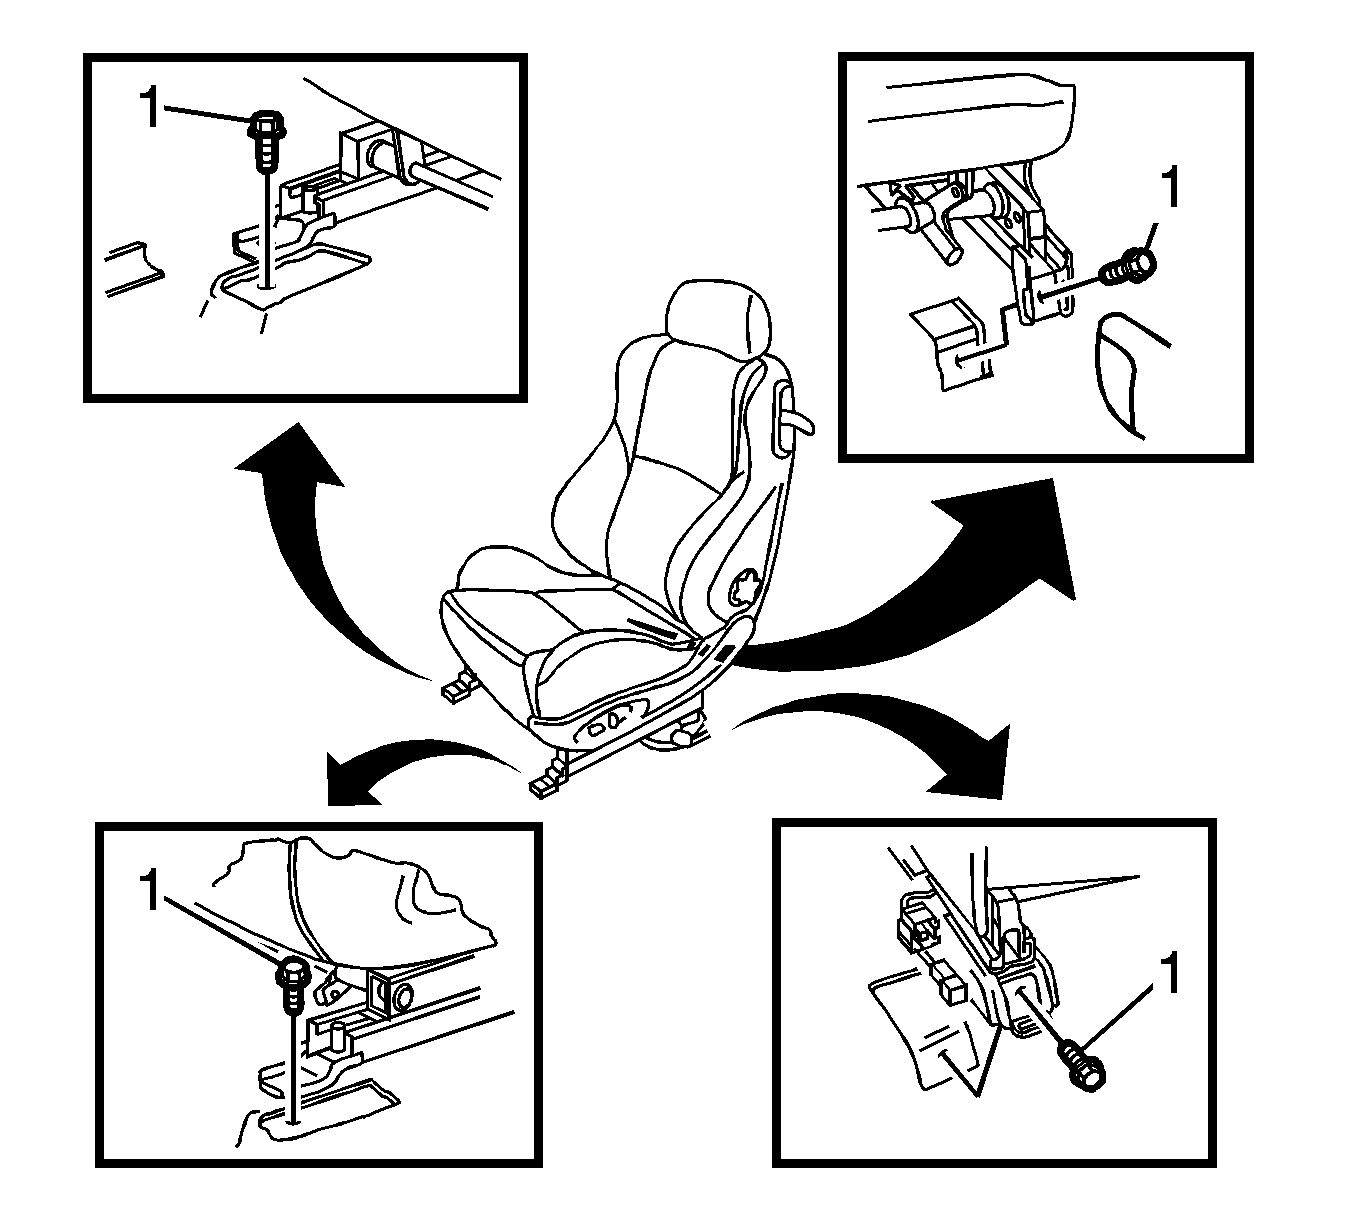
- Remove the seat to floor mounting bolts (1).
- Position the seat to the most rearward position.
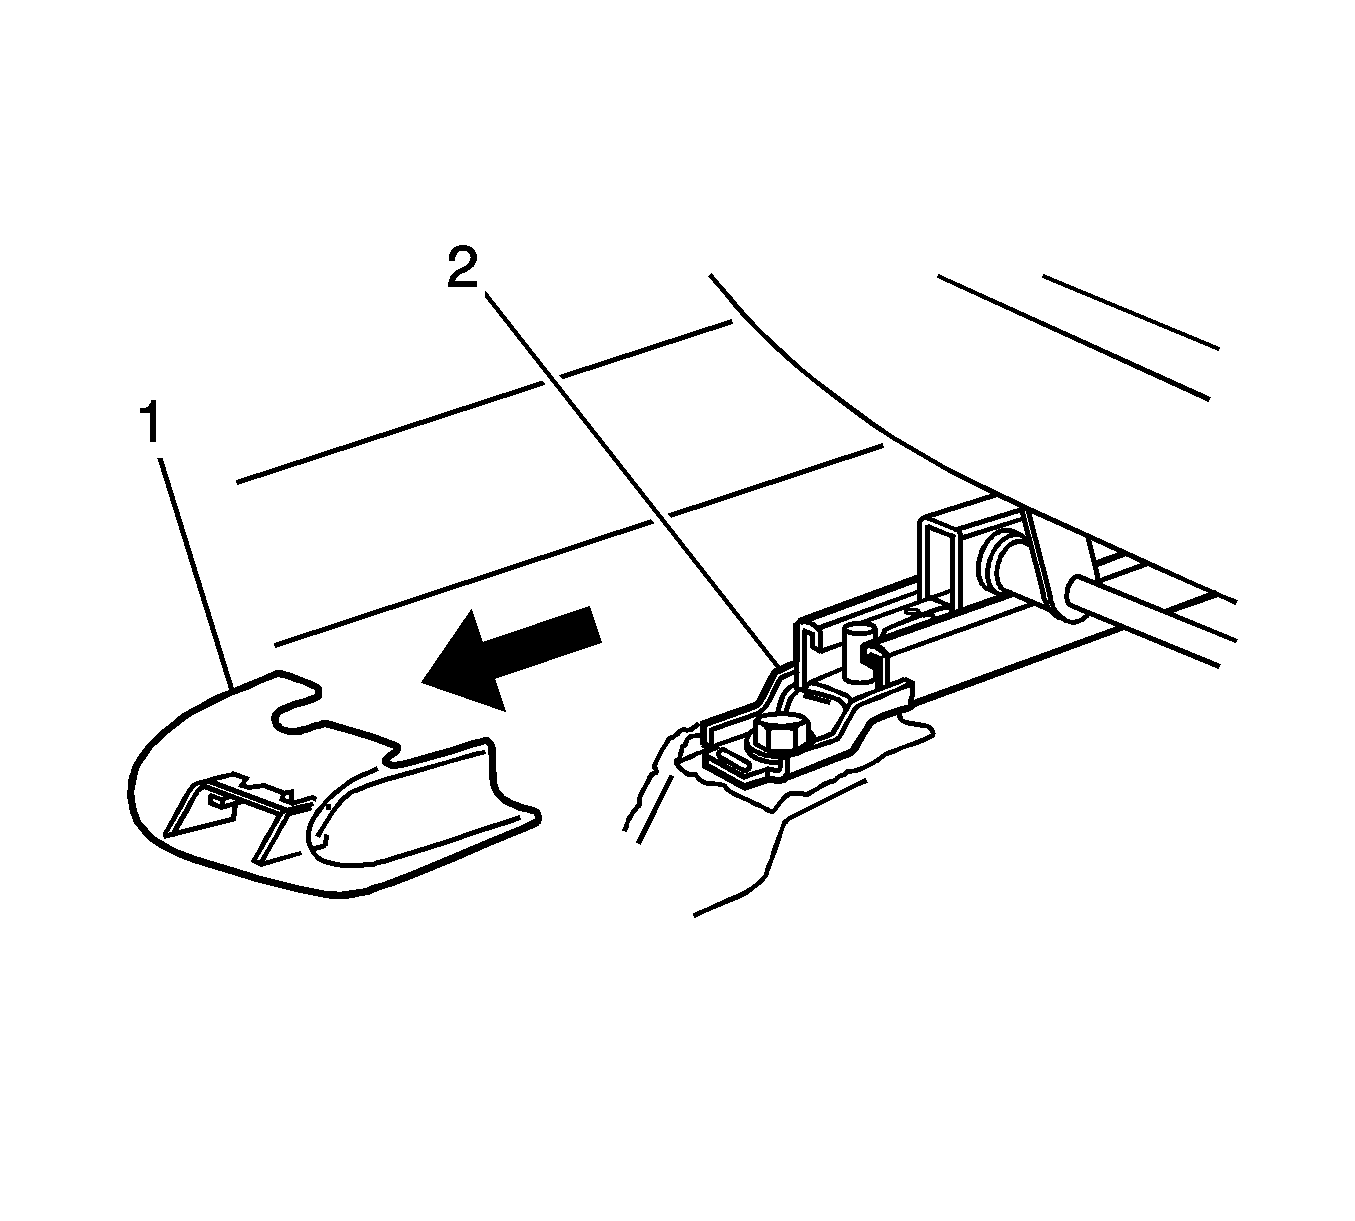
- Unclip the front seat inner front cover (1) from the seat track (2).
- Remove seat-to-floor mounting bolts (1).
- Disconnect the negative battery cable.
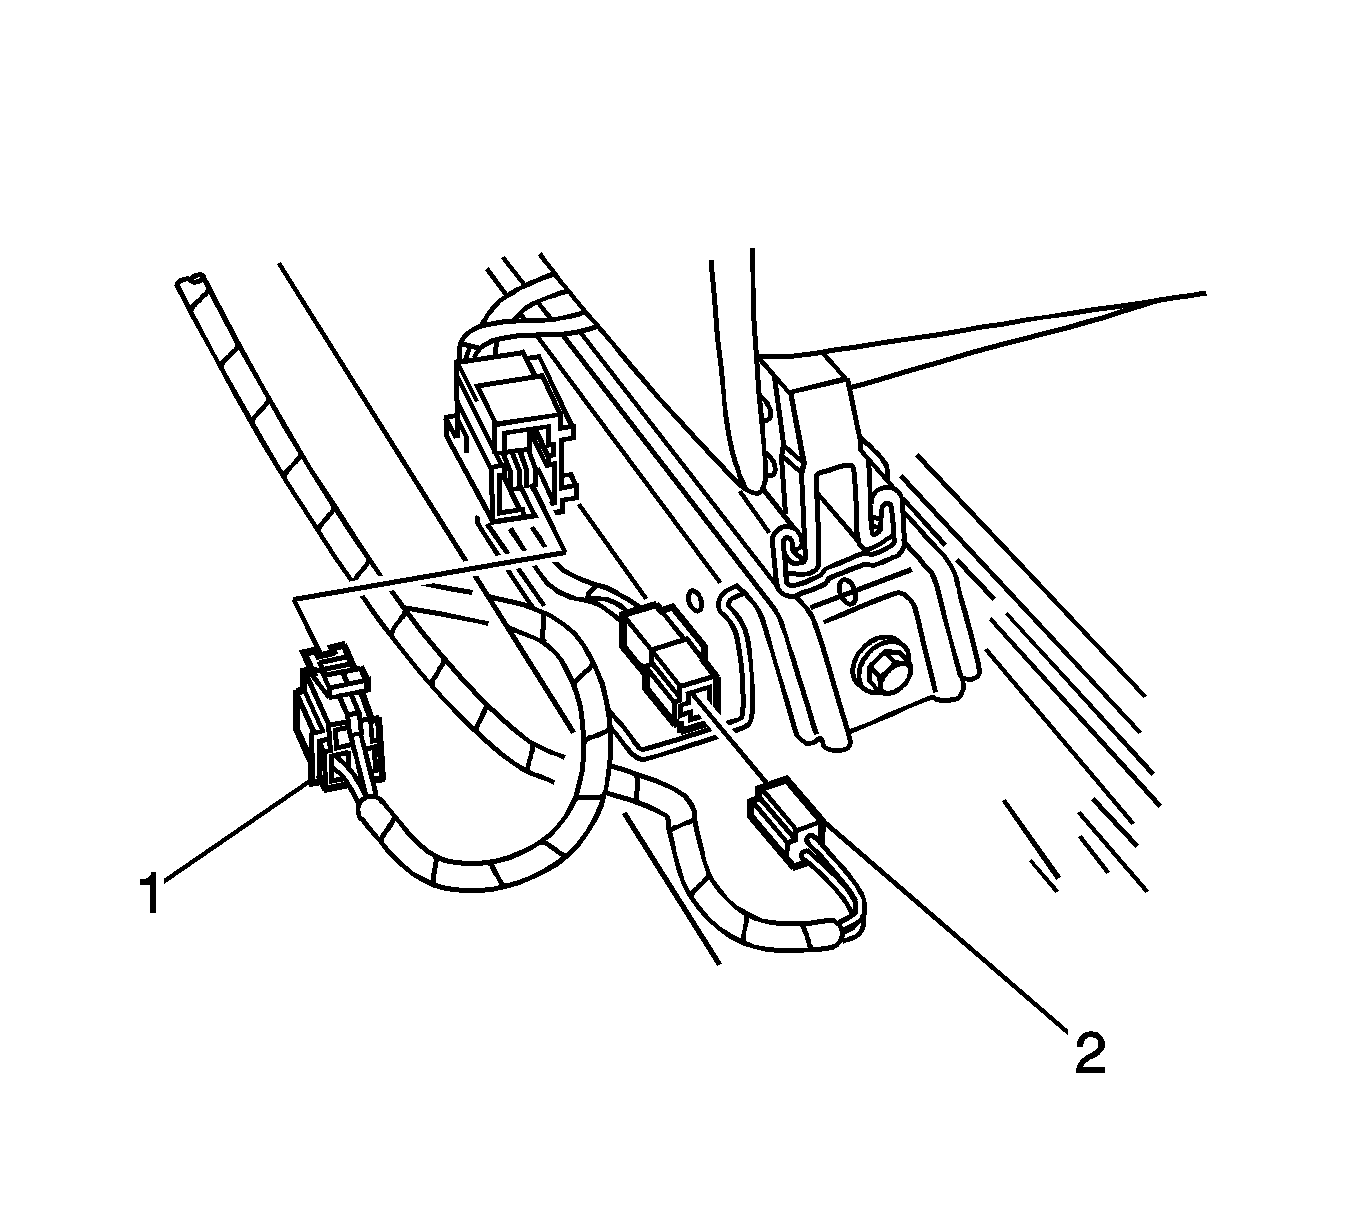
- Disconnect the body wiring harness connectors (1 and 2).
- Remove the seat from the vehicle.


Caution: Refer to Battery Disconnect Caution in the Preface section.

Installation Procedure
- Position the seat in the vehicle.
- Connect the body wiring harness connectors (1 and 2).
- Connect the negative battery cable.
- Install the seat-to-floor mounting bolts.
- Clip the front seat inner front cover (1) to the seat track (2).
- Position the seat to the most forward position.
- Install the seat to floor mounting bolts (1).
- Clip the front seat inner rear cover (1) to the seat track (2).
- Install the door sill plate. Refer to Door Sill Plate Replacement .

Caution: Refer to Battery Disconnect Caution in the Preface section.
Notice: Refer to Fastener Notice in the Preface section.

Tighten
Tighten the seat-to-floor mounting bolts to 42.5 N·m
(31 lb ft).


Tighten
Tighten the seat-to-floor mounting bolts to 42.5 N·m
(31 lb ft).

