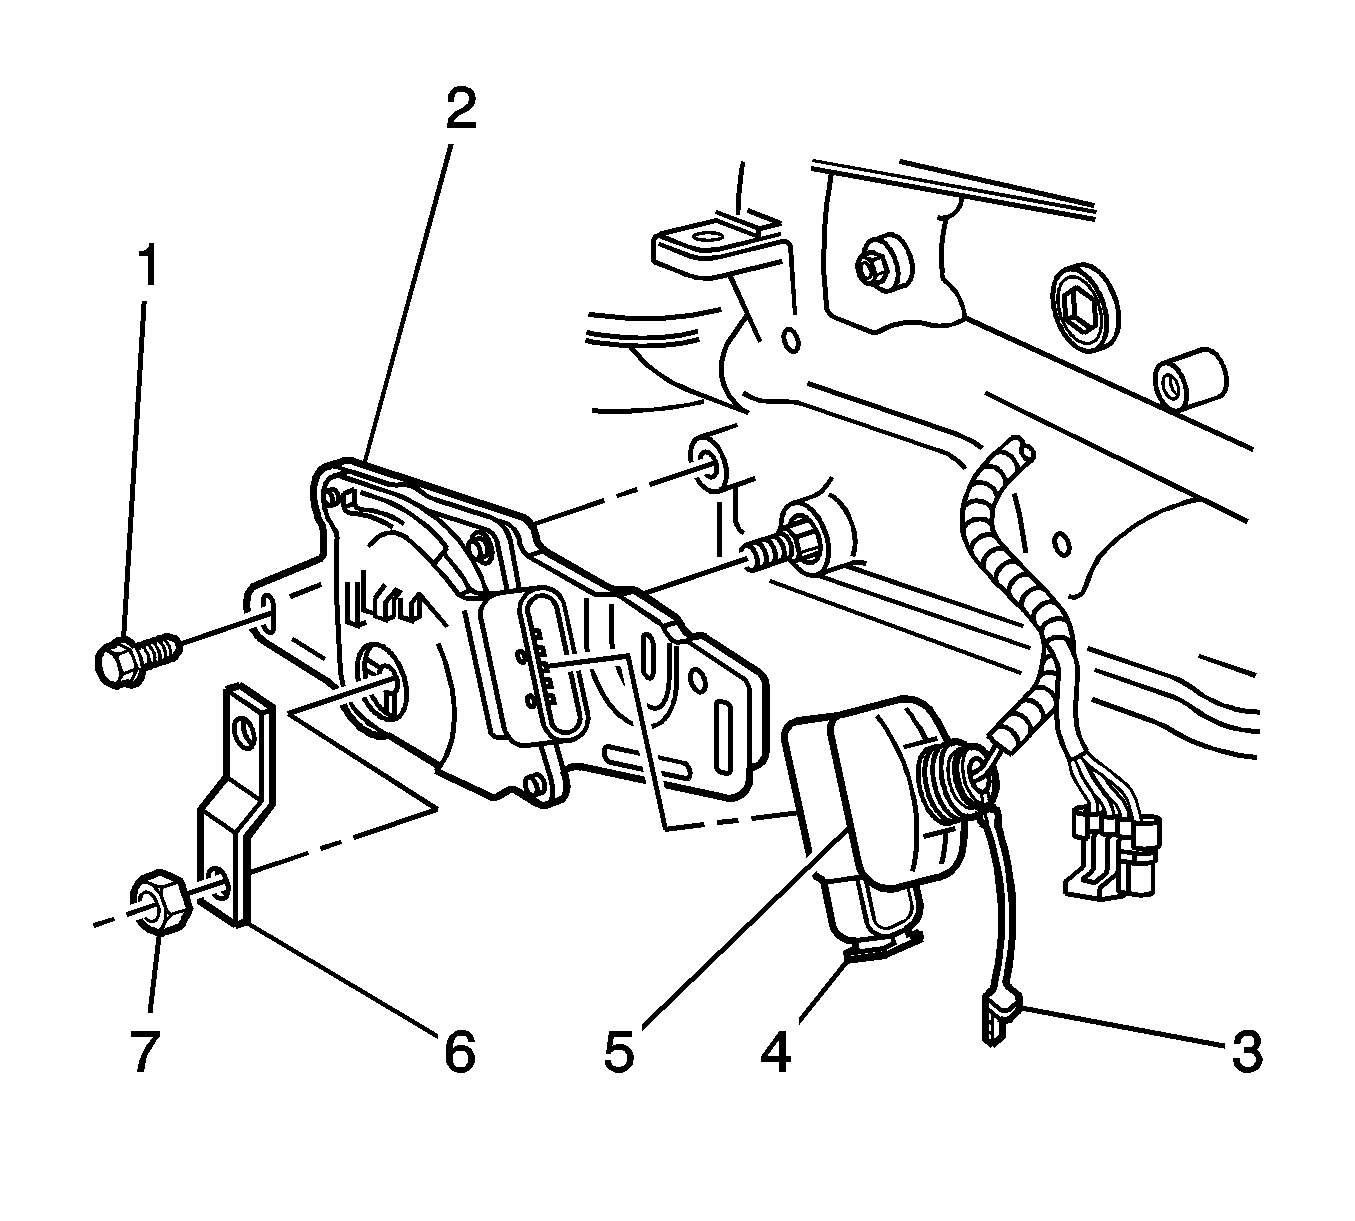
For 1990-2009 cars only
Removal Procedure
- Raise and suitably support the vehicle. Refer to Lifting and Jacking the Vehicle in General Information.
- While holding the transmission selector lever (1), remove the lever retaining nut (2).
- Position the lever and shift linkage out of the way.
- Remove the wiring harness connector (CPA) securing pin (3).
- Pull the connector release clip downward, the remove park neutral position (PNP) switch electrical connector (5).
- Remove the PNP switch bolts (6).
- Remove the PNP switch from the transmission.

Installation Procedure
- install the PNP switch on the transmission.
- Install the PNP switch retaining bolts (6) finger tight only at this time.
- Install the selector lever and nut on the manual selector shaft.
- Slightly rotate the PNP switch back and forth until a central position is obtained; then lightly tighten the front screw.
- Connect the PNP switch electrical connector (2).
- Install the PNP wiring harness electrical connector, do not install the securing pin at this time.
- Ensure that the engine can only be started in the Park and Neutral positions. Adjust the switch as necessary.
- Tighten the retaining bolts.
- Compress the electrical connector release clip, then install the securing pin.
- Lower the vehicle.
- Ensure that the engine can only be started in the Park and Neutral positions.
- Check the reverse lamps for proper operation.

Notice: Refer to Fastener Notice in the Preface section.
Tighten
Tighten the retaining nut to 25 N·m
(18 lb ft).
Tighten
Tighten the retaining bolts to 25 N·m
(18 lb ft).
