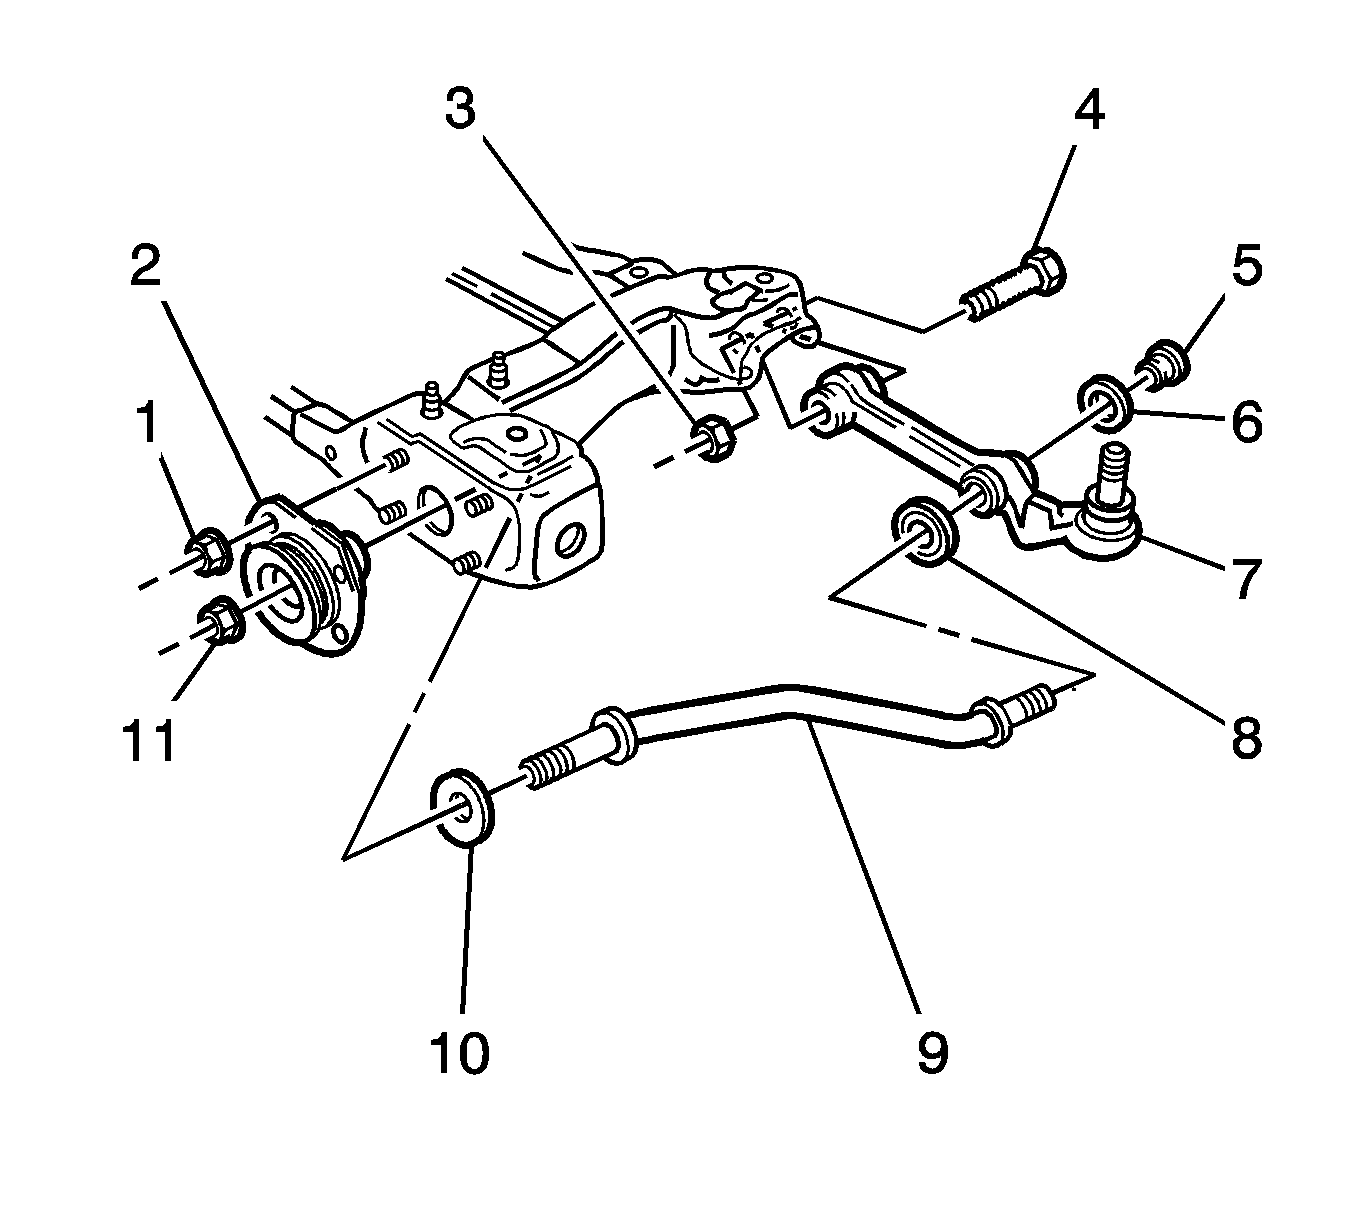
For 1990-2009 cars only
Removal Procedure
- Raise and support the vehicle. Refer to Lifting and Jacking the Vehicle in General Information.
- Remove the front tire and wheel assembly. Refer to Tire and Wheel Removal and Installation in Tires and Wheels.
- Remove and discard the nut (11) that retains the front lower control arm rod (9) to the front lower control arm rod insulator bushing (2).
- Remove the 4 nuts (1) that retain the insulator bushing to the front frame.
- Remove the insulator bushing from the front frame.

Installation Procedure
- If equipped, ensure the washer is on the front of the rod.
- Install the insulator bushing (2) over the front of the rod.
- Install the insulator bushing to the studs on the frame.
- Install the 4 nuts (1) in order to retain the insulator bushing to the frame.
- Install a NEW nut (11) in order to retain the rod to the insulator bushing.
- Install the front tire and wheel assembly. Refer to Tire and Wheel Removal and Installation in Tires and Wheels.
- Lower the vehicle.
- With the weight of the vehicle on the tire and wheel assemblies, push down on the front bumper 3 times in order to stabilize the suspension.
- Tighten the nut that retains the rod to the insulator bushing.
- Measure the wheel alignment. Adjust the wheel alignment if necessary. Refer to Wheel Alignment Measurement in Wheel Alignment.

Important: The washer (10) for the front of the lower control arm rod (9) is for reducing caster.
Notice: Refer to Fastener Notice in the Preface section.
Tighten
Tighten the nuts to 23 N·m (17 lb ft).
Important: Do not tighten the nut yet.
Tighten
Tighten the nut to 148 N·m (109 lb ft).
