For 1990-2009 cars only
Removal Procedure
- Raise the vehicle. Refer to Lifting and Jacking the Vehicle in General Information.
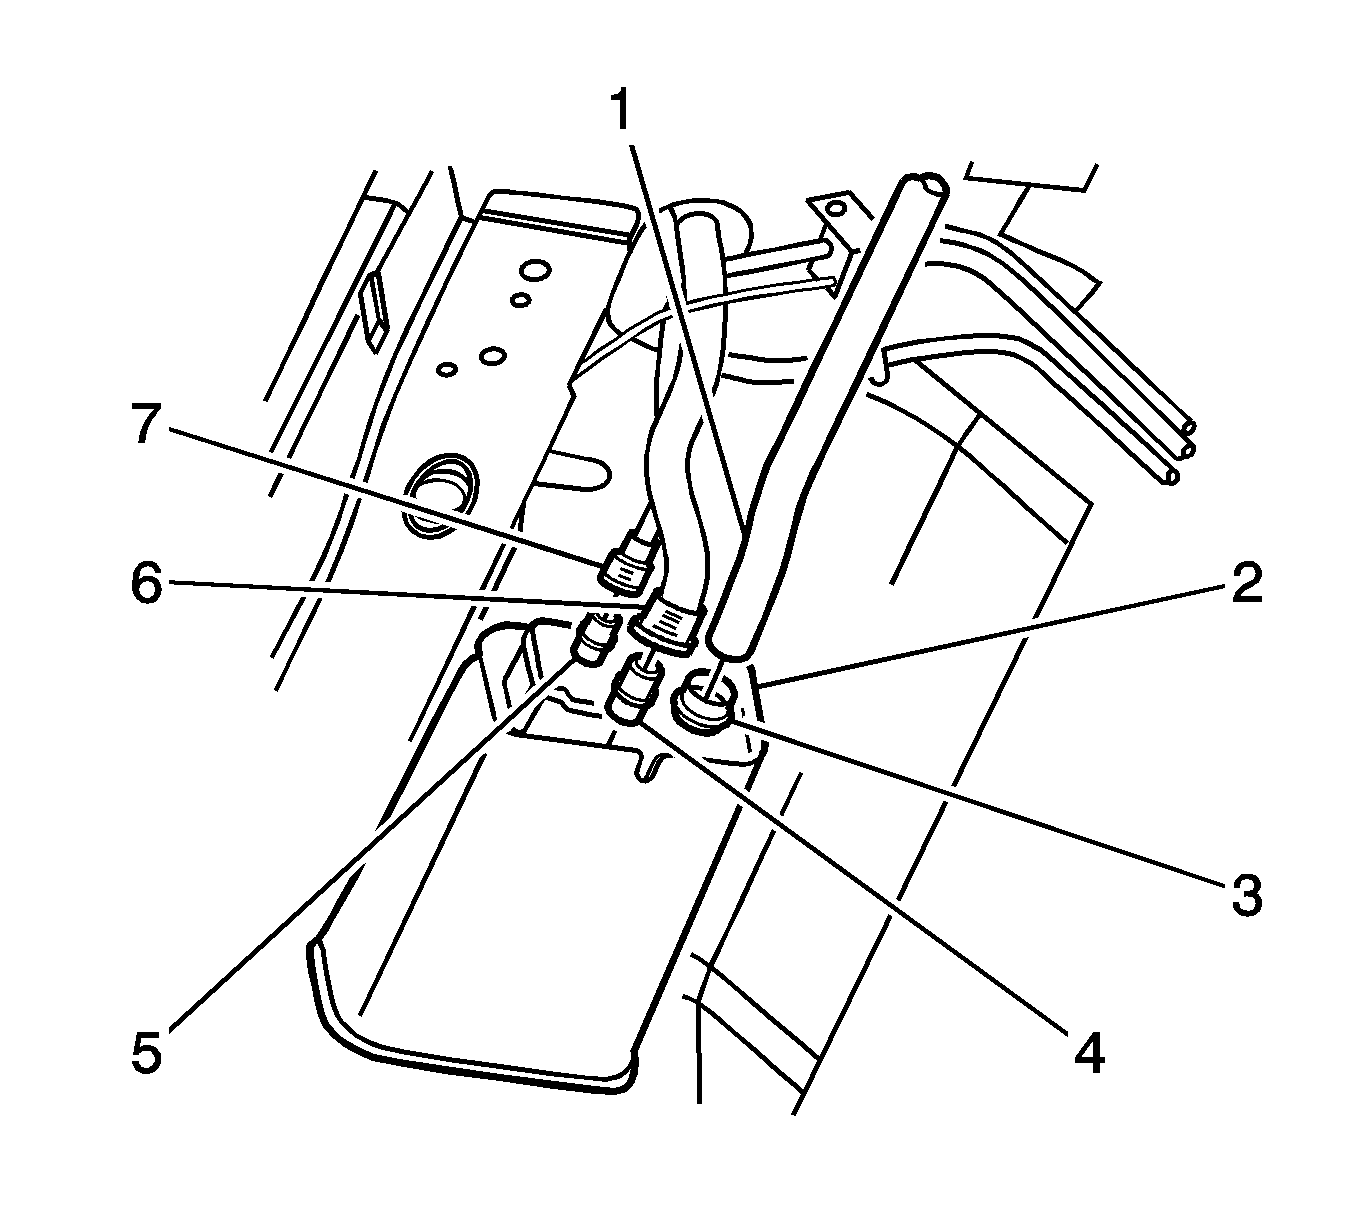
- Disconnect the fuel tank vapor line (6) from the canister (2).
- Disconnect the canister purge line (7) from the canister (2).
- Remove the canister vent line (1) from the canister (2) by twisting and pulling it away from the canister.
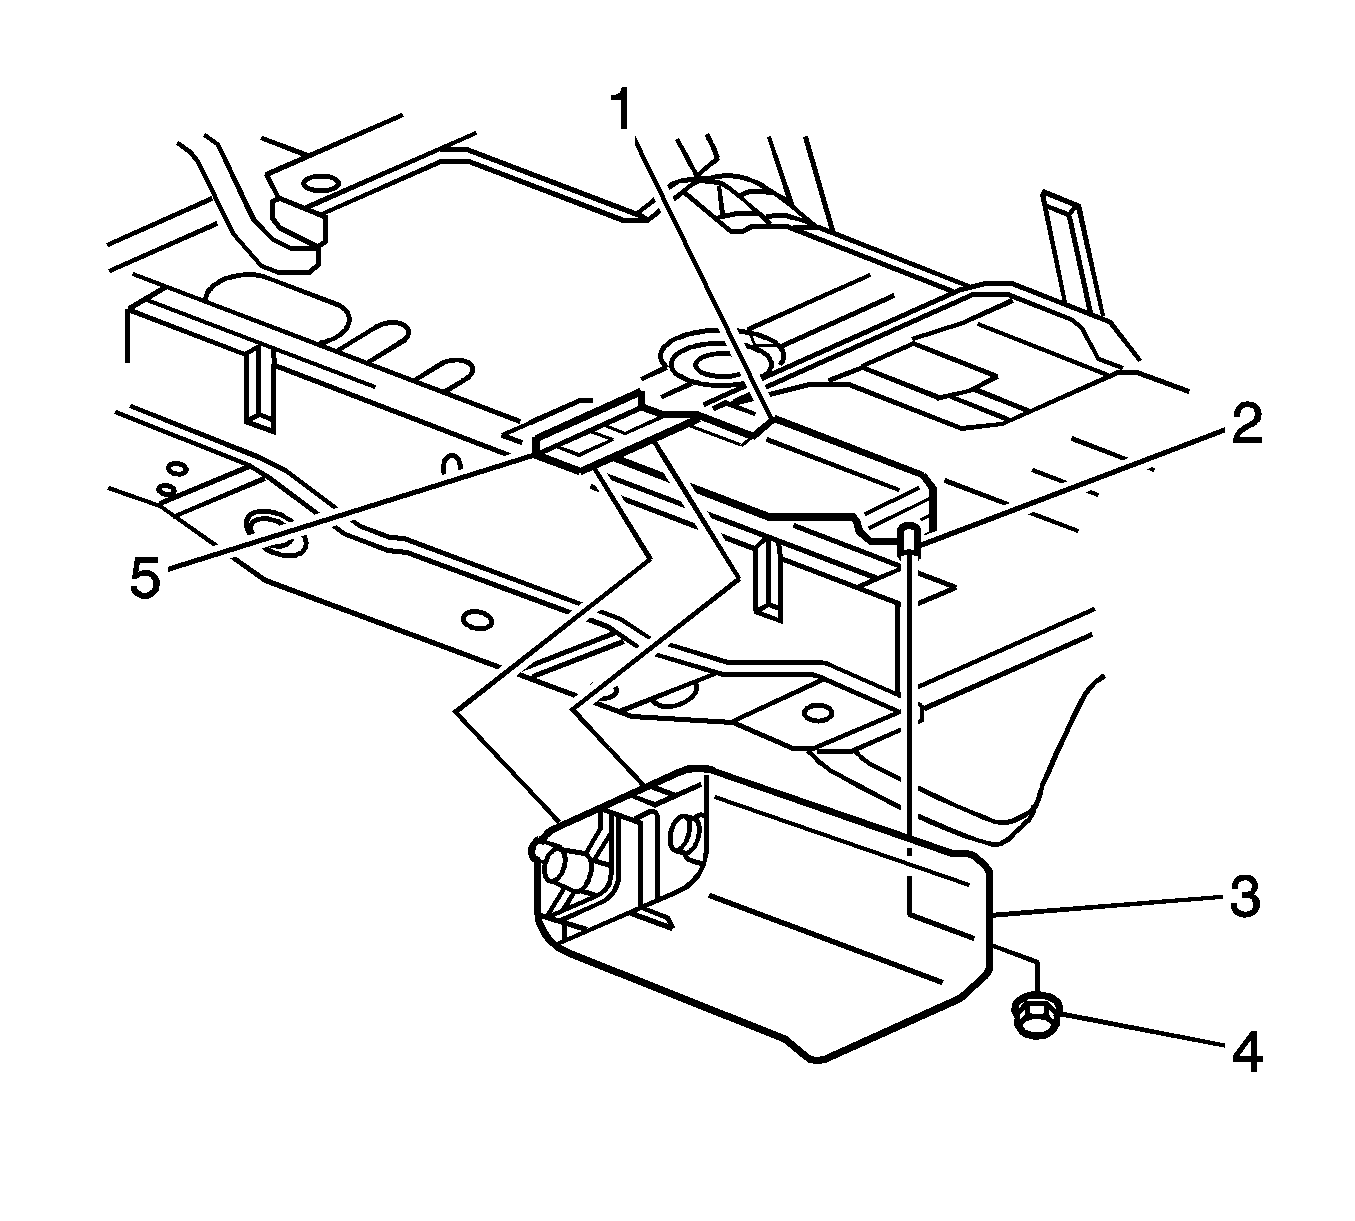
- Remove the canister retaining nut (4).
- Remove the canister (3) from the attaching stud (2) and then slide the canister out of the retainer enclosed slots (5).


Installation Procedure
- Install the canister (3) onto the retainer (5) and over the retaining stud (2).
- Install the canister retaining nut (4), hand tighten only.
- Push the canister in board as far as possible in the enclosed slots (5) of the retainer, and tighten the canister retaining nut to the specified torque.
- Install the canister vent line (1) onto the canister vent port (3).
- Align the canister purge line quick connector (7) with the canister purge line port (5) and push the connector firmly onto the port.
- Align the fuel tank vapor line quick connector (5) with the fuel tank vapor port (4) and push the connector firmly onto the port.

Notice: Refer to Fastener Notice in the Preface section.
Tighten
Tighten the canister retaining nut to 6 N·m
(53 lb in).

