For 1990-2009 cars only
Removal Procedure
- Remove the instrument cluster trim panel. Refer to Instrument Cluster Trim Panel Replacement.
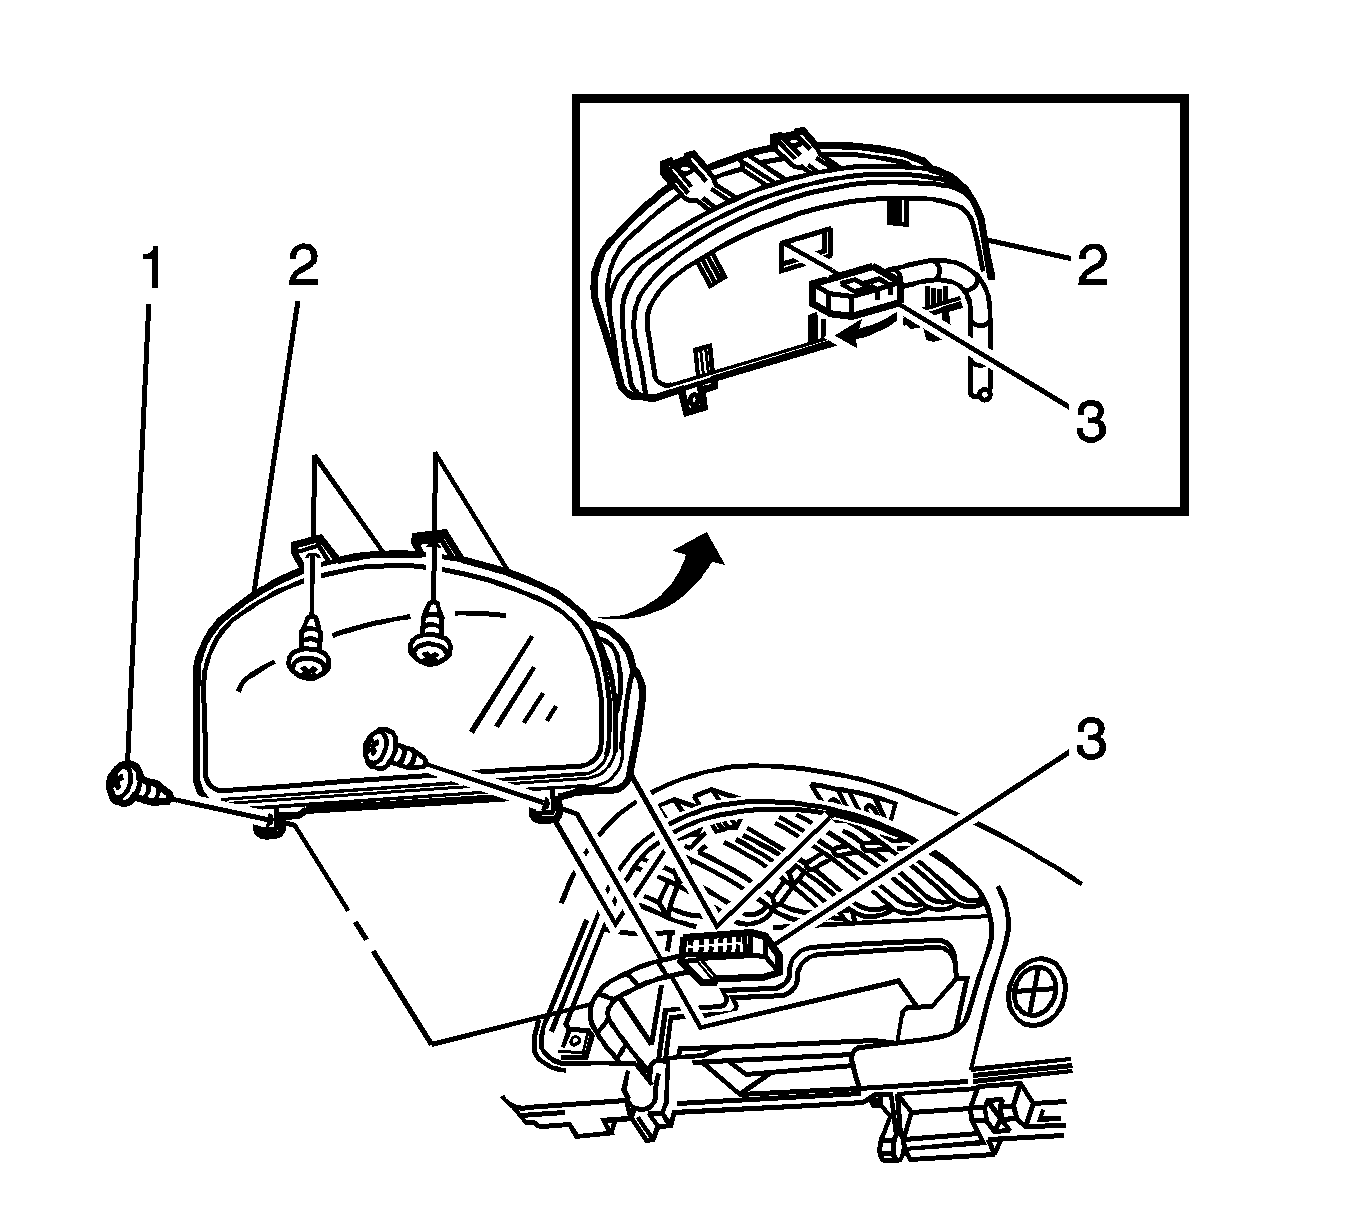
- Remove the 4 screws (1) attaching the instrument cluster (2) to the instrument panel.
- Pull the top of the cluster from its cavity.
- Using a flat-bladed tool, open the wiring connector locking tab (3) on the back of the cluster (2).
- Remove the instrument cluster (2) from the vehicle.

Installation Procedure
- Connect the wiring connector and locking tab (3) to the back of the cluster (2).
- Install the cluster (2) to the instrument panel.
- Install the 4 screws (1) attaching the instrument cluster (2) to the instrument panel.
- Install the instrument cluster trim panel. Refer to Instrument Cluster Trim Panel Replacement.

Important: When a new instrument panel cluster is being replaced, it will need to be setup using a Scan Tool. Go to the Programming Selection under Instrument Panel Cluster. Special Functions and follow steps displayed.
Notice: Refer to Fastener Notice in the Preface section.
Tighten
Tighten the screws to 2 N·m (18 lb in).
