For 1990-2009 cars only
Removal Procedure
- Remove the instrument panel cluster trim panel. Refer to Instrument Cluster Trim Panel Replacement in Instrument Panel, Gages and Console.
- Remove the left-hand instrument panel outer cover. Refer to Instrument Panel Outer Trim Cover Replacement .
- Remove the driver side outer duct. Refer to Instrument Panel Air Outlet Ducts Replacement in HVAC.
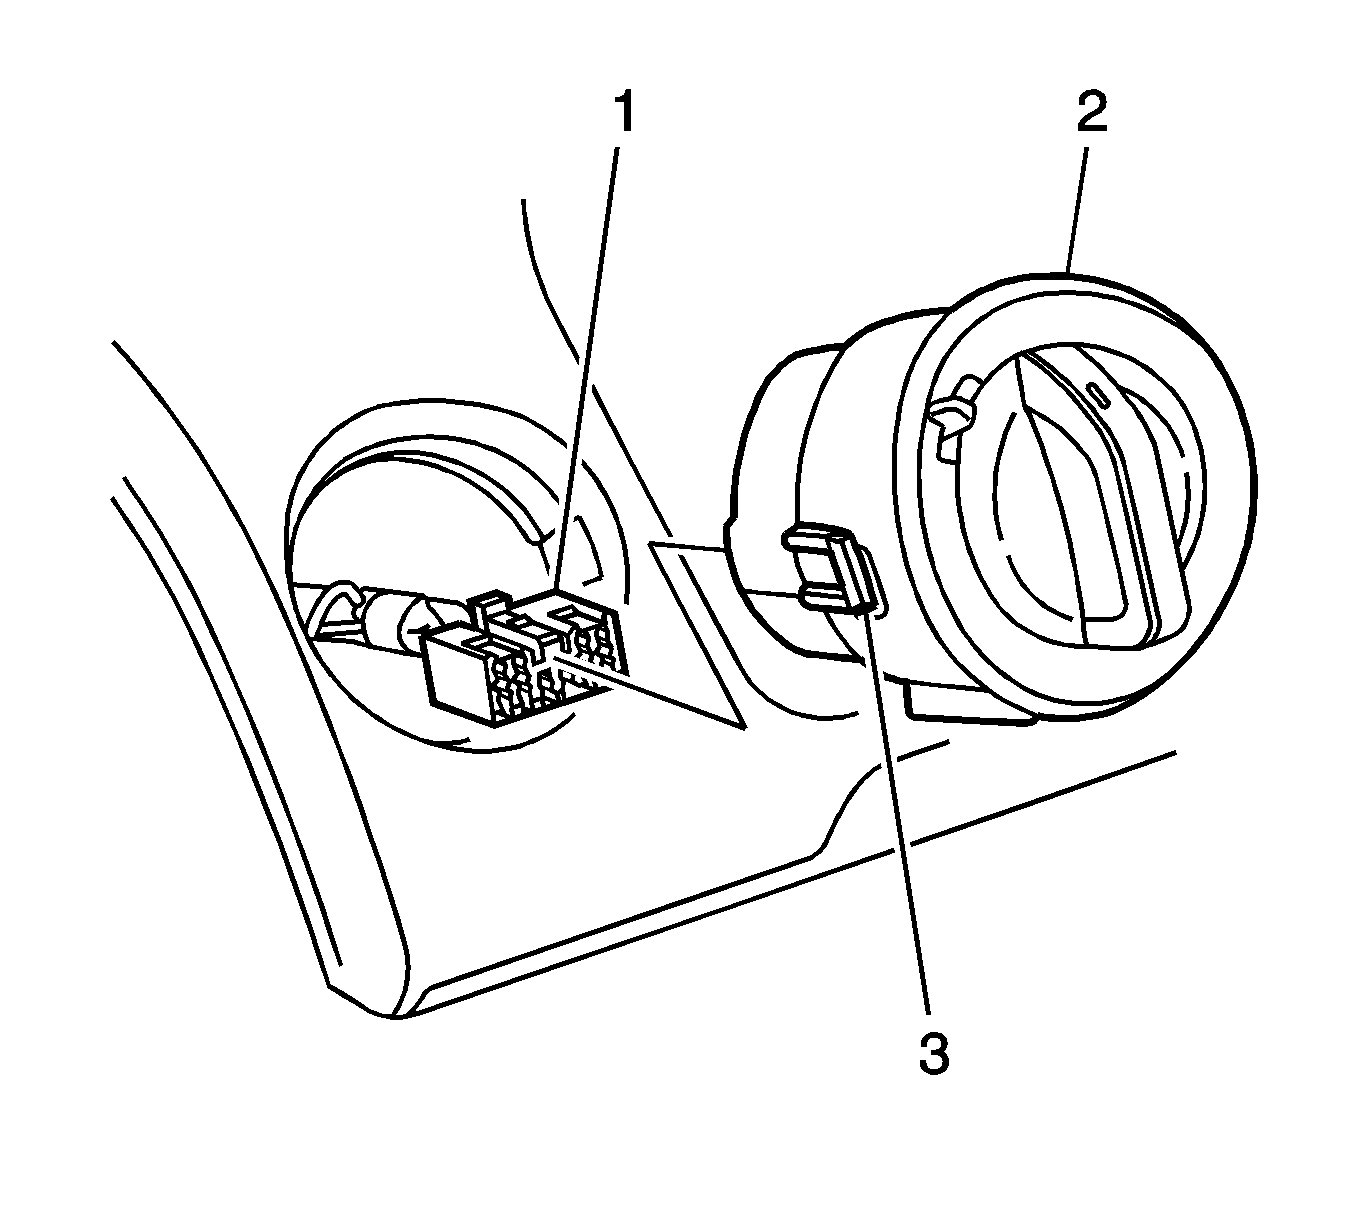
- From the rear of the switch (2), squeeze the retaining clips (3) on each side of the switch (2) and push the switch (2) part way from the cavity.
- Using a plastic flat-bladed tool, hold the retaining clips (3) depressed while slowly removing the switch (2) from it's cavity.
- Disconnect the wiring connector (1) and remove the switch (2) from the vehicle.

Installation Procedure
- Connect the wiring connector (1) to the switch (2).
- Install the switch (2) to the panel, making sure the retaining clips (3) are engaged.
- Install the driver side outer duct. Refer to Instrument Panel Air Outlet Ducts Replacement in HVAC.
- Install the left-hand instrument panel outer cover. Refer to Instrument Panel Outer Trim Cover Replacement .
- Install the instrument panel cluster trim panel (1). Refer to Instrument Cluster Trim Panel Replacement in Instrument Panel, Gages and Console.

