For 1990-2009 cars only
Removal Procedure
- Raise and suitably support the vehicle. Refer to Lifting and Jacking the Vehicle in General Information.
- Support the transmission with a transmission jack.
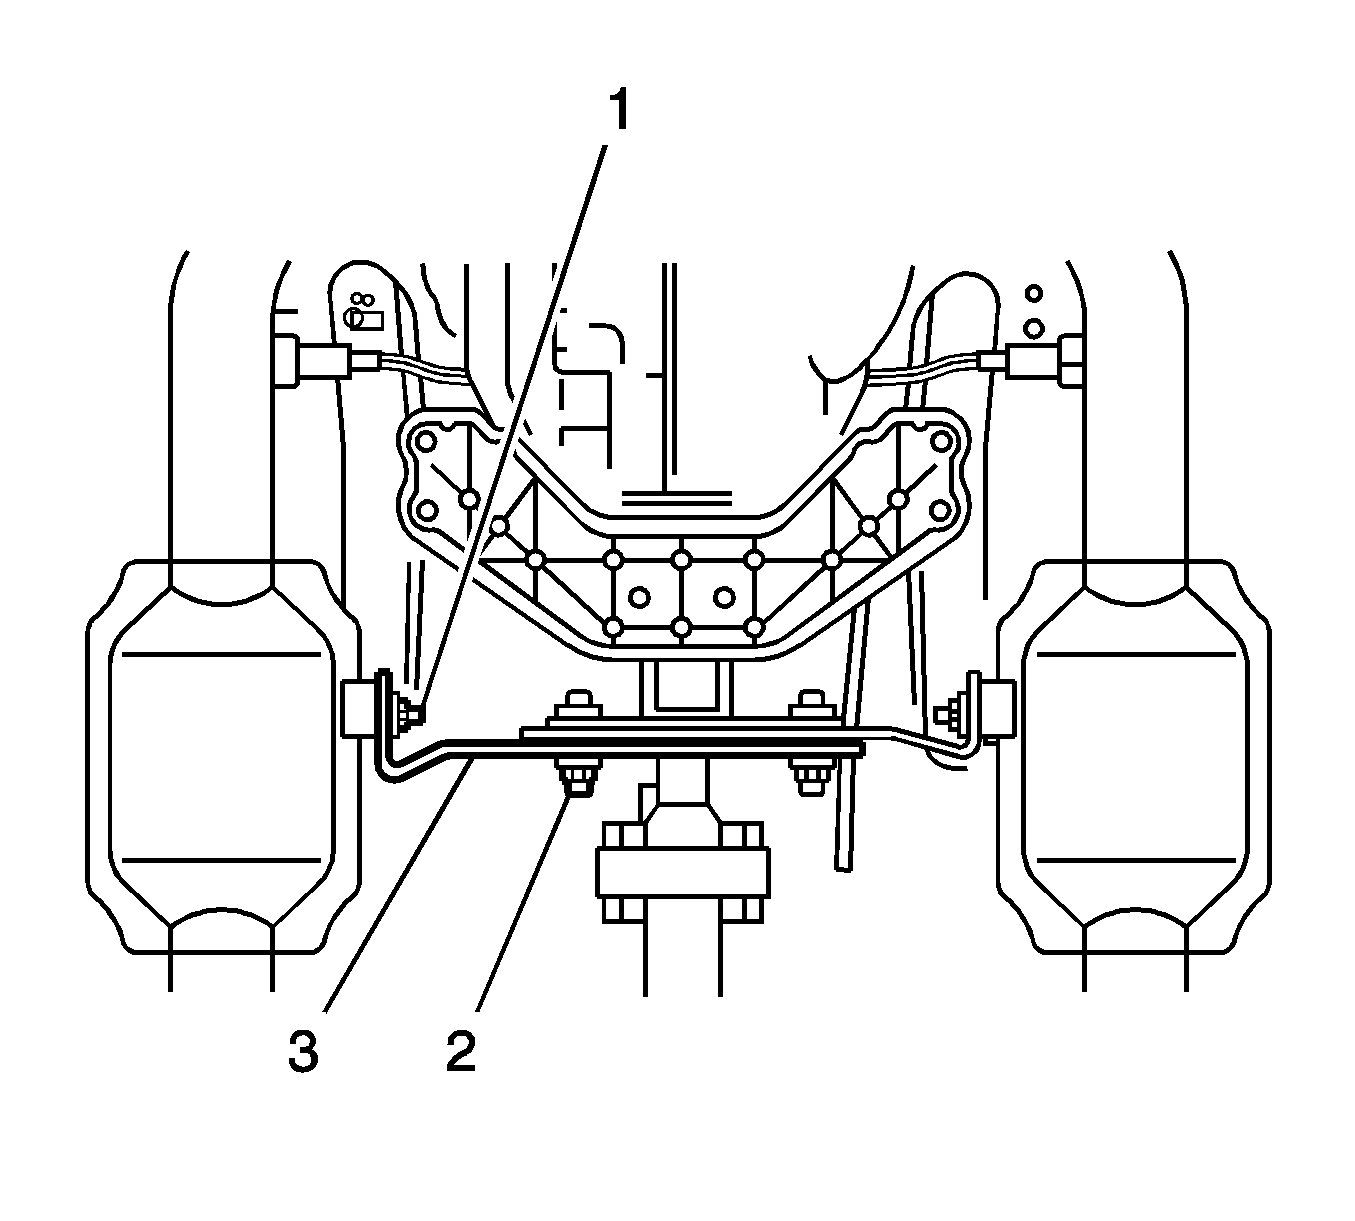
- Remove the retaining bolts (1, 2) from the exhaust bracket (3).
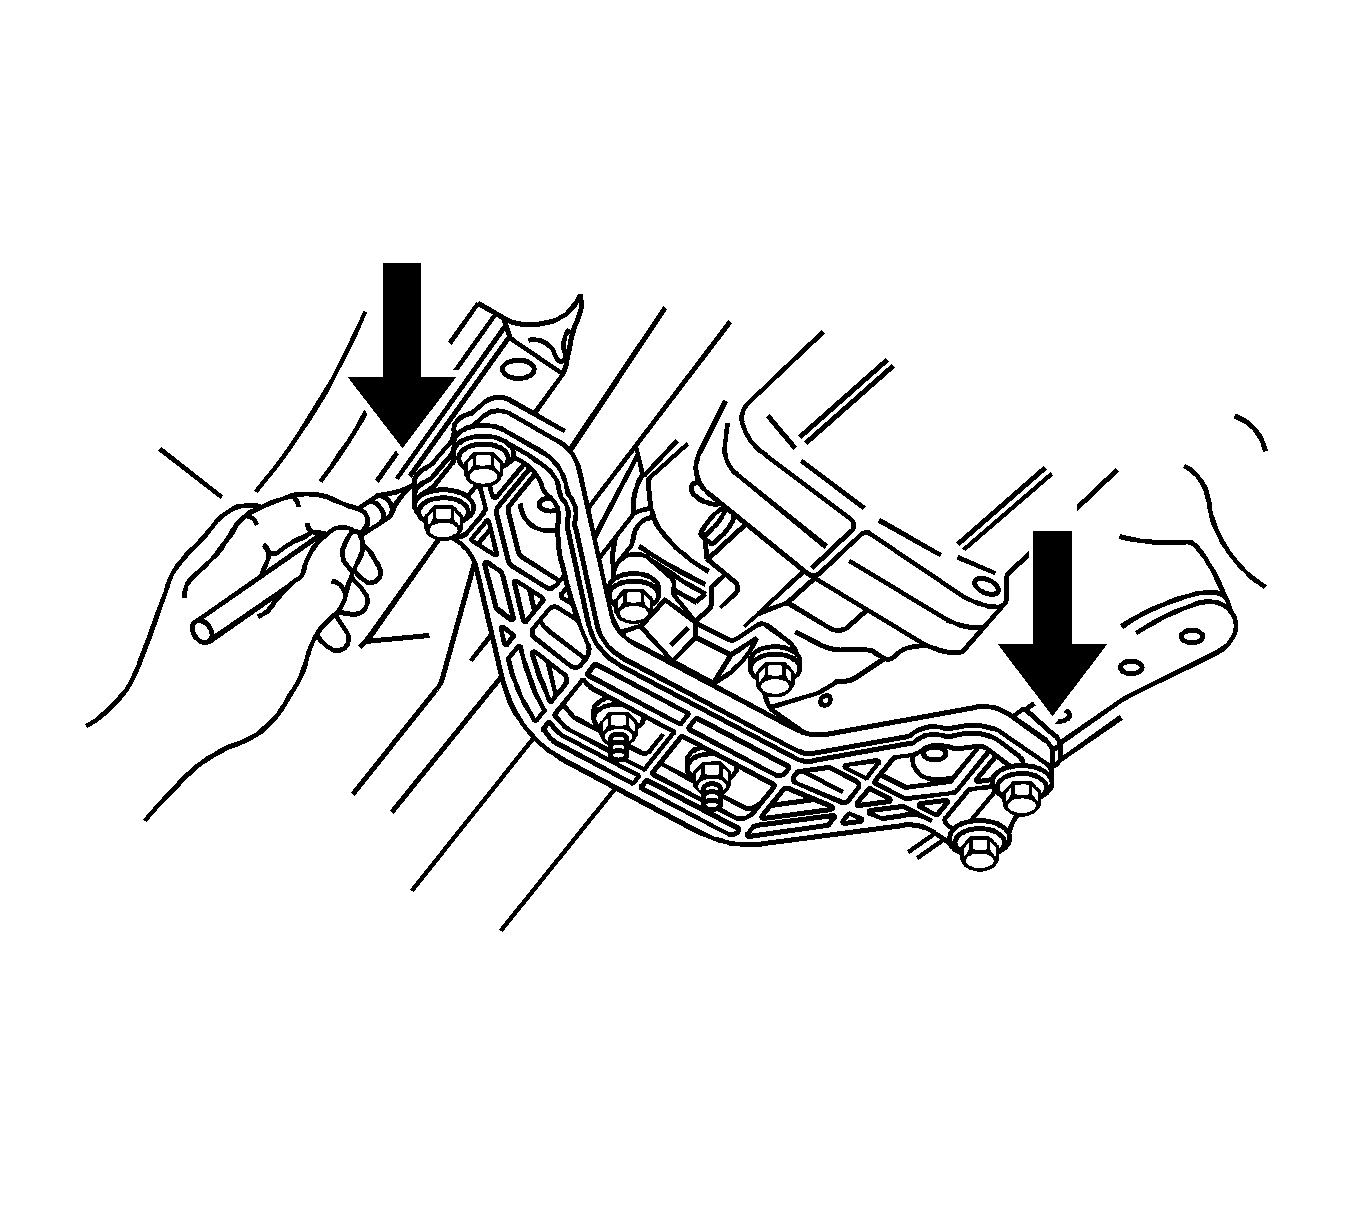
- Scribe or mark around each of the transmission crossmember support mounting points to the vehicle underbody, to provide alignment reference points for reassembly.
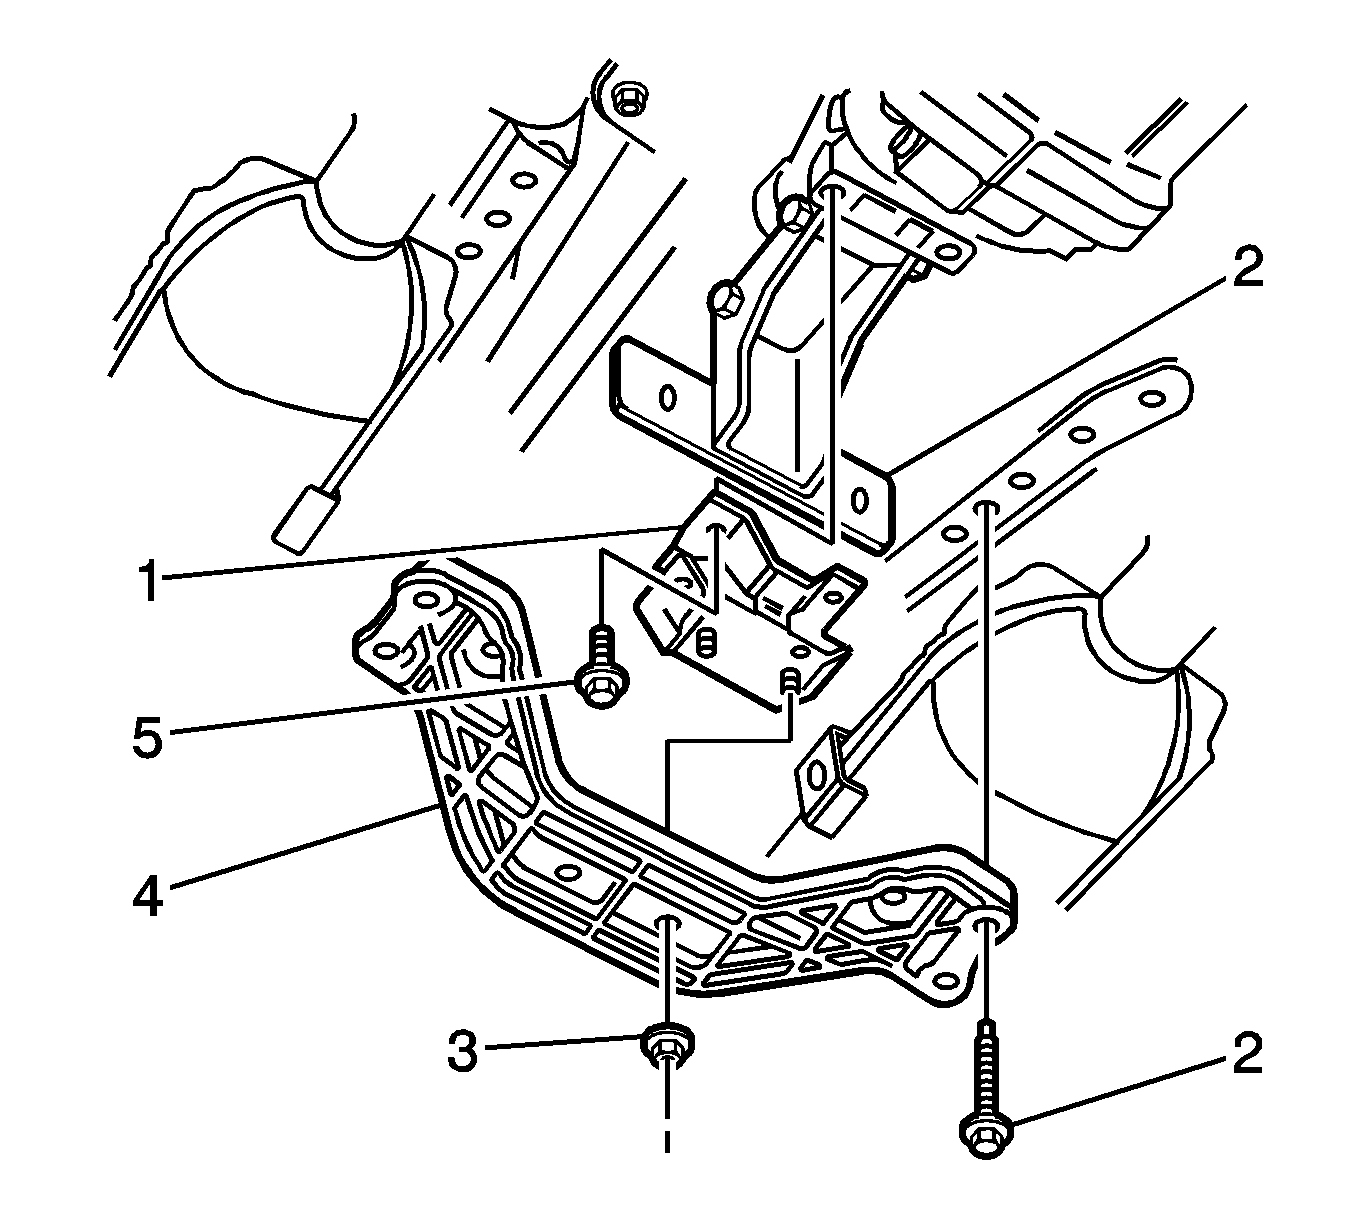
- Remove the 2 transmission mount nuts (2) from the crossmember support.
- Remove the transmission crossmember support bolts (1).
- Remove the transmission crossmember support (1).
- Remove the 2 bolts retaining the transmission mount to the transmission.
- Remove the transmission mount (5).


Important: This step must be done to maintain the correct powertrain alignment on reassembly or vehicle vibration and/or handling problems may occur.

Installation Procedure
- Install the transmission mount and retaining bolts on the transmission.
- Install the transmission mount bolts.
- Install the transmission crossmember support (3) to the vehicle.
- Install the transmission crossmember support bolts (1).
- Install the transmission mount nuts (2).
- Install the retaining bolts (1, 2) for the exhaust bracket (3).
- Remove the transmission jack.
- Lower the vehicle.

Notice: Refer to Fastener Notice in the Preface section.
Tighten
Tighten the transmission mount bolts to 25 N·m
(18 lb ft).
Important: Ensure that the crossmember support is aligned with the scribe marks on the underbody.
Tighten
Tighten the transmission crossmember support bolts (1)
to 58 N·m (43 lb ft).
Tighten
Tighten the transmission mount nuts (2) to
25 N·m (18 lb ft).

Tighten
Tighten the retaining bolts to 45 N·m
(33 lb ft).
