For 1990-2009 cars only
Exhaust Manifold Replacement - Right Side LNJ
Removal Procedure
- Disconnect the oxygen sensor electrical connector.
- Remove the 3 nuts attaching exhaust crossover pipe to the right exhaust manifold. Refer to Exhaust Crossover Pipe Replacement .
- Raise and support the vehicle. Refer to Lifting and Jacking the Vehicle .
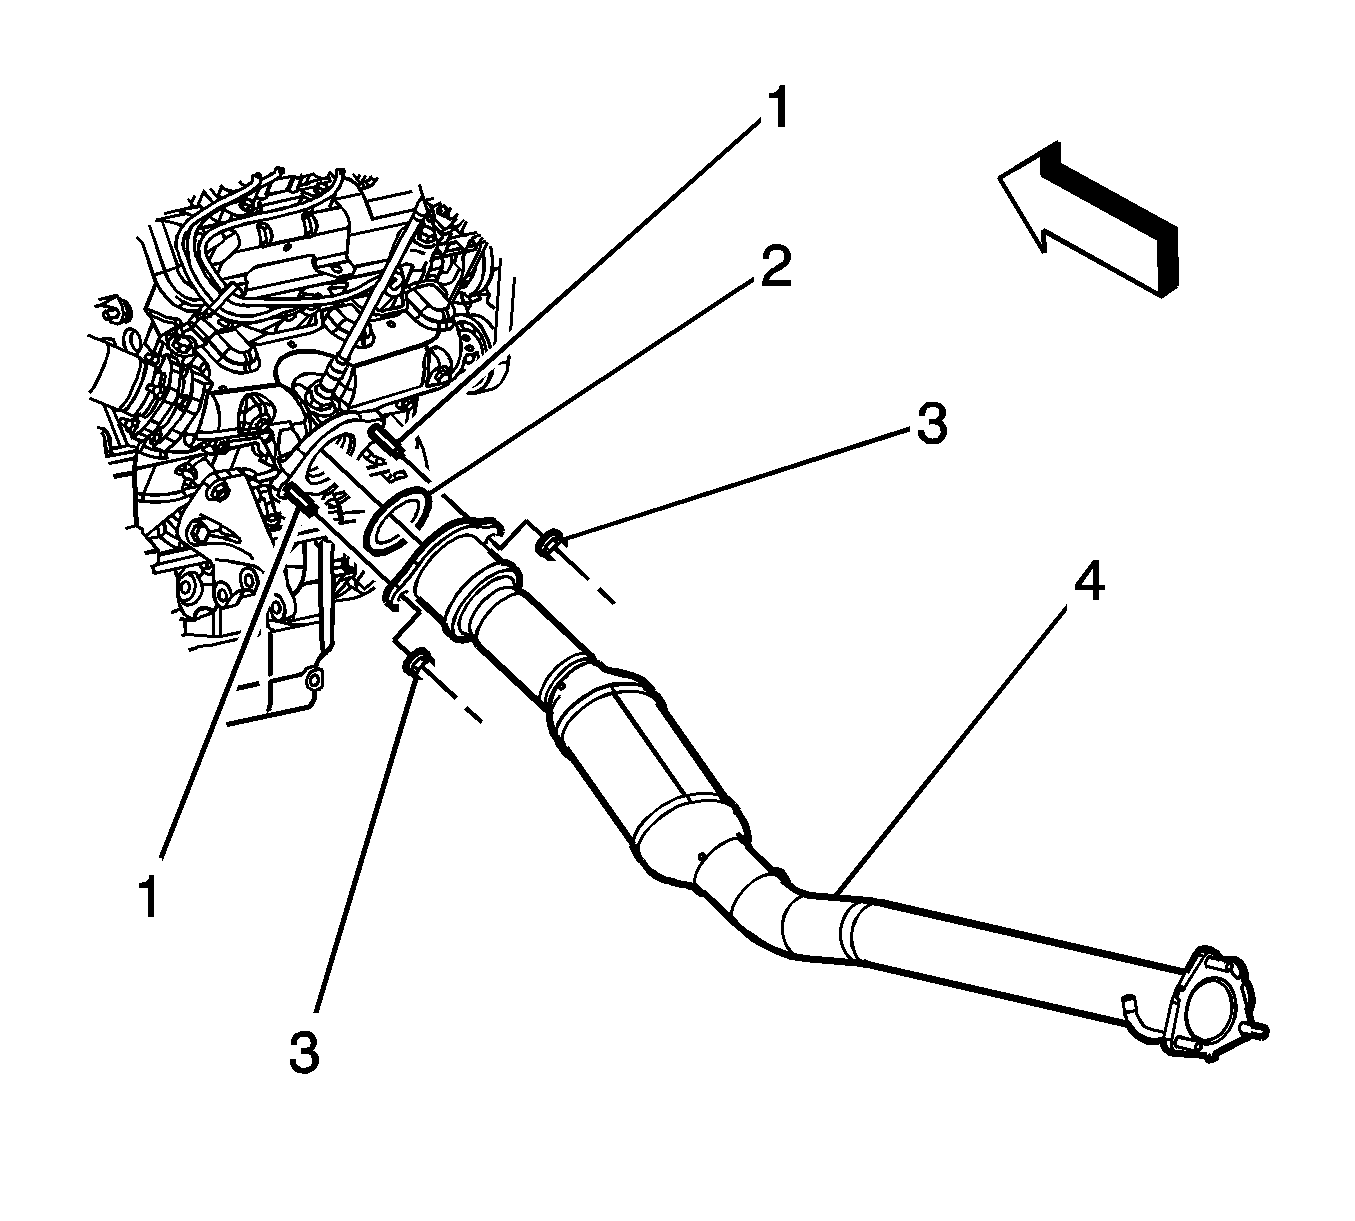
- Remove the nuts (3) securing the catalytic converter (4) to the exhaust manifold and position catalytic converter out of the way. Refer to Catalytic Converter Replacement .
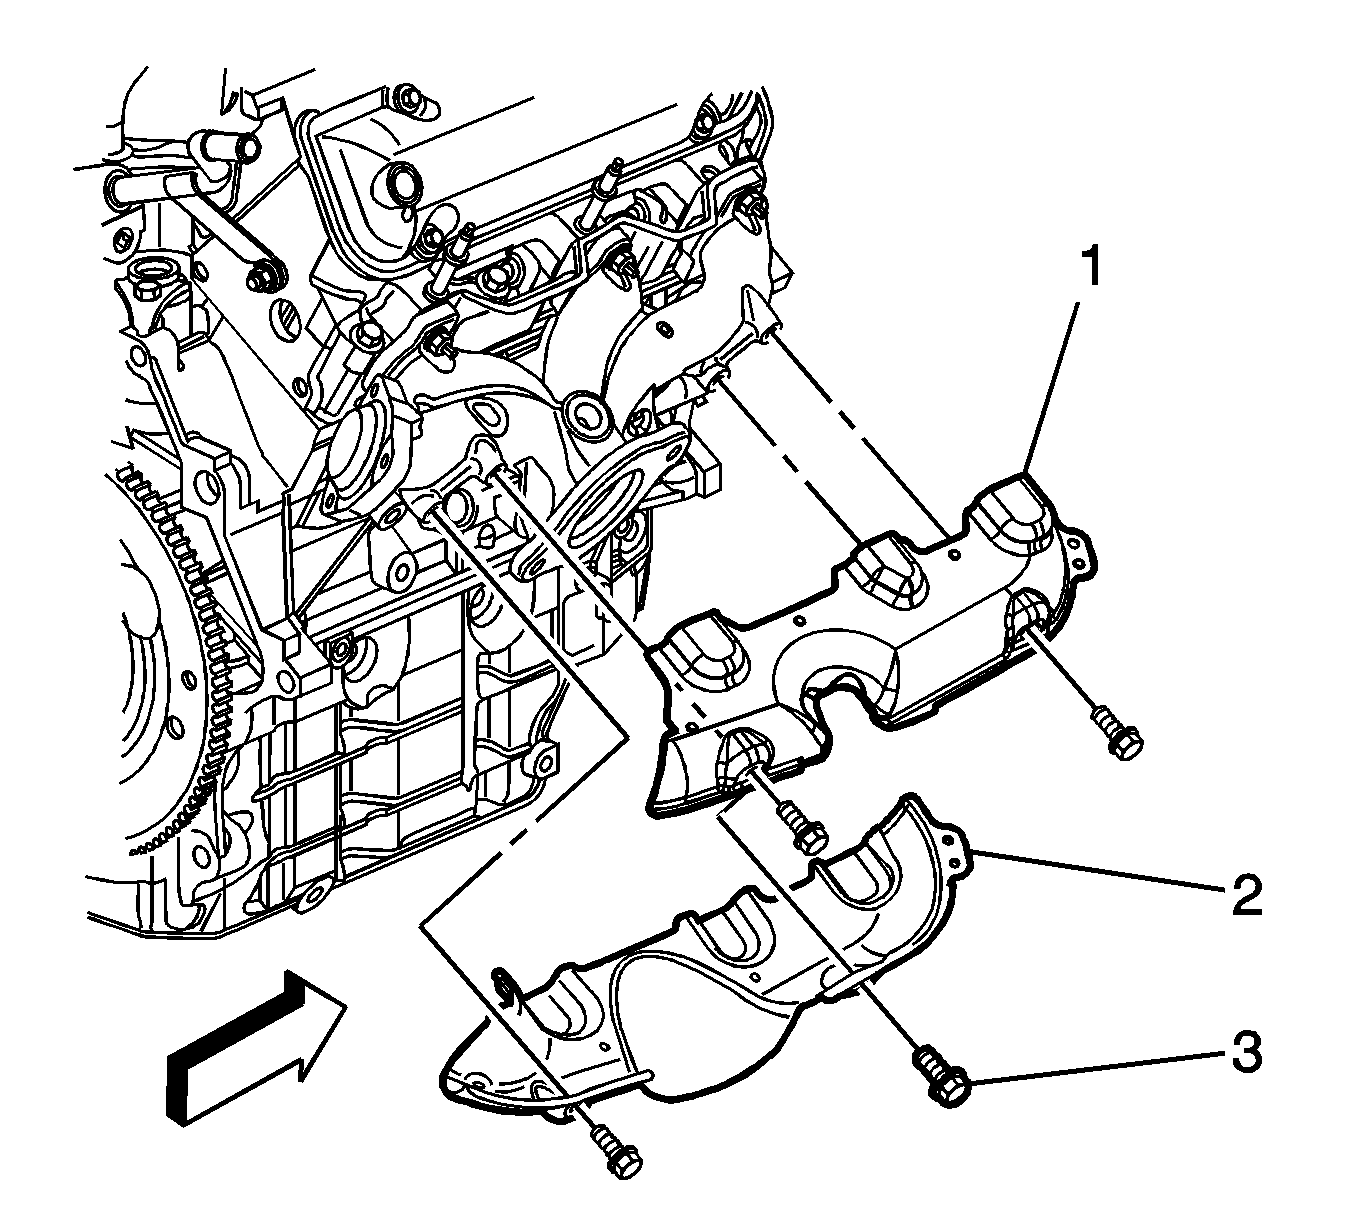
- Remove the exhaust manifold heat shield bolts (3).
- Remove the exhaust manifold heat shields (1, 2).
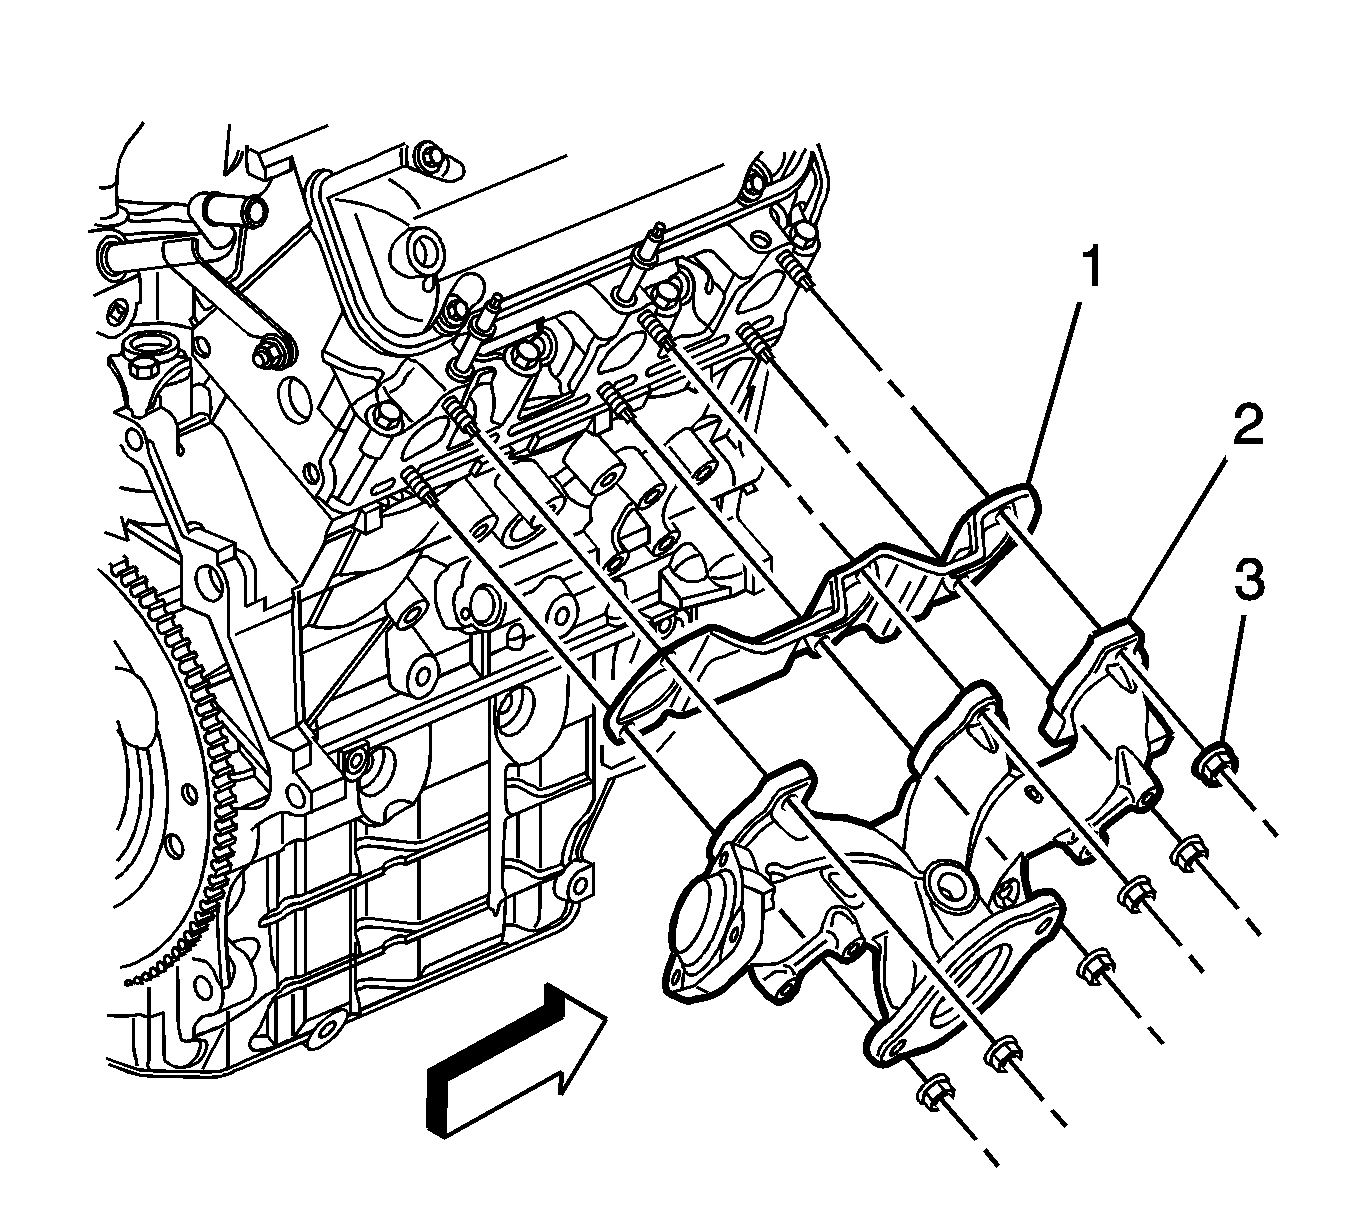
- Remove the exhaust manifold nuts (3).
- Remove the exhaust manifold (2).
- Remove the exhaust manifold gasket (1).
- If you are REPLACING the engine right side exhaust manifold, remove the heated oxygen sensor (HO2S). Refer to Heated Oxygen Sensor 1 Replacement .
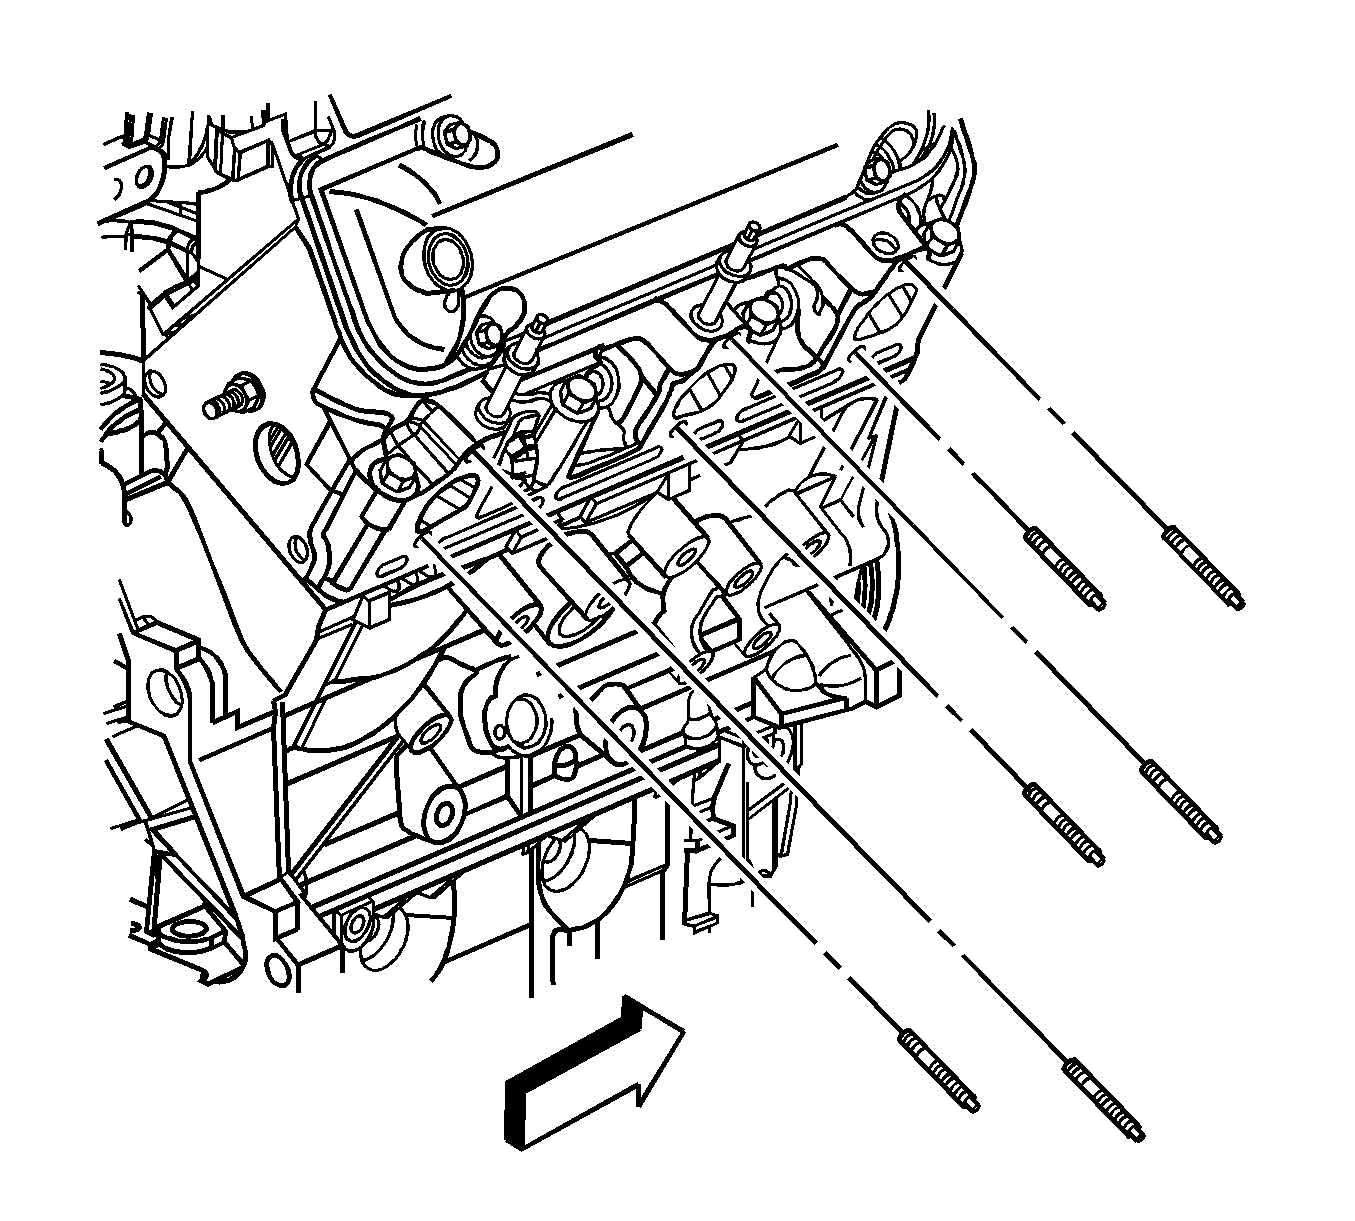
- If necessary, remove the exhaust manifold studs.
- Clean the exhaust manifold and the cylinder head exhaust manifold sealing surfaces.
Installation Procedure
- If previously removed, install the exhaust manifold studs.
- If removed, install the HO2S. Refer to Heated Oxygen Sensor 1 Replacement .
- Install the exhaust manifold gasket (1).
- Install the exhaust manifold (2).
- Install the exhaust manifold nuts (3).
- Install the exhaust manifold upper heat shield (1).
- Install the exhaust manifold lower heat shield (2).
- Install the exhaust manifold heat shield bolts (3).
- Install the catalytic converter (4) to the exhaust manifold and install the nuts (3). Refer to Catalytic Converter Replacement .
- Lower the vehicle.
- Install the exhaust crossover pipe nuts to the right side exhaust manifold. Refer to Exhaust Crossover Pipe Replacement .
- Connect the HO2S electrical connector.
Notice: Refer to Fastener Notice in the Preface section.

Tighten
Tighten the studs to 18 N·m (13 lb ft).

Tighten
Tighten the nuts to 16 N·m (12 lb ft).

Tighten
Tighten the bolts to 10 N·m (89 lb in).

Exhaust Manifold Replacement - Right Side LY7
Removal Procedure
Caution: Refer to Exhaust Service Caution in the Preface section.
Caution: Refer to Protective Goggles and Glove Caution in the Preface section.
- Remove the exhaust manifold heat shield. Refer to Exhaust Manifold Heat Shield Replacement - Right Side .
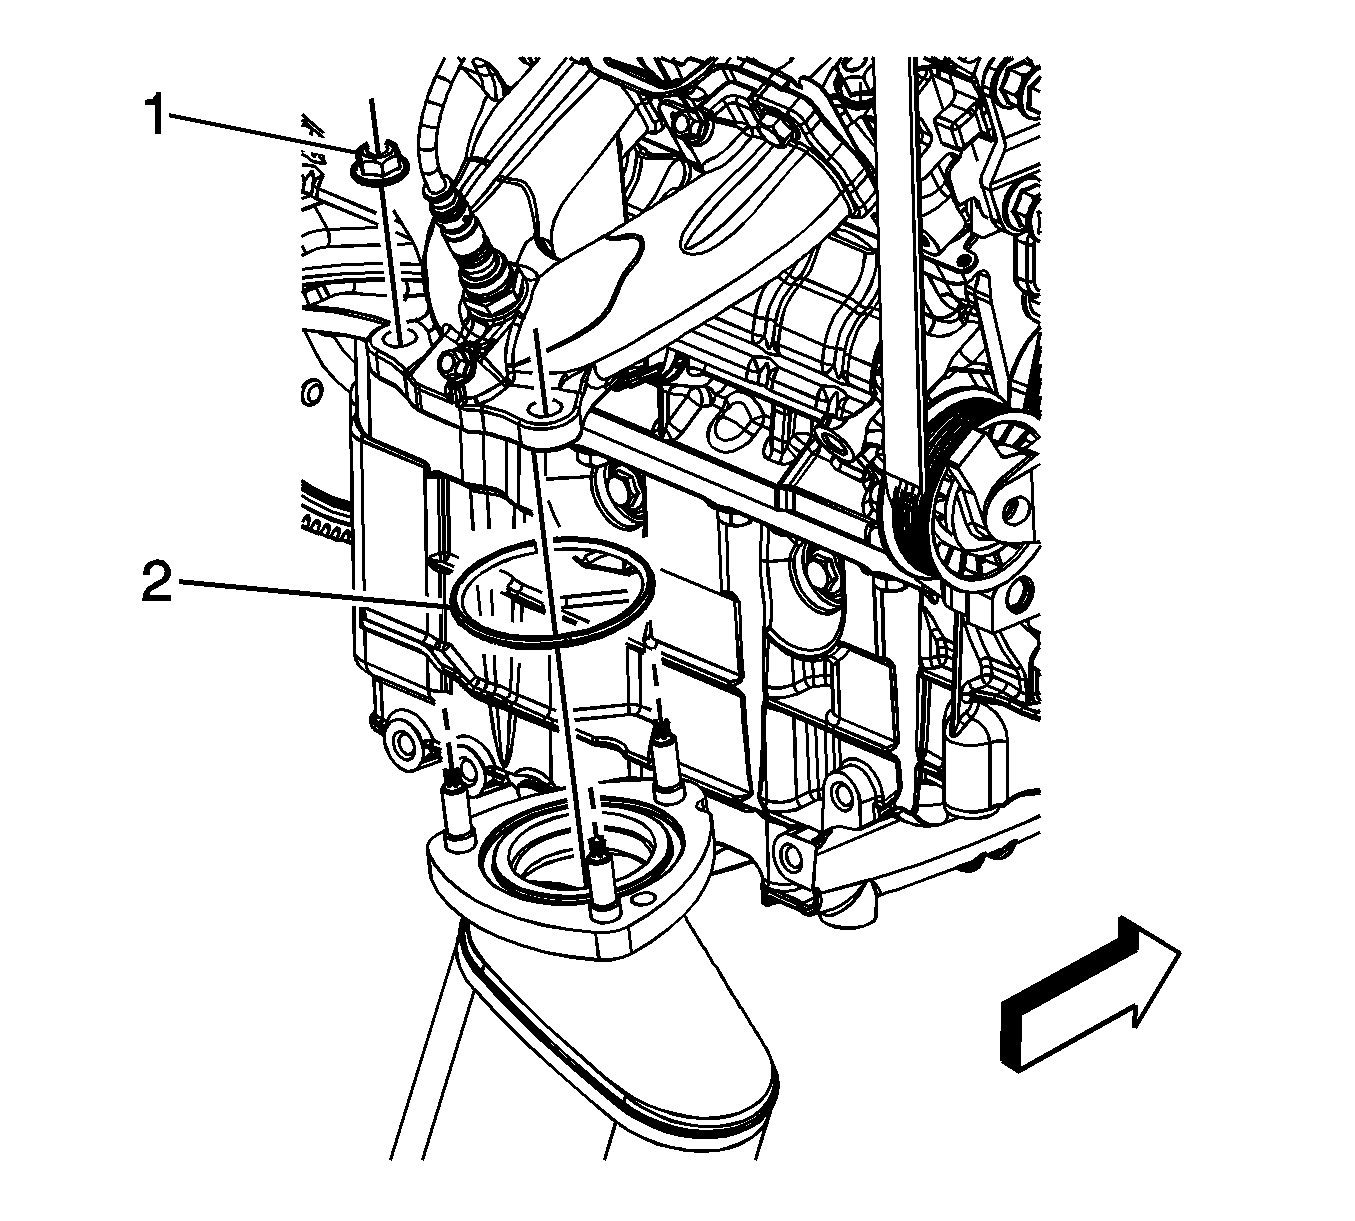
- Remove the catalytic converter to exhaust manifold nuts (1).
- Remove the right catalytic converter. Refer to Catalytic Converter Replacement - Right Side .
- Remove the exhaust manifold bolts.
- Remove the exhaust manifold and gasket out from vehicle. Discard the gasket.
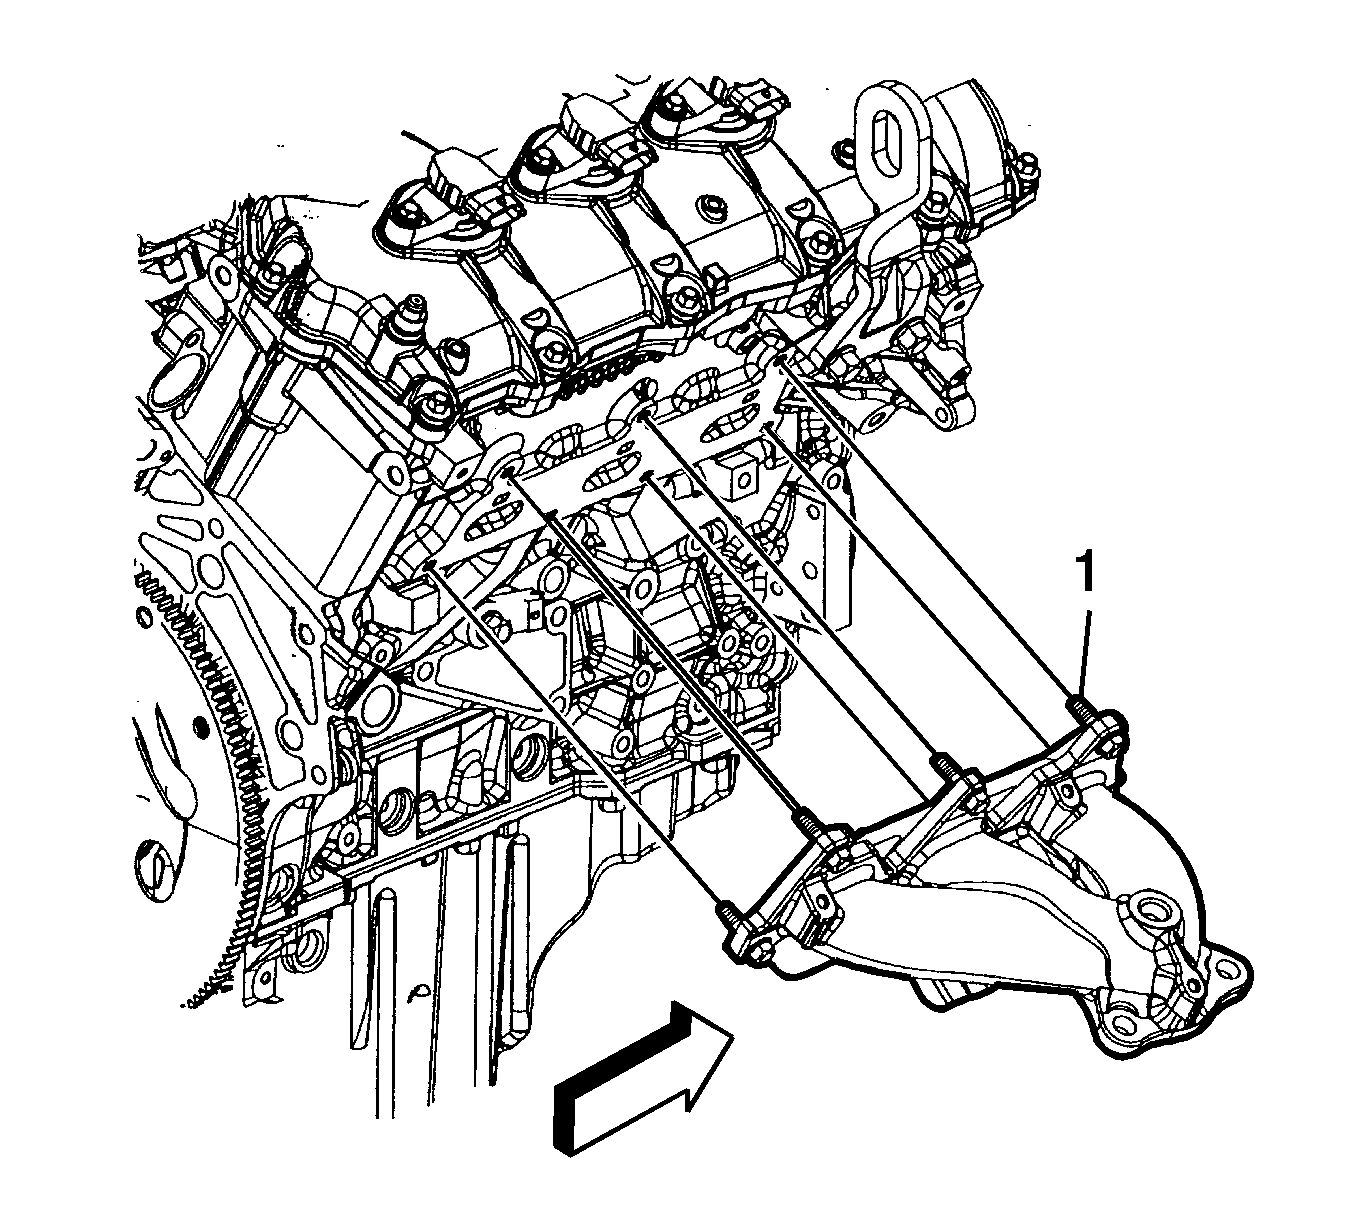
Important: Do not reuse the gasket.
Installation Procedure
- Install one exhaust manifold bolt to the exhaust manifold.
- Install the NEW exhaust manifold gasket onto the cylinder head and bolt.
- Install the exhaust manifold (with gasket) to the catalytic converter and the cylinder head.
- Install the exhaust manifold bolts.
- Install the right catalytic converter. Refer to Catalytic Converter Replacement - Right Side .
- Install the catalytic converter nuts.
- Install the exhaust manifold heat shield. Refer to Exhaust Manifold Heat Shield Replacement - Right Side .

Notice: Refer to Fastener Notice in the Preface section.
Tighten
Tighten the bolts to 20 N·m (15 lb ft).

Tighten
Tighten the nuts to 50 N·m (37 lb ft).
