Tools Required
| • | J 6627-A Tie Rod Puller |
| • | J 24319-B Steering Linkage and Tie Rod Puller |
Removal Procedure
- Raise and support the vehicle. Refer to Lifting and Jacking the Vehicle .
- Remove the front tire and wheel assembly. Refer to Tire and Wheel Removal and Installation .
- If the vehicle has ABS, remove the ABS wheel speed sensor from the steering knuckle. Position the sensor to the side. Refer to Front Wheel Speed Sensor Replacement .
- Unstake the front wheel drive shaft nut.
- Remove the drive shaft nut from the drive axle while an assistant presses the brake pedal.
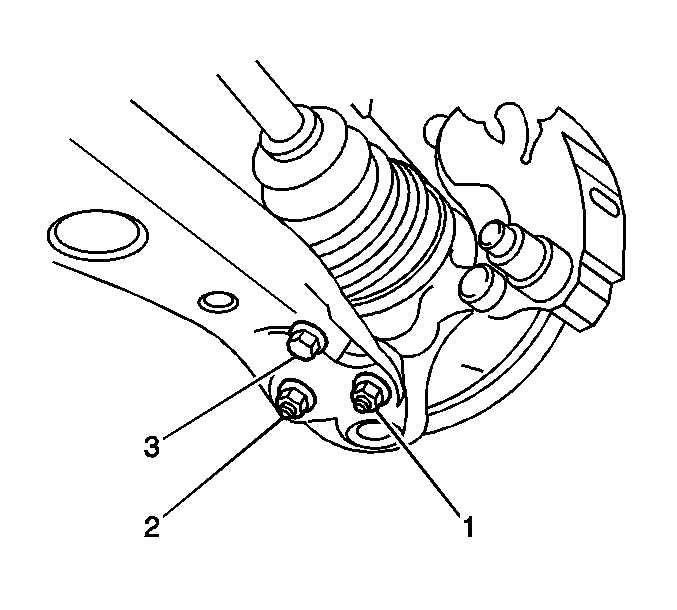
- Remove the 2 nuts (1, 2) and the bolt (3) from the lower control arm.
- Remove the brake rotor. Refer to Front Brake Rotor Replacement .
- Loosen the nuts on the lower side of the strut assembly. Do not remove the bolts.
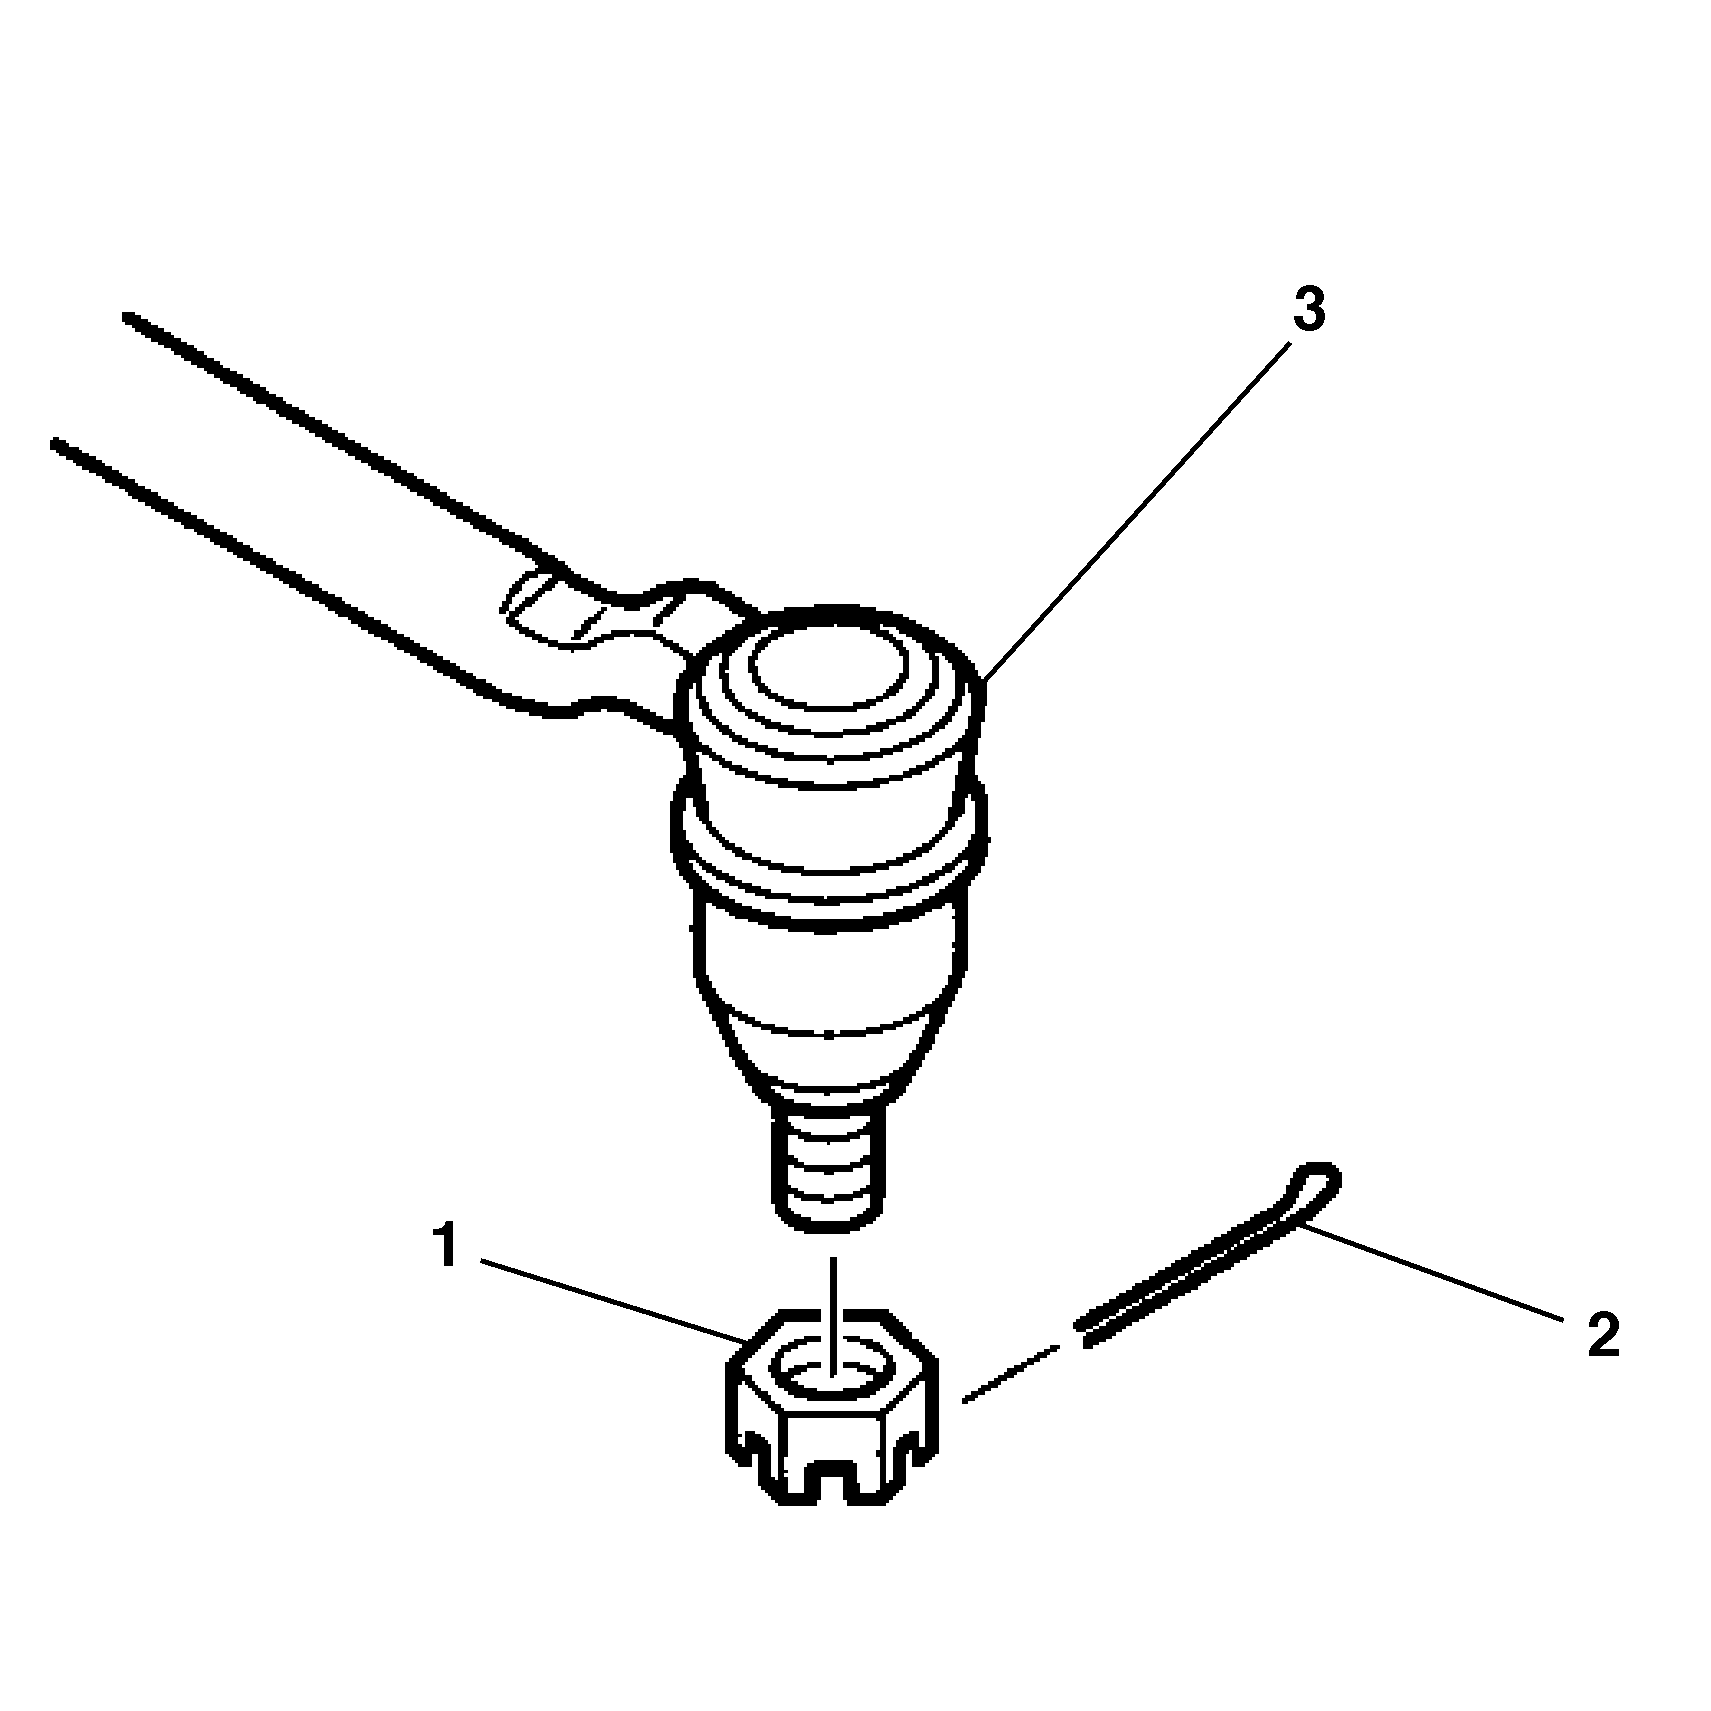
- Remove the outer tie rod cotter pin (2).
- Remove the outer tie rod nut (1).
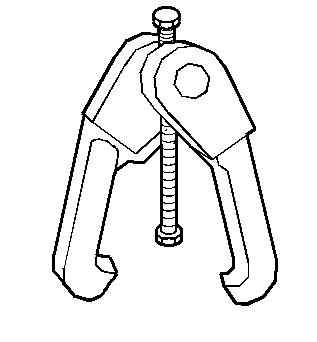
- Use the J 6627-A , or equivalent, in order to disconnect the outer tie rod from the knuckle.
- Remove the 2 nuts and the 2 bolts from lower side of the strut assembly.
- Remove the steering knuckle from the strut.
- Remove the front wheel bearing and the disc brake shield. Refer to Front Wheel Hub, Bearing, and Seal Replacement .
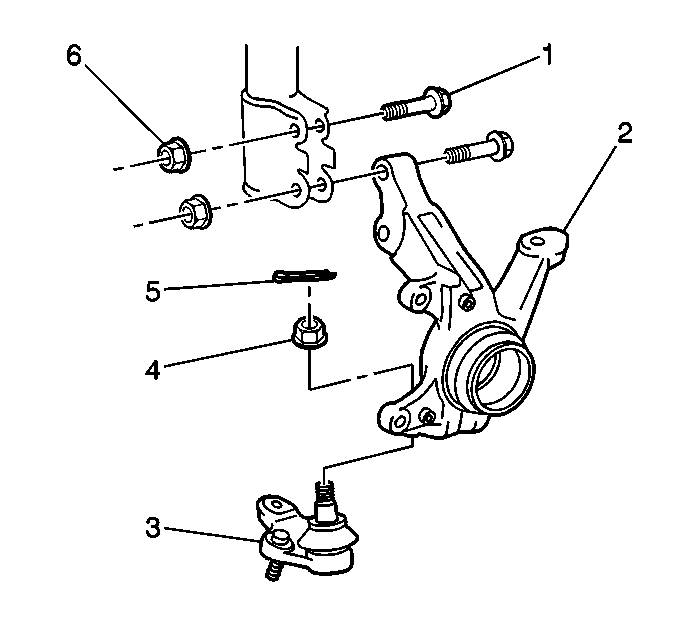
- Remove the steering knuckle cotter pin (5) and the ball stud nut (4).
- Use the J 24319-B , or equivalent, in order to remove the ball joint (3) from the steering knuckle.
Important: You may remove the following components as an assembly:
• The steering knuckle • The lower ball joint • The front hub • The wheel studs • The front wheel bearing • The disc brake shield
Important: If you are replacing the steering knuckle, continue with this procedure.
Installation Procedure
- Install the ball joint (3) and the nut (4) to the steering knuckle (2).
- Install a NEW cotter pin (5) to the ball joint stud. Bend the cotter pin ends in order to retain the nut.
- Install the front wheel bearing and the disc brake shield to the steering knuckle. Refer to Front Wheel Hub, Bearing, and Seal Replacement .
- Install the following components to the lower side of the strut assembly:
- Install the outer tie rod and the nut to the steering knuckle.
- Install a NEW cotter pin to the tie rod ball joint stud. Bend the cotter pin ends in order to retain the nut.
- Install the front brake rotor. Refer to Front Brake Rotor Replacement .
- Install a NEW drive shaft nut while an assistant applies the brakes.
- Stake the drive shaft nut into the slot on the wheel drive shaft.
- Install the bolt (3) and the 2 nuts (1, 2) to the control arm.
- Tighten the nuts and the bolts on the lower side of the strut assembly.
- If the vehicle has ABS, install the ABS wheel speed sensor to the knuckle. Refer to Front Wheel Speed Sensor Replacement .
- Install the tire and wheel assembly. Refer to Tire and Wheel Removal and Installation .
- Lower the vehicle.
- Measure the front wheel alignment. Adjust as necessary. Refer to Wheel Alignment Measurement .
Notice: Refer to Fastener Notice in the Preface section.
Important: Do not loosen the nut in order to insert the cotter pin.
Tighten
Tighten the nut to 103 N·m (76.0 lb ft). Tighten the nut up to 1/6 additional turn in order to insert the cotter pin.
Important: Do not tighten the nuts or the bolts.
| • | The steering knuckle |
| • | The 2 bolts |
| • | The 2 nuts |
Important: Do not loosen the nut in order to insert the cotter pin.
Tighten
Tighten the outer tie rod nut to 49 N·m (36 lb ft). Tighten the nut up to 1/6 additional turn in order to insert the cotter pin.
Tighten
Tighten the nut to 216 N·m (159 lb ft).
Tighten
Tighten the bolt and the 2 nuts to 89 N·m (65.6 lb ft).
Tighten
Tighten the nuts and bolts to 220 N·m (162.3 lb ft).
