For 1990-2009 cars only
Removal Procedure
- Raise and suitably support the vehicle. Refer to Lifting and Jacking the Vehicle in General Information.
- Remove the flywheel inspection cover from the transaxle.
- Remove the starter assembly from the engine. Refer to Starter Motor Replacement in Engine Electrical.
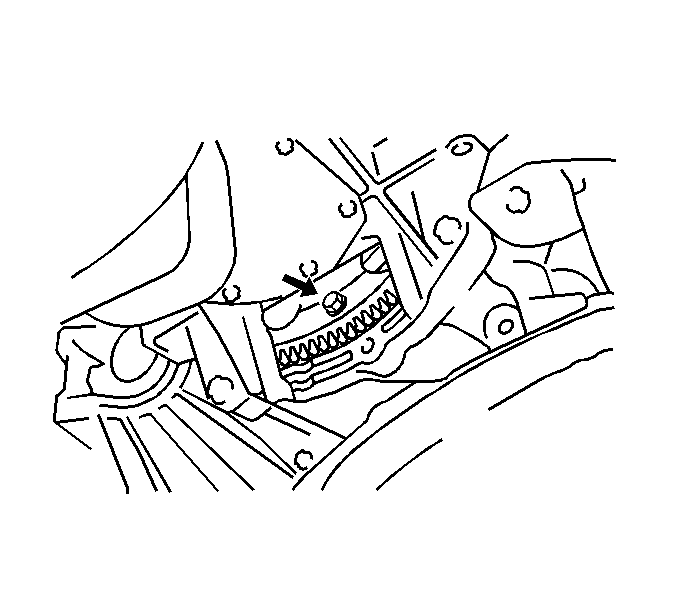
- Remove the 6 flywheel-to-torque converter bolts.
- Remove the transaxle drain plug and the oil.
- Remove the engine and transaxle as an assembly from the vehicle. Refer to Engine Replacement in Engine Mechanical - 1.8L (LV6).
- Remove the transfer case assembly from the transaxle. Refer to Transfer Case Replacement in Transfer Case - Vibe.
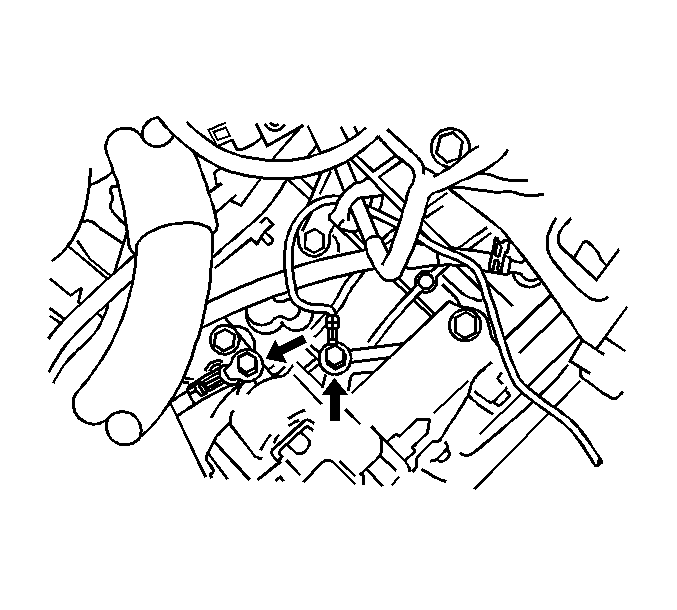
- Remove the 2 bolts and ground cables from the transaxle.
- Disconnect the 3 transaxle wiring harness connectors from the transaxle.
- Disconnect the breather hose from the transaxle.
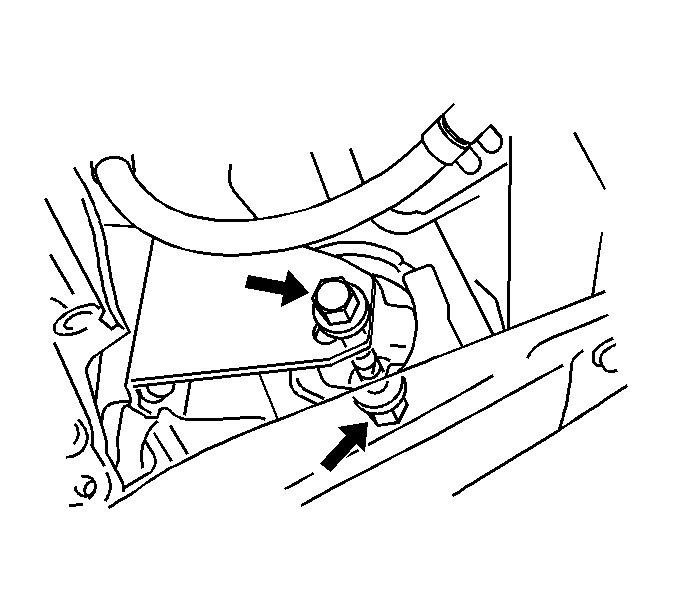
- Remove the front transaxle mount through bolt.
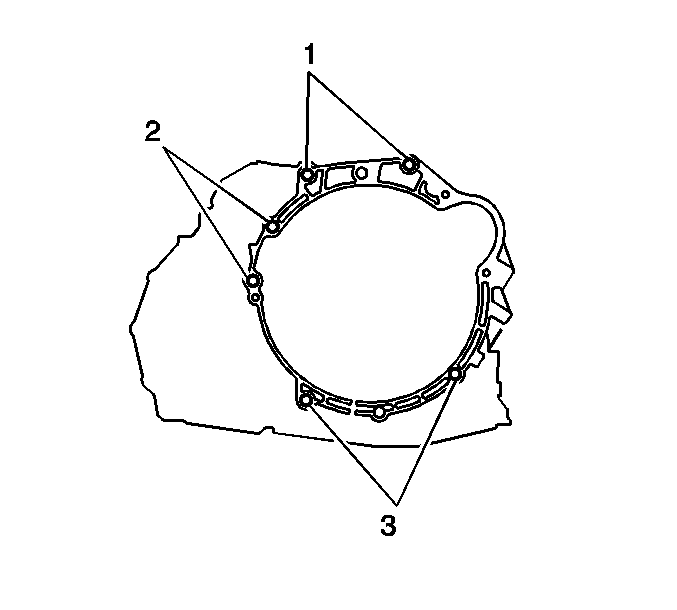
- Remove the 6 transaxle to engine mounting bolts (1,2,3).
- Separate the transaxle from the engine assembly.
- Remove the left transaxle mounting bracket from the transaxle assembly.
- Remove the front transaxle mounting bracket from the transaxle assembly.
Important: Before removing the torque converter bolts, mark the position of the anodized, gold colored, bolt for installation.


Installation Procedure
- Install the front transaxle mounting bracket on the transaxle assembly.
- Install the left transaxle mounting bracket on the transaxle assembly.
- Position the transaxle on the front suspension crossmember.
- Install the 6 transaxle to engine retaining bolts.
- Install the front mount through bolt.
- Install the transfer case assembly on the transaxle. Refer to Transfer Case Replacement in Transfer Case - Vibe.
- Connect the 3 electrical connectors to the transaxle.
- Install the 2 bolts and ground cables to the transaxle.
- Install the engine and transaxle as an assembly in the vehicle. Refer to Engine Replacement in Engine Mechanical - 1.6L (LV6).
- Install the 6 torque converter bolts.
- Install the starter assembly in the vehicle. Refer to Starter Motor Replacement in Engine Electrical.
- Install the flywheel inspection cover
- Install the drain plug with a new gasket.
- Lower the vehicle.
- Fill the transaxle with 2.9 L (3.06 qt) of T-IV (GM Part No. 88900925).
Notice: Refer to Fastener Notice in the Preface section.
Tighten
Tighten the bolt to 64 N·m (47 lb ft).
Tighten
Tighten the bolt to 52 N·m (38 lb ft).

Tighten
| • | Tighten the bolts (1) to 64 N·m (47 lb ft). |
| • | Tighten the bolt (2) to 46 N·m (35 lb ft). |
| • | Tighten the bolts (3) to 23 N·m (17 lb ft). |

Tighten
Tighten the bolt to 52 N·m (38 lb ft).

Tighten
Tighten the bolts to 10 N·m (7 lb ft).

Important: The anodized (gold colored) bolt must be installed first. This bolt is to insure proper alignment for the other 5 bolts.
Tighten
Tighten the bolts to 28 N·m (20 lb ft).
Tighten
Tighten the drain plug to 49 N·m (36 lb ft).
