Special Tools
| • | J 43178 /KM-37088-2A Fuel Line Disconnect Tool |
| • | SA9805E /KM-796-A Fuel Line Separator |
Removal Procedure
Warning: Refer to Gasoline/Gasoline Vapors Warning in the Preface section.
Note:
| • | In the presence of fuel vapors or escaping fuel - observe safety regulations and national legislation. Store drained fuel in a suitable, sealable container. |
| • | The vehicle fuel system is designed in petrol engines as a return-free fuel system. |
- Open the hood.
| • | Disconnect the ground clamp from the negative terminal. |
Warning: Refer to Battery Disconnect Warning in the Preface section.
- Remove the battery.

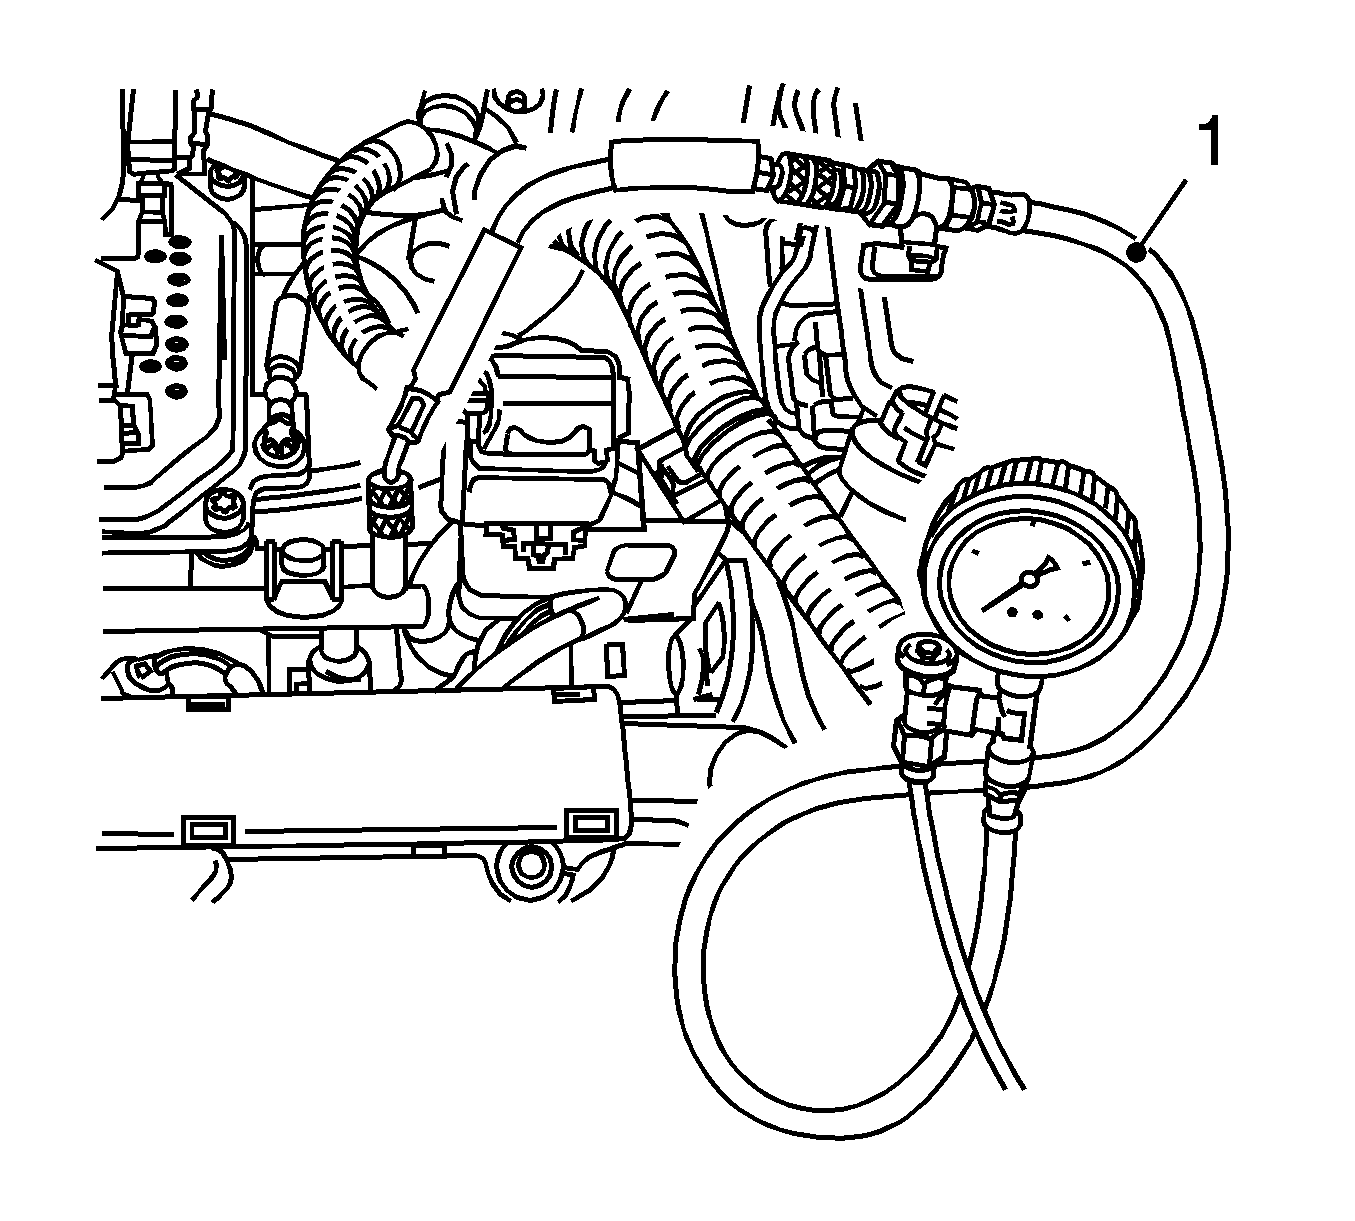
- Reduce the fuel pressure with a pressure tester
J 34730-1A /KM-J-34730-91 (1) via test connection - collect escaping fuel in suitable container - observe safety regulations
and national legislation.

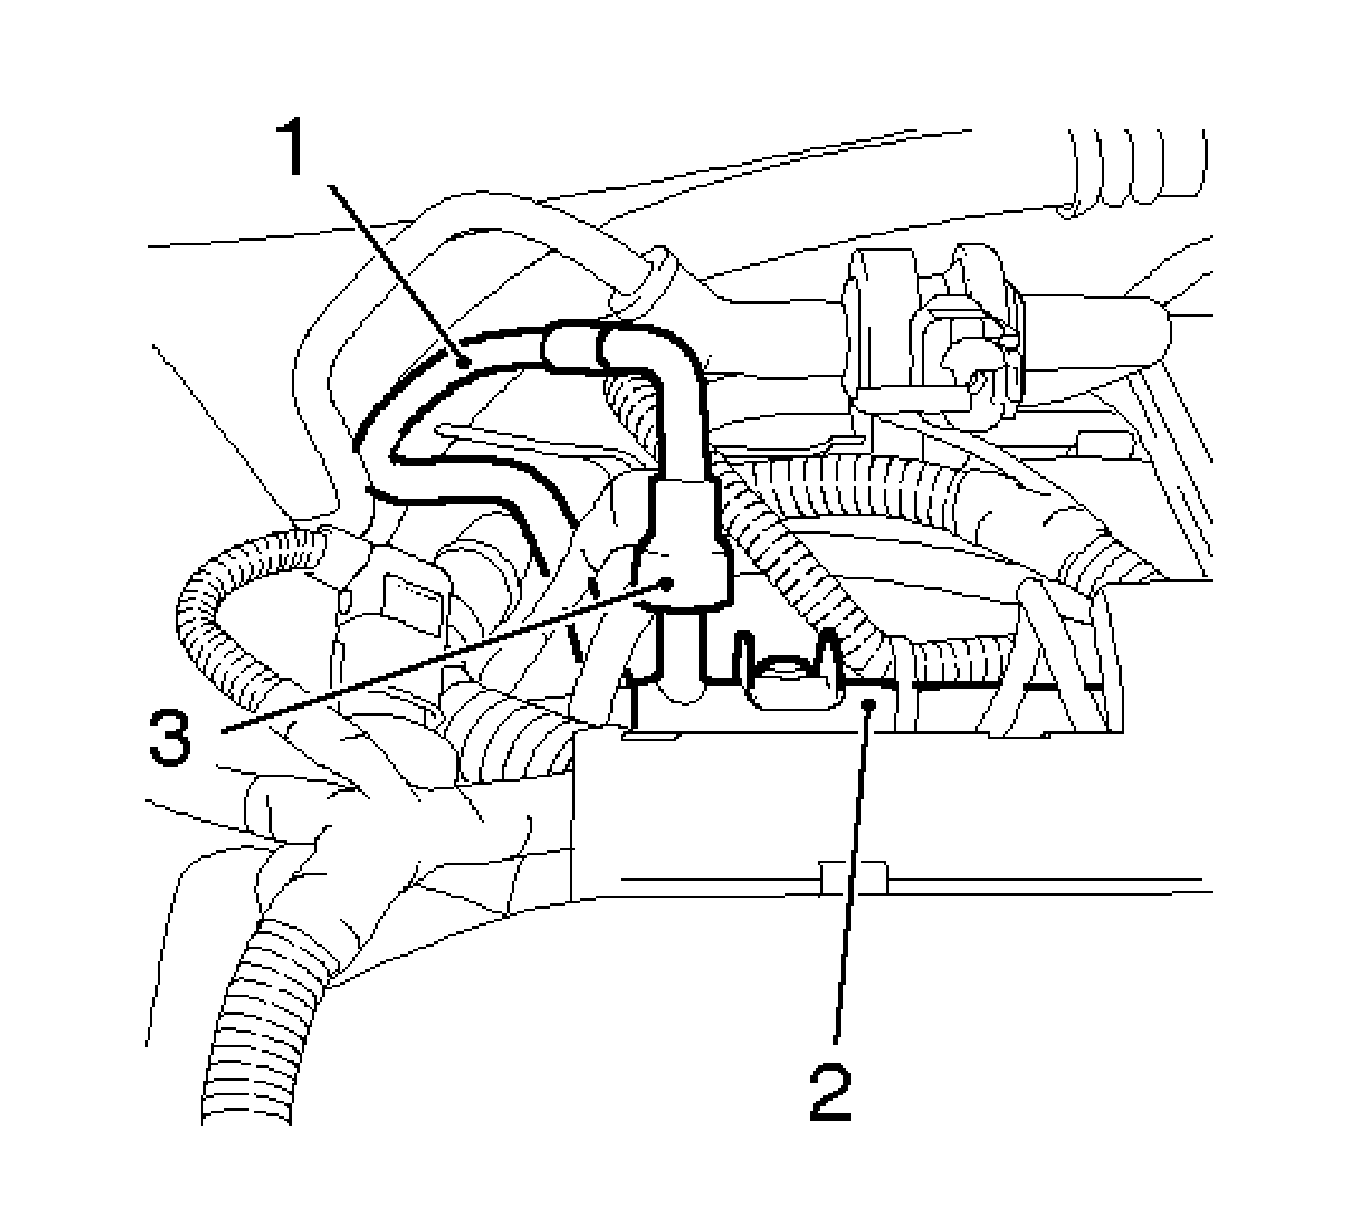
- Remove the fuel supply line (1) from the fuel distributor pipe (2).
| • | Remove the quick-release fitting (3) with
J 43178 /KM-37088-2A. |
| | Seal off with a closure plug
KM-807 . |
| • | Remove the fuel supply line in engine compartment and uncover. |
- Remove the front frame. Refer to
Front Frame Replacement.

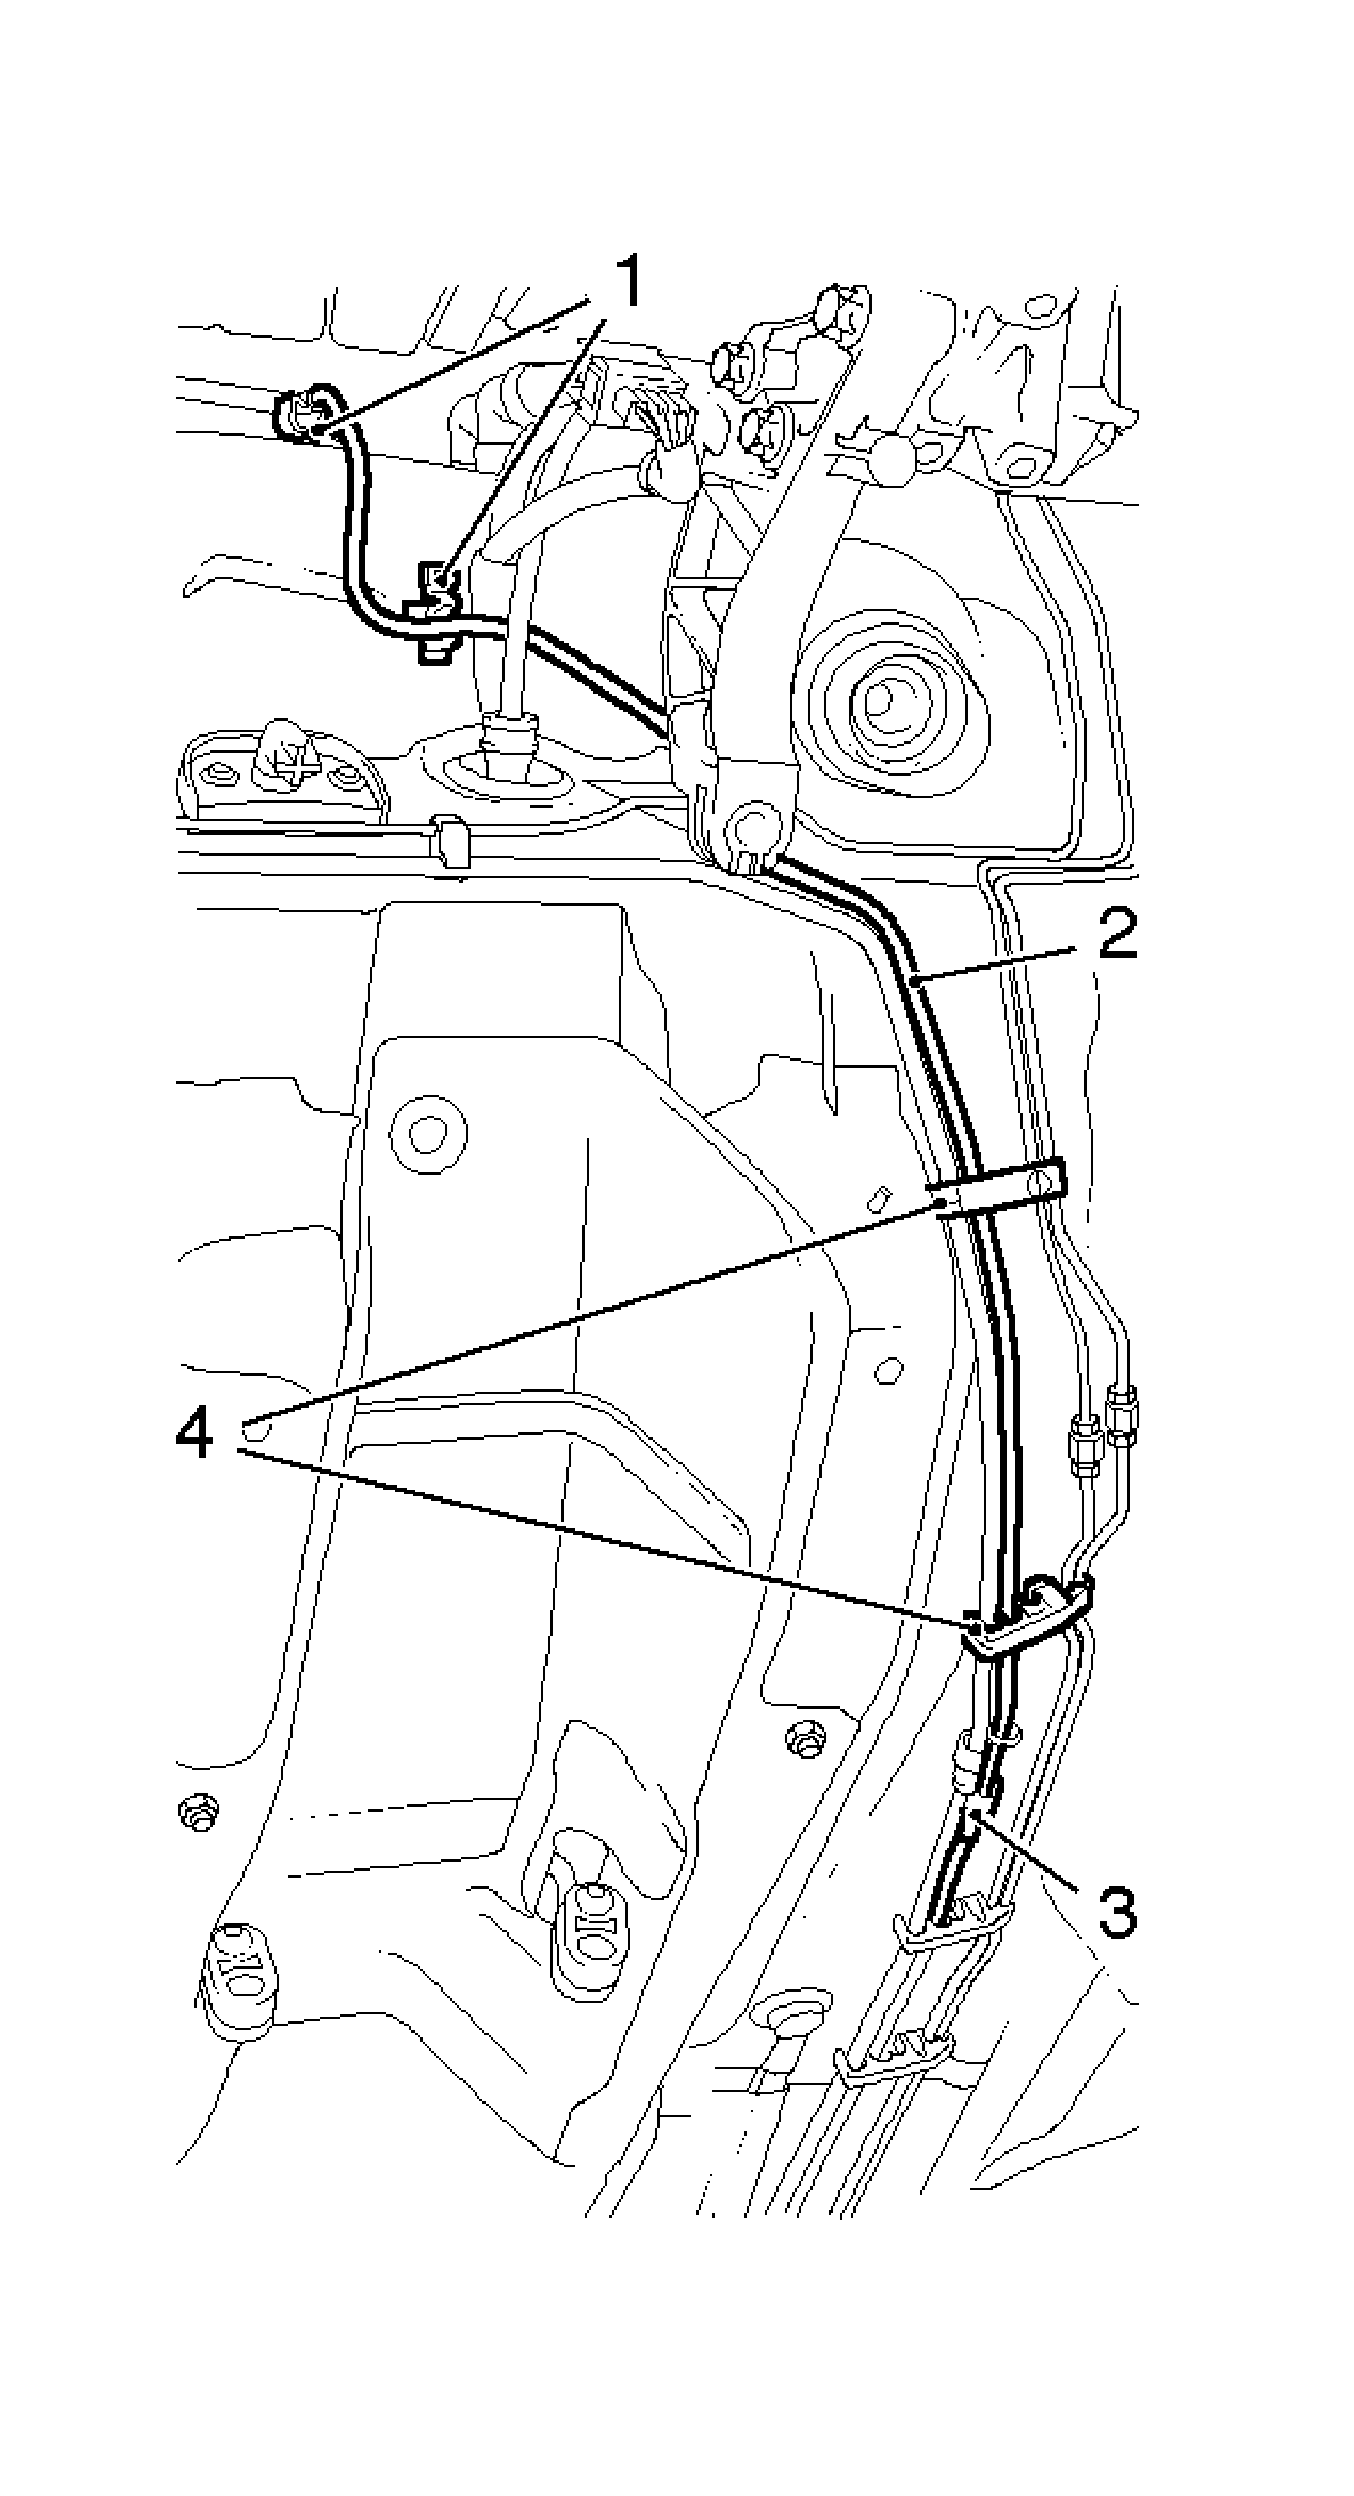
- Remove the 2 fuel line brackets (4) from the underbody.
| • | Remove the fuel supply line (2). |
- Detail the fuel supply line (2) to the quick-release fitting (3) using
SA9805E /KM-796-A.
Seal the fuel line with
KM-807 .
- Remove the fuel pump feed hose from the 2 dash brackets (1).
Installation Procedure
- Insert the fuel pump feed hose and clip into the 2 dash brackets.
- Install the fuel pump feed hose to the intermediate fuel line.
| • | Remove the closure plug
KM-807 . |
Caution: Refer to Fastener Caution in the Preface section.
- Install the 2 fuel line brackets to the underbody.
Install the fuel line.
Tighten
Tighten the 2 bolts.
- Install the front frame. Refer to
Front Frame Replacement.
- Attach the fuel supply line to the fuel rail.
| • | Remove the closure plug
KM-807 . |
| • | Connect the quick-release fitting. |
| • | Move the fuel supply line in the engine compartment and install. |
- Install the battery.
Connect the ground clamp to the negative terminal.
Tighten
Tighten the ground clamp nut to 5 N·m (44 lb in).
- For programming procedures, refer to
Control Module References.
- Close the hood.


