Removal Procedure
- Remove the air inlet screen. Refer to
Air Inlet Screen Replacement.

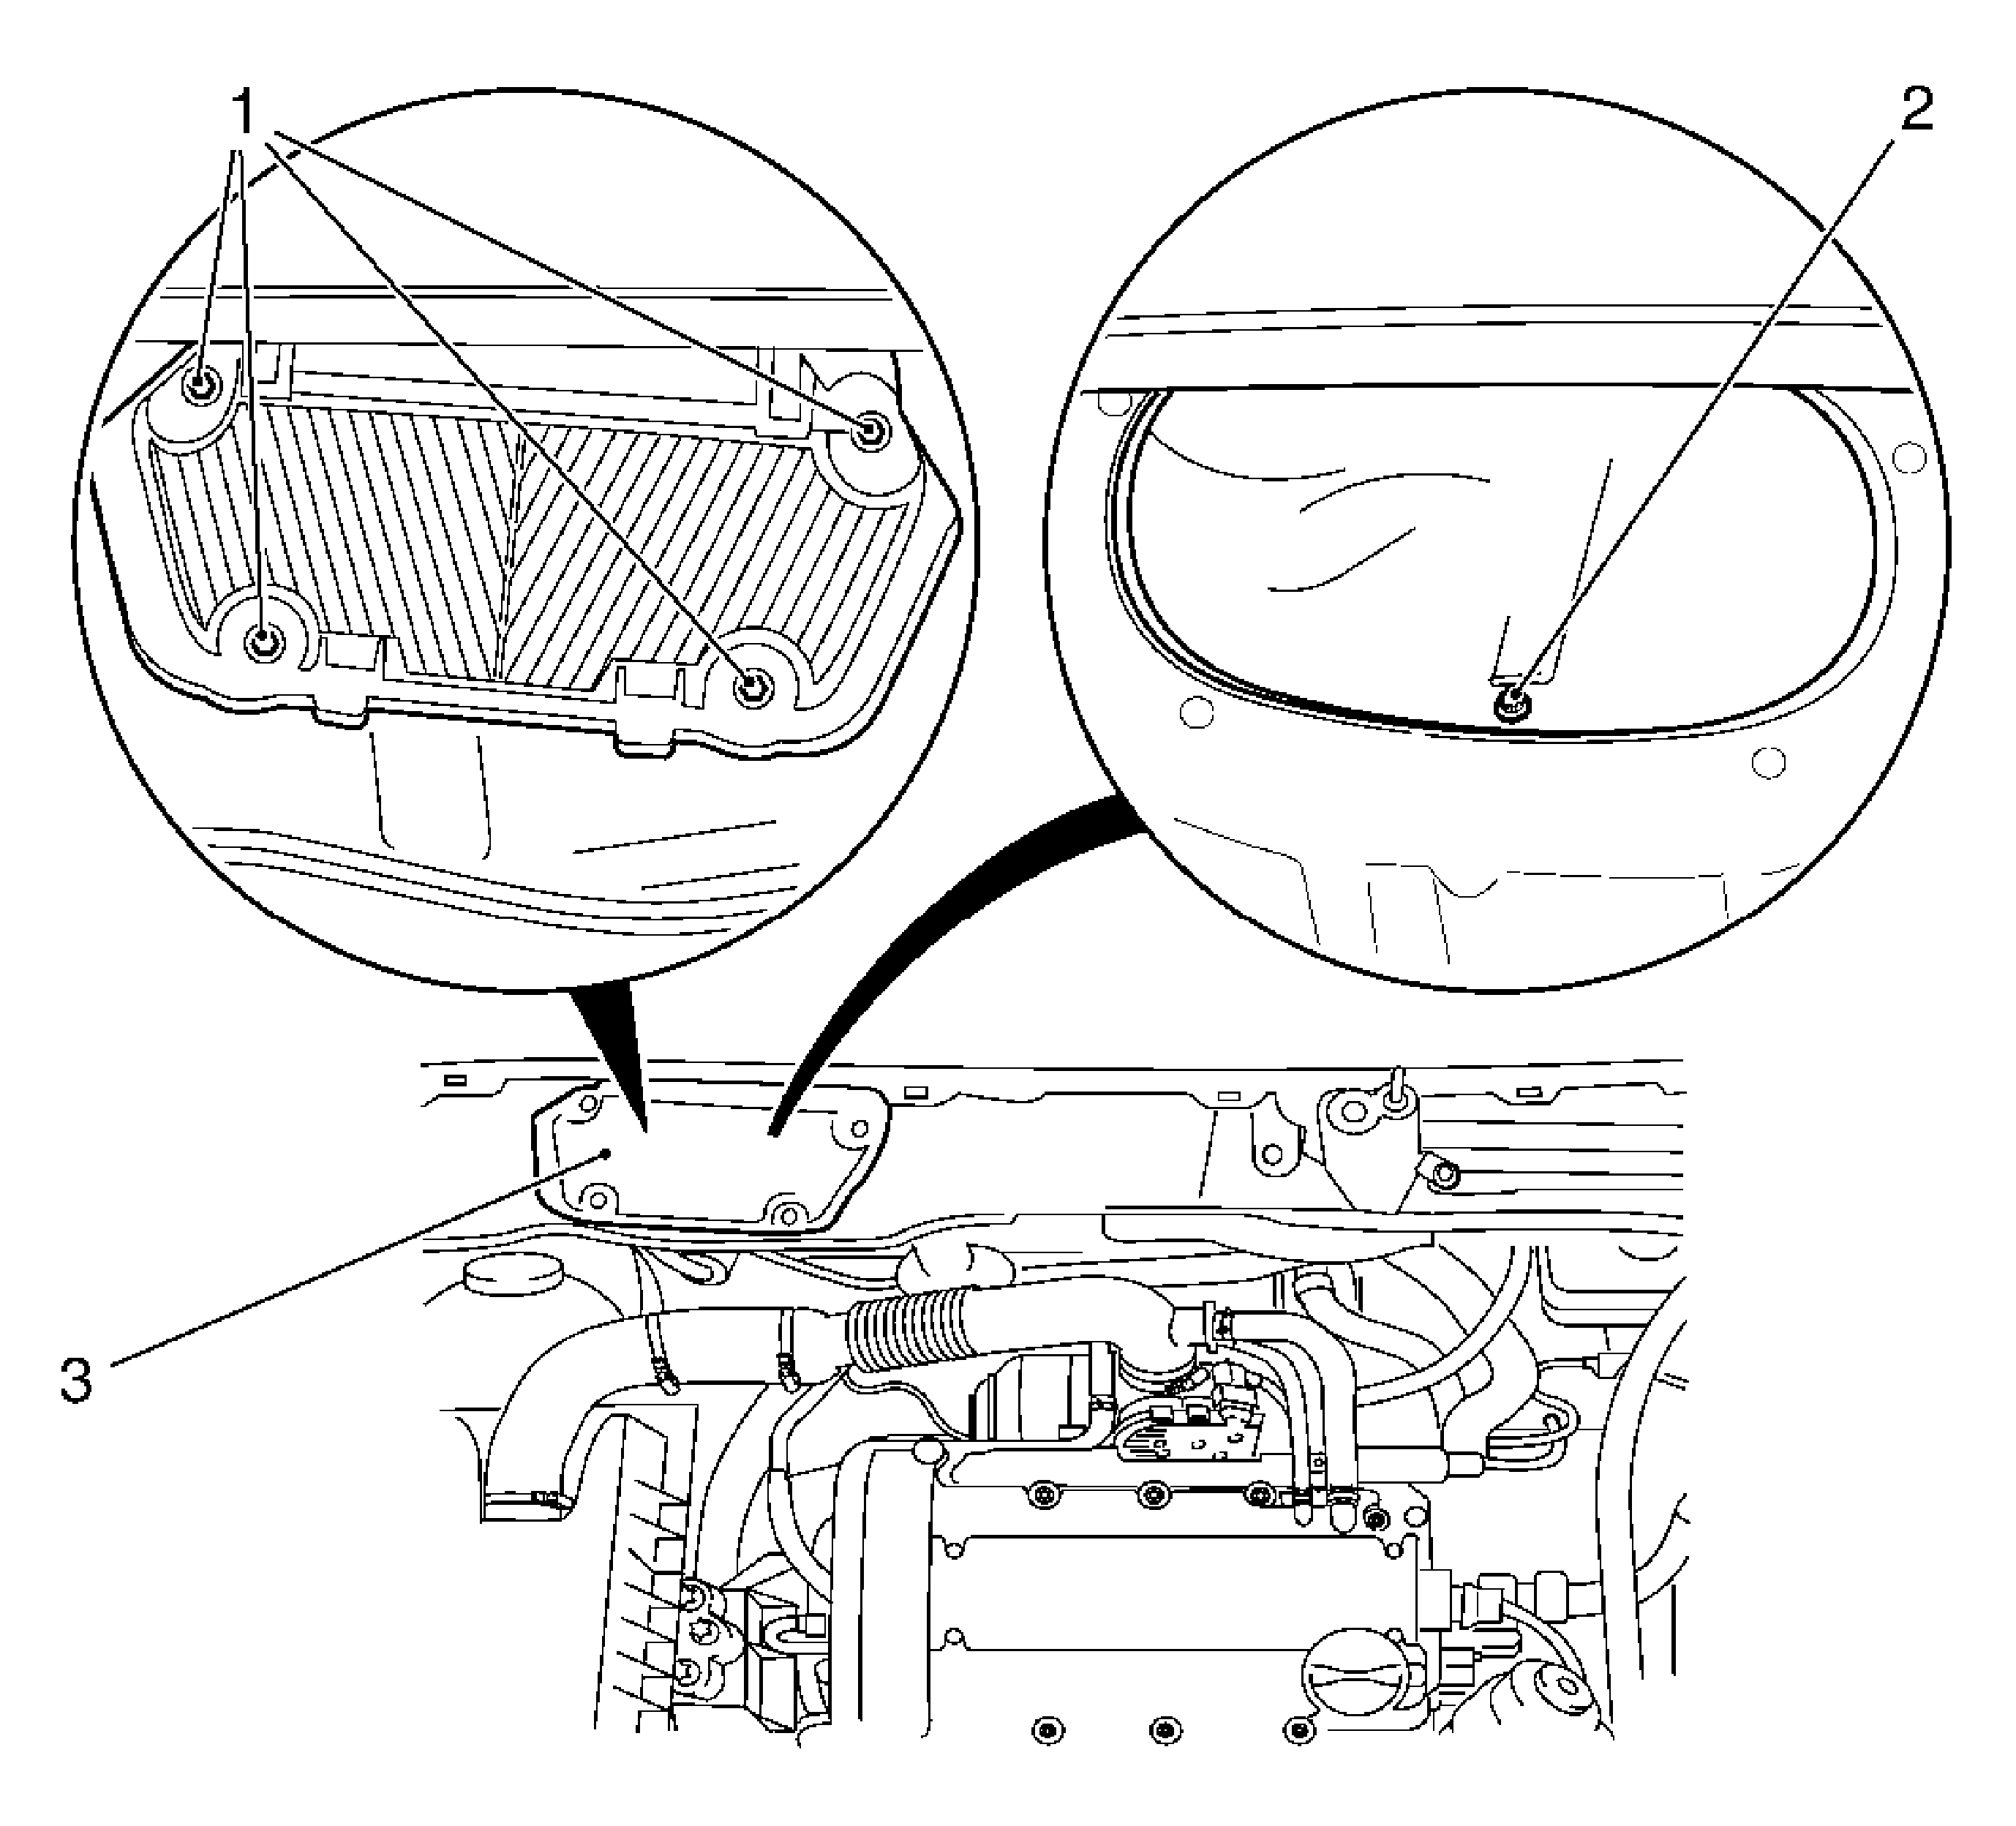
- Remove the recirculating air valve housing, outside.
| 2.1. | Remove the 4 bolts (1). |
| 2.2. | Remove the recirculating air valve housing grille (3). |
| 2.3. | Remove the bolt for recirculating air valve housing (2). |

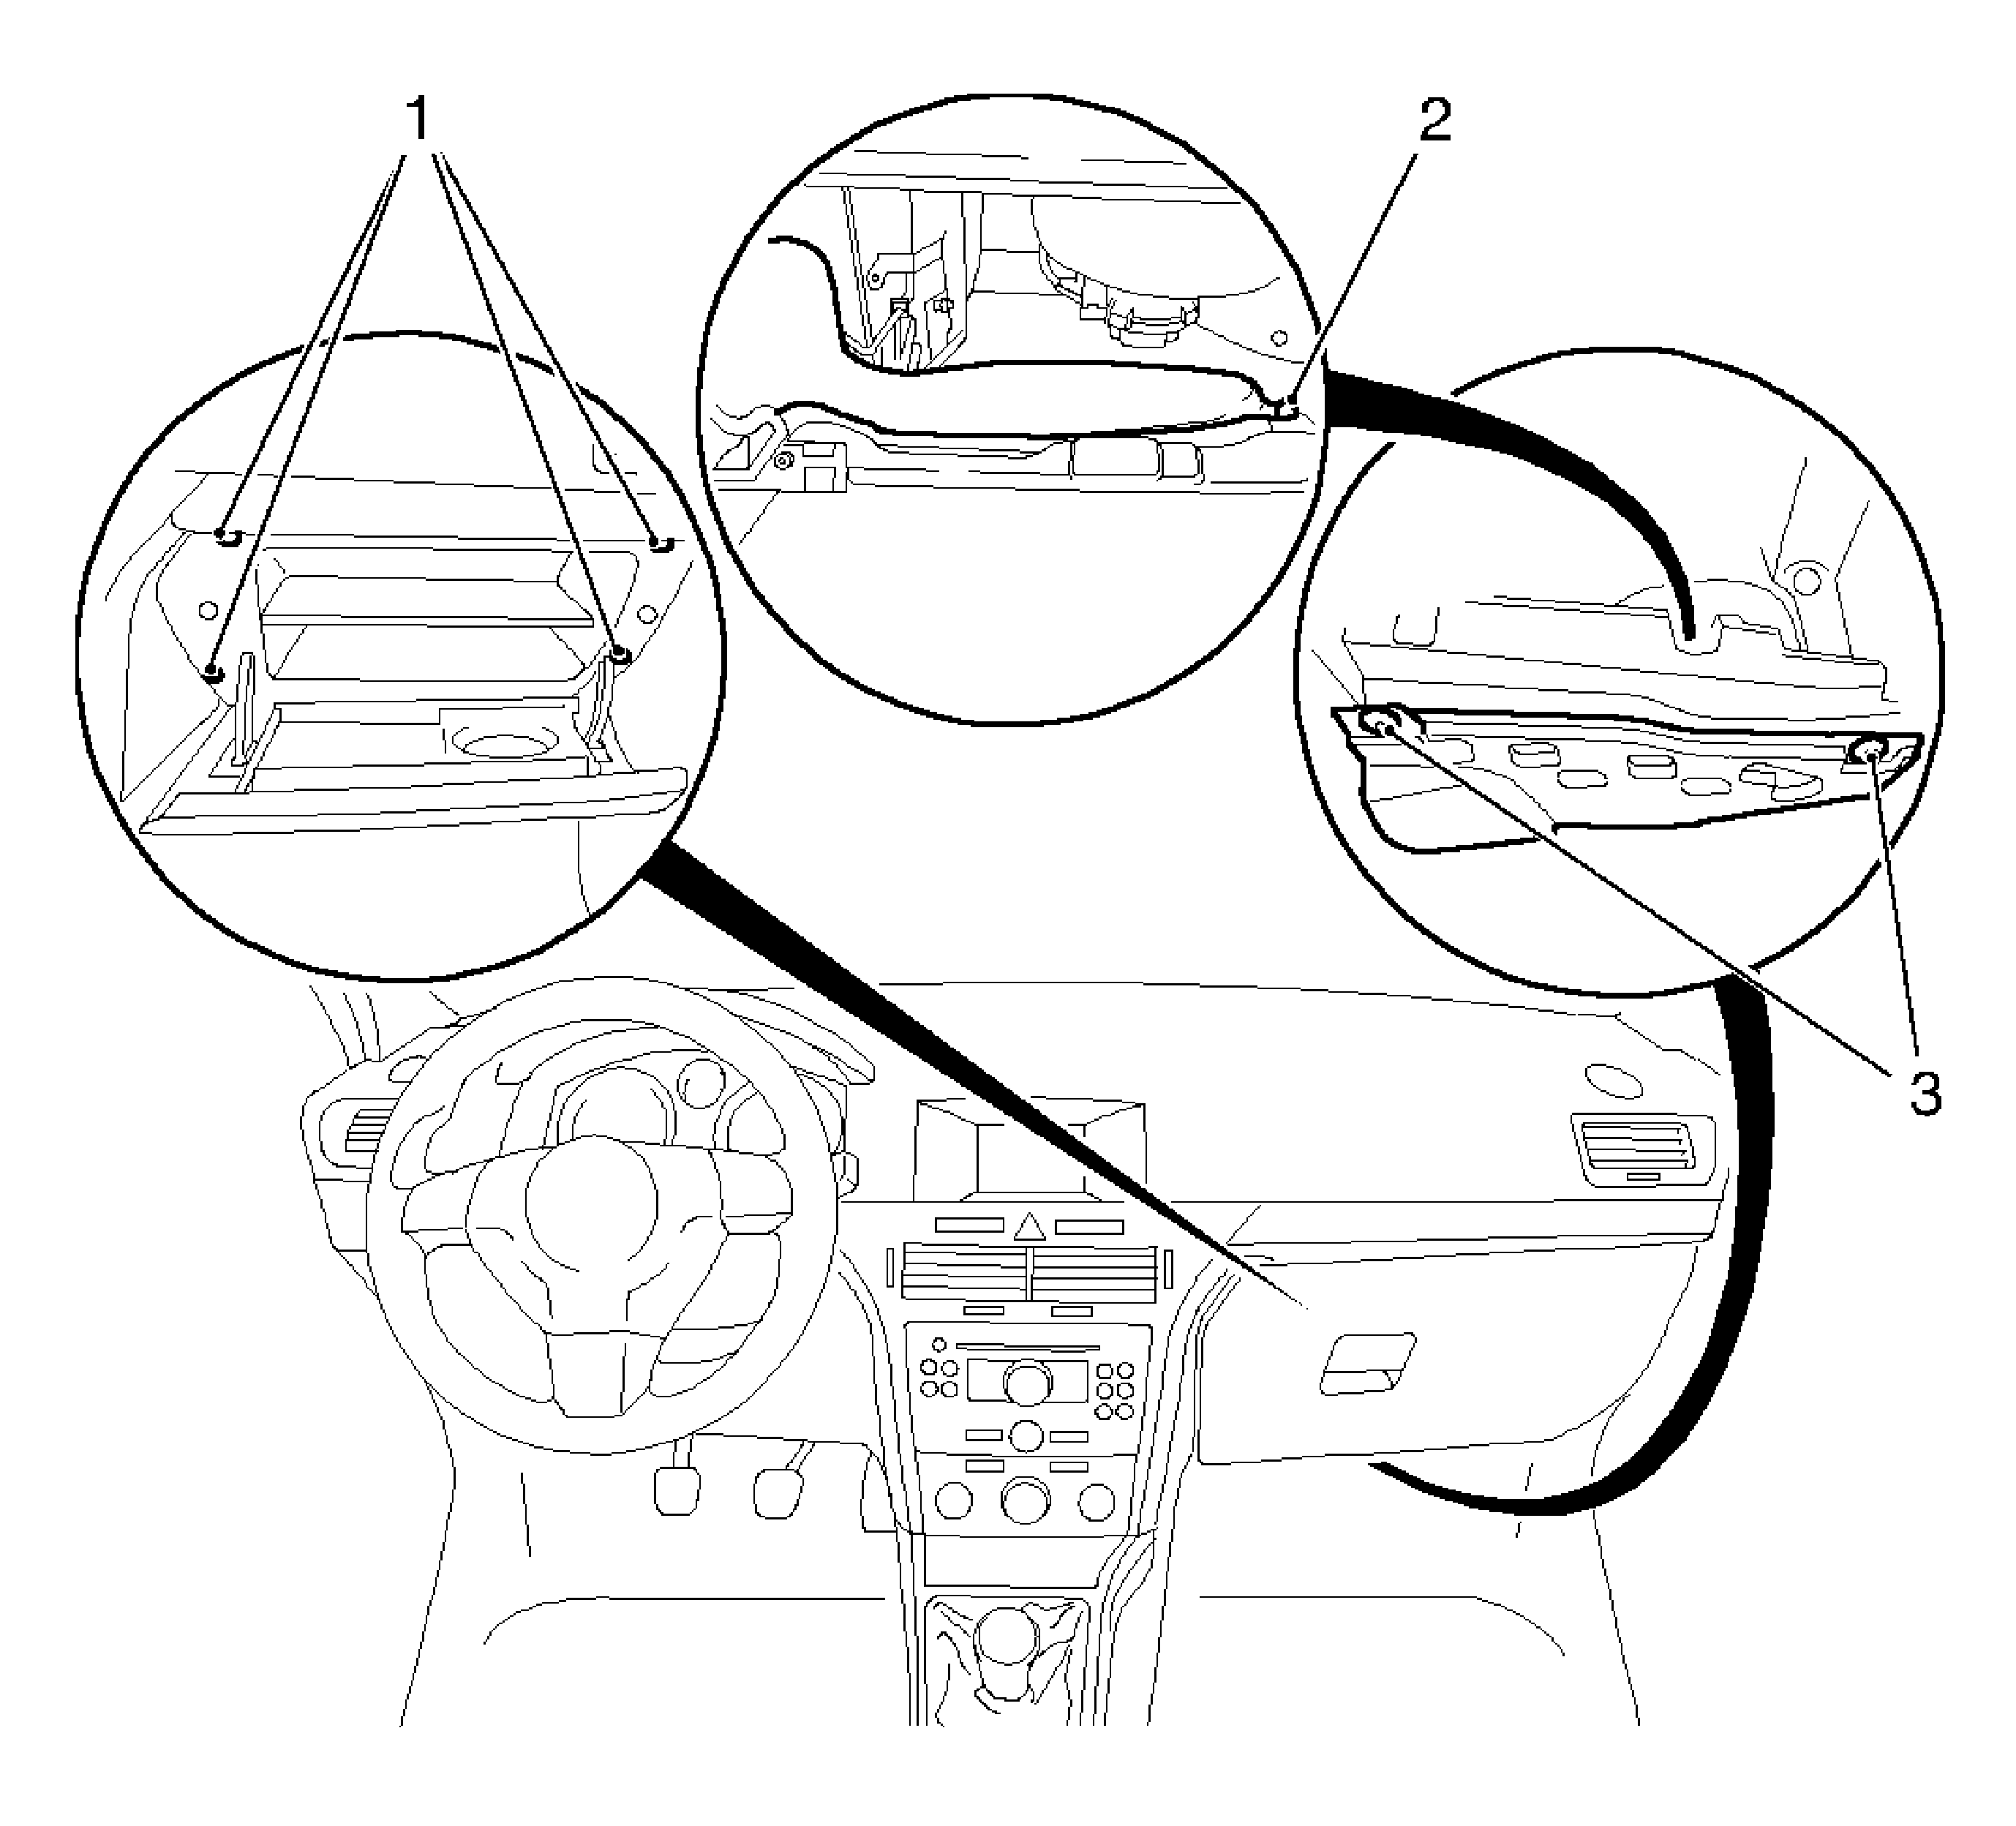
- Remove the instrument panel (I/P) compartment.
| 3.1. | Remove the 4 bolts (1). |
| 3.2. | Disconnect the wiring harness plug. |
- Remove the inner paneling on I/P padding, lower passengers side.
Remove the 2 bolts (3).
- Remove the air duct.
Remove the body-bound rivet (2).

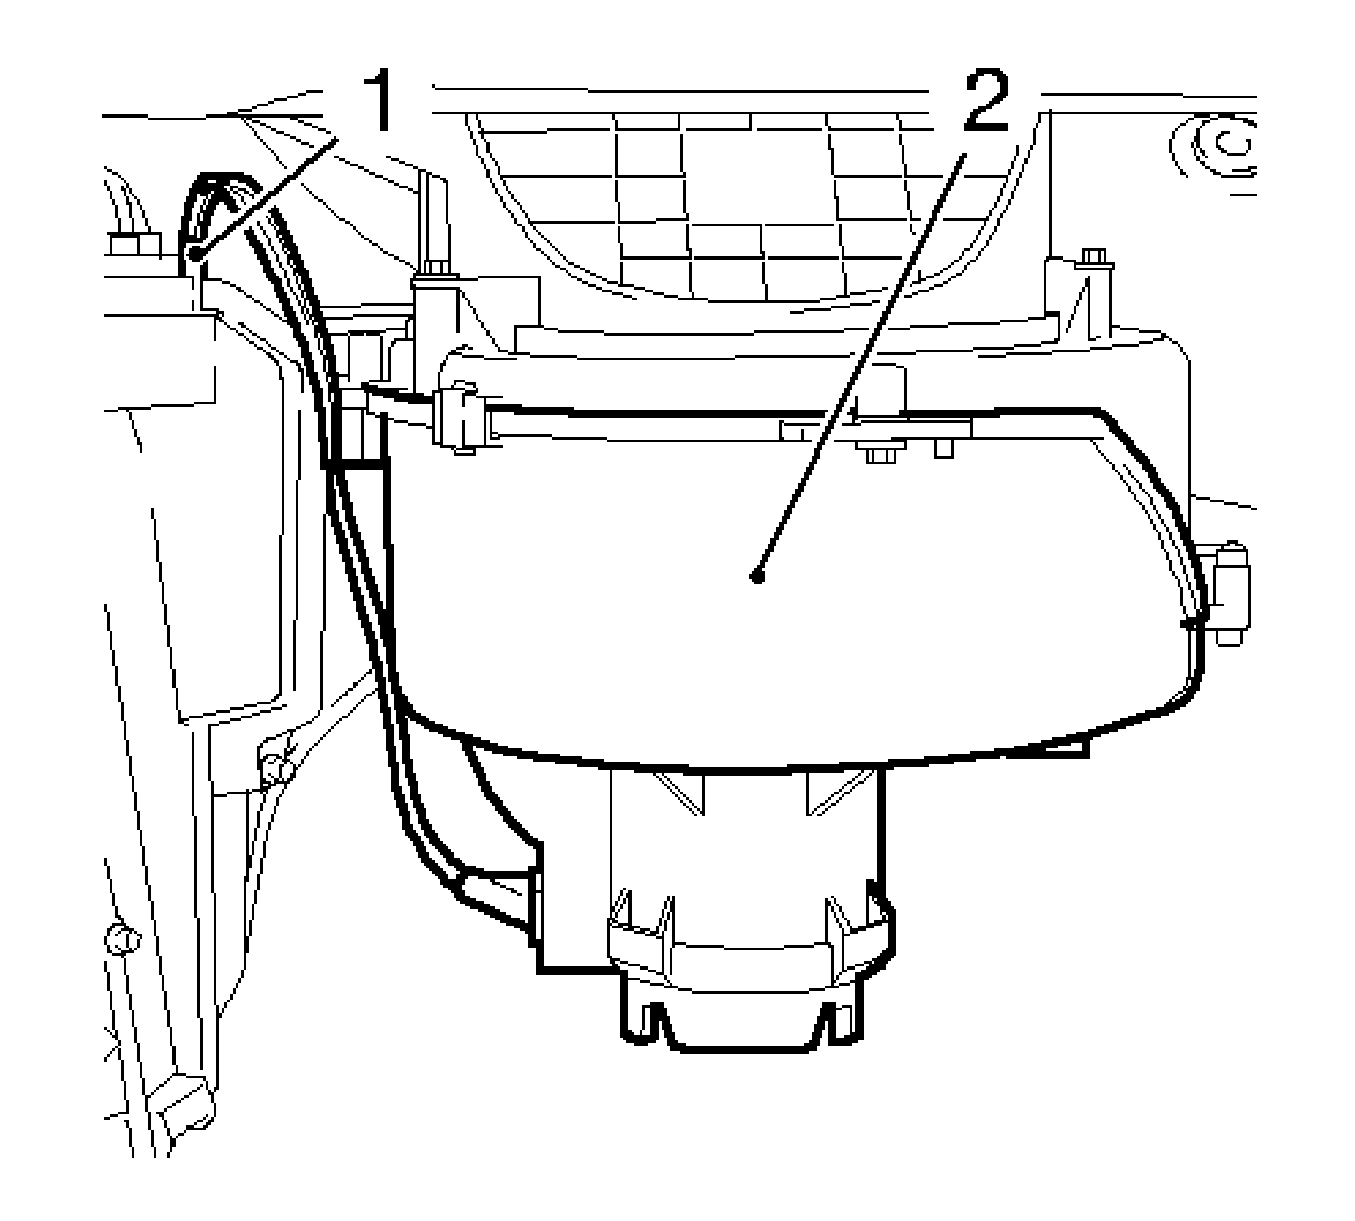
- Remove the heater fan motor (2).
| 6.1. | Disconnect the 2 wiring harness plugs (1) from series resistor. |

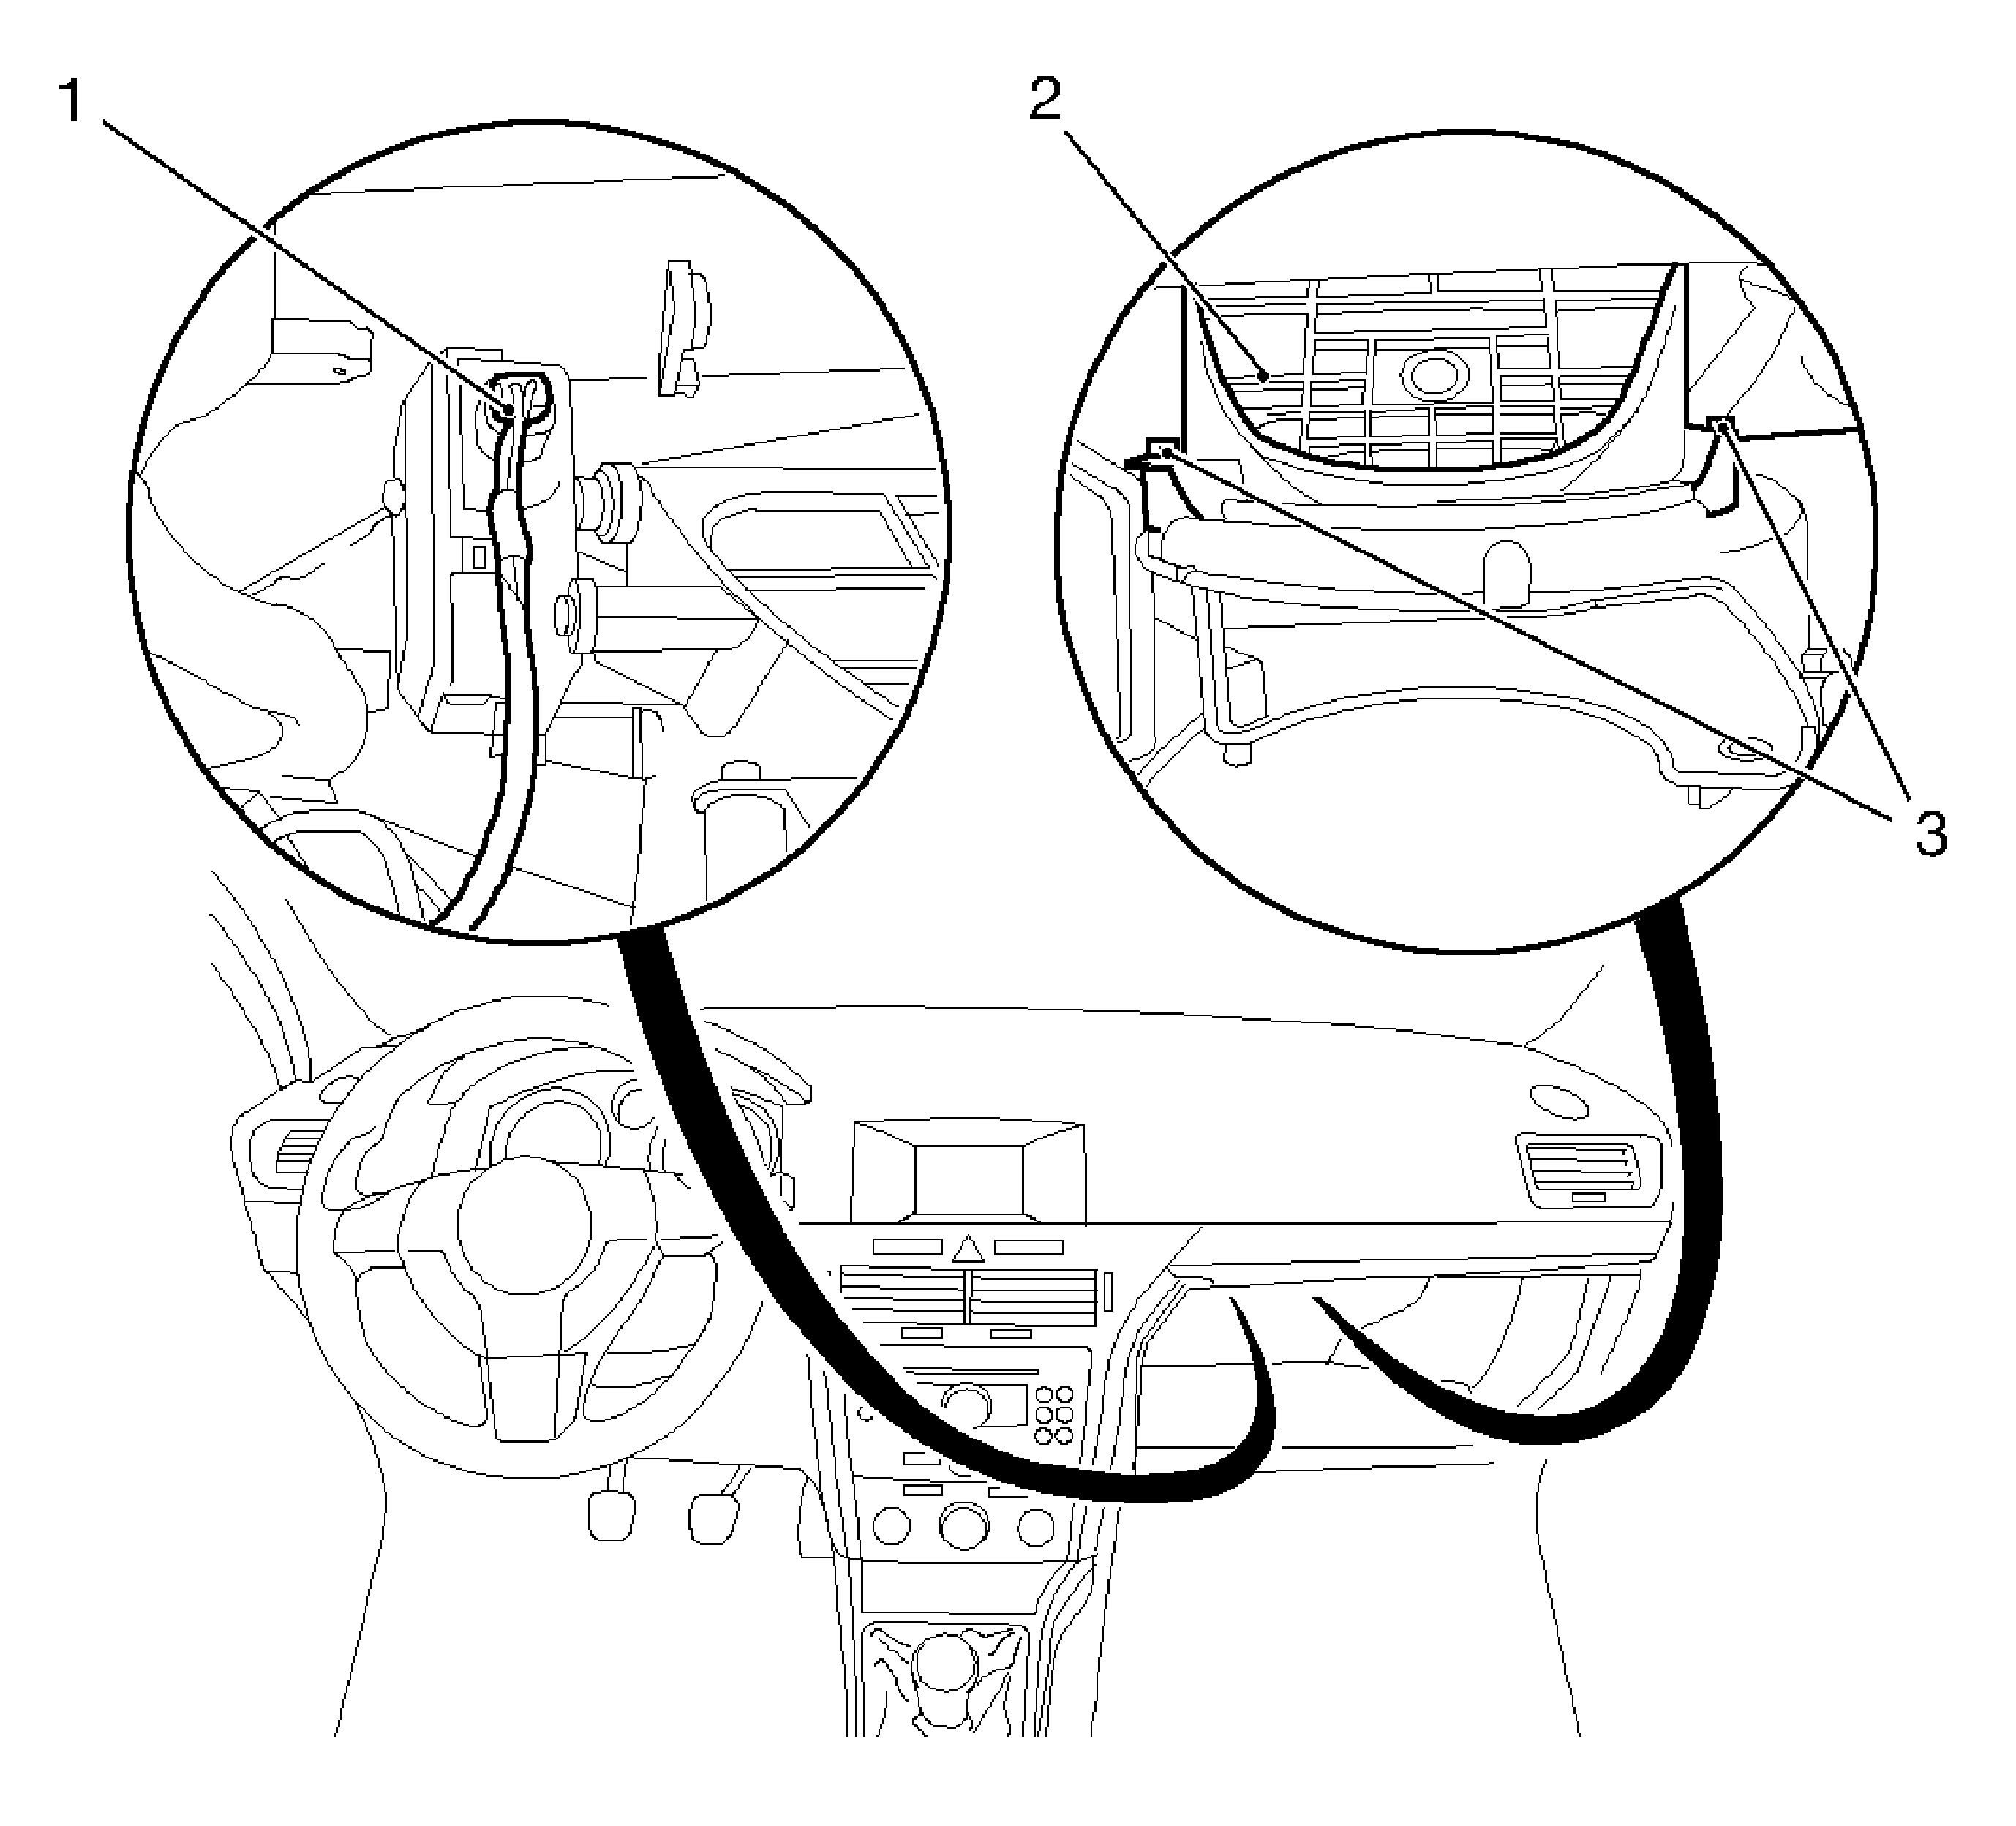
- For vehicles equipped with air conditioning (A/C), disconnect the wiring harness plug for the recirculating air valve (1) servo motor. Detach and remove the recirculating air valve housing (2).
| 7.1. | Remove the 2 bolts (3). |
| 7.2. | Disconnect the wiring harness plug. |
Installation Procedure
Caution: Refer to Fastener Caution in the Preface section.
- For vehicles equipped with A/C, connect the wiring harness plug for recirculating air valve servo motor.
Insert and tighten the recirculating air valve housing.
Tighten
Tighten the 2 bolts to 5 N·m (44 lb in).
- Install the heater fan motor.
| 2.2. | Install the 5 bolts. |
| 2.3. | Connect the 2 wiring harness plugs. |
- Install the air duct.
Install the body-bound rivet.
- Install the I/P insulator panel.
Install the 2 retainers.
- Install the recirculating air valve housing, outside.
| 5.2. | Install the recirculating air valve housing grille. |
Tighten
Tighten the 4 bolts to 5 N·m (44 lb in).
- Install the air inlet screen. Refer to
Air Inlet Screen Replacement.


