Removal Procedure
- Disable the SIR system. Refer to SIR Disabling and Enabling or to SIR Disabling and Enabling .
- Remove the headliner. Refer to Headlining Trim Panel Replacement in Interior Trim.
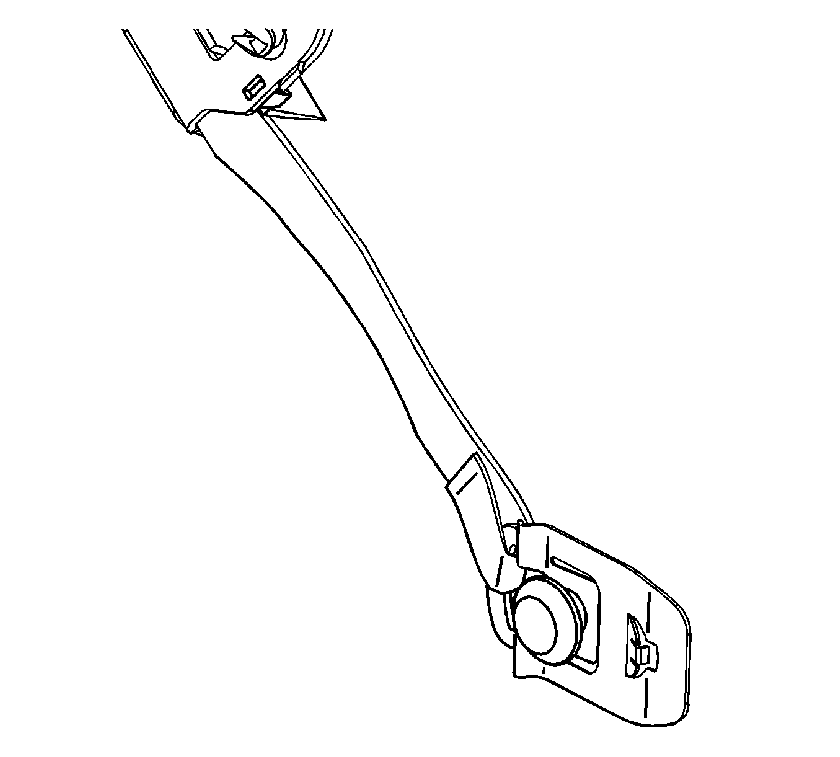
- Remove the tether snap-in fastener. Depress the locking tab and lift the fastener stud up and out of the key hole slot in the sheet metal.
- Remove the tether channel push-in fasteners.
- Remove the remaining snap-in fasteners.
- Remove the rear tether snap-in fastener.
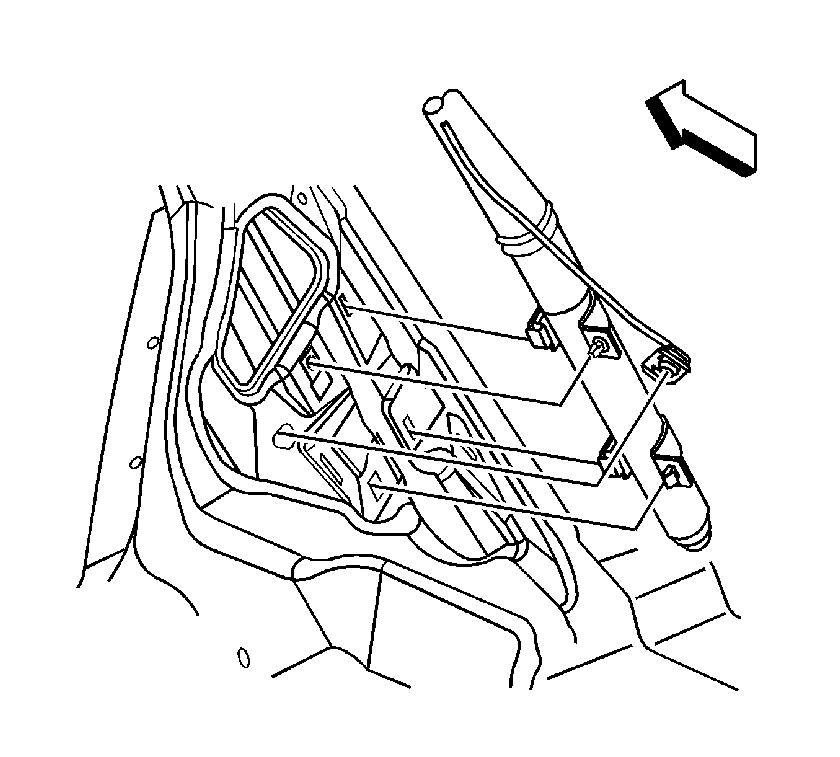
- Remove the inflator fastener.
- Rotate the inflator inboard to disengage the inflator bracket tabs from the sheet metal.
- Remove the roof rail module from the vehicle.
- Fully deploy the module before disposal. Refer to Inflator Module Handling and Scrapping .
Caution: Refer to SIR Caution in the Preface section.
Caution: In order to prevent accidental deployment and the risk of personal injury, do not dispose of an undeployed inflator module as normal shop waste. Undeployed inflator modules contain substances that could cause severe illness or personal injury if their sealed containers are damaged during disposal. Use the following deployment procedures to safely dispose of an undeployed inflator module. Failure to observe the following disposal methods may be a violation of federal, state, or local laws.
Caution: Use care when working around the roof rail inflator module because sharp objects may puncture the roof rail airbag and the airbag will not deploy correctly.
In order to avoid personal injury, if any part of the module is damaged replace the entire module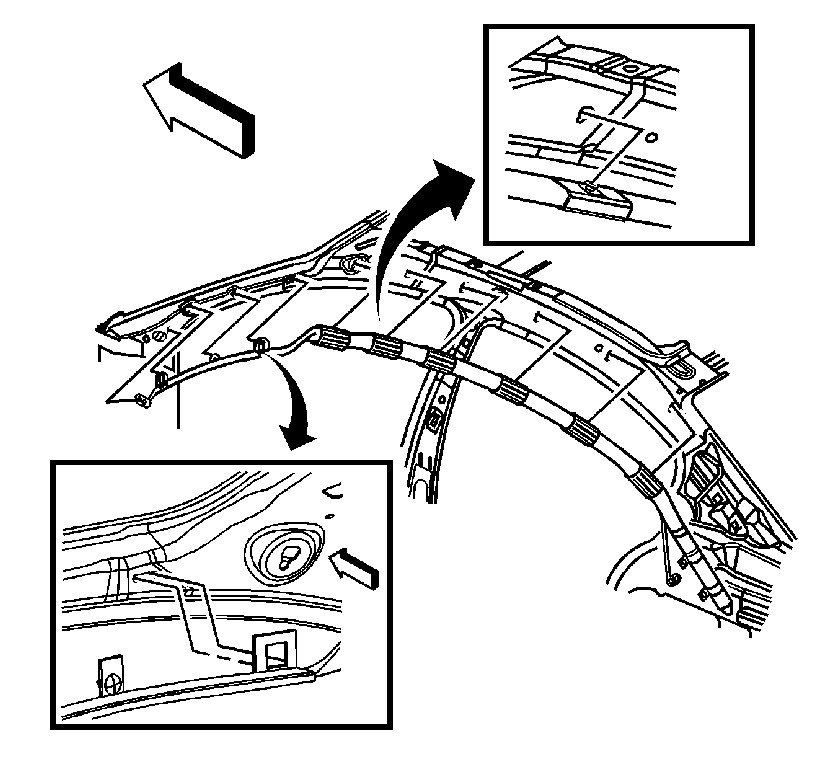
Installation Procedure
- Install the inflator bracket tabs in the slots in the upper lock pillar sheet metal.
- Install the inflator fastener.
- Install the rear tether snap-in fastener. Ensure that the fastener locks in place.
- Install the remaining snap-in fasteners.
- Install the tether channel push-in fastener.
- Install the front tether snap-in fastener. Ensure that the fastener locks in place.
- Connect the electrical connector on the inflator.
- Install the electrical connector CPA.
- Install the headliner. Refer to Headlining Trim Panel Replacement in Interior Trim.
- Enable the SIR system. Refer to SIR Disabling and Enabling or to SIR Disabling and Enabling .
Notice: Use the correct fastener in the correct location. Replacement fasteners must be the correct part number for that application. Fasteners requiring replacement or fasteners requiring the use of thread locking compound or sealant are identified in the service procedure. Do not use paints, lubricants, or corrosion inhibitors on fasteners or fastener joint surfaces unless specified. These coatings affect fastener torque and joint clamping force and may damage the fastener. Use the correct tightening sequence and specifications when installing fasteners in order to avoid damage to parts and systems.
Tighten
Tighten the fasteners to 10 N·m (89 lb in).
Important: Pull up on each snap-in fastener without depressing the locking tab to verify that the fastener is installed correctly.
