For 1990-2009 cars only
Removal Procedure
- Remove the left and right instrument panel (I/P) outer trim covers. Refer to Instrument Panel Outer Trim Cover Replacement .
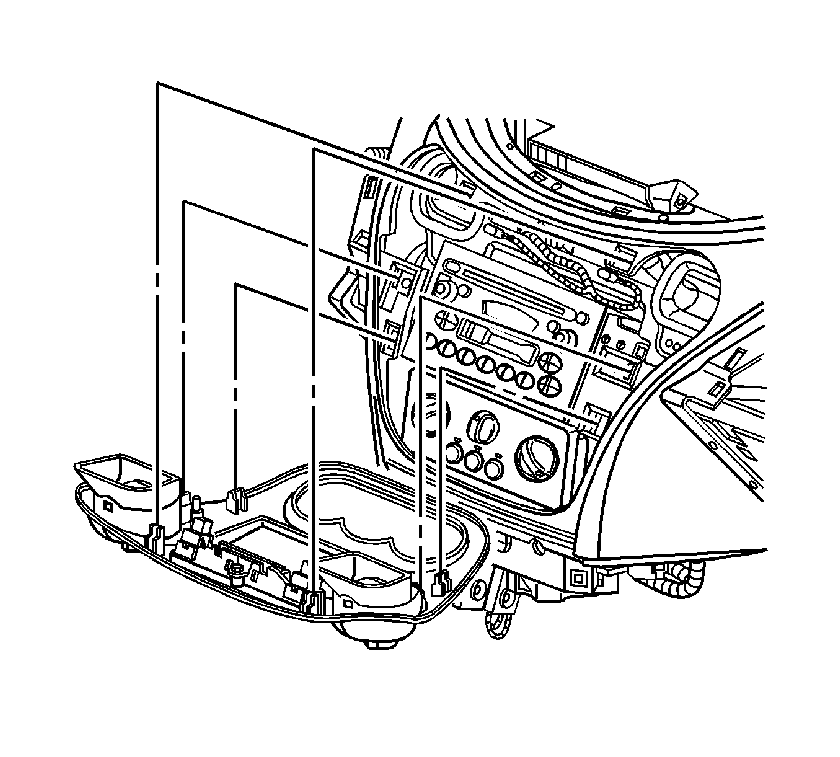
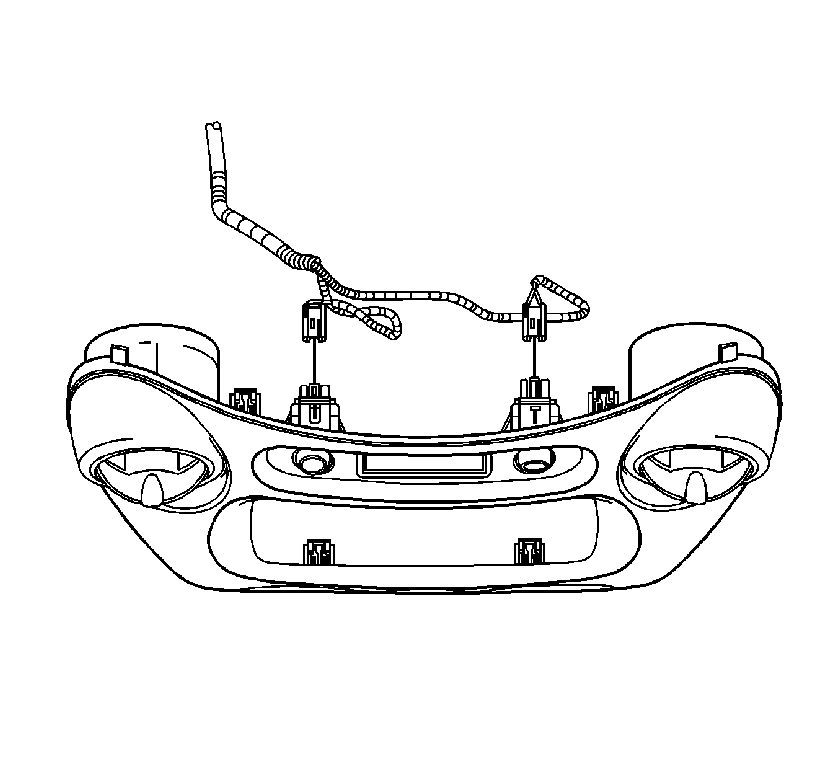
- Pull out on the accessory trim plate in order to release the retaining fasteners.
- Disconnect the accessory trim plate electrical connectors.
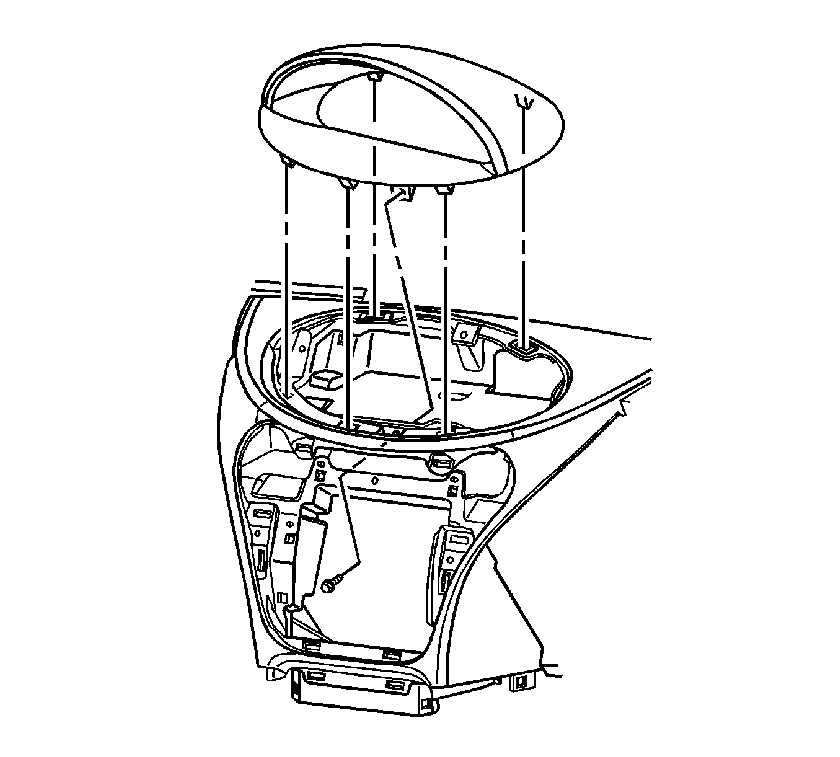
- Remove the screw retaining the cluster trim plate to the center trim panel.
- Lift up on the cluster trim plate to release the retaining fasteners.
- Remove the cluster trim plate.
- Remove the left and right windshield garnish moldings. Refer to Windshield Garnish Molding Replacement in Interior Trim.
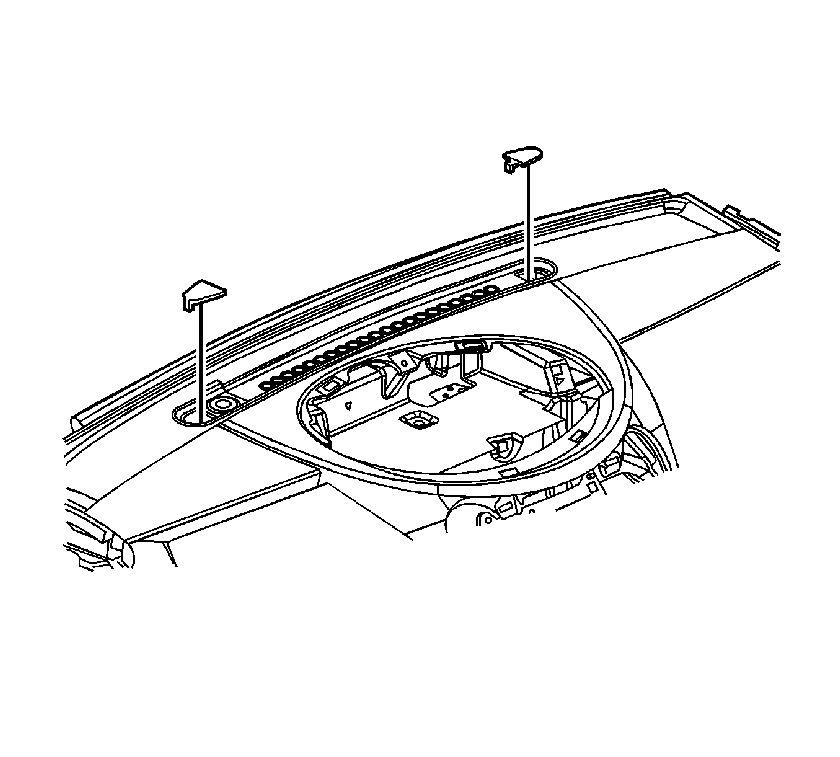
- Remove the defroster grille bolt covers.
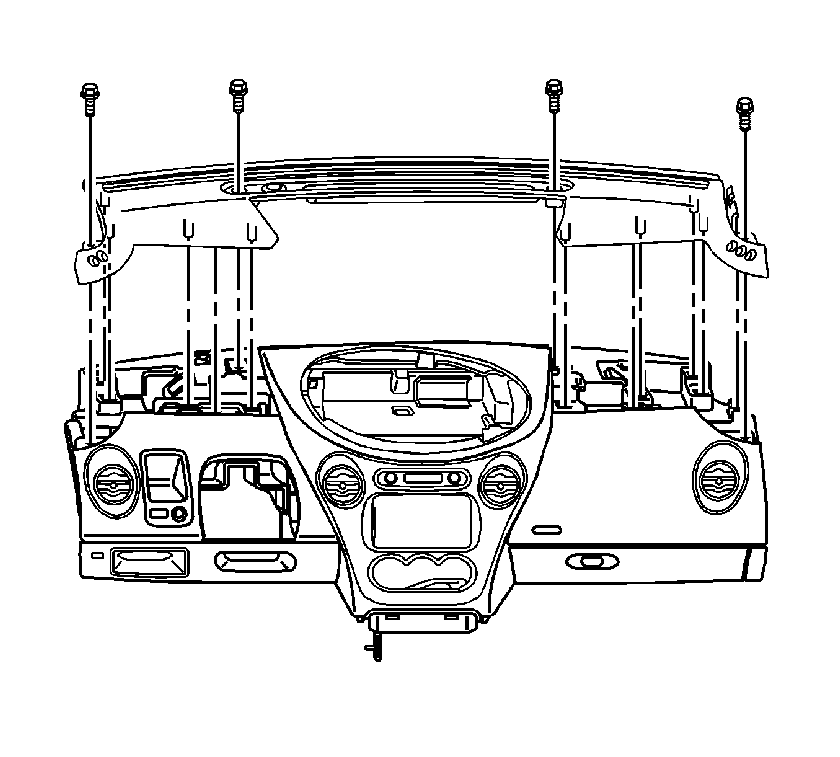
- Remove the defroster grille center bolts and the outer screws.
- Lift up on the defroster grille to release the retaining fasteners.
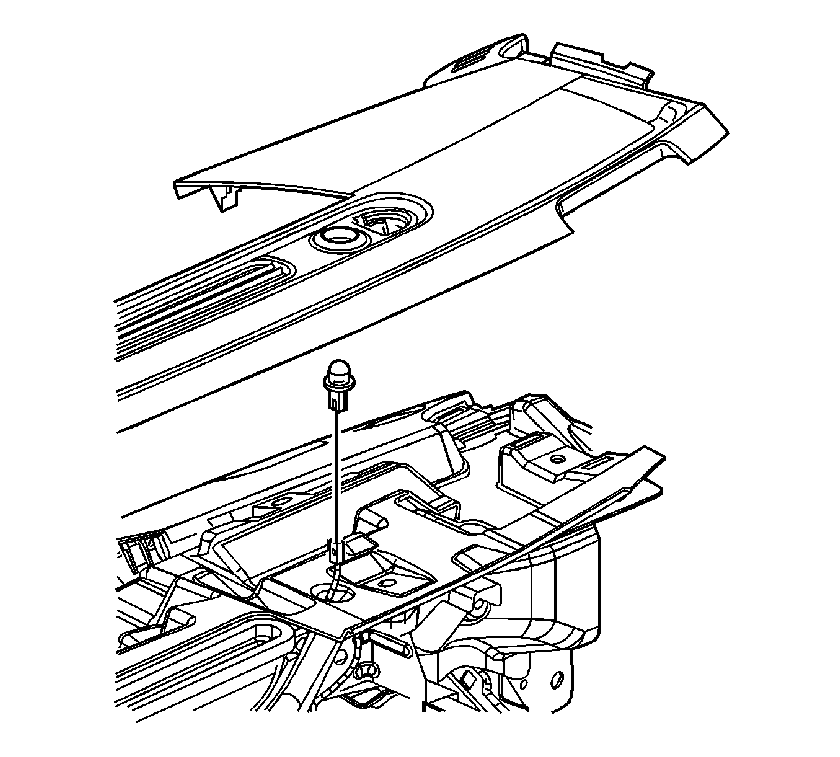
- If equipped, turn the ambient light sensor body clockwise to remove the sensor from the defroster grille.
- Remove the defroster grille.
Installation Procedure
- If equipped, install the ambient light sensor to the defroster grille. Turn the ambient light sensor body counterclockwise to lock the sensor into the defroster grille.
- Align the defroster grille retaining fasteners with the I/P.
- Push on the defroster grille in order to secure the retaining fasteners.
- Install the defroster grille center bolts.
- Install the defroster grille outer screws.
- Install the defroster grille bolt covers.
- Install the left and right windshield garnish moldings. Refer to Windshield Garnish Molding Replacement in Interior Trim.
- Align the cluster trim plate retaining fasteners with the center trim panel.
- Push on the outer edge of the cluster trim plate in order to secure the retaining fasteners.
- Install the screw retaining the cluster trim plate to the center trim panel.
- Connect the accessory trim plate electrical connector(s).
- Align the retaining fasteners with the I/P.
- Push on the outer edge of the accessory trim plate in order to secure the retaining fasteners.
- Install the left and right I/P outer trim covers. Refer to Instrument Panel Outer Trim Cover Replacement .


Notice: Refer to Fastener Notice in the Preface section.
Tighten
Tighten the defroster grille center bolts to 10 N·m (88 lb in).
Tighten
Tighten the defroster grille outer screws to 2.5 N·m (22 lb in).


Tighten
Tighten the cluster trim plate screw to 2.5 N·m (22 lb in).


